Free Download For Win & Mac | 100% Clean & Secure
3D Motion Effect
Want to make your screen recordings more immersive and professional? FocuSee's 3D Motion feature makes it easy. With smooth camera movements and dynamic focus in a virtual space, it highlights key content while naturally guiding viewers' attention, making your demonstrations clearer and your videos more engaging. Here's a quick comparison between 2D Zoom and 3D Motion to help you choose the right approach:
2D Zoom – Simple and stable, ideal for basic demonstrations
• Move / Zoom / Crop within a single plane
• Intuitive controls and stable visuals
• Use case: Short videos, quick demonstrations, or simple interface walkthroughs
3D Motion – Dynamic and immersive, ideal for longer or complex recordings
• Move closer / farther, follow actions, or switch perspectives in virtual space
• Adds depth and visual guidance for a more engaging presentation
• Use case: Product demos, interface tutorials, or any scenario that requires highlighting key details
This guide walks you through applying and customizing 3D Motion effects, helping you create screen recordings with greater depth, clarity, and a more professional finish.
Computer System Requirements
| Operating System | Windows | Mac |
| Operating System | Windows 10 or later | macOS 10.15 or later, and optimal |
| Processor | Intel i5 and above processors, dual-core 2.9GHz and above | Apple M1 or later or Intel-based Mac |
| Memory | At least 8GB of RAM | At least 8GB of RAM |
Supported Video Output Formats
| MP4, GIF |
Part 1. How to Automatically Generate a 3D Motion Effect
Step 1. Download and Install FocuSee on Your Computer.
Visit our official website and get FocuSee downloaded onto your computer. Ensure that you have a stable network connection during the download and installation process. Follow the prompts on the screen to install FocuSee.
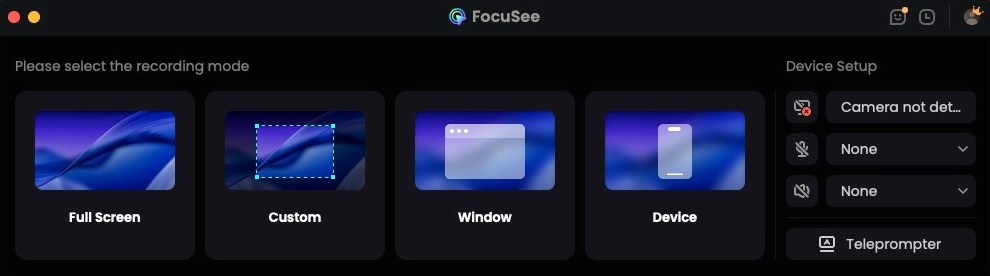
Step 2. Launch FocuSee and Record Video.
Open FocuSee on your computer. You can either record a new video or import an existing one to enter the editing interface.
Launch FocuSee
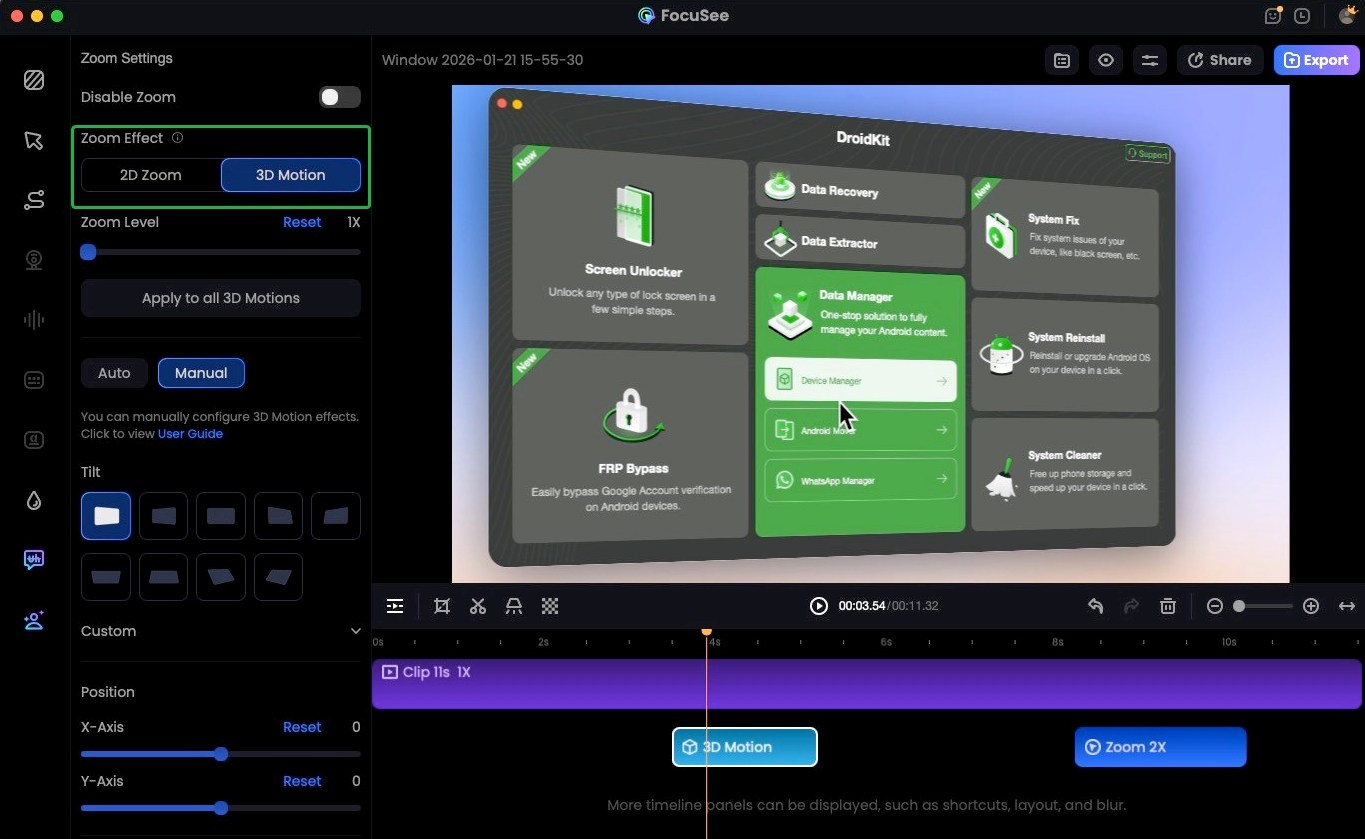
Step 3. Apply 3D Motion.
Method 1: Apply 3D Motion in the Editing Interface.
Once you're on the editing page, locate the Zoom Effect track on the timeline. Click the 2D Zoom Effect clip and switch the effect from 2D Zoom to 3D Motion. The 3D Motion effect will be applied instantly.
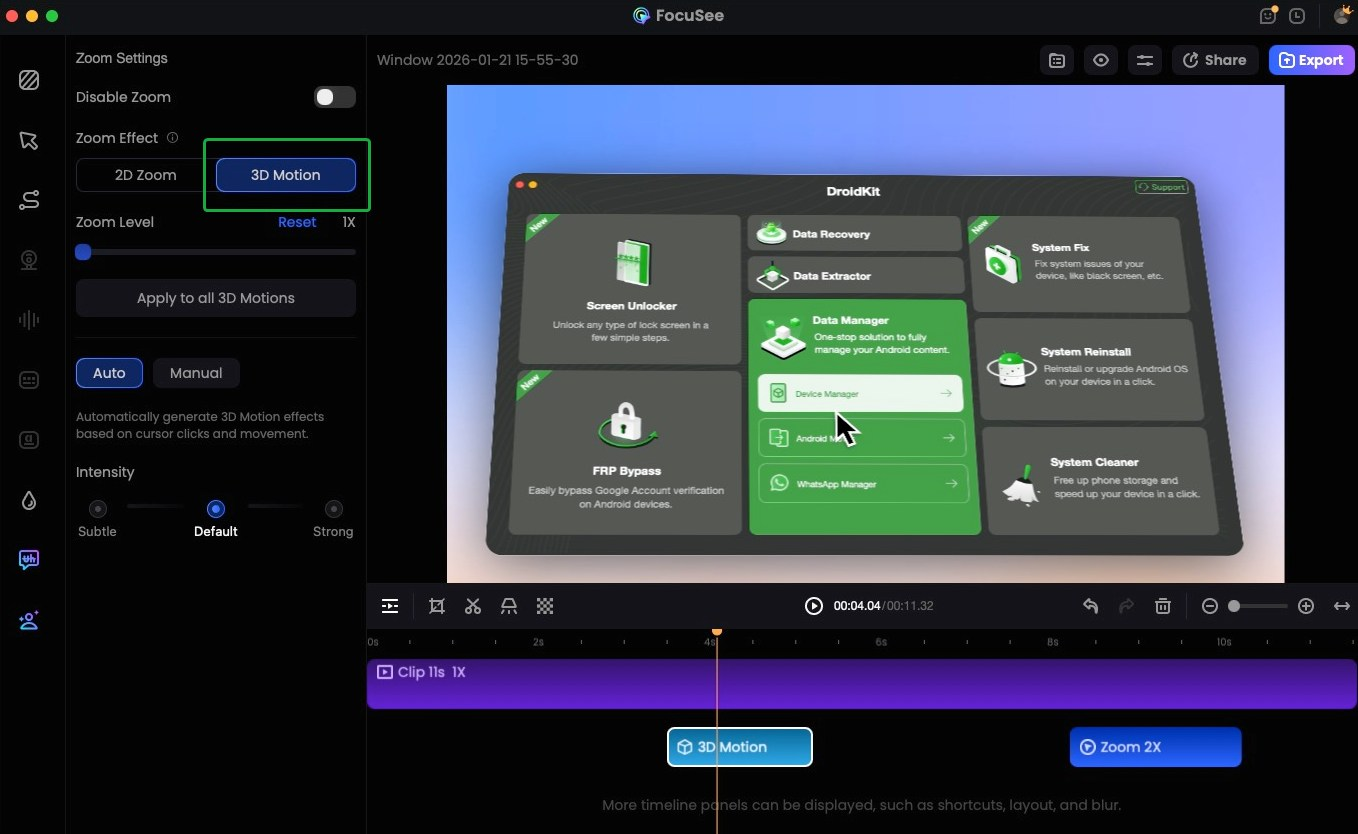
Choose 2D Zoom Clip and Click 3D Motion
If no mouse activity is detected, the system will automatically switch to Manual 3D Motion mode. To learn more about manual 3D Motion settings, please refer to this section
Method 2: Automatically Apply 3D Motion During Recording.
If you want to record a new video and automatically apply the 3D Motion Effect, choose a recording mode, enable 3D Motion under Zoom Effect in the toolbar, and then start recording.
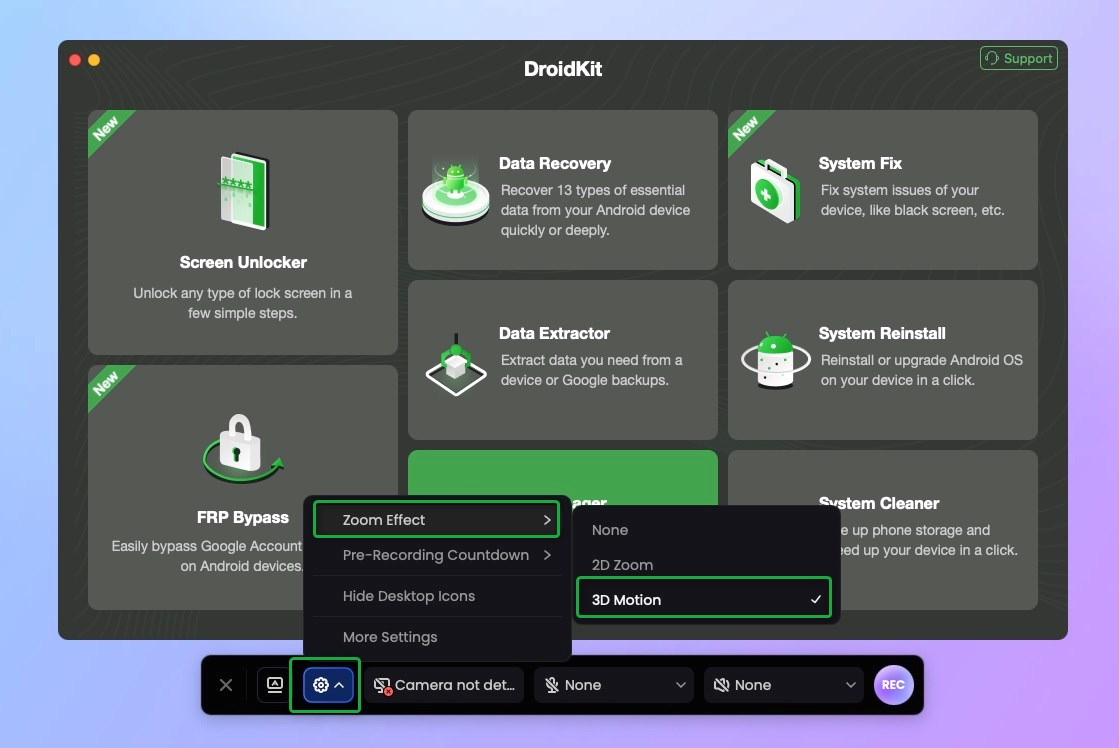
Set 3D Motion Before Recording
Mouse click actions are required during recording to generate the automatic 3D Motion effect.
After recording, the 3D Motion Effect will be generated automatically.
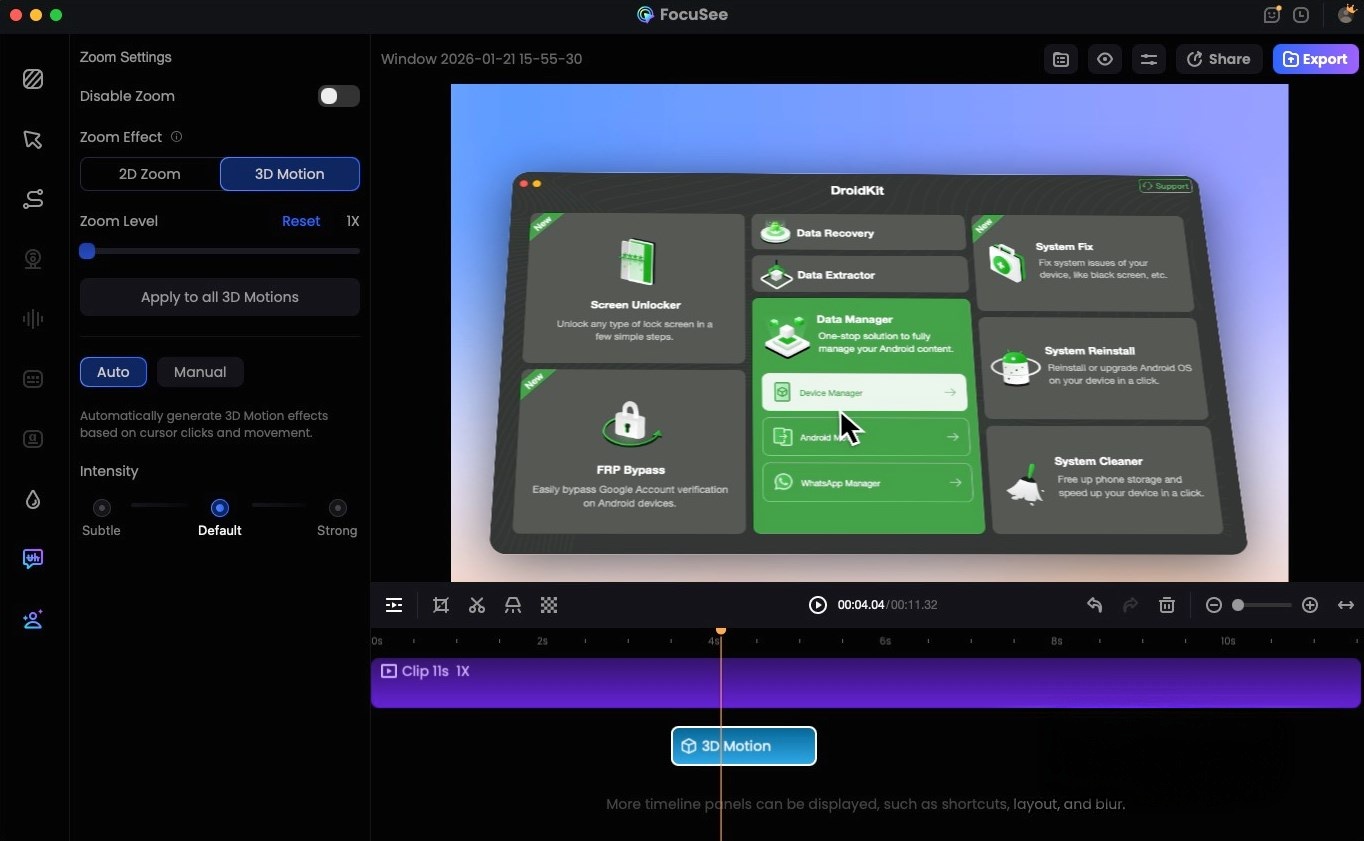
Generate 3D Motion Effect in Zoom Track
Step 4. Adjust 3D Motion Effect.
Click on a 3D motion clip in the timeline to adjust the zoom level, and choose your preferred effect intensity: Subtle, Default or Strong.

Adjust 3D Motion Effect
Part 2. How to Manually Create a 3D Motion Effect
Step 1. Enter Manual Mode.
When there is no mouse interaction in the video, you can create a 2D Zoom on the zoom track, select the clip, and switch it to 3D Motion to automatically enter 3D Motion Manual mode.
Enter Manual Mode
When switching from Automatic 3D Motion to Manual 3D Motion, the canvas immediately enters the manual default state: the X and Y position values are set to 0, the first tilt preset is selected by default and does not follow mouse movement, and all settings are automatically saved to the project file.
Step 2. Apply a Tilt Preset.
You can also quickly apply a tilt effect by selecting a preset angle from Tilt presets.
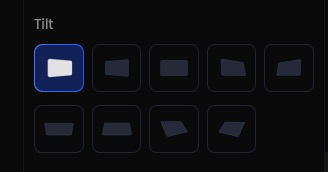
Apply a Tilt Preset
Step 3. Customize Rotation (Optional).
If the presets is unable to meet your needs, click Custom to freely adjust the rotation:
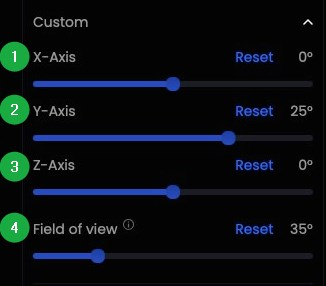
Customize Rotation
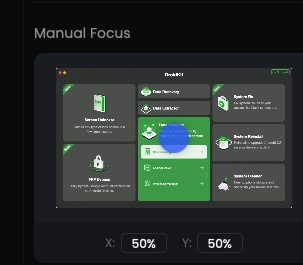
Step 4. Adjust Position.
In Manual mode, you can precisely adjust the Position of the 3D motion:
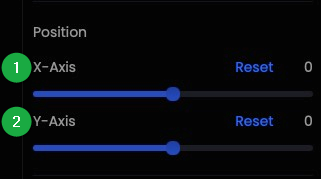
Adjust Position
Step 5. Set the Focus Area.
Finally, you can also manually define the focus area to guide viewers' attention to the most important part of the screen.
Set the Focus Area Manually
Step 6. Export the Video.
Once you're satisfied with all the settings, click Export to save your video.

Export the Video
Part 3. How to Use 3D Motion Effect
1. Create an Entrance Animation.
If you want to create an animation where the video gradually enters the screen from outside at the beginning, follow these steps:
1. Add a 3D Motion Clip at the first frame of the video and switch to Manual mode.
2. In Position, set the X-Axis value to 80% or –80%, depending on whether you want the screen to enter from the right or left, and how far it should travel.
3. Trim the 3D Motion Clip to the frame where you want the entrance animation to end.
4. The entrance animation is now complete.
5. Optionally, you can add tilt adjustments to the clip to enhance the entrance or exit effect.
2. Create a 3D Display Effect.
If you want to present your screen with a 3D perspective effect, follow these steps:
1. Add a 3D Motion Clip beneath the segment you want to highlight and switch to Manual mode.
2. Keep the X-Axis value in Position at its default setting.
3. In Tilt, select a preset angle or customize the tilt values as needed.
4. Trim the 3D Motion Clip to an appropriate duration.
5. The 3D screen preview is now complete.
If you have further question after reading this guide, please refer to FAQs page to check more solutions. Or you can contact our Support Team to get further help. We are here to help you!

Try It Out & Share Your Feedback!

We'd love to hear how FocuSee is working for you.
Give it a try and share your thoughts—your feedback helps us keep improving.
If you're enjoying FocuSee, we'd be so grateful if you could leave us a review on Trustpilot. Your support helps others discover FocuSee and motivates our team!
Thank you for being part of the iMobie community — we couldn’t do it without you!
Try It Out & Share Your Feedback!
We'd love to hear how FocuSee is working for you.
Give it a try and share your thoughts—your feedback helps us keep improving.
If you're enjoying FocuSee, we'd be so grateful if you could leave us a review on Trustpilot. Your support helps others discover FocuSee and motivates our team!
Thank you for being part of the iMobie community — we couldn’t do it without you!