Free Download For Win & Mac | 100% Clean & Secure
Spotlight Effect
Have you ever encountered the following troubles during screen recording and editing?
"I want to highlight key points in my video, like software buttons or key paragraphs in a document, but I don't know what tools to use?"
"There are too many elements in the video, distracting the viewer and preventing the core message from being conveyed effectively. What should I do?"
If you have similar needs as mentioned above, FocuSee's spotlight effect will provide you with a solution. This feature supports quickly adding highlight focus effects to videos, accurately highlighting designated areas, and also allows flexible adjustment of style parameters to help you create more professional video content. The following guide will detail how to add and optimize the spotlight effect when editing and screen recording.
Computer System Requirements
| Windows OS | macOS | |
| Operating System | Windows 10 or later | macOS 10.15 or later, and optimal experience on macOS 12.3 and above |
| Processor | Intel i5 and above processors, dual-core 2.9GHz and above | Apple M1 or later or Intel-based Mac |
| Memory | At least 8GB of RAM | At least 8GB of RAM |
Step 1. Add Spotlight.
After recording or importing the video, FocuSee will automatically open the editing page. Please click Spotlight Effect in the editing toolbar below the video preview to add the spotlight.
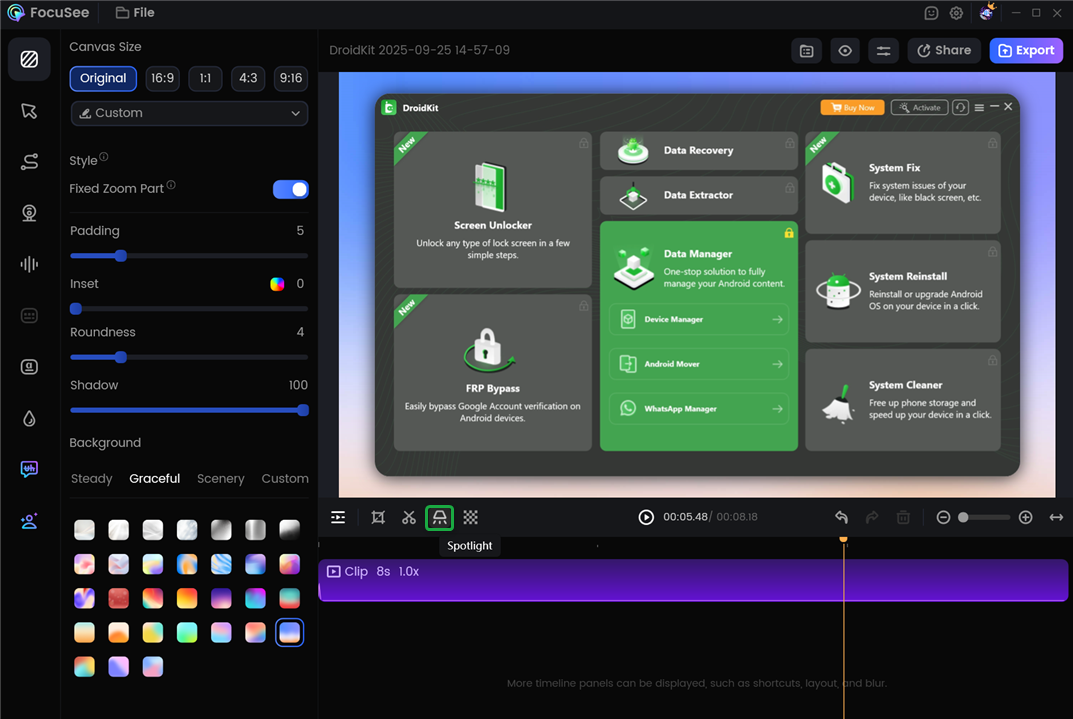
Add Spotlight
On the spotlight track, you can add spotlight effects at different time points and drag both ends of the spotlight to adjust the duration of the spotlight effect.
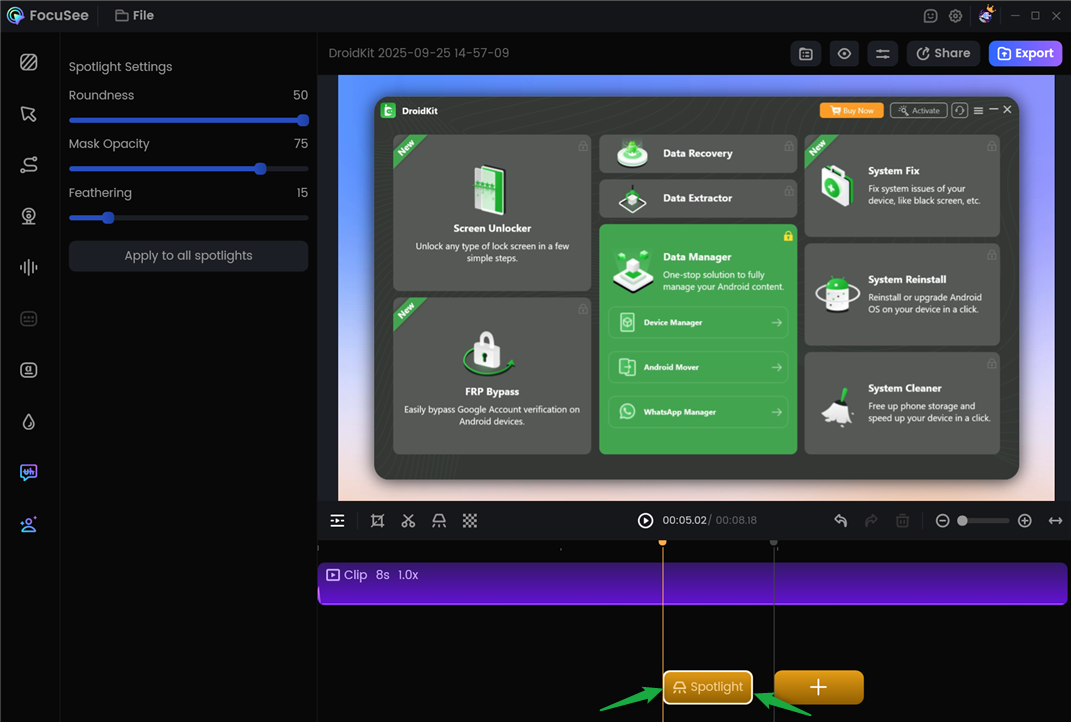
Spotlight Track
Step 2. Adjust Spotlight.
You can drag the spotlight effect on the canvas to adjust its position, and drag the four corners to adjust its size and proportions.
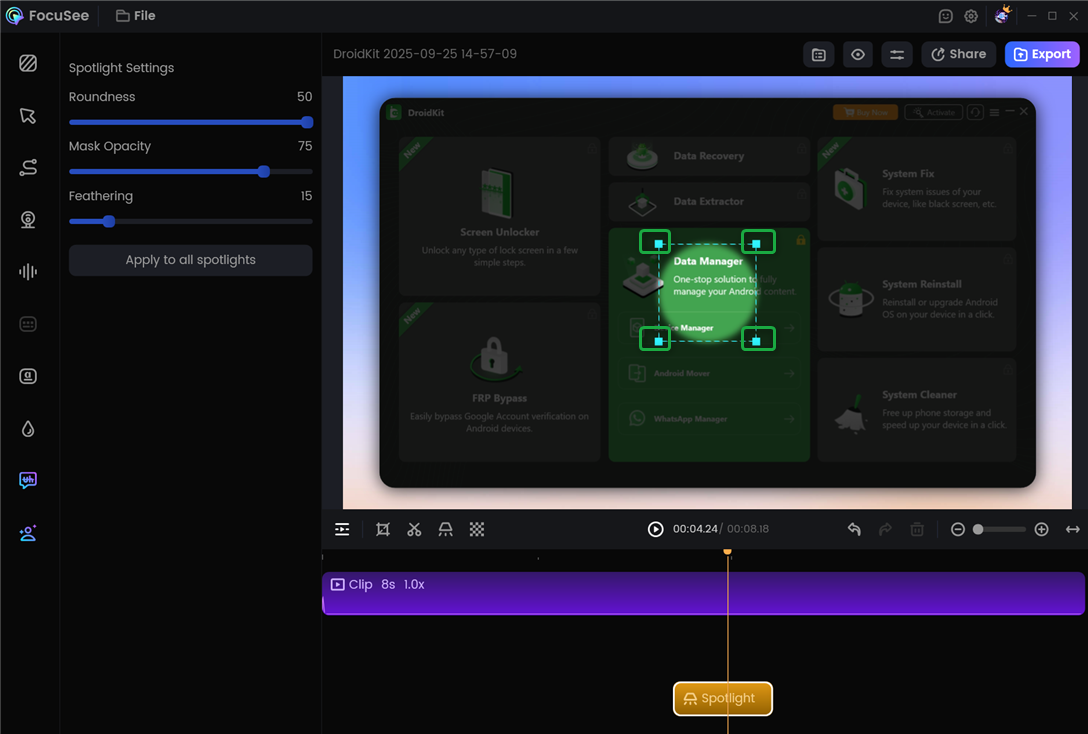
Adjust Spotlight
Step 3. Set Spotlight Properties.
Click the Spotlight Effect on the track. Then, you can slide the control bar on the left side of the interface to freely adjust the shape of the spotlight (supports various effects such as right angle or ellipse), Mask Opacity, and Feathering effect.
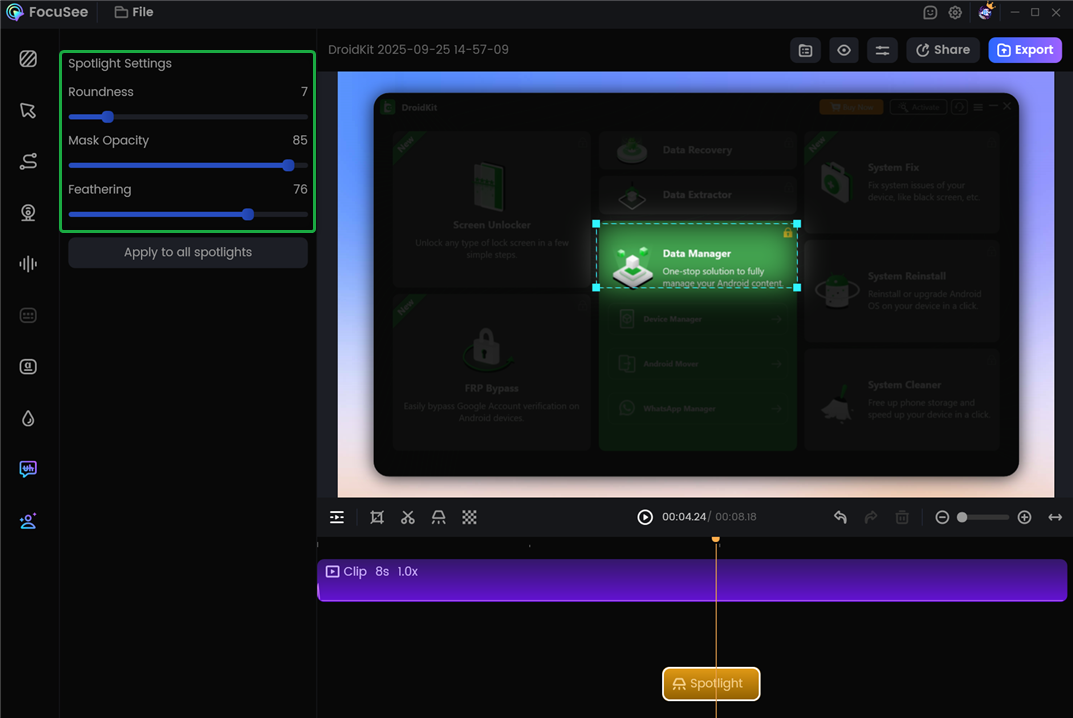
Set Spotlight Properties
Step 4. Share and Export.
After completing works, you can click the Play button to view the spotlight effects. Then, you can click the Share or Export button to share or export your video.

Share and Export
If you have further question after reading this guide, please refer to FAQs page to check more solutions. Or you can contact our Support Team to get further help. We are here to help you!

Try It Out & Share Your Feedback!

We'd love to hear how FocuSee is working for you.
Give it a try and share your thoughts—your feedback helps us keep improving.
If you're enjoying FocuSee, we'd be so grateful if you could leave us a review on Trustpilot. Your support helps others discover FocuSee and motivates our team!
Thank you for being part of the iMobie community — we couldn’t do it without you!
Try It Out & Share Your Feedback!
We'd love to hear how FocuSee is working for you.
Give it a try and share your thoughts—your feedback helps us keep improving.
If you're enjoying FocuSee, we'd be so grateful if you could leave us a review on Trustpilot. Your support helps others discover FocuSee and motivates our team!
Thank you for being part of the iMobie community — we couldn’t do it without you!