Free Download For Win & Mac | 100% Clean & Secure
Record iPhone/iPad
Here are some user queries we have gathered regarding iOS screen recording. Have you encountered similar issues?
"I am a teacher and I use my iPad to write handwritten notes, explain slides, or demonstrate problem-solving steps. I want to capture the entire process through screen recording on my computer in post-production to create reusable online courses. Can FocuSee help me with this situation?"
"As a game streamer, I want to record the high-difficulty level operations of mobile games on my iPhone, then transfer the footage to my computer for editing. Does FocuSee have this function?"
If you have similar questions and needs, don't worry. FocuSee provides Device recording mode, which can help you to record iPhone or iPad on computer. You can refer to the instructions to learn how to record iPhone or iPad on computer easily.
Computer System Requirements
| Operating System | Windows OS | macOS |
| Version | Windows 10 or later | macOS 10.15 or later, and optimal experience on macOS 12.3 and above |
| Processor | Intel i5 and above processors, dual-core 2.9GHz and above | Apple M1 or later or Intel-based Mac |
| Memory | At least 8GB of RAM | At least 8GB of RAM |
Supported iOS Version
| iPhone and iPad with iOS 10 and above |
Supported Video Output Format
| MP4, GIF |
Supported Video Resolution
| 480P, 720P, 1080P, 2K, 4K |
Step 1. Download and Install FocuSee on Computer.
Visit our official website and get FocuSee downloaded onto your computer. Ensure you have a stable network connection during the download and installation process. Follow the prompts on the screen to install FocuSee.
Step 2. Configure Settings before Recording.
Launch FocuSee on your computer. The video creation interface will be displayed. Prior to recording, please select your webcam, microphone, and speaker.
Hardware Setup of FocuSee
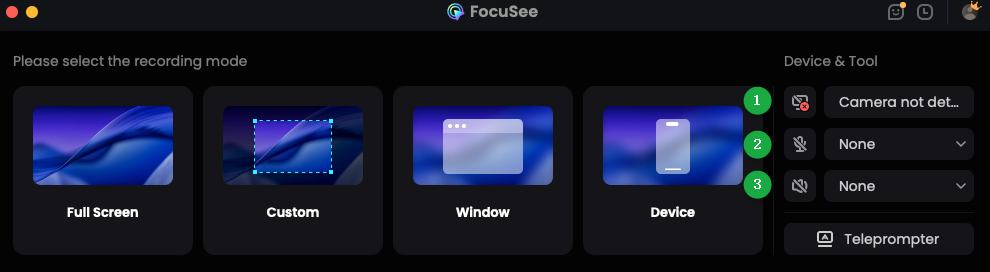
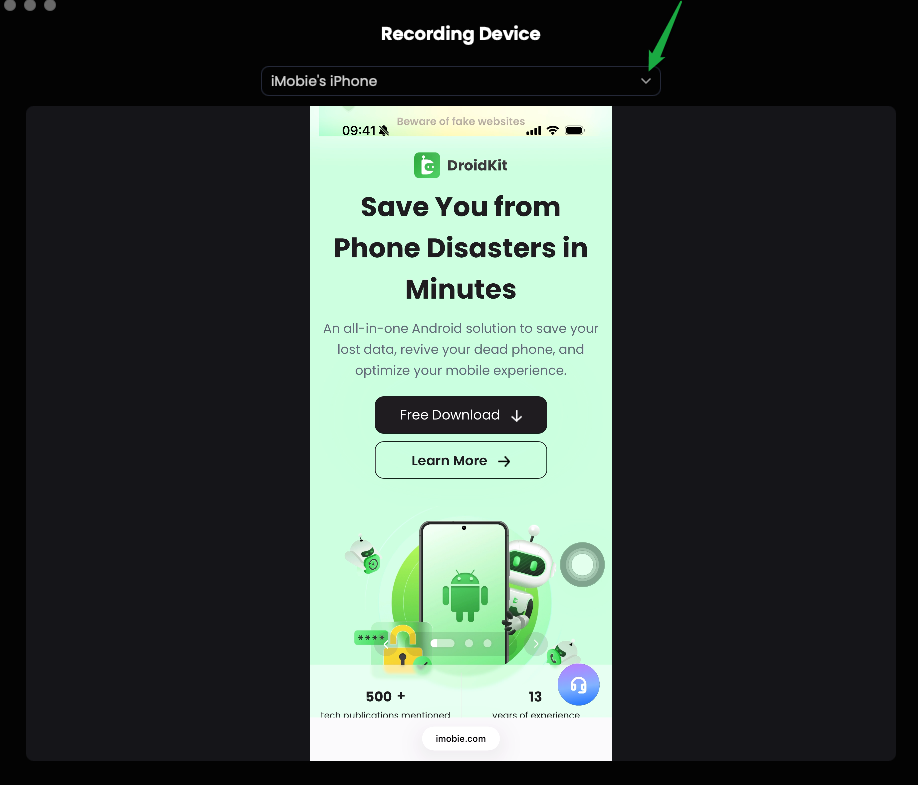
Step 3. Select the Recording Mode.
And select Device to continue.
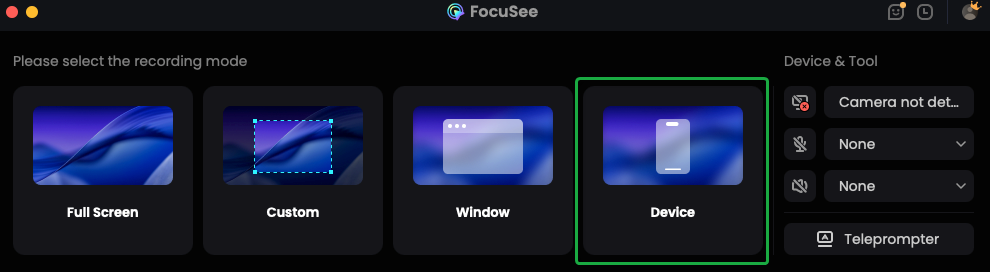
Select Device Mode
Then select iOS to continue.
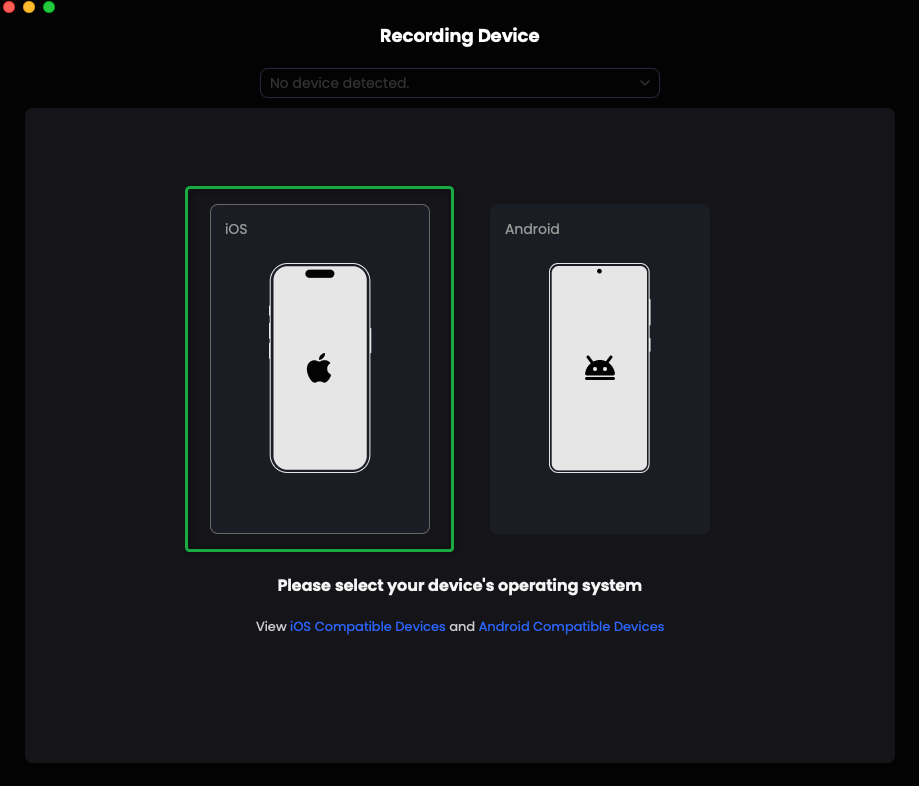
Select iOS Mode
If you are using a Windows computer and don't install the driver of the iOS device, recording iOS screens requires dedicated drivers (two Apple drivers and one screen mirroring driver). After installation, Windows can recognize and connect to your iPhone or iPad reliably. If you connect a new device, you need to install drivers again.
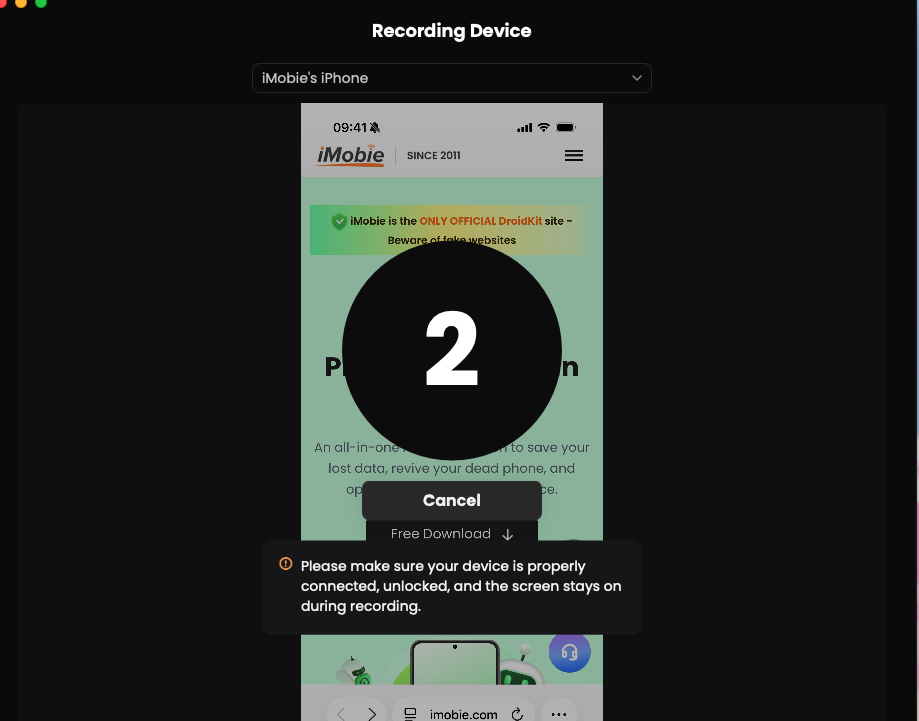
Step 4. Connect Your iPhone/iPad to Computer with the USB Cable.
Next, please connect the iOS device to the computer via a USB cable. Make sure the device is unlocked and the screen stays active. When the trust prompt pops up on the device, tab "Trust" icon. Then, enter the screen passcode.
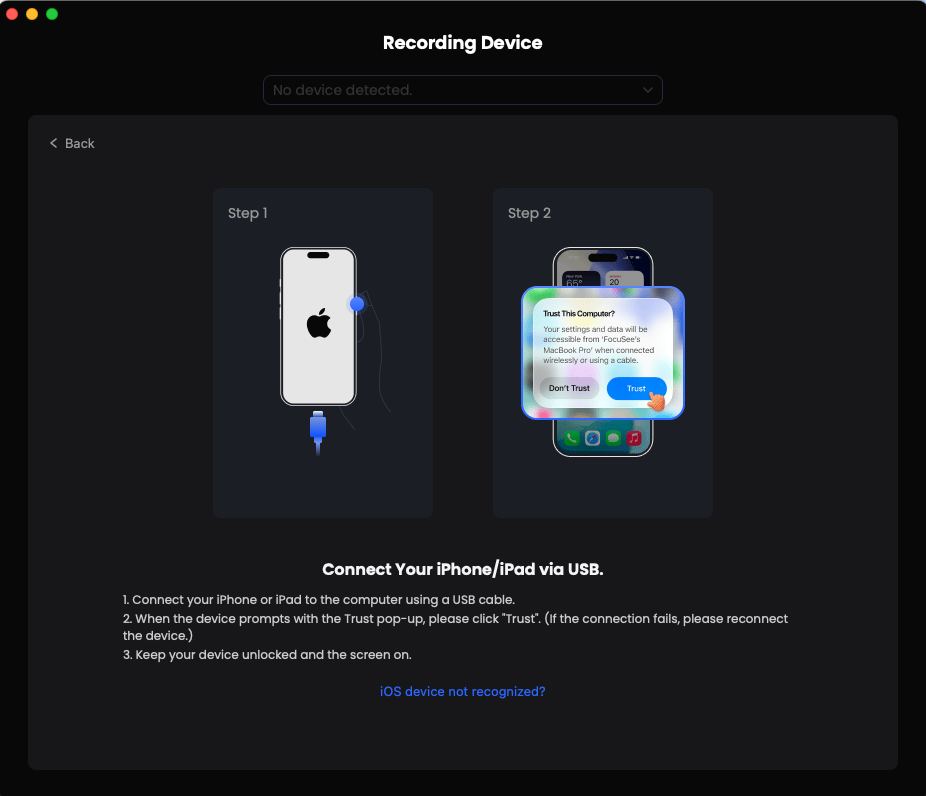
Click Trust This Computer on Device
If FocuSee is unable to recognize your iOS device, you can try to fix this issue by following troubleshooting steps:
① Please download the latest version of FocuSee.
② Disconnect the device from this computer, and reconnect it.
③ Try another USB port on this computer, or try another USB cable.
④ You can try to restart your iOS device or computer.
⑤ If the problem persists, please contact our Support Team for further help.
Once your iPhone or iPad is connected, you will see the interface as below. If you connect multiple devices, you can switch to another device from the device list.
Device Is Connected
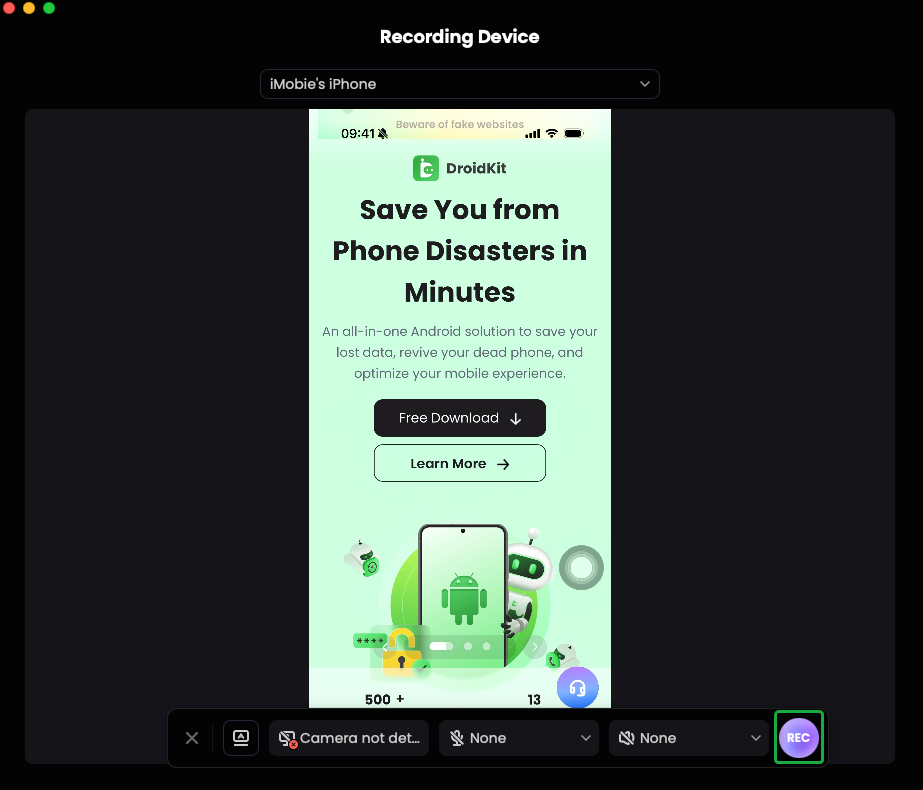
Step 5. Initiate Recording.
Adjust your camera, microphone, and audio settings as necessary, then initiate recording by clicking the purple REC button.
Adjust Settings
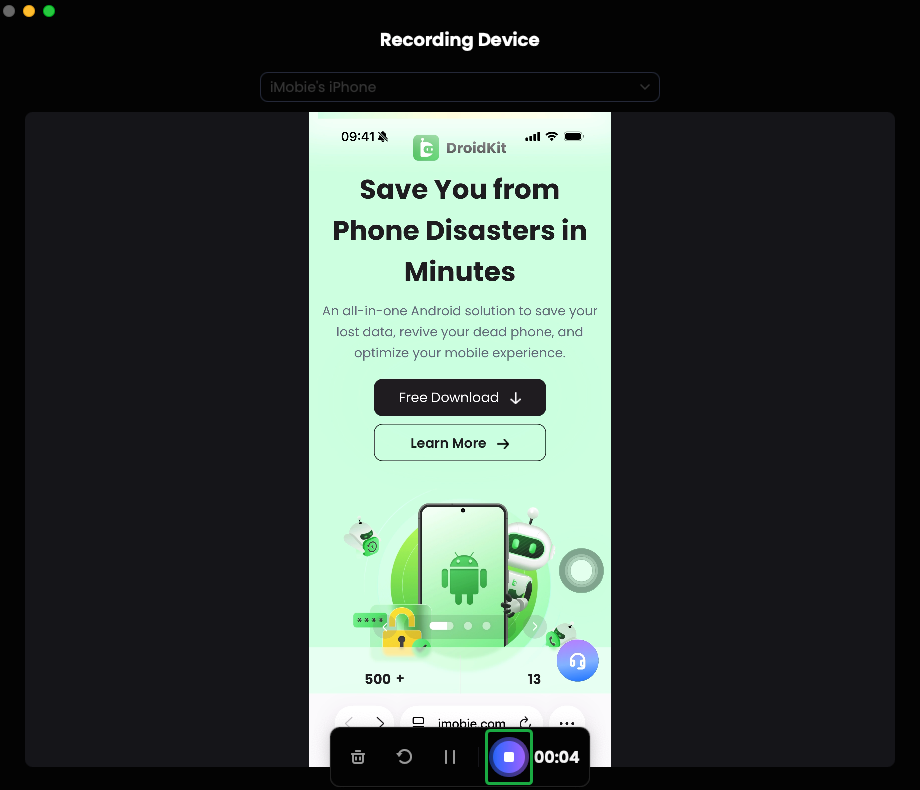
Step 6. Wait for the Recording Countdown.
Before the recording starts, there will be a 3-second countdown to prepare. Once the countdown ends, FocuSee will start recording. You can then begin your presentation at your own pace.
Recording Countdown
Step 7. Complete the Recording Process.
After completing the recording, click the purple button to conclude the recording.
End Recording
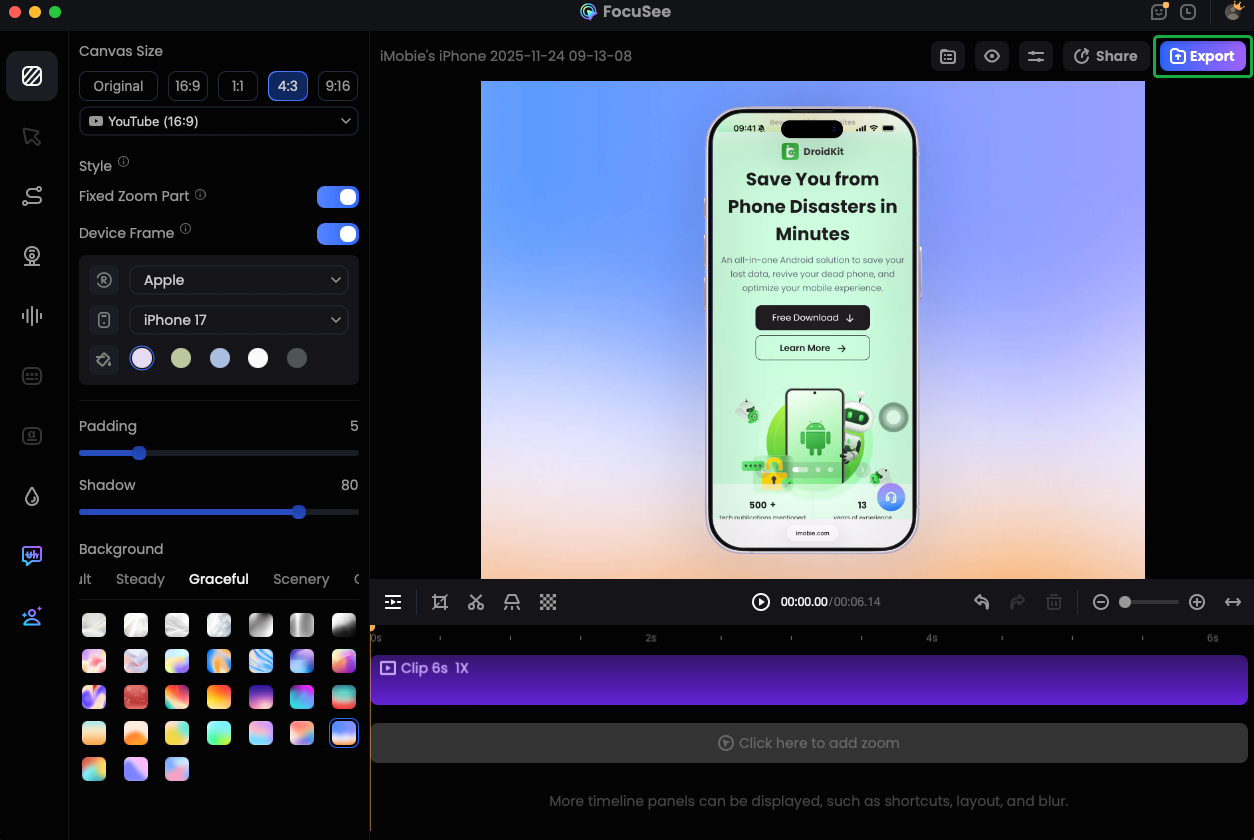
Step 8. Edit the Video.
Once the recording process is completed, you can edit the video. FocuSee allows you to select your preferred iPhone or iPad frame if you’d like to change it. Currently, we support iPhone/iPad, Samsung and Google Pixel device frames.

Edit the Video
1. When recording from an iPhone/iPad, zoom effects are not applied automatically. If desired, you can add them manually during editing. Cursor effects and shortcut keys are also unavailable while editing iPhone/iPad recordings.
2. Please click the following post to learn more about video editing details: Edit the Recording.
Step 9. Export the Video.
Once you complete editing the video, please click the Export button to export the video.
Export the Video
If you have further question after reading this guide, please refer to FAQs page to check more solutions. Or you can contact our Support Teamm to get further help. We are here to help you!

Try It Out & Share Your Feedback!

We'd love to hear how FocuSee is working for you.
Give it a try and share your thoughts—your feedback helps us keep improving.
If you're enjoying FocuSee, we'd be so grateful if you could leave us a review on Trustpilot. Your support helps others discover FocuSee and motivates our team!
Thank you for being part of the iMobie community — we couldn’t do it without you!
Try It Out & Share Your Feedback!
We'd love to hear how FocuSee is working for you.
Give it a try and share your thoughts—your feedback helps us keep improving.
If you're enjoying FocuSee, we'd be so grateful if you could leave us a review on Trustpilot. Your support helps others discover FocuSee and motivates our team!
Thank you for being part of the iMobie community — we couldn’t do it without you!