Free Download For Win & Mac | 100% Clean & Secure
Edit the Recording
Whether you encounter the similar situations below?
“I have recorded a video with FocuSee, how can I crop the video?"
"I'm looking for an all-in-one software solution for recording and editing videos, with features like zooming in on specific areas and adding mouse click effects. Any suggestions?"
If you encounter situations like those described above, there’s no need to worry. The Edit the Recording feature allows you to modify videos recorded with FocuSee, and also supports importing videos for editing. This mode helps enhance the visual appeal and engagement of your videos. Please refer to the detailed instructions to begin editing.
Computer System Requirements
| Windows OS | macOS | |
| Operating System | Windows 10 or later | macOS 10.15 or later, and optimal experience on macOS 12.3 and above |
| Processor | Intel i5 and above processors, dual-core 2.9GHz and above | Apple M1 or later or Intel-based Mac |
| Memory | At least 8GB of RAM | At least 8GB of RAM |
Part 1. Background Canvas Settings
Step 1. Jump to the Recording Editing Interface.
After recording your screen, you will automatically jump to the recording editing interface.
Recording Editing Interface
Discover how to record videos using FocuSee. Click here for in-depth instructions.
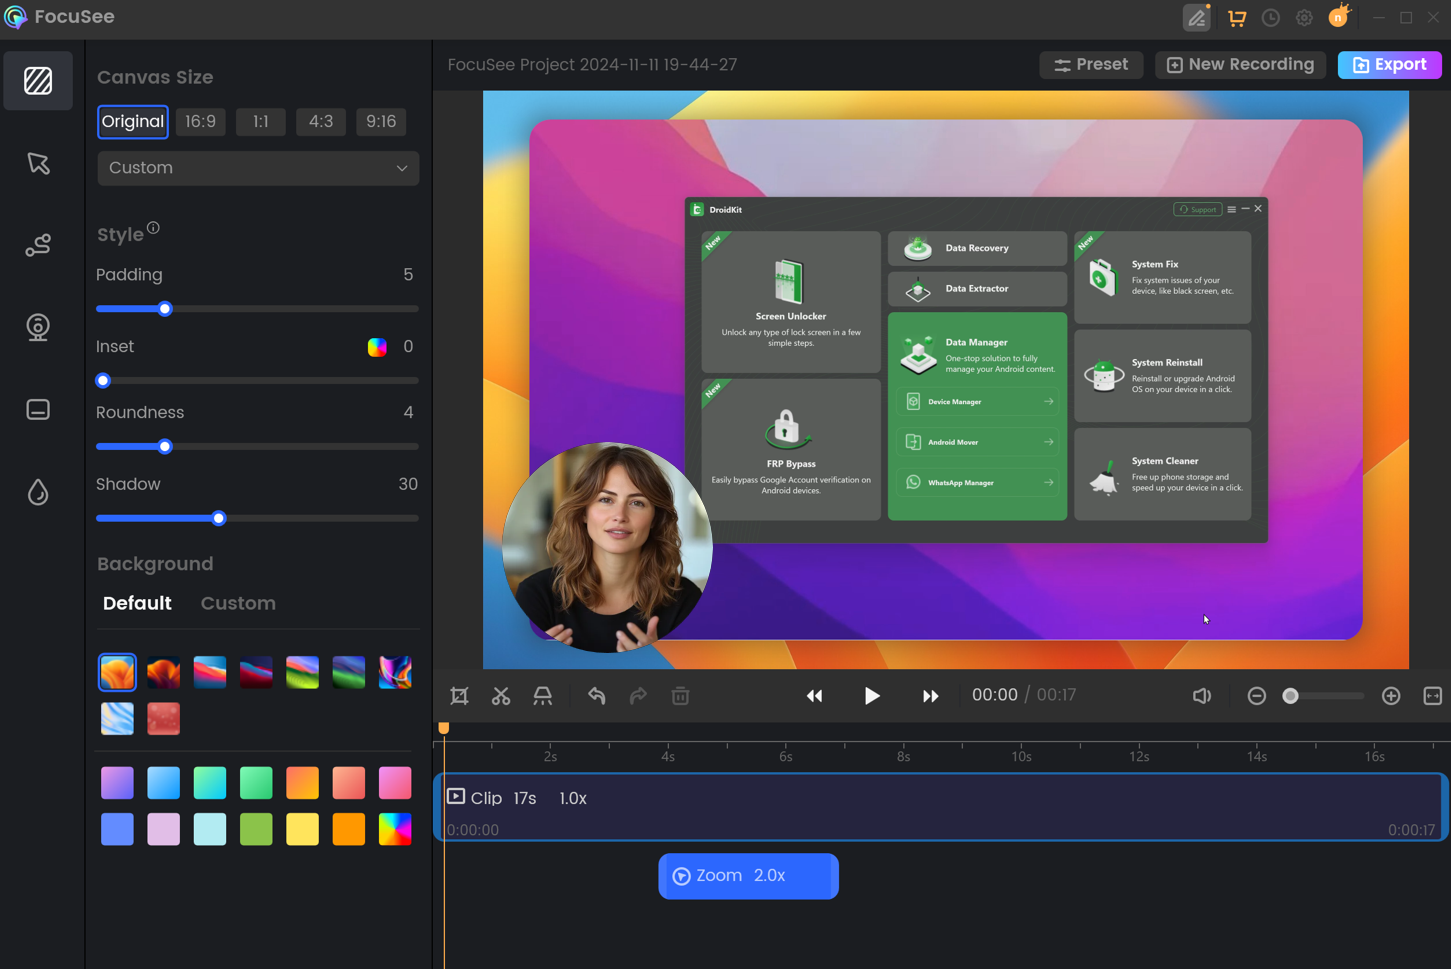
Step 2. Choose the Video Enhancement Option.
Please select the Video Enhancement option. This will take you to the Background Canvas Settings interface, where you can adjust the size and style of the video canvas to suit your preferences. Additionally, you can customize the video background as well.
Choose Video Enhancement Option
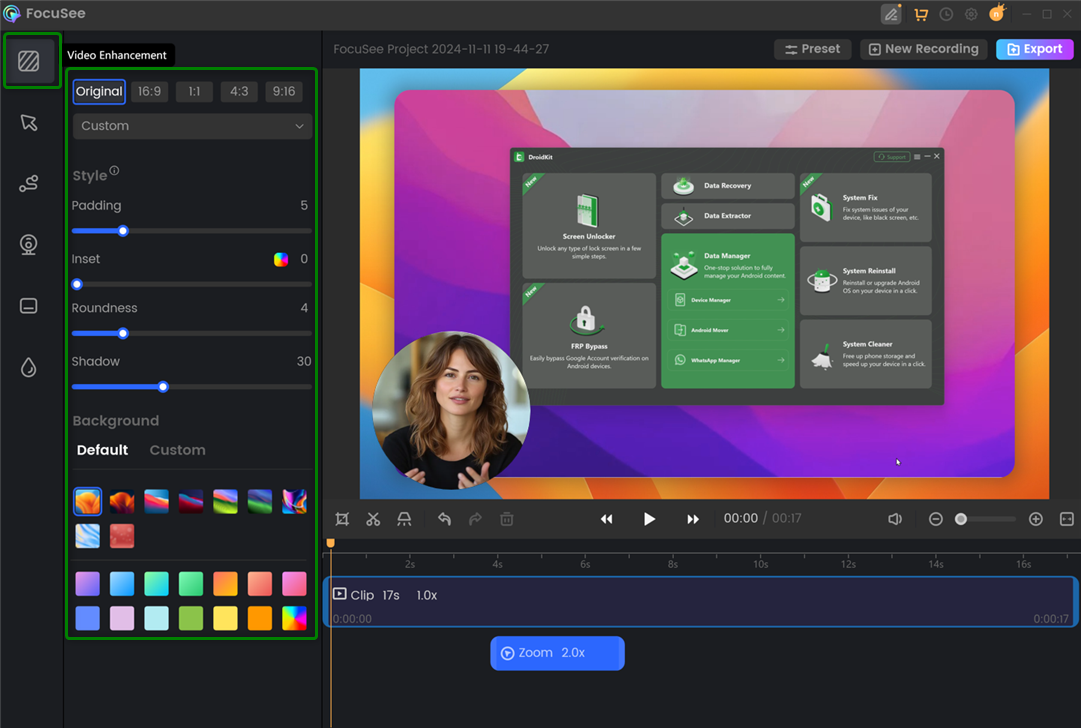
Step 3. Set Video Canvas Size.
By default, FocuSee sets the size of your video canvas to auto-size. If you want to resize the canvas, FocuSee offers another four commonly - used video sizes: 1:1, 4:3, 16:9, and 9:16. This enables you to adjust the dimensions of your video to meet your specific needs.
Set Video Canvas Size
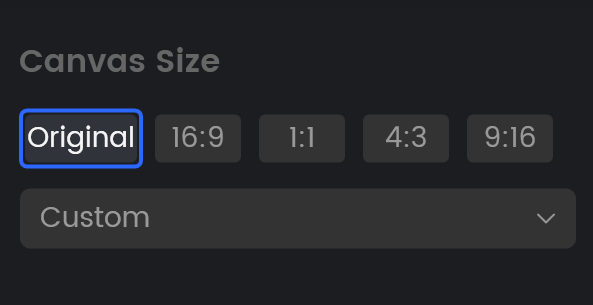
FocuSee provides the option to customize the canvas size for sharing on diverse social media platforms such as YouTube, TikTok, Twitter, LinkedIn, Facebook, and Instagram. This guarantees that your video is optimized for each specific platform and retains its visual allure when shared across different social media channels.
Step 4. Set Video Canvas Style.
In addition to adjusting the video canvas, FocuSee enables you to fix the zoomed-in section and meticulously fine-tune other visual aspects, including padding, inset, roundness, and shadow.
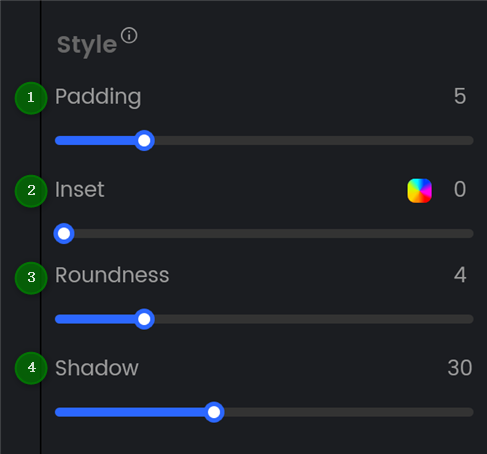
Set Video Canvas Style
If you are recording an Android or iOS device, you can add a device frame, such as an iPhone, iPad, Android phone, or tablet, around your recorded screen to give your video a more professional appearance.
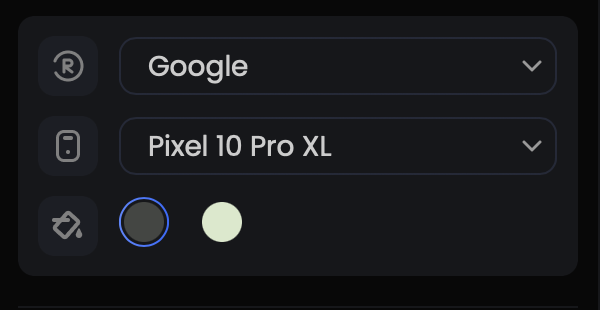
Set Device Frame
Step 5. Set Background.
Additionally, we offer a variety of video background templates, allowing you to easily add or change the background of your video.
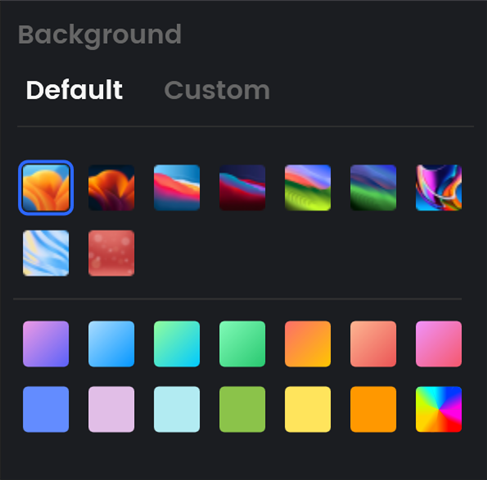
Set Background
Part 2. Cursor Settings
Step 1. Jump to the Recording Editing Interface.
Once you have finished recording your screen, you will be automatically redirected to the recording editing interface. At this point, please select the Cursor Option.
Click Cursor Option in Recording Editing Interface
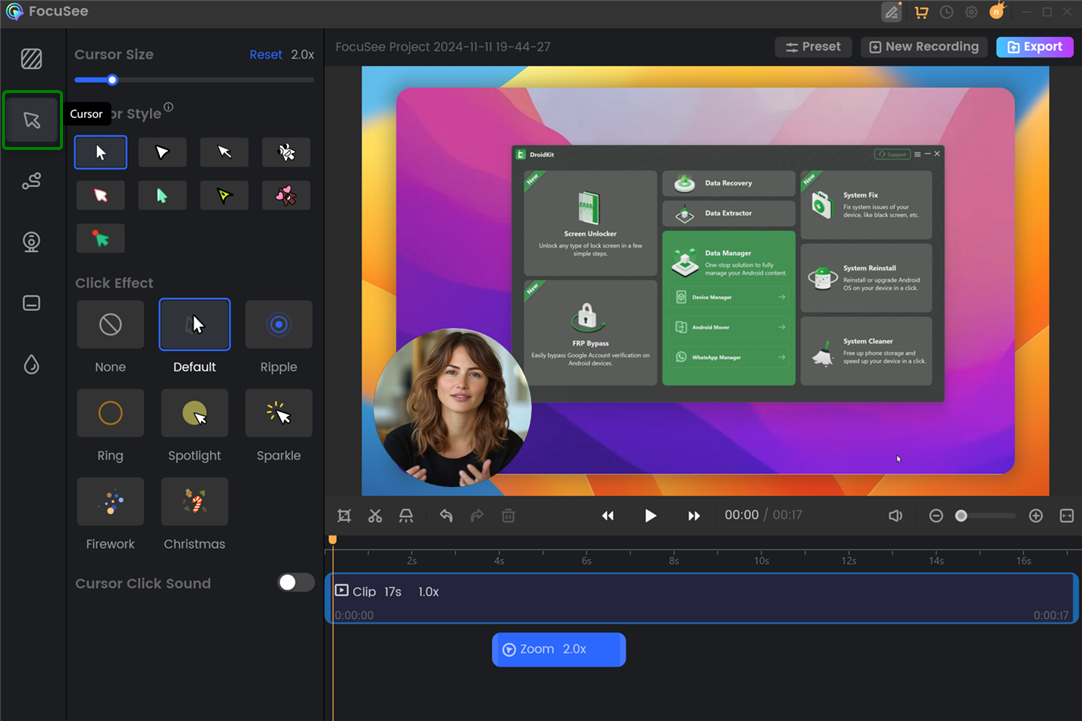
Step 2. Configure Cursor.
The Cursor tab provides you with the ability to adjust the mouse size, choose from a variety of mouse styles, add mouse click sounds, apply different cursor effects, and hide mouse if not moving. Customizing the mouse cursor allows you to personalize your experience and enhance visual and audio feedback for mouse interactions.
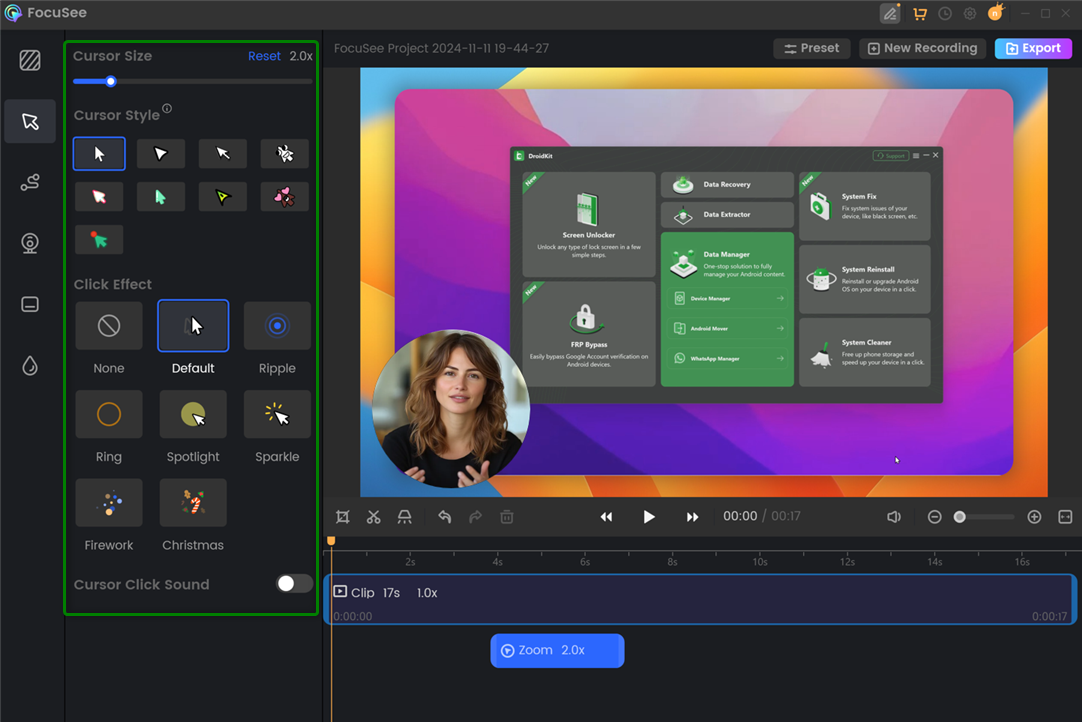
Configure Mouse Cursor
For more details about mouse settings, please click here to view additional information about camera features.
Part 3. Camera Layout Settings
Step 1. Jump to the Recording Editing Interface.
Once you have finished recording your screen, you will be automatically redirected to the recording editing interface. At this point, please select the Camera Option.
Click Camera Option in Recording Editing Interface
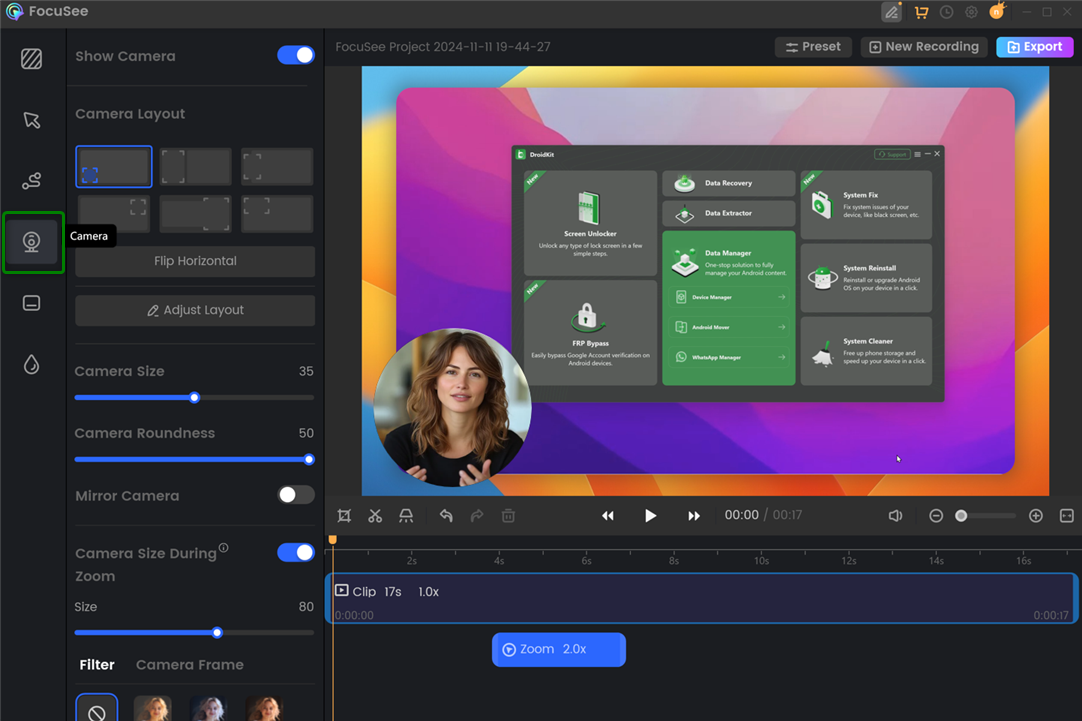
Step 2. Configure Camera Display.
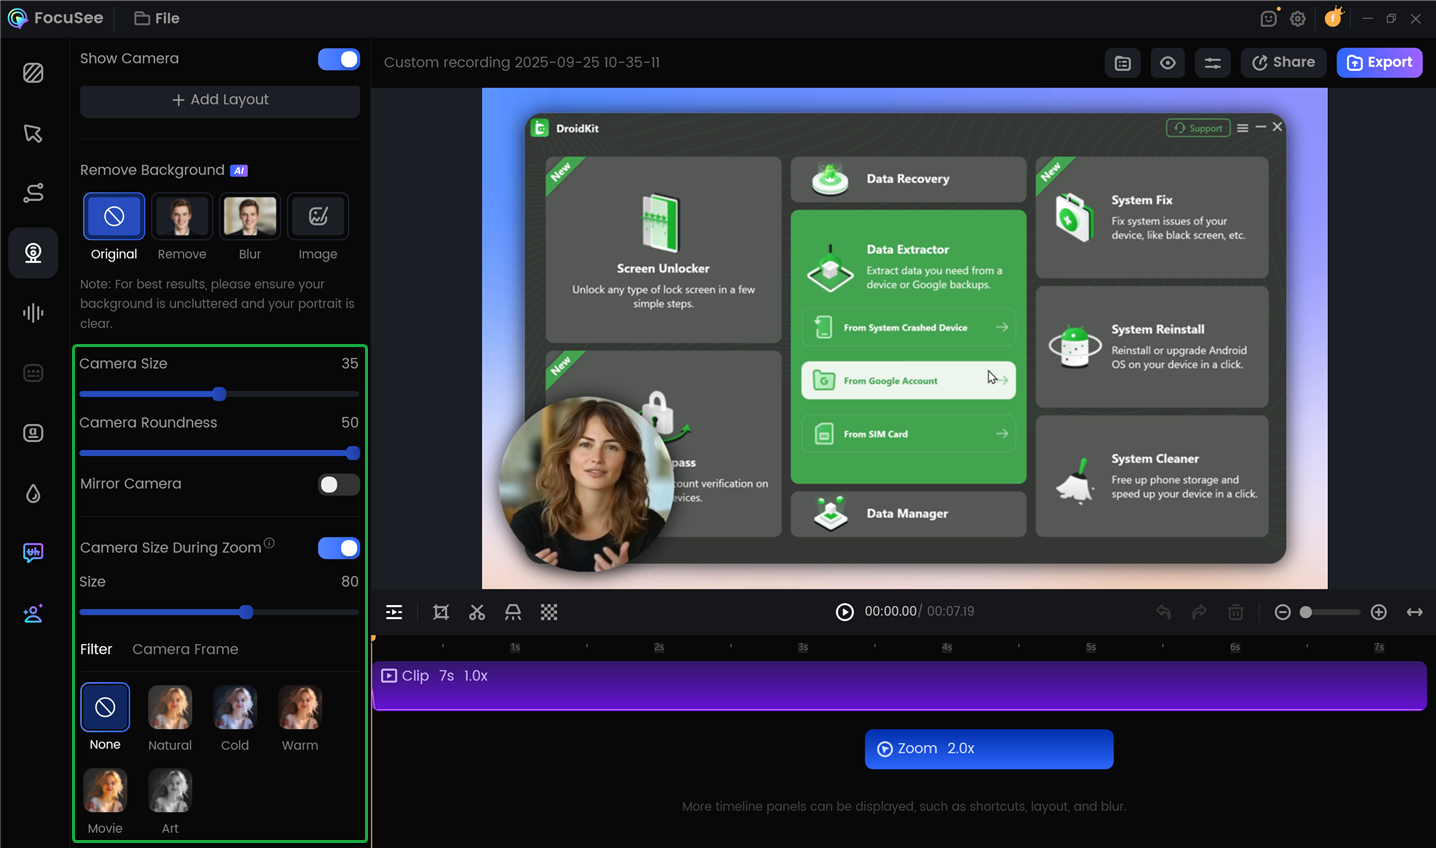
In the Camera module, you can choose whether to show or hide the camera and switch between different camera styles. By clicking AI Avatar, you can jump directly to the AI Camera feature. You can also freely adjust the camera's position and layout, set it to full-screen mode, and remove the background for a cleaner look.
Configure Camera Display
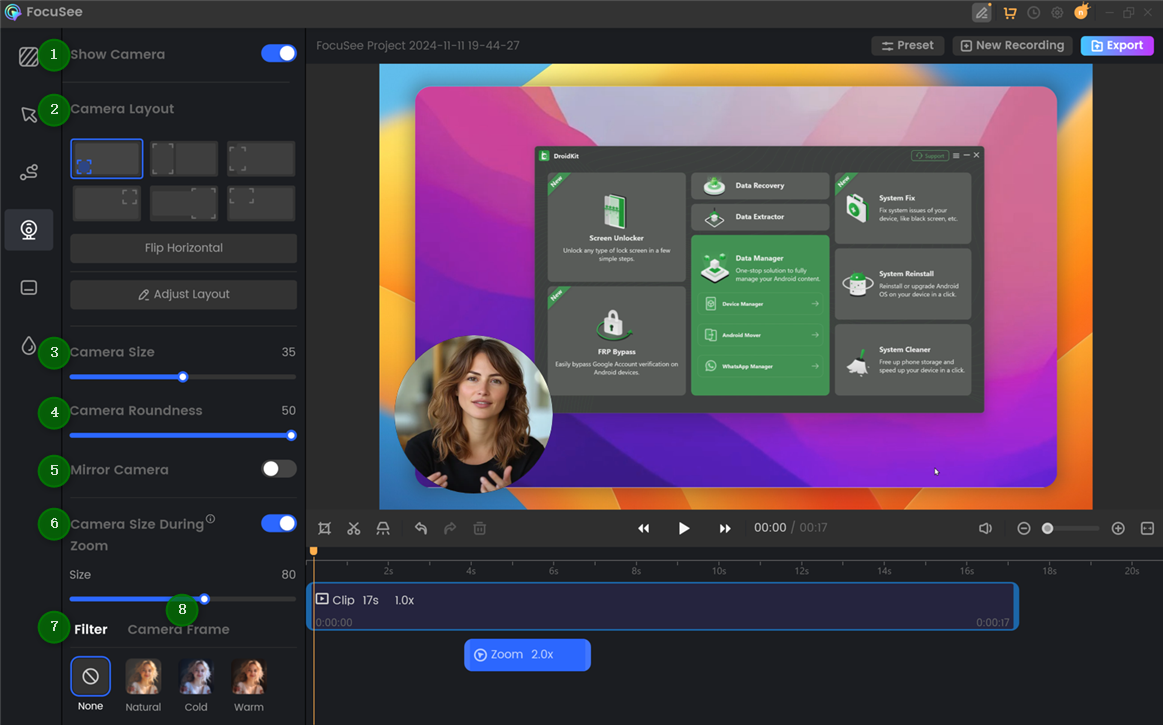
In addition, you can resize the camera window and adjust its roundness, apply portrait mirroring, dynamically scale the camera during zooming, and enhance visuals with filters. A variety of camera borders are also available to give your video presentations a more polished and professional appearance.
Configure Camera Settings
1. Learn more about Camera Layout: Learn how to adjust, resize, and arrange your camera to achieve optimal video composition and enhance visual quality.
2. Discover AI Avatar features: Explore how to replace your real webcam feed with a virtual AI avatar for a creative presentation style.
3. Remove Camera Background Guide: Follow step-by-step instructions to remove or replace your background for a cleaner, distraction-free look.
Part 4. Crop the Video
Step 1. Jump to the Recording Editing Interface.
Once you have recorded your screen using FocuSee, you will be automatically redirected to the recording editing interface.

Jump to the Recording Editing Interface
Discover how to record videos using FocuSee. Click here for in-depth instructions.
Step 2. Crop Video.
Then, please click the Crop icon to start cropping the video.
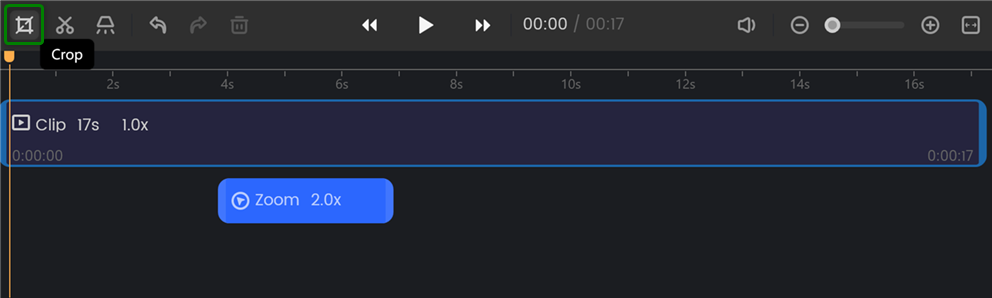
Click Crop Icon
In this feature, we provide four preset aspect ratios for your convenience: 16:9, 4:3, 1:1, and 9:16. Additionally, FocuSee offers you the freedom to customize the video size, enabling you to have full control over the visual presentation of your video.
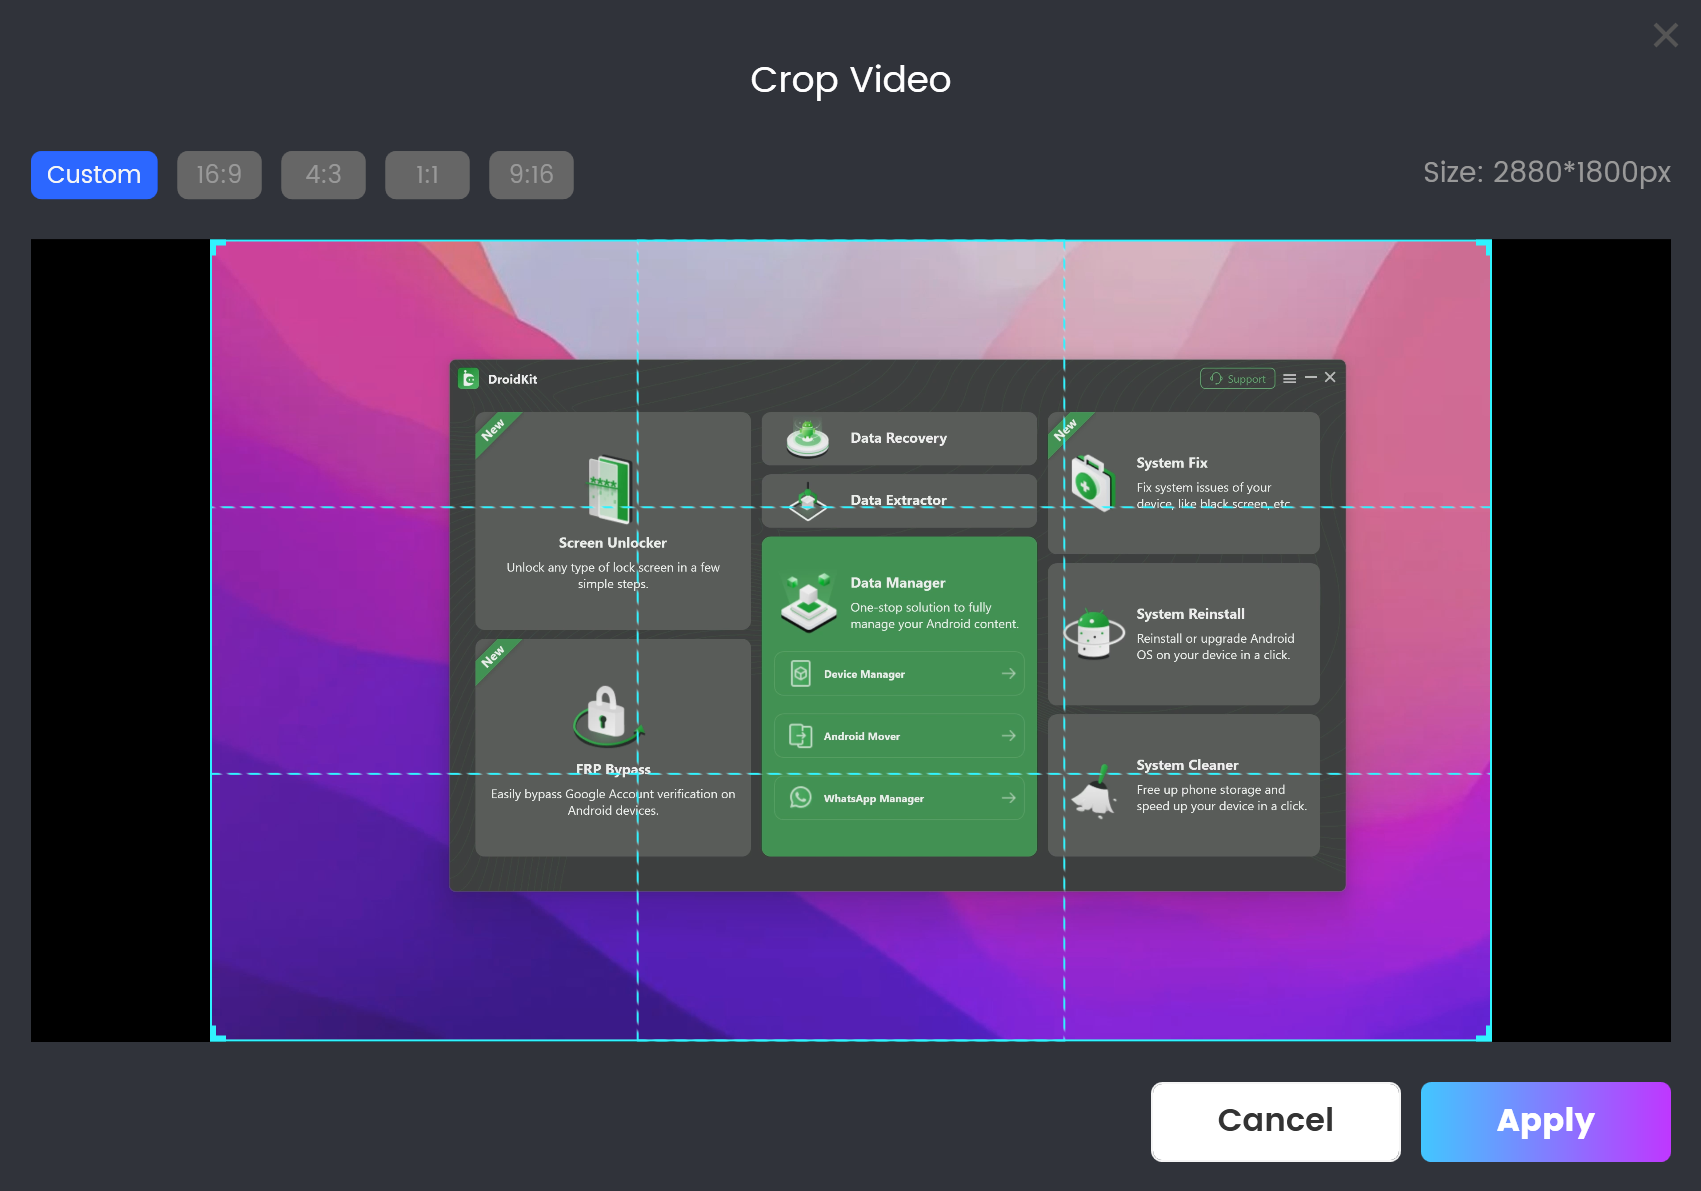
Crop the Video
Part 5. Clip Settings
Step 1. Jump to the Recording Editing Interface.
After recording your screen, you will automatically jump to the recording editing interface.

Jump to the Recording Editing Interface
Discover how to record videos using FocuSee. Click here for in-depth instructions.
Step 2. Click Clip Icon to Start Cliping Video.
Please click on the timeline at the desired location to select the section you want to cut, then tap the Clip icon to split your video into separate clips.
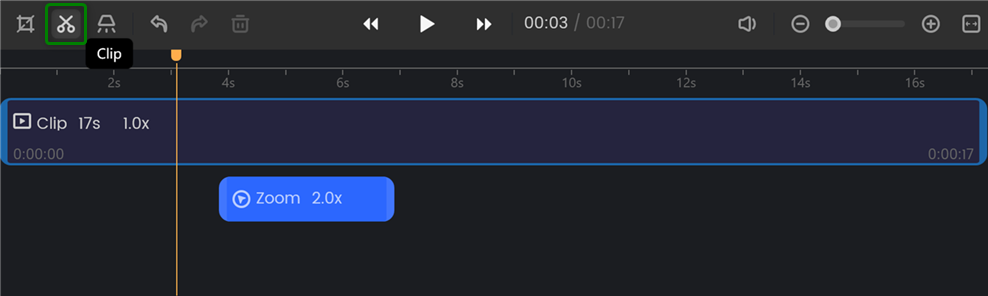
Click Clip Icon
Step 3. Manage Video Clips.
And you can click on each clip to adjust its speed to your preference. The settings can also apply to all video clips.
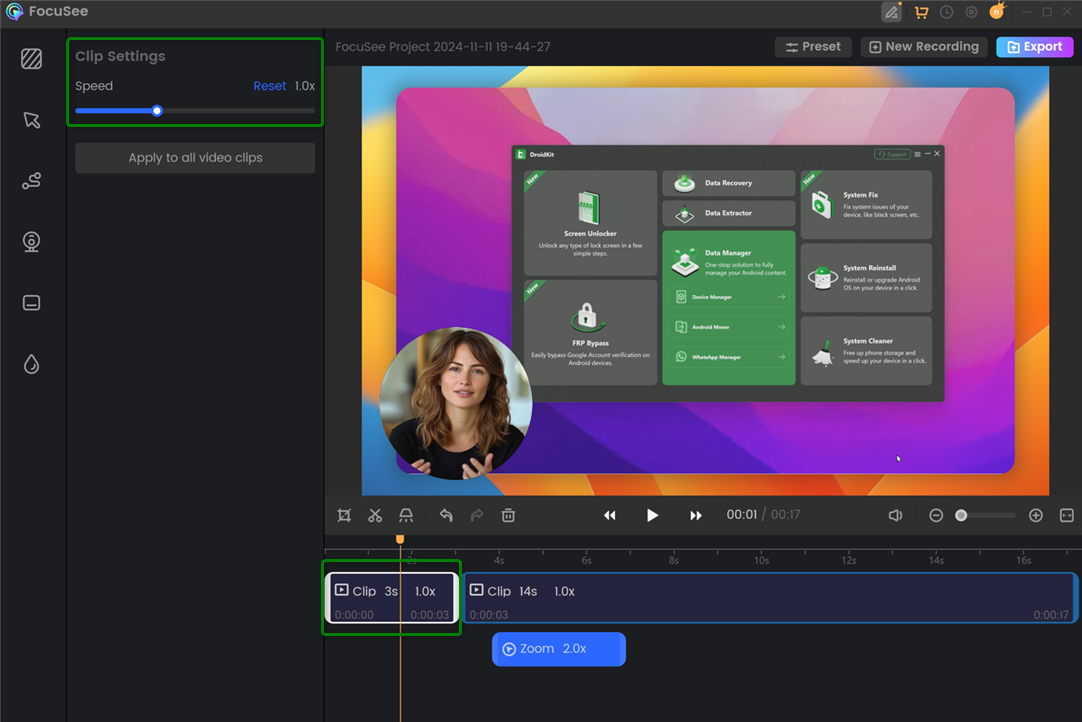
Adjust Video Clips Speed
You can toggle the Show Cursor option to flexibly control whether the mouse cursor appears in this clip.
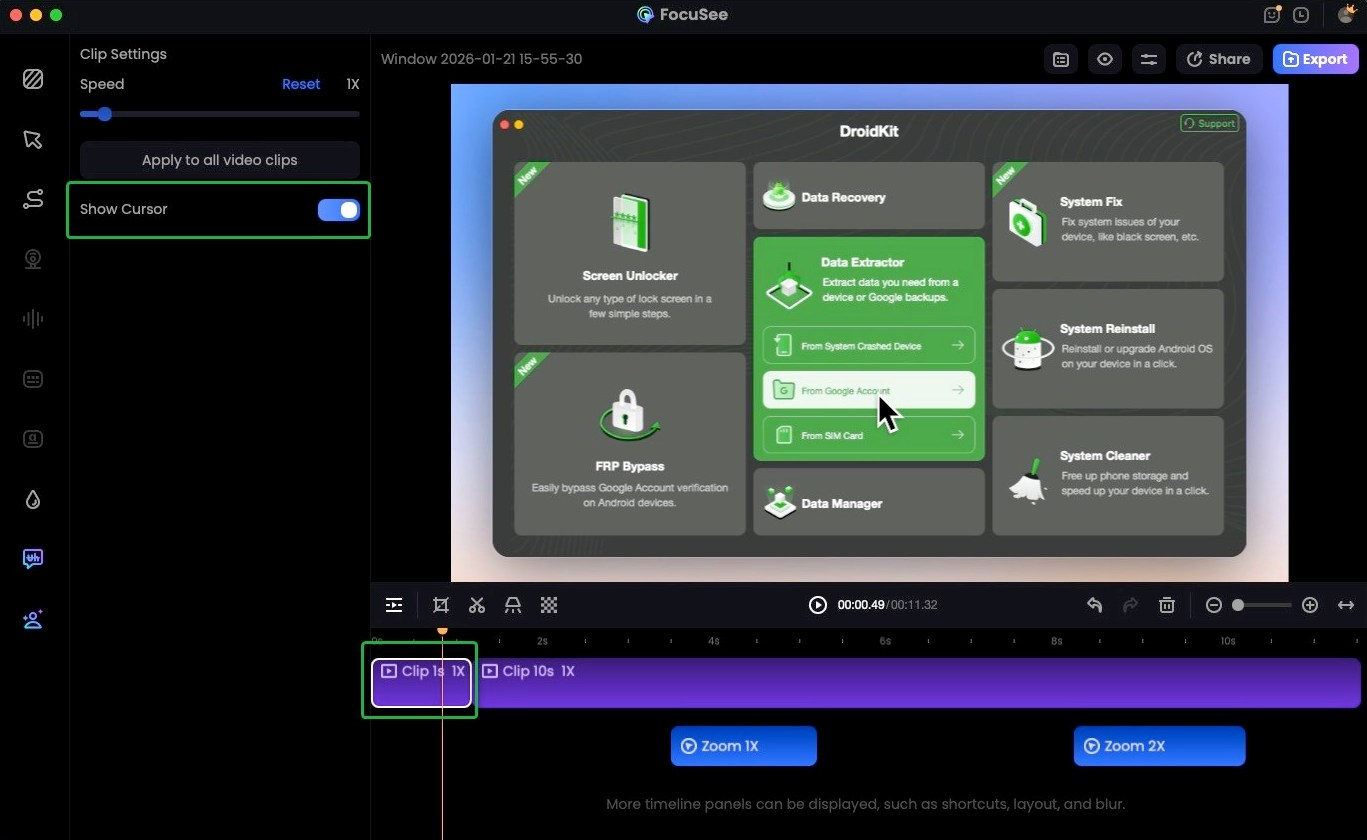
Turn on Show Cursor
Additionally, to remove any unwanted parts from the video, simply click the Delete button.
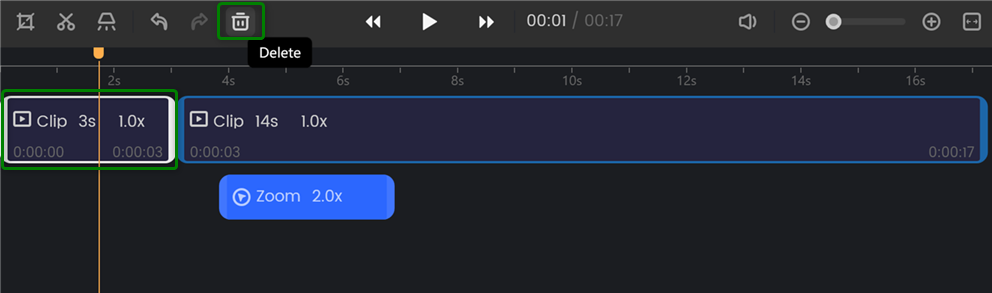
Delete Unnecessary Video Clips
Part 6. Zoom Settings
Step 1. Jump to the Recording Editing Interface.
After recording your screen, you will automatically jump to the recording editing interface.

Jump to the Recording Editing Interface
Discover how to record videos using FocuSee. Click here for in-depth instructions.
Step 2. Manage Zoom Settings.
FocuSee incorporates an automatic zoom-in effect during screen recording. However, if you find that the zoom-in effect is unnecessary for your recording, you have the option to disable it. Please choose the Zoom clips and click the Disable Zoom button.
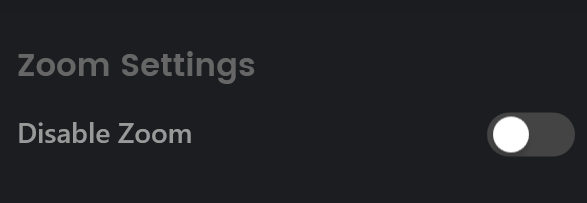
Click Disable Zoom Button
If you choose to keep the zoom settings, you can set the zoom size as well as manually adjust the position of the video zoom.
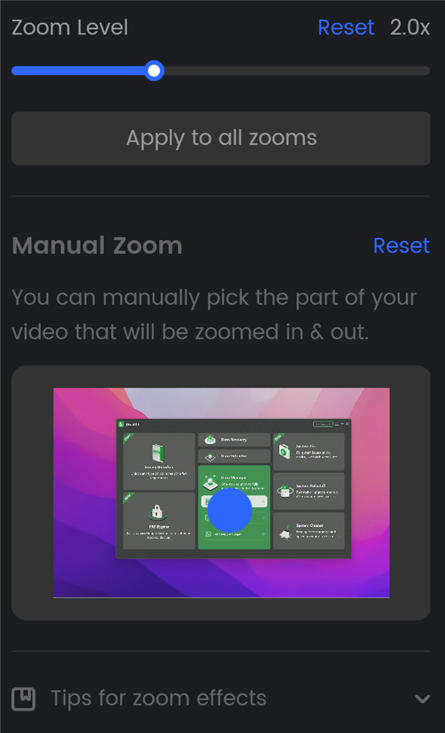
Set Zoom Size and Adjust Position
To add a new zoom to your recording, simply click on the zoom timeline at the desired location.
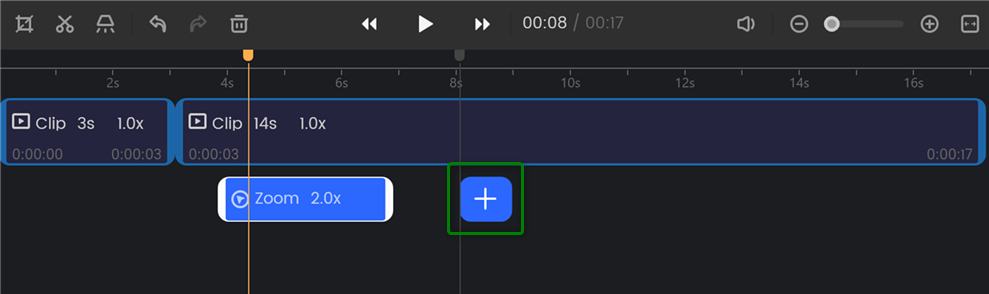
Add New Zoom
Part 7. Spotlight Settings
Step 1. Jump to the Recording Editing Interface.
After recording your screen with FocuSee, you will automatically jump to the recording editing interface.

Jump to the Recording Editing Interface
Discover how to record videos using FocuSee. Click here for in-depth instructions.
Step 2. Choose Spotlight.
Please click on the spotlight timeline at the desired location. Then, please click the Spotlight icon.
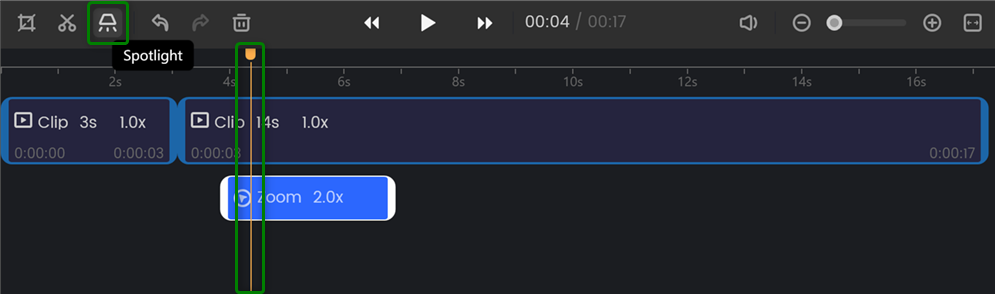
Click Spotlight Icon
Step 3. Manage Spotlight Effect.
Then, you can customize its size and shape by adjusting the spotlight round. With this effect, you have the flexibility to add spotlights to various parts of your video, such as the title, important features, images, and other elements.
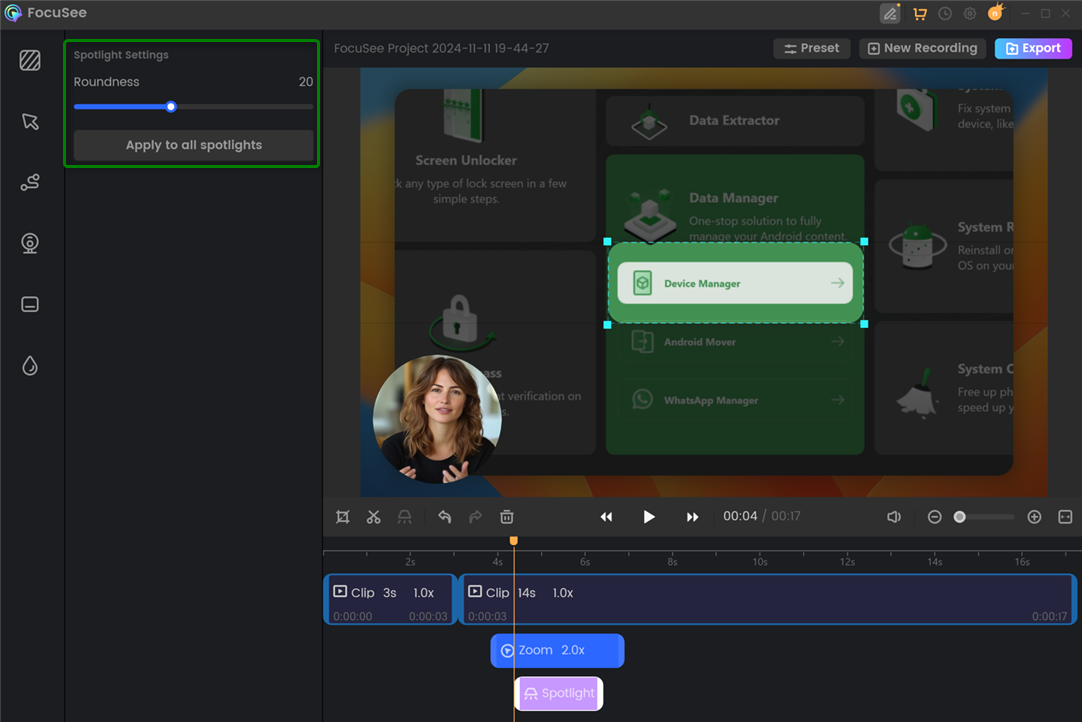
Customize Size and Shape of Spotlight
If you have further question after reading this guide, please refer to FAQs page to check more solutions. Or you can contact our Support Team to get further help. We are here to help you!

Try It Out & Share Your Feedback!

We'd love to hear how FocuSee is working for you.
Give it a try and share your thoughts—your feedback helps us keep improving.
If you're enjoying FocuSee, we'd be so grateful if you could leave us a review on Trustpilot. Your support helps others discover FocuSee and motivates our team!
Thank you for being part of the iMobie community — we couldn’t do it without you!
Try It Out & Share Your Feedback!
We'd love to hear how FocuSee is working for you.
Give it a try and share your thoughts—your feedback helps us keep improving.
If you're enjoying FocuSee, we'd be so grateful if you could leave us a review on Trustpilot. Your support helps others discover FocuSee and motivates our team!
Thank you for being part of the iMobie community — we couldn’t do it without you!