Free Download For Win & Mac | 100% Clean & Secure
Permissions and Settings
Whether you encounter the similar situations below?
"My computer runs on macOS 10.15, but I'm unable to use FocuSee because it's asking me for permission. What should I do?"
"I want to use keyboard shortcuts with FocuSee. How can I complete the relevant settings for keyboard shortcuts?"
If you encounter similar situations as mentioned above, there is no need to worry. The Permissions and Settings section will guide you to complete granting permission on your computer and configure the settings of the FocuSee.
Computer System Requirements
| Windows OS | macOS | |
| Operating System | Windows 10 or later | macOS 10.15 or later, and optimal experience on macOS 12.3 and above |
| Processor | Intel i5 and above processors, dual-core 2.9GHz and above | Apple M1 or later or Intel-based Mac |
| Memory | At least 8GB of RAM | At least 8GB of RAM |
Part 1. Grant Permission on Mac Computer
Due to macOS privacy policies, FocuSee requires screen, camera, and microphone permissions, as well as driver installation, to function properly. Please follow the instructions below to grant the necessary permissions.
Step 1. Download and Install FocuSee on Computer.
Visit our official website and download FocuSee on to your computer. Make sure you have a stable network connection during the download and installation process. Follow the on-screen prompts to install FocuSee.
Step 2. Enable System Privileges.
Upon initial launch on Mac computers, the app will request permission to access the screen, camera, microphone, and drivers installation for recording capabilities. If you have unauthorized permissions for your microphone, camera, etc., you will get a popup to grant permissions when you click any of the icons or features.
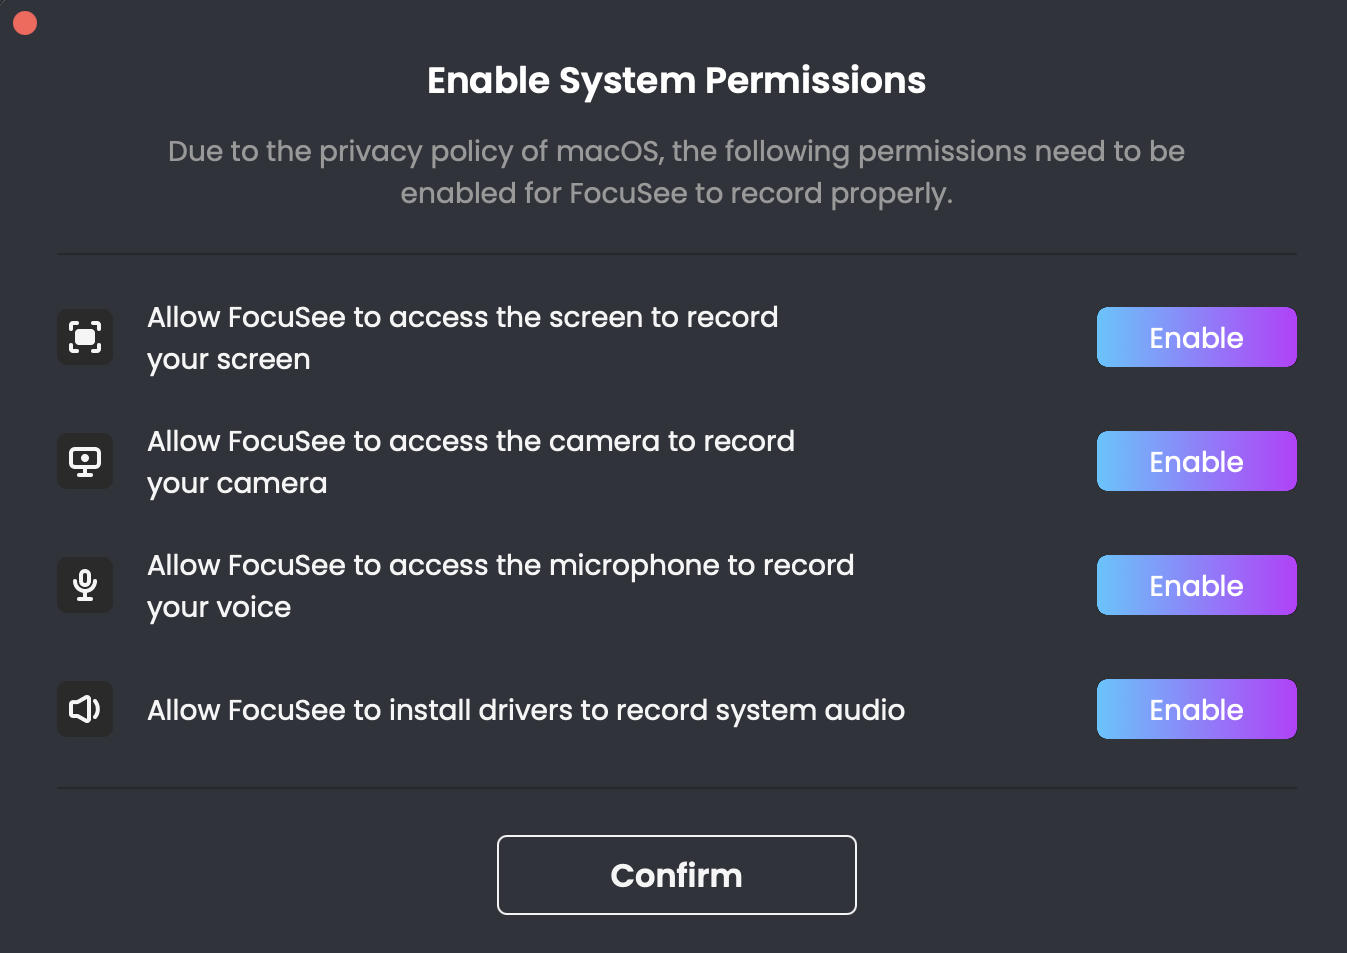
Enable System Privileges
For macOS 13 and later, you can record audio without installing an extra driver. However, if you're using macOS 13 earlier, you'll need to install the audio driver for smooth recording.
Let's take Camera permission granting as an example. Please click Enable button to continue the process.
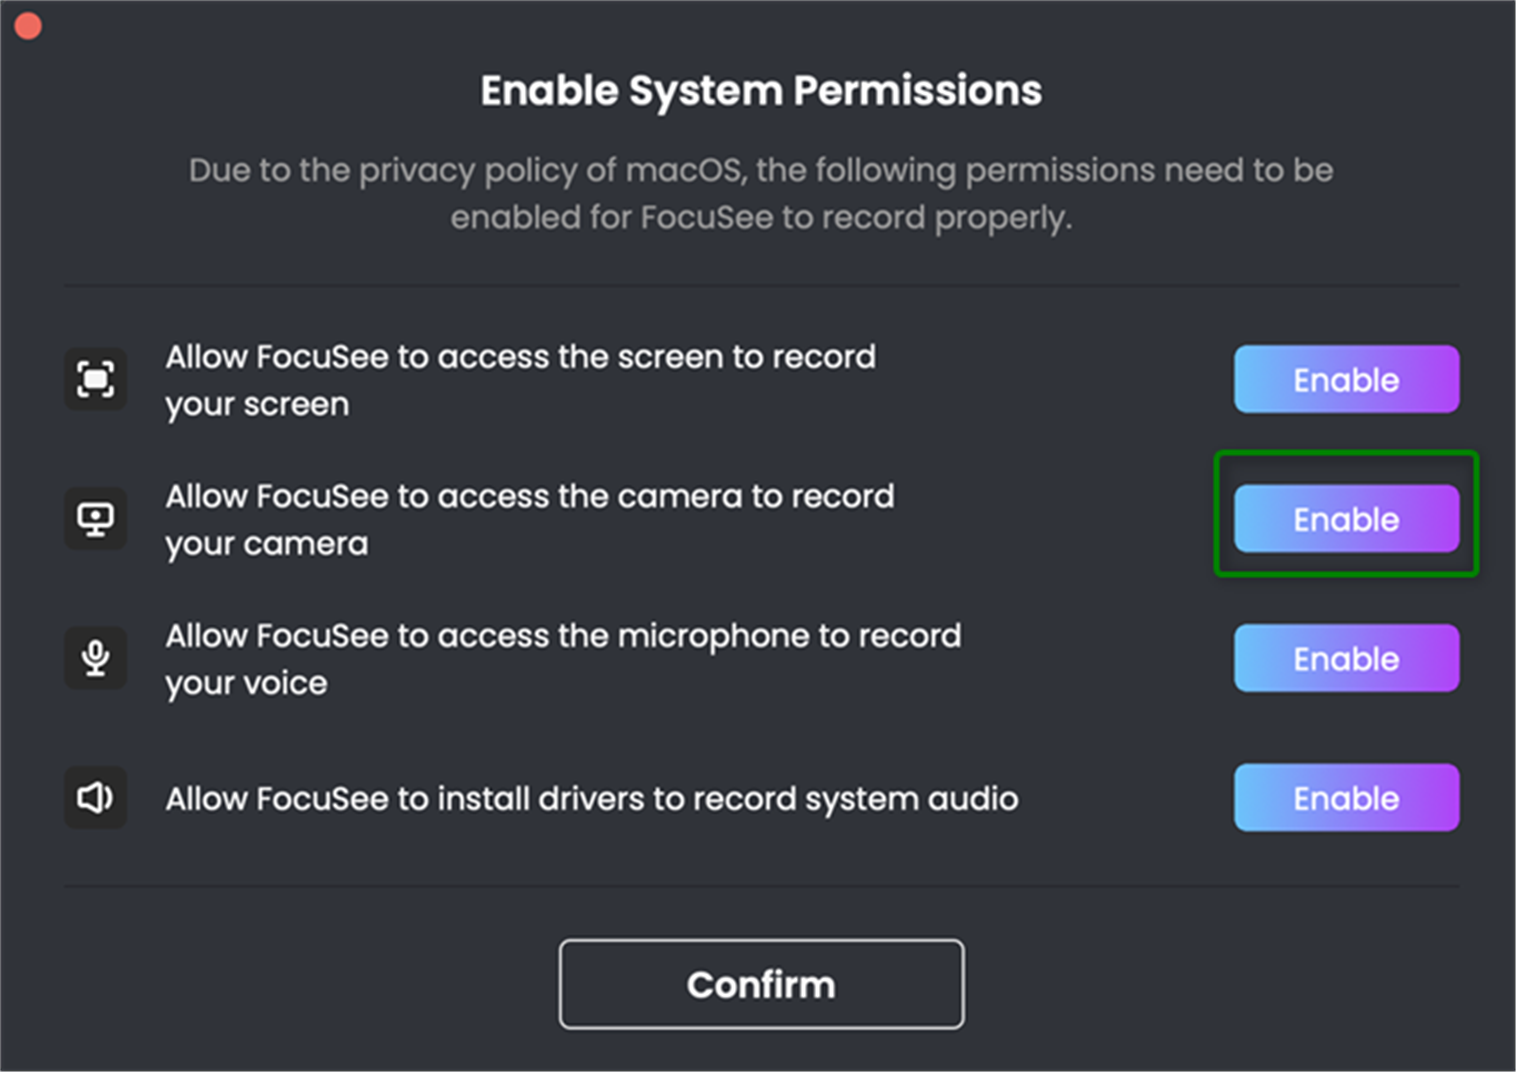
Click Enable Button
Step 3. Grant Permissions.
Then, it will open your Mac computer's System Settings - Privacy & Security settings - Camera to complete the Camera Permission Authorization. After authorization, please restart FocuSee to ensure that the permission authorization is successful.

Grant Camera Permission
Part 2. How to Enable Microphone Privacy on Windows Computer
If you're using Windows computer and encounter a prompt about microphone privacy when starting a recording in FocuSee, it's likely because the microphone access is disabled in your system settings. To record your voice, you'll need to enable microphone privacy by following the steps below. This ensures that FocuSee can access your microphone seamlessly.
Step 1. Open Microphone Privacy Settings.
In the Windows search bar, type "Microphone privacy settings" and open it. You can also go to "Settings" > "Privacy" > "Microphone".
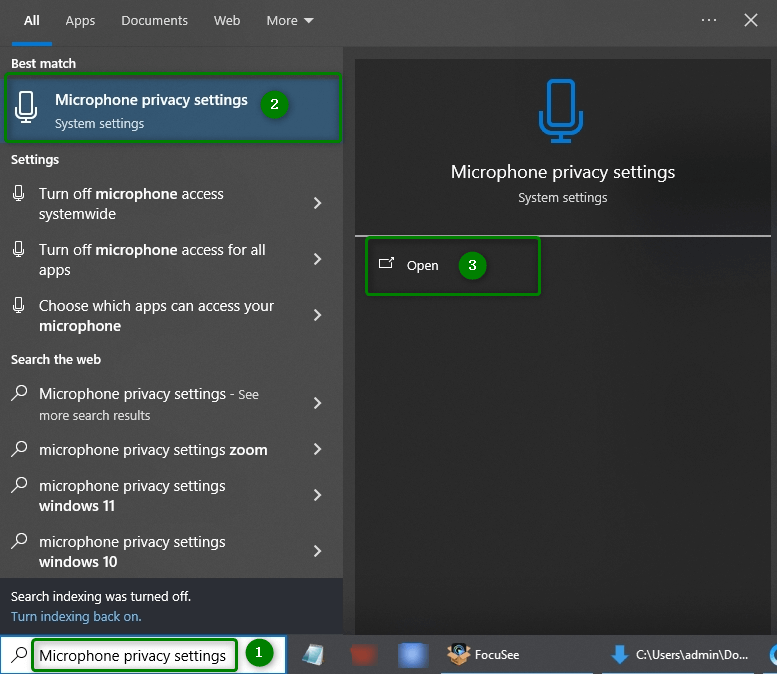
Type Microphone privacy settings
If the search bar is not visible, right-click on the Windows taskbar, select "Search", and enable "Show search box".

Select Search and Enable Show search box
Step 2. Open Microphone Privacy Settings.
In the Microphone privacy settings, toggle the switch to "On" for "Allow apps to access your microphone".
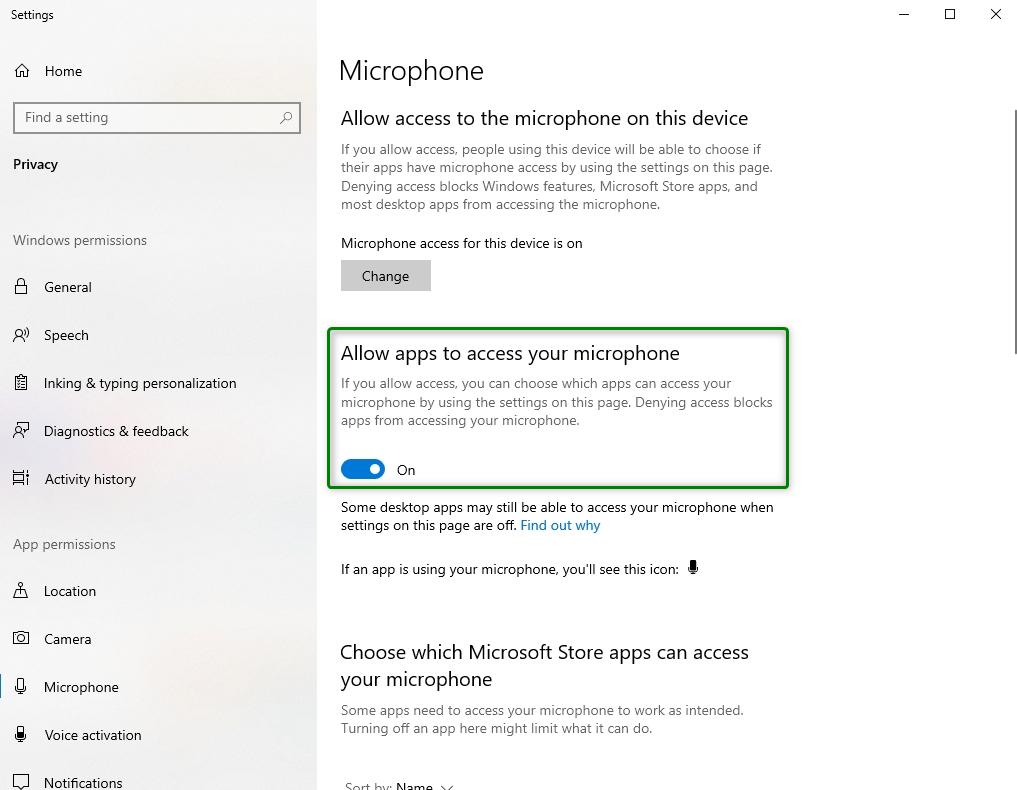
Allow Apps to Access Your Microphone
Step 3. Allow Desktop Apps to Access Your Microphone.
Then, please scroll down and ensure the option for "Allow desktop apps to access your microphone" is also turned "On".

Allow Desktop Apps to Access Your Microphone
Step 4. Restart FocuSee.
Finally, close and restart FocuSee, then try recording again. Your microphone should now work seamlessly during recordings.
Restart FocuSee
Part 3. How to Enable Camera Privacy on Windows Computer
If you're using Windows computer and encounter a prompt about camera privacy when starting a recording in FocuSee, it's likely because the camera access is disabled in your system settings. To record your webcam, you'll need to enable camera privacy by following the steps below. This ensures that FocuSee can access your camera seamlessly.
Step 1. Open Camera Privacy Settings.
In the Windows search bar, type "Camera privacy settings" and open it. You can also go to "Settings" > "Privacy" > "Camera".
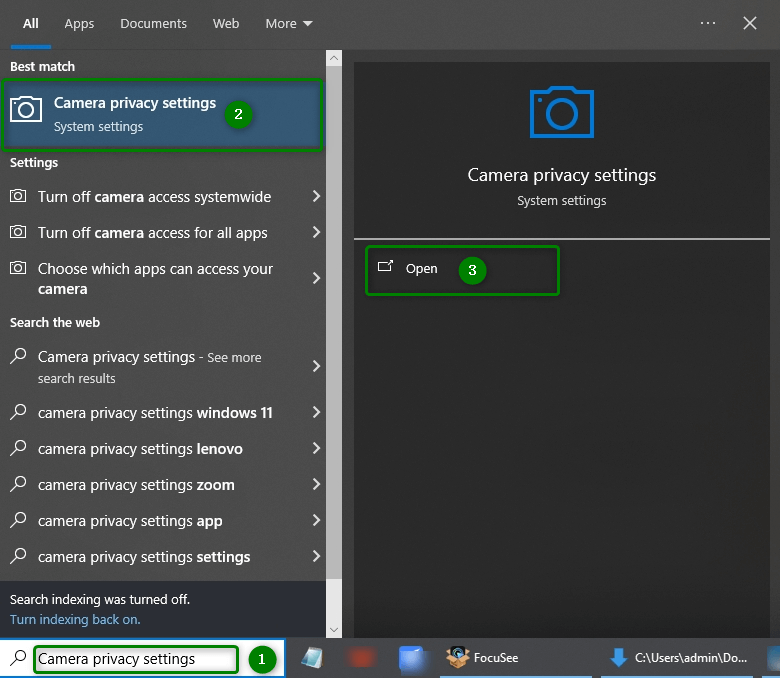
Type Camera privacy settings
If the search bar is not visible, right-click on the Windows taskbar, choose "Search", and tick "Show search box".
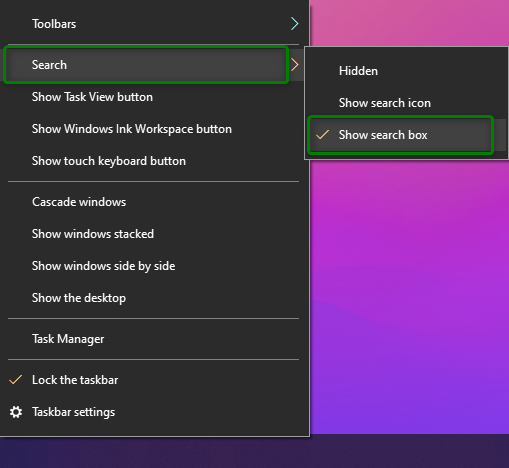
Select Search and Enable Show search box
Step 2. Allow Apps to Access Your Camera.
In the Camera privacy settings, toggle the switch to "On" for "Allow apps to access your camera".
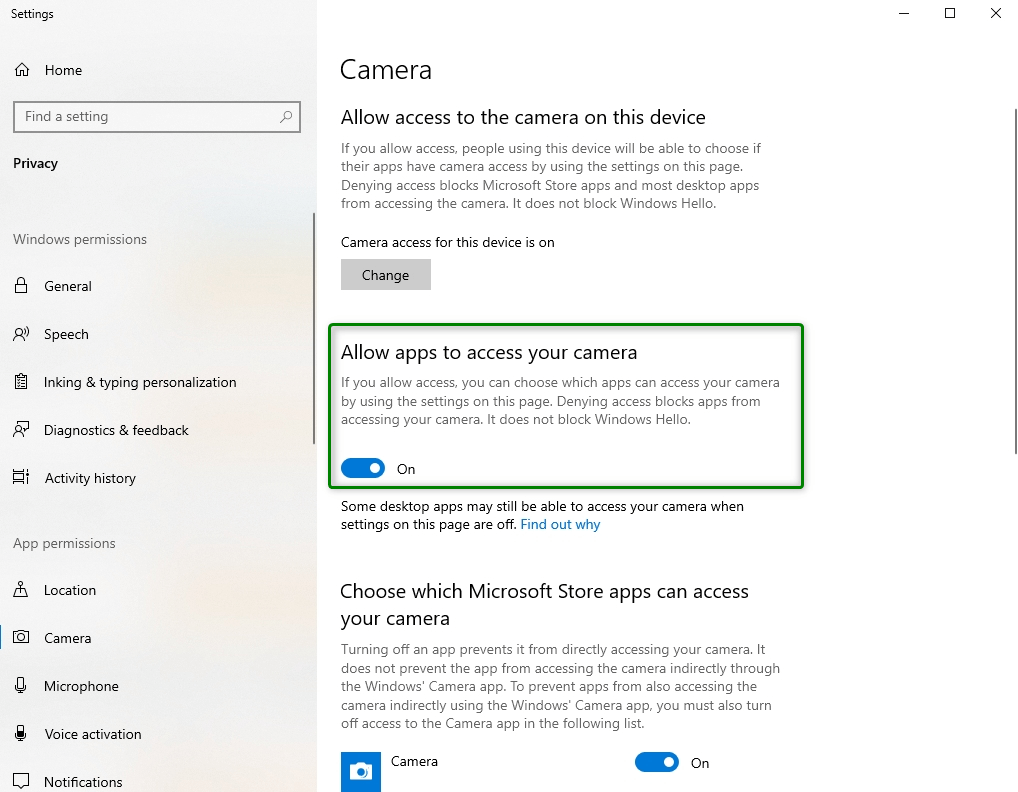
Allow Apps to Access Your Camera
Step 3. Allow Desktop Apps to Access Your Camera.
Then, please scroll down and toggle the switch to "On" for "Allow desktop apps to access your camera".
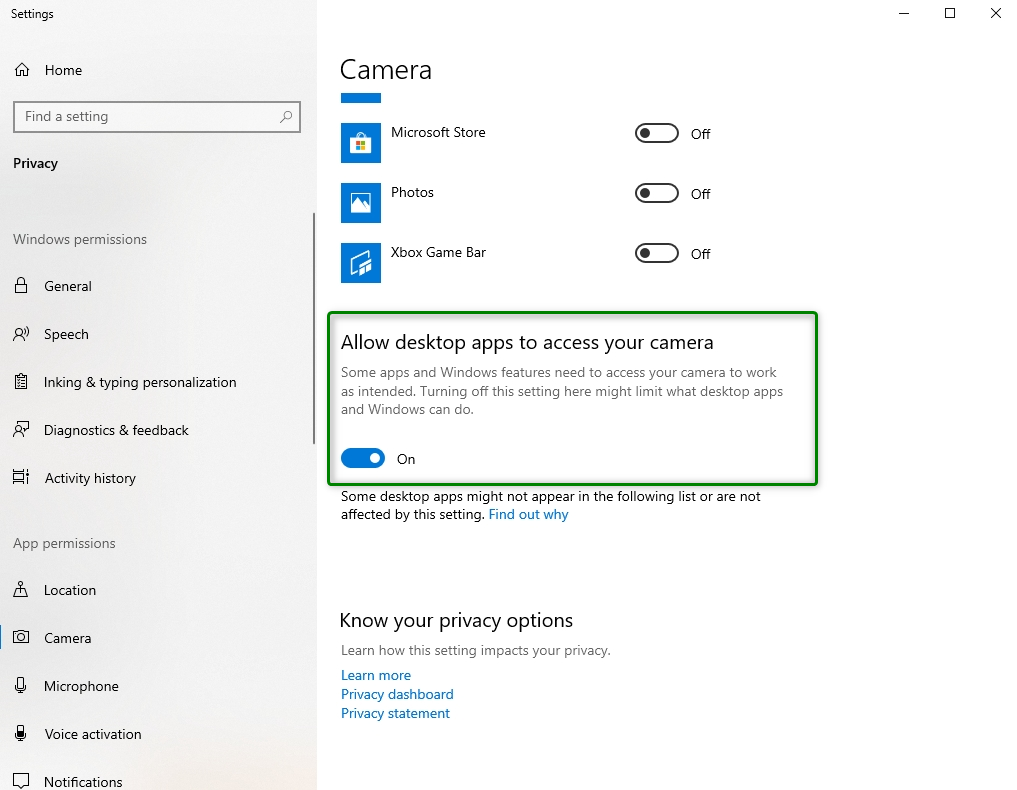
Allow Desktop Apps to Access Your Camera
Step 4. Restart FocuSee.
Finally, close and restart the FocuSee you want to use with the camera. Your camera should now work seamlessly during recordings.

Restart FocuSee
Part 4. Configure the Settings of FocuSee
Step 1. Download and Install FocuSee on Your Computer.
Visit our official website and download FocuSee on to your computer. Make sure you have a stable network connection during the download and installation process. Follow the on-screen prompts to install FocuSee.
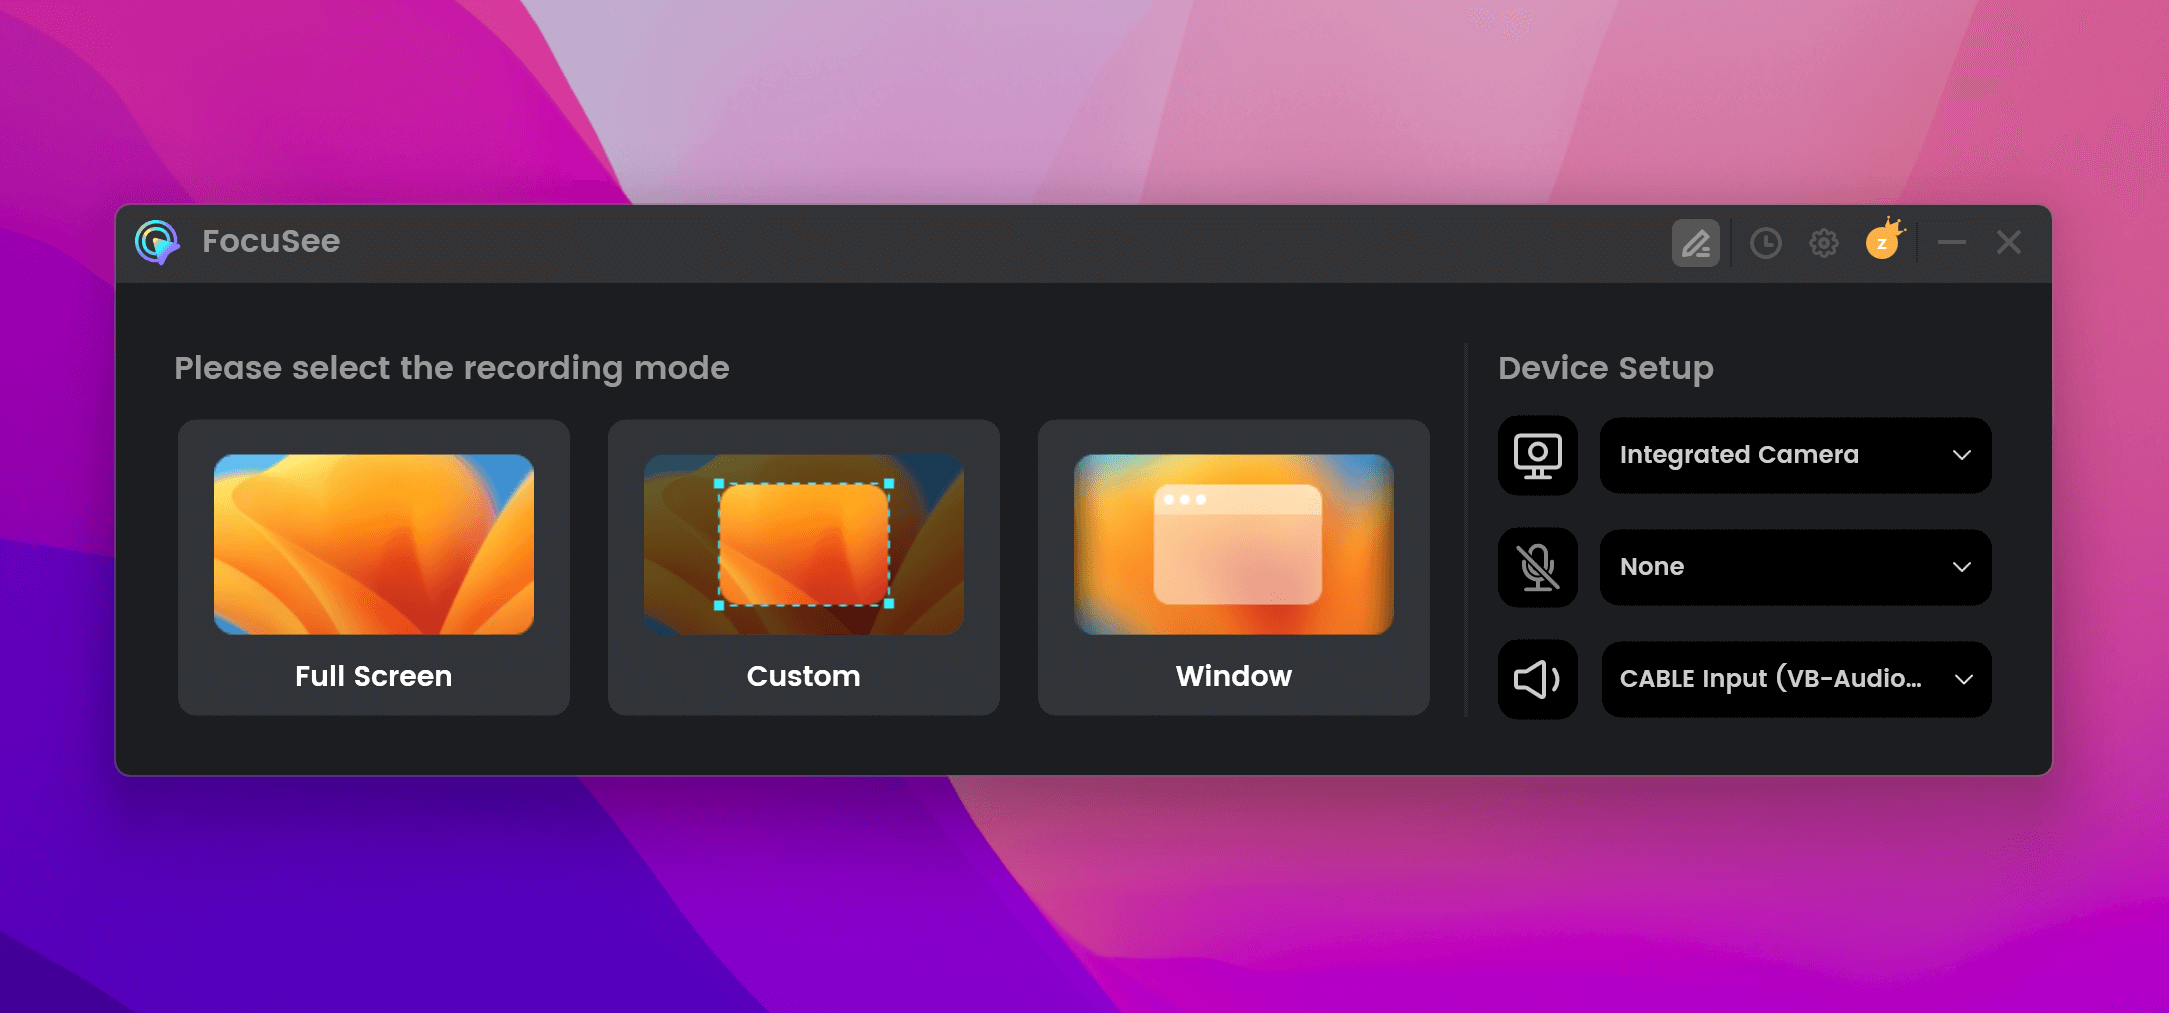
Step 2. Enter the Settings Interface.
Launch FocuSee on your computer and click on the Settings icon on the right-upper corner of the interface.
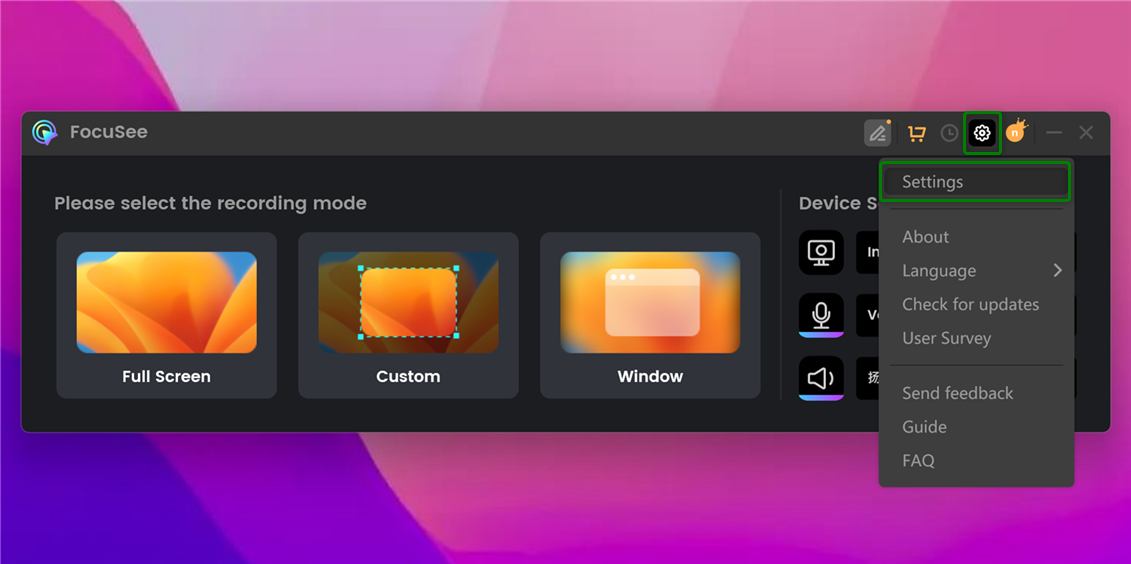
Click Settings Icon
Next, you will see the FocuSee Settings interface, which includes General, Record, Shortcut Keys, and Export settings.
Enter the Settings Interface
Step 3. Finish General Settings.
For General settings, you can change Save Location, Export Location, choose whether FocuSee starts automatically on power-up, and enable auto play video when entering the editor.

General Settings
Step 4. Finish Record Settings.
Click the Record option to apply your settings, including automatically adding Zoom effects, hiding desktop icons, hiding the taskbar, setting recording quality, and configuring the countdown before recording.
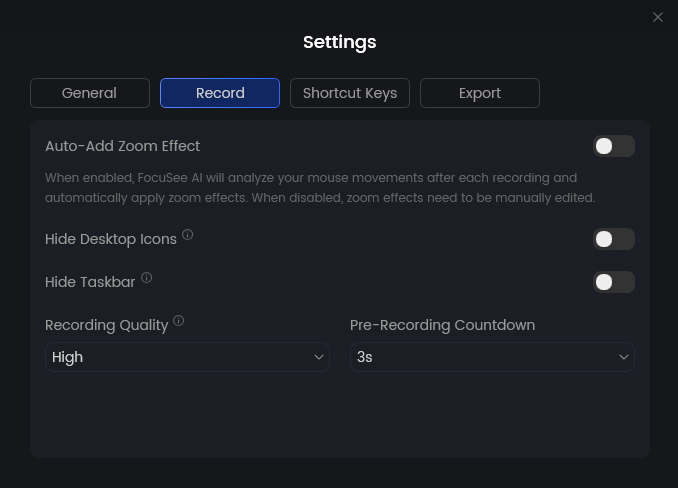
Configure Record Settings
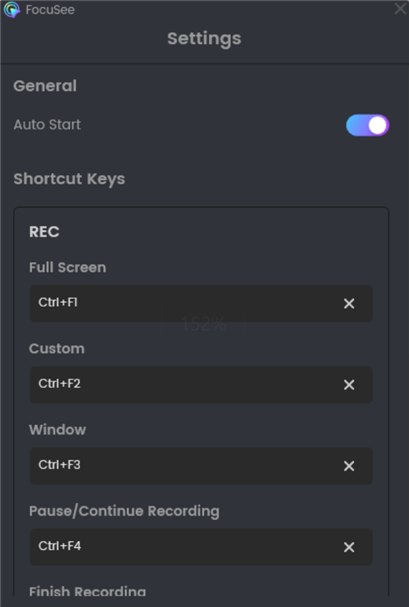
Step 5. Finish Shortcut Keys Settings.
To complete the Recording Shortcut Keys Settings, please click the Record under Shortcut Keys option.
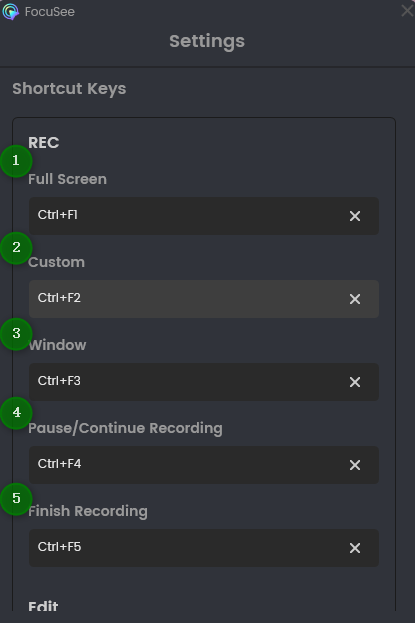
Screen Recording Shortcut Keys Settings Interface
With Record Shortcut Keys Settings interface, you can finish the below settings:
Click the Edit button to open the Editing Shortcuts Key Settings page.
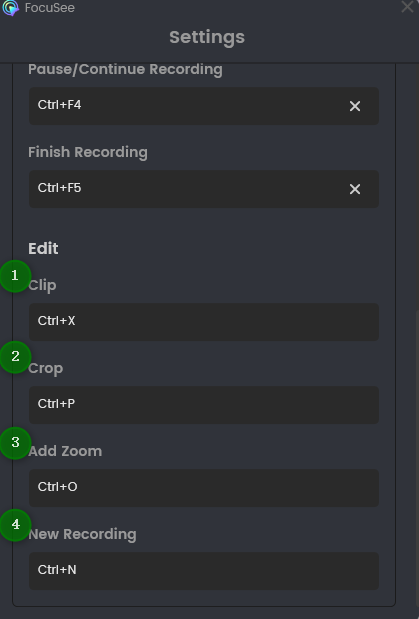
Screen Editing Shortcut Keys Settings Interface
With screen editing Shortcut Keys Settings interface, you can finish the below settings:
You can move your cursor to the next content area to reveal additional editing options and customize keyboard shortcuts.
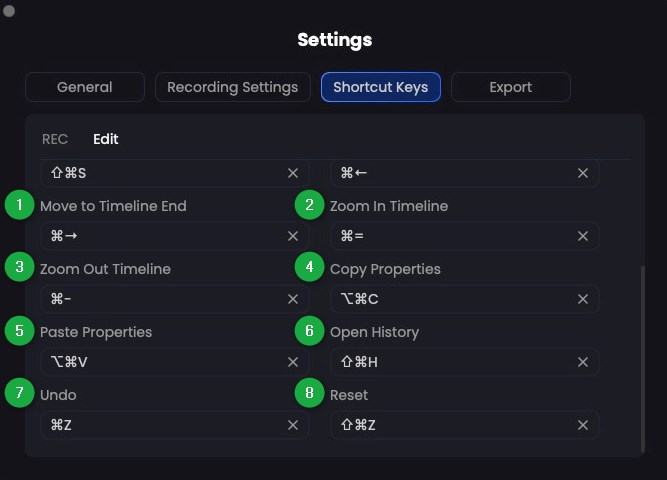
Show More Editing Shortcuts
Step 6. Finish Export Settings.
Click the Export button to configure the video format, resolution, frame rate, and recommended settings. Once applied, FocuSee will use these settings by default for all future video exports, ensuring consistency and professional-quality output.
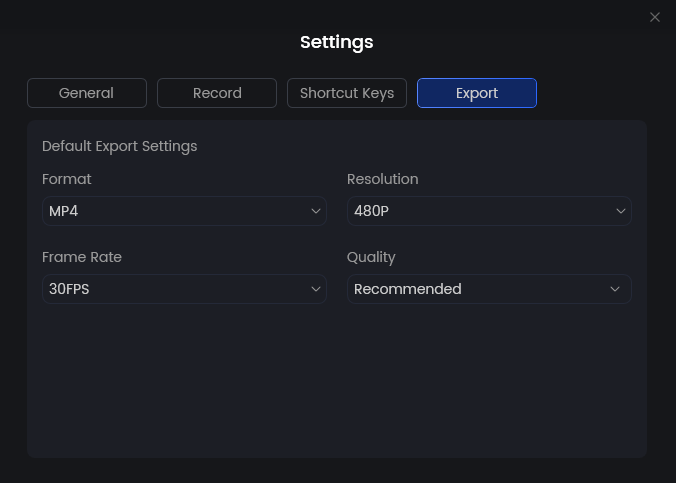
Configure Export Settings
If you have further question after reading this guide, please refer to FAQs page to check more solutions. Or you can contact our Support Team to get further help. We are here to help you!

Try It Out & Share Your Feedback!

We'd love to hear how FocuSee is working for you.
Give it a try and share your thoughts—your feedback helps us keep improving.
If you're enjoying FocuSee, we'd be so grateful if you could leave us a review on Trustpilot. Your support helps others discover FocuSee and motivates our team!
Thank you for being part of the iMobie community — we couldn’t do it without you!
Try It Out & Share Your Feedback!
We'd love to hear how FocuSee is working for you.
Give it a try and share your thoughts—your feedback helps us keep improving.
If you're enjoying FocuSee, we'd be so grateful if you could leave us a review on Trustpilot. Your support helps others discover FocuSee and motivates our team!
Thank you for being part of the iMobie community — we couldn’t do it without you!