Free Download For Win & Mac | 100% Clean & Secure
Set Camera Layout
When you start a screen recording, you may want to incorporate a camera in addition to the content that is captured. The camera layout controls how the camera is presented and integrated into the screen recording.
Part 1. What Is Camera Layout?
Camera layout involves the position, arrangement, and resizing of the camera within your screen recording. You have the flexibility to choose where the camera appears within the frame of the screen recording, such as in a corner, alongside, behind, or overlaid on the screen content.
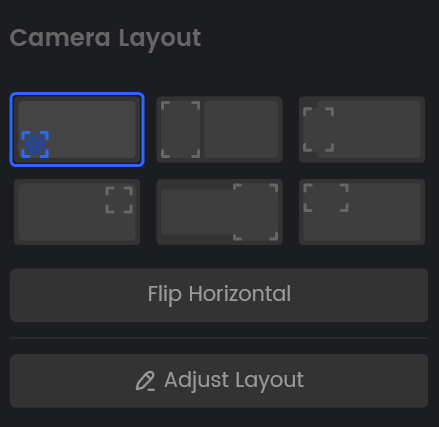
Camera Layout Options
Part 2. How to Apply Default Camera Layout?
To accommodate the size and arrangement of your screen recording canvas, FocuSee provides a variety of basic camera setups. There are six predefined camera configuration options in FocuSee, depending on whether your canvas is oriented vertically or horizontally. As an alternative, you can freely manually modify the camera feed's size and position to suit your own needs. You can simply turn off the camera display if you don't want your face to be seen during the screen capture.
Find the Camera icon on the left panel and select the layout that best fits your needs to use FocuSee's default camera arrangement.
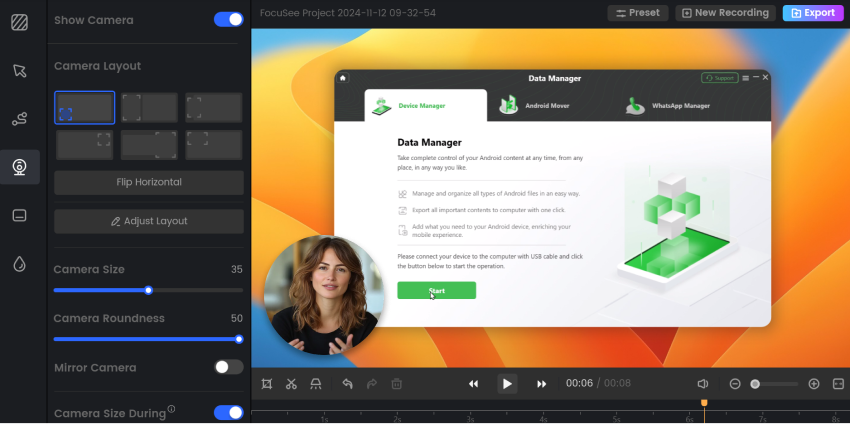
Apply Default Camera Layout
For horizontally oriented canvases, the default camera layouts allow you to arrange your camera feed above or behind the screen recording. Alternatively, you can position the camera and screen recording side by side.
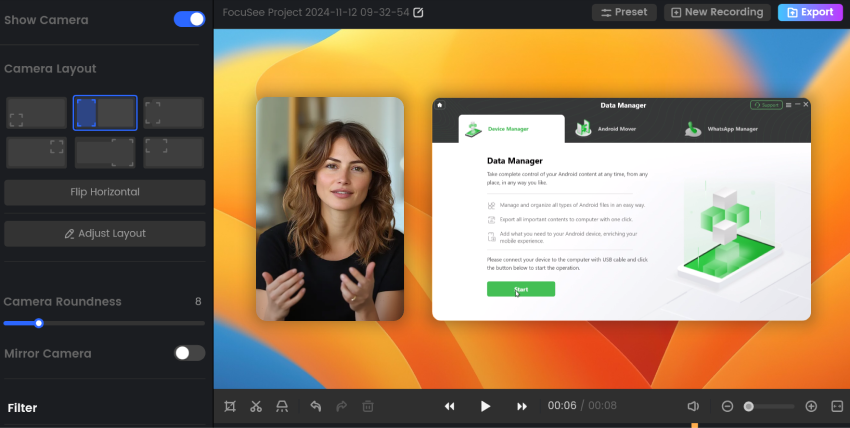
Horizontally Oriented Canvases
For vertical canvases, the default camera layout places the camera feed in the center of the screen recording area, placing the camera and screen capture in a vertical sequence.
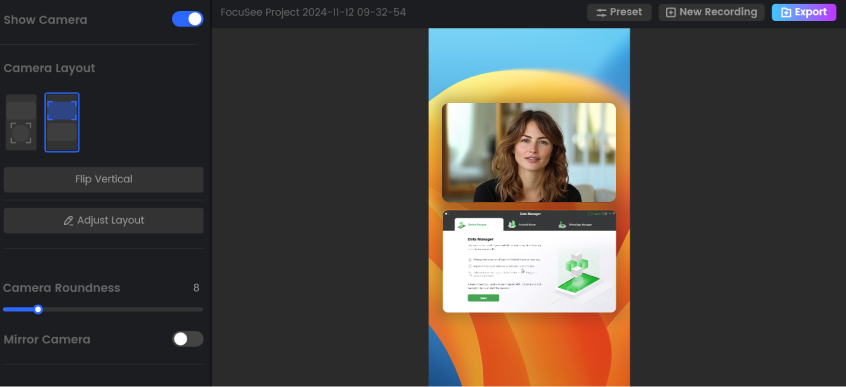
Vertical Canvases
Part 3. How to Customize Camera Layout?
In addition to utilizing the default camera layout, you have the option to personalize the camera arrangement. The following steps outline how you can customize the camera layout:
Step 1. Choose one of the pre-set default layout choices and click on the Adjust Layout button to enter the custom layout page.
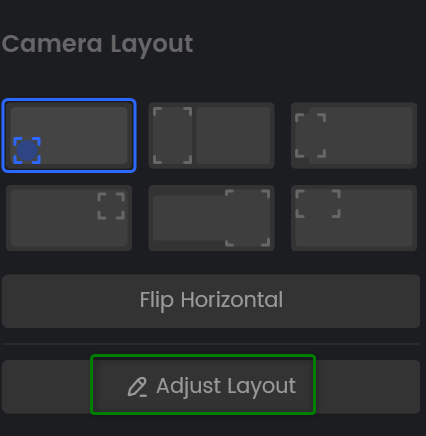
Choose Adjust Layout
Step 2. Drag and drop the camera feed and screen recording to change their position and size based on the preset configuration.
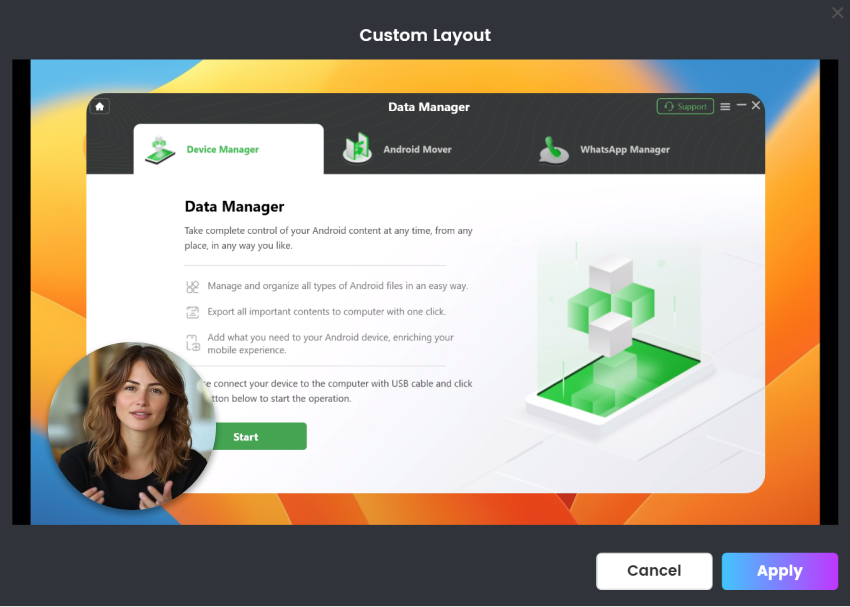
Apply Custom Camera Layout
Step 3. When you're finished modifying the camera, click Apply to return to the previous interface, where you'll notice the message "Currently using a custom layout". If you want to use the default camera arrangement again, click the default layout button above.
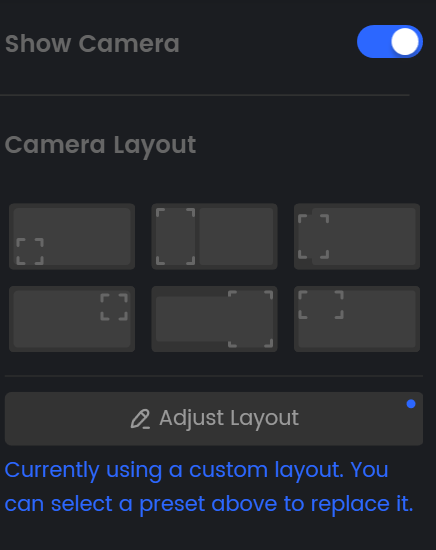
You are Using a Custom Layout
After modifying the camera layout, you cannot crop the video, horizontally flip the lens arrangement, or adjust the video's padding or inset.
Part 4. Add Multiple Layouts.
Enhance your video with dynamic camera layouts that adapt to different segments of your content. Switch between full-screen, picture-in-picture, or hidden camera modes at specific timestamps to guide viewer focus and improve engagement.
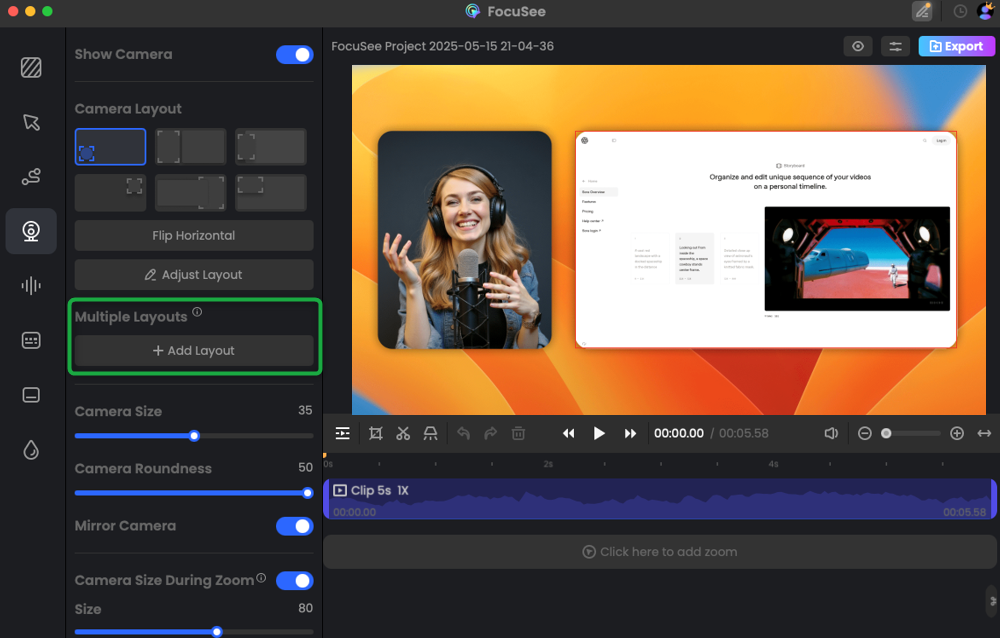
Add Multiple Layouts
Here you can see multi-camera layout effects.
Part 5. Other Camera Settings.
If you choose to use the AI Camera, you can easily customize your camera view with the following options:
Crop Your Camera
Adjust the cropping of your camera feed to focus on the desired area. After clicking on the AI avatar, drag the slider to adjust the camera to the appropriate frame and click Apply.
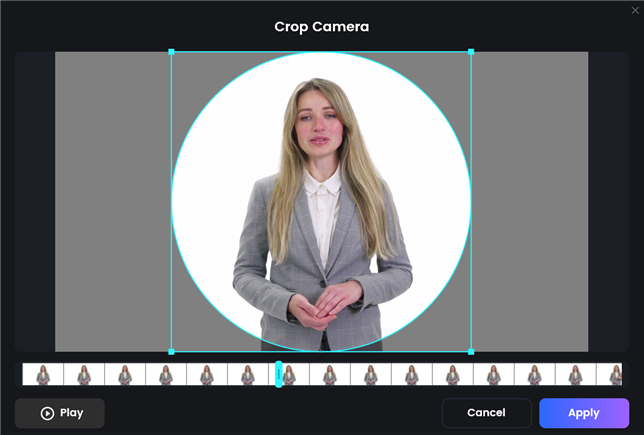
Crop Your Camera
Remove or Customize Your Camera Background
Select your preferred background style for your camera, these features help you create a more engaging and polished video presence.
Original: Keep your current background unchanged.
Remove: Eliminate the background entirely for a clean, professional look.
Blur: Gently blur your background to minimize distractions while maintaining a natural ambiance.
Image: Upload an image or choose from available templates to set a personalized background.
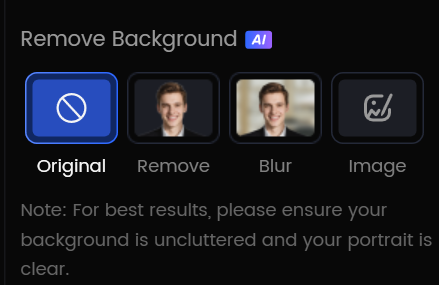
Remove or Customize Your Camera Background
To learn more about removing or customizing your camera background, please visit this Guide.
In addition to cropping your camera view and removing or customizing your background, you can further adjust other camera-related settings to enhance your video experience. These camera settings will give you more freedom and creative control when capturing webcam recordings.
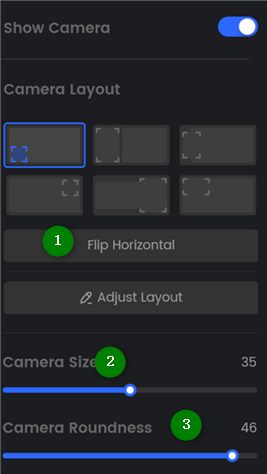
Other Webcam Settings
You can adjust other camera settings using the following methods:
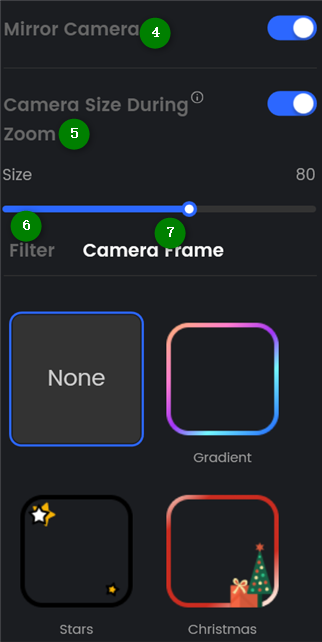
Other Webcam Settings
If you have further question after reading this guide, please refer to FAQs page to check more solutions. Or you can contact our Support Team to get further help. We are here to help you!

Try It Out & Share Your Feedback!

We'd love to hear how FocuSee is working for you.
Give it a try and share your thoughts—your feedback helps us keep improving.
If you're enjoying FocuSee, we'd be so grateful if you could leave us a review on Trustpilot. Your support helps others discover FocuSee and motivates our team!
Thank you for being part of the iMobie community — we couldn’t do it without you!
Try It Out & Share Your Feedback!

We'd love to hear how FocuSee is working for you.
Give it a try and share your thoughts—your feedback helps us keep improving.
If you're enjoying FocuSee, we'd be so grateful if you could leave us a review on Trustpilot. Your support helps others discover FocuSee and motivates our team!
Thank you for being part of the iMobie community — we couldn’t do it without you!