Free Download For Win & Mac | 100% Clean & Secure
Export Video
Once your video is ready, you can download the video to your computer. Additionally, you will have access to the video file history for your convenience.
Differences between Free & Activated Version
| Benefits | Free Version | Activated Version |
| Export Video | 1 (With Watermark) | Unlimited (No Watermark) |
Part 1. Export the Video
Once the recording is done, you can click the Export button to download the video.
In this part, you can:
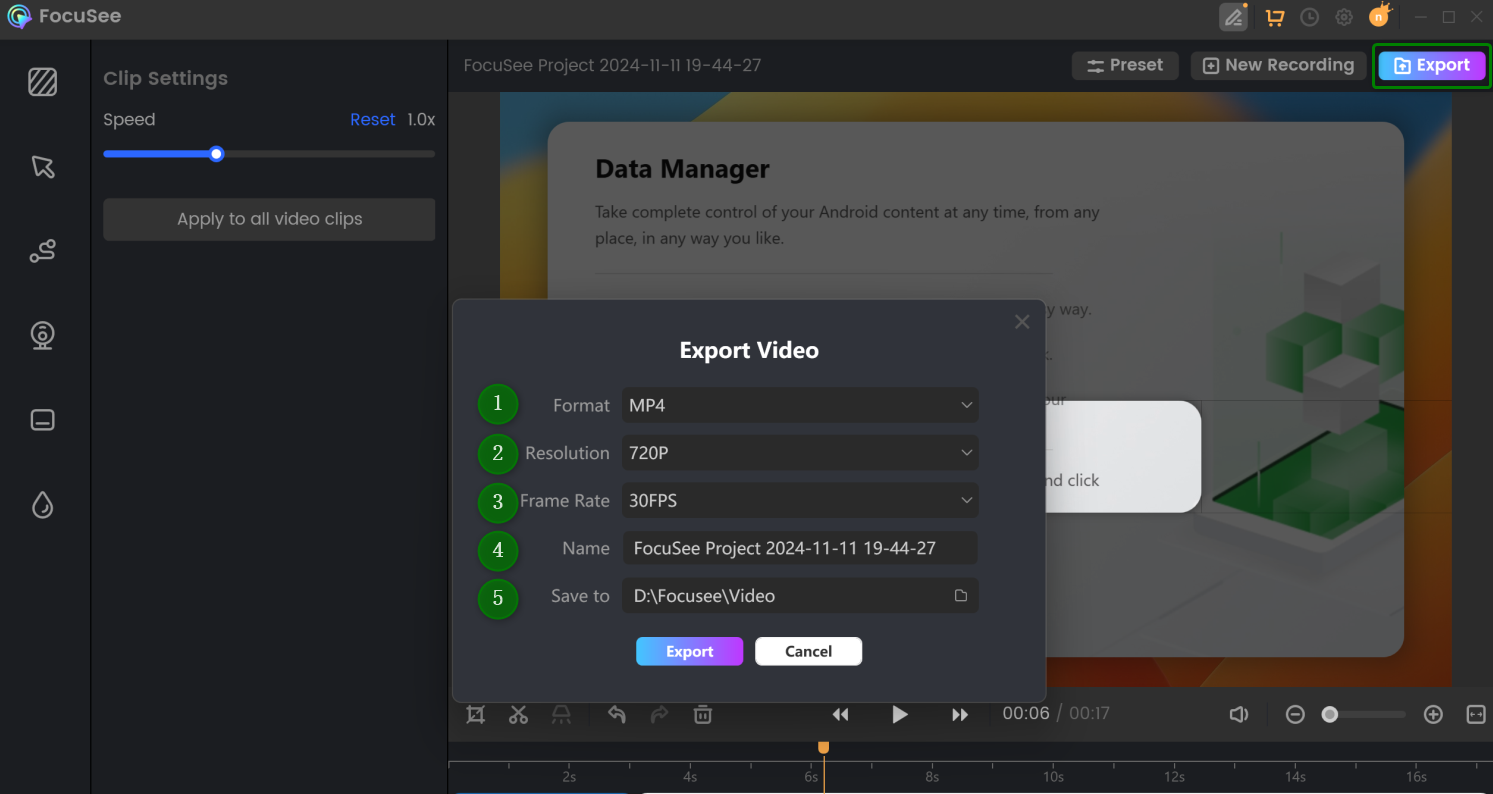
Export Video
You can also use shortcuts Ctrl+S for save or Shift+Ctrl+S for save as. Discover how to complete the relevant settings for keyboard shortcuts, click here for in-depth instructions.
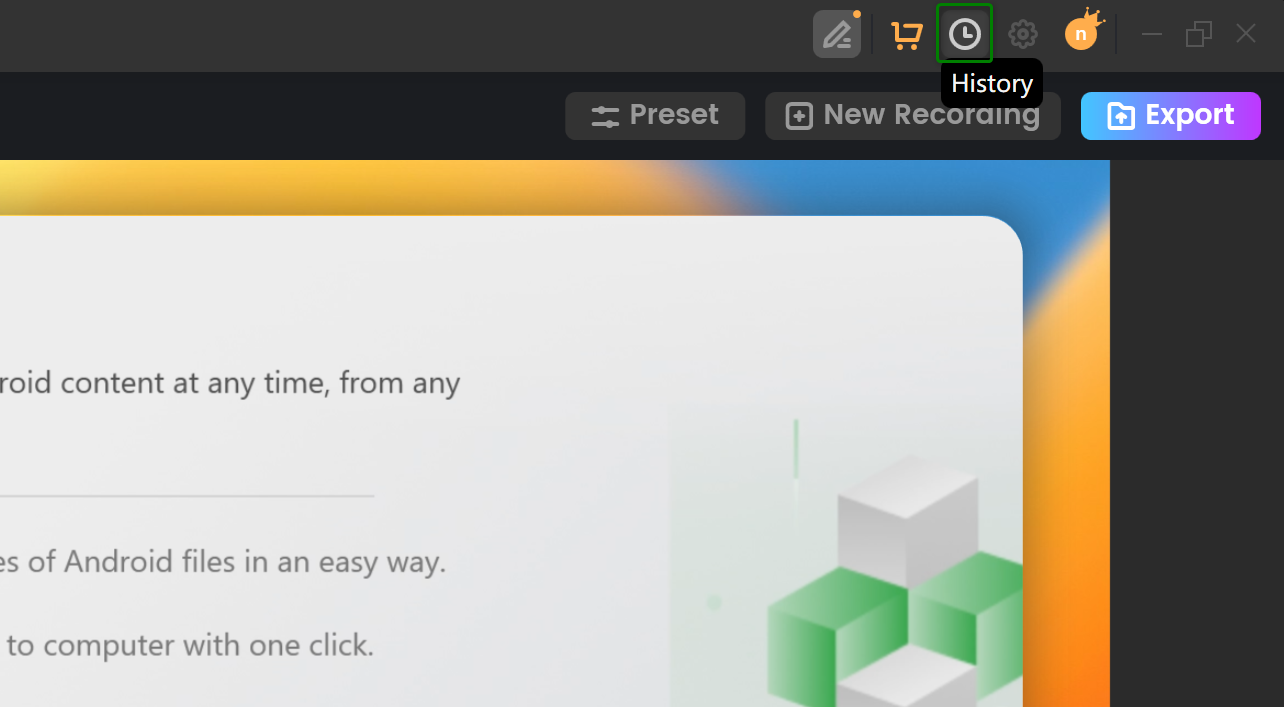
Part 2. File History
By clicking the File button in the upper left corner of the software, you can view the video history.
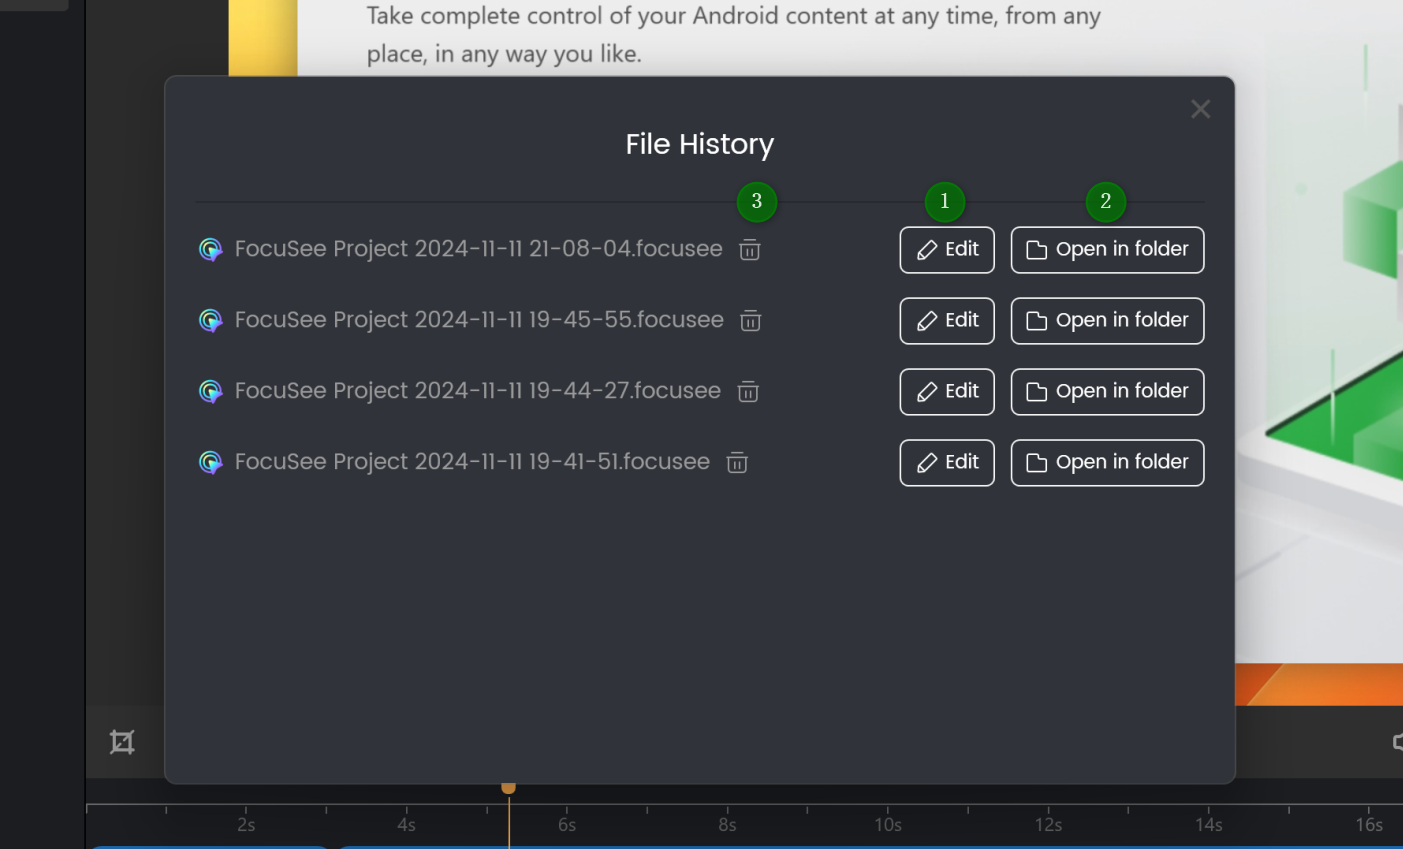
View File History
The Project History records all the videos you have created. You can manage them by re-editing the video, locating the saved file on your computer, or deleting the video.
Manage the Videos
Part 3. Extract Source Files
Please click File button and select Extract source files button, you can choose to extract camera files, audio files and video files.
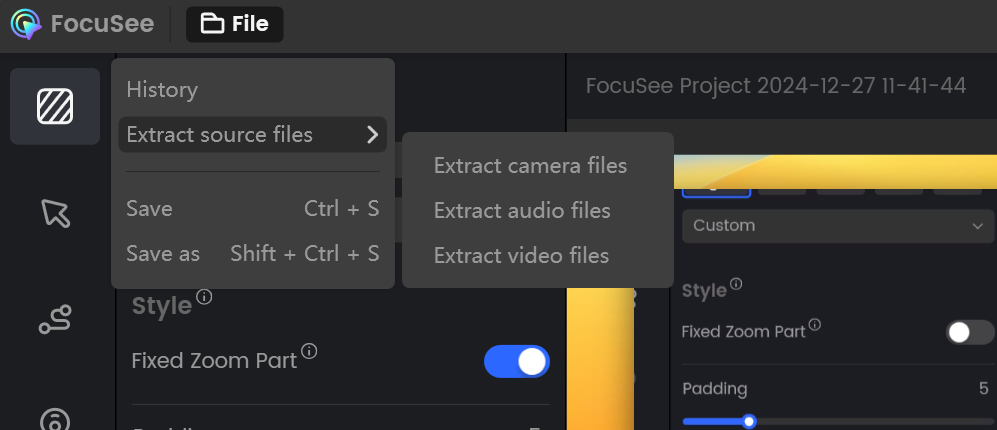
Extract Source Files
If you still have questions after reading this guide, please refer to FAQs page to check more solutions. Or you can contact our Support Team to get further help. We are here to help you!

Try It Out & Share Your Feedback!

We'd love to hear how FocuSee is working for you.
Give it a try and share your thoughts—your feedback helps us keep improving.
If you're enjoying FocuSee, we'd be so grateful if you could leave us a review on Trustpilot. Your support helps others discover FocuSee and motivates our team!
Thank you for being part of the iMobie community — we couldn’t do it without you!
Try It Out & Share Your Feedback!
We'd love to hear how FocuSee is working for you.
Give it a try and share your thoughts—your feedback helps us keep improving.
If you're enjoying FocuSee, we'd be so grateful if you could leave us a review on Trustpilot. Your support helps others discover FocuSee and motivates our team!
Thank you for being part of the iMobie community — we couldn’t do it without you!