How to Record Tutorial Videos on Mac Using Built-in and Third-party Tools

Imagine needing to explain a procedure, guide a user through software, or teach a lesson, but text or images just aren’t doing the trick. The final solution is a tutorial video that illustrates each step in real-time. Capturing video is something that most people assume requires specialized hardware, but if you use a Mac, it is relatively simple to accomplish. This tutorial will guide you on how to record tutorial videos on Mac through native functionality and third-party software, giving you simple ways to create professional and easy-to-follow tutorials.
Recording Tutorial Videos on Mac: Is It Possible?
Yes, it’s possible to create tutorial videos using a Mac, and it’s far easier than most would think. Mac computers have software built into them that will enable you to record your voice and screen without needing to download extra software. For example, you can utilize the screenshot toolbar or QuickTime player to record your screen and voice at the same time very easily. They are all free, easy, and standard with every Mac.
Record Tutorial Video
Alternatively, you may need more feature-rich functionality, such as editing, annotations, or recording via webcam, in which case, there are third-party screen recording software for Mac that make it even easier. In other words, you do not need to be concerned with tricky configurations or costly equipment. Mac provides all you need to create elegant and clean tutorials, whether you are teaching, producing tutorials, or making content.
How to Record Tutorial Videos on Mac with Your Webcam Using FocuSee
Recording tutorial videos on a Mac becomes much easier with FocuSee, an AI screen recorder designed for simple and smart screen recording. With dynamic auto-zoom effects, the audience’s view automatically follows your mouse to notice the highlighted key actions.
The new version of FocuSee brings more mouse animations, including click effects and customizable cursor styles. It also allows the cursor to be hidden when stationary, enhancing the overall viewing experience.
For tutorial creators, annotations are just as important as cursor tracking. FocuSee lets you add arrows, shapes, text callouts, highlights, and spotlight effects to draw attention to important buttons, menus, or workflow steps. Instead of relying solely on narration, you can visually guide viewers through each action, making tutorials easier to follow and reducing confusion for first-time users.
AI captions have become an essential feature for creating tutorial videos, as they significantly enhance readability and accessibility. It is worth mentioning that FocuSee 2.0 introduces an upgraded subtitle generation feature powered by a more advanced AI model. This function now supports recognition in 50+ global languages with an impressive accuracy rate of up to 98%, which can streamline your workflow significantly.
In addition, FocuSee also supports dynamic camera layouts, including picture-in-picture, full-screen, and various other modes. These layouts can be smoothly switched with just one click, allowing you to enhance video visuals without complicated work.
Key Features:
- The AI-powered editing features boost your editing efficiency by 50%, making the process faster.
- Built-in annotations, callouts, arrows, and spotlight effects make tutorials clearer and more engaging.
- Auto-zoom and enhanced cursor animation guide viewers better.
- The teleprompter helps you deliver the explanation smoothly without forgetting key points.
- You can add your watermark to keep your tutorials branded and professional.
- One click to fit the specifications of TikTok, YouTube, Instagram, Facebook, and Twitter.
- 4K, 60FPS output ensures high-quality videos.
How to Make a Video on Mac via FocuSee
Here are the detailed steps for creating tutorial videos with FocuSee on a Mac.
Step 1. Download and Install FocuSee
Go to the FocuSee official site, download the app, and follow the instructions to install it.
Step 2. Set Camera, Audio, and Recording Mode
Adjust the camera, microphone, and audio settings, and select the desired screen size for recording.
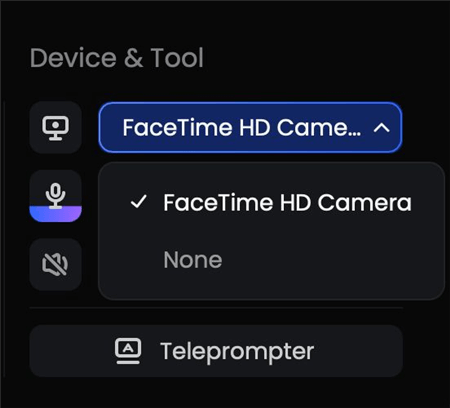
Adjust Settings
Step 3. Make a Screen Recording
After you have got your settings ready, press the red REC button to record. FocuSee will give you a 3-second countdown just before the recording starts. This interval can be used to prepare. Hit the red stop button to finish the session.
Step 4. Add Annotations and Spotlight Effects
Add arrows, text callouts, shapes, or spotlight effects to emphasize important actions and guide viewers through the tutorial step by step. This helps make complex workflows easier to understand and keeps viewers focused on the right areas of the screen.
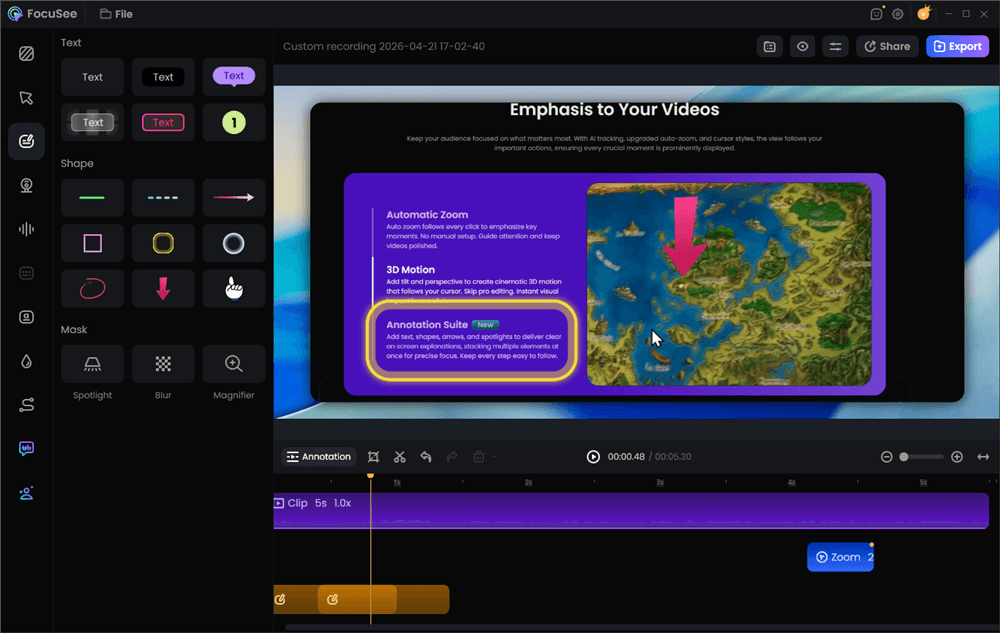
Add Annotations for Clarity
Step 5. Edit Your Video with AI Features
Upon completion, FocuSee would have also included zoom effects in the video. You can use the AI function to improve the video quality. For example, you can use AI-powered audio enhancement to reduce noise and amplify vocals.
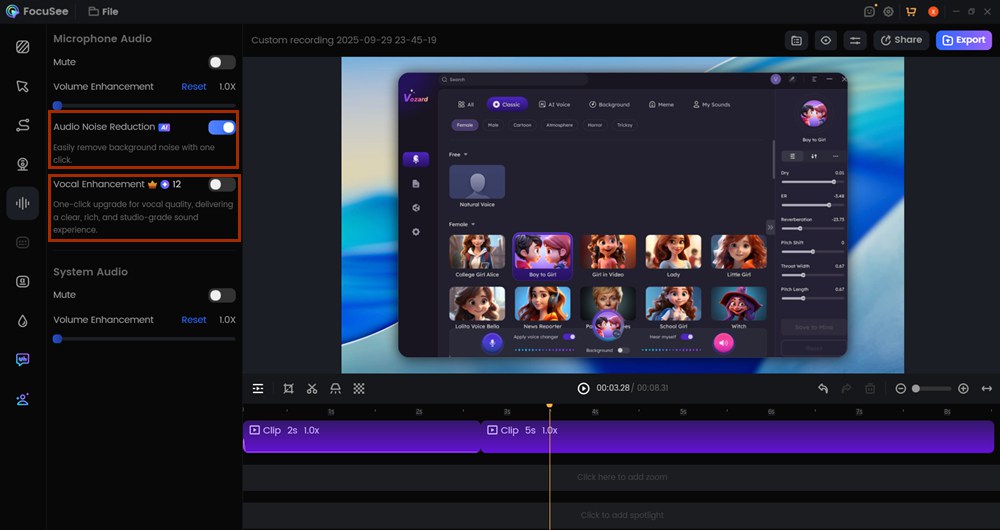
Use FocuSee AI Features
Step 6. Export the Final Video
When everything looks good, click “Export” to save your video in MP4 or GIF format, or you can click on the “Share” button to generate a shareable link.
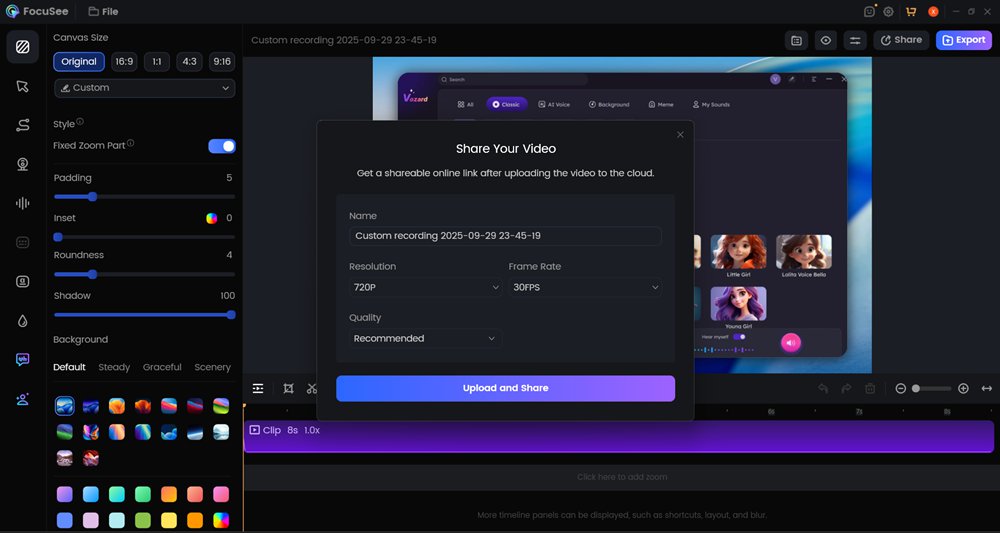
Share Final Result
How To Screen Record Video on Mac Using Keyboard Shortcuts
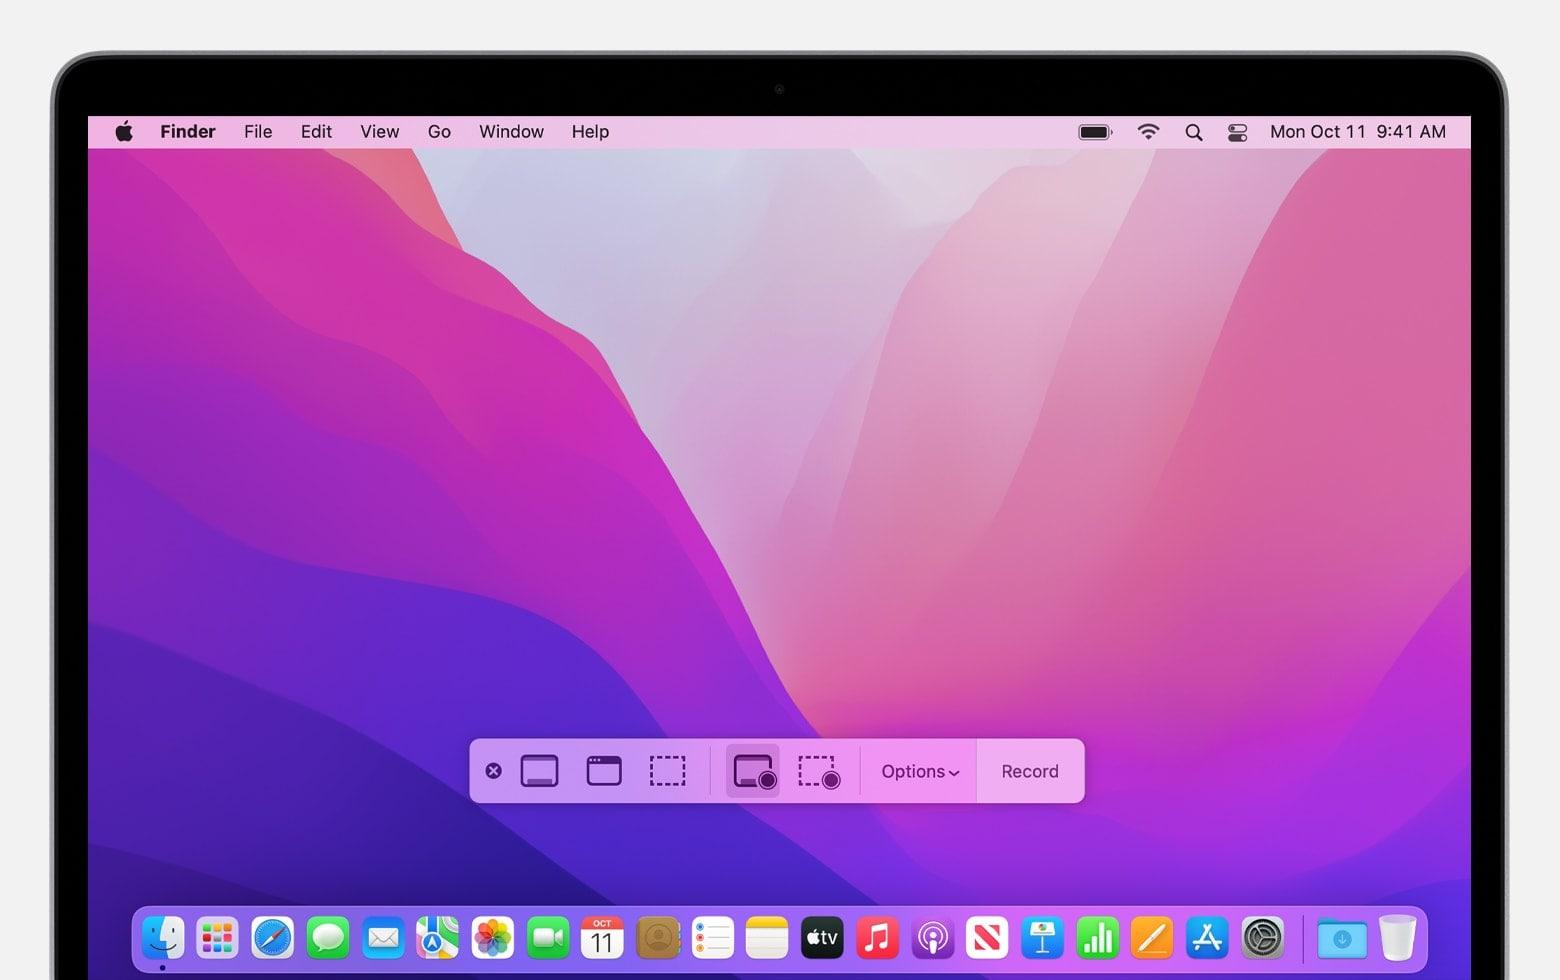
Mac’s screenshot toolbar feature supports easy and quick recording with minimal shortcuts. Shift + Command + 5 will switch on the toolbar, and you can choose to record the entire screen, record the selected window (available in macOS Tahoe 26 or later), or record the selected portion. The “Options” menu is one of the standouts, where you can schedule a timer and choose where the recording will be saved.
It is fast, lightweight, and requires no additional software, making it the best choice for quick tutorial videos directly from your screen. For this:
Step 1. Press “Shift + Command + 5” to open the Screenshot Toolbar.

Press Shortcut Keys
Step 2. Choose the recording mode in the onscreen toolbar with controls for recording a video.
Step 3. To start recording, click the Record button in the Screenshot toolbar.
Step 4. When finished, click the “Stop” button in the menu bar to end the recording, or press Command-Control-Esc.
How To Screen Record Video and Audio Using QuickTime
QuickTime Player is another good option to record tutorial videos on a Mac. Its finest feature is to keep the screen and audio recording simultaneous, ideal for step-by-step tutorials. Your voice instructions are synchronized and audible in the video.
The aspect that is also useful is the ability to trim recordings within QuickTime itself without any other editor. This enables you to do some basic editing and create a video easily in a few seconds. The process is smooth and user-friendly.
To use this technique:
Step 1. Open QuickTime Player from the Applications folder.
Step 2. Go to “File” in the top menu and select “New Screen Recording” to open the toolbar.
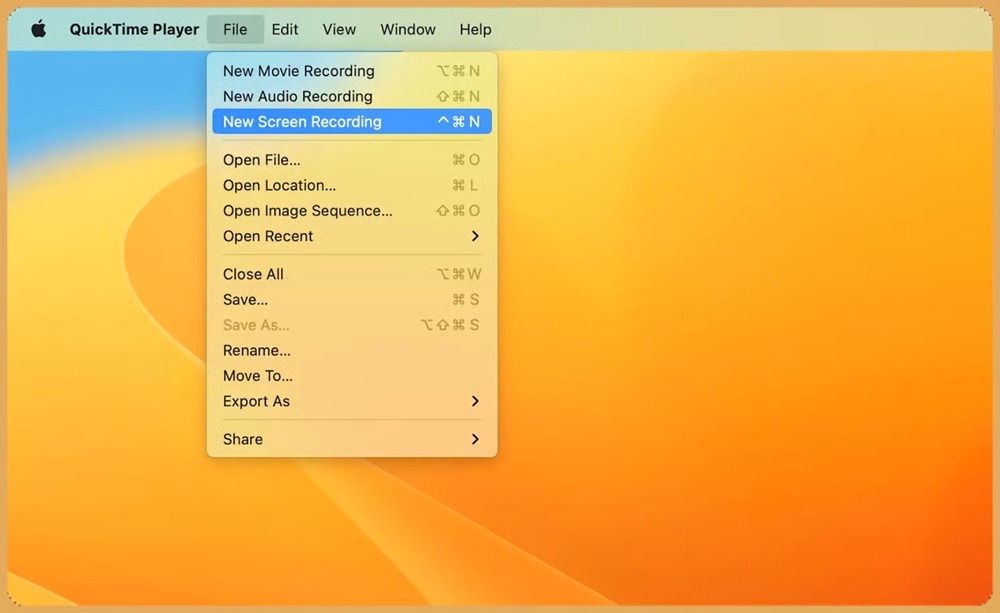
Select New Screen Recording
Step 3. Click the arrow next to the record button to choose a microphone.
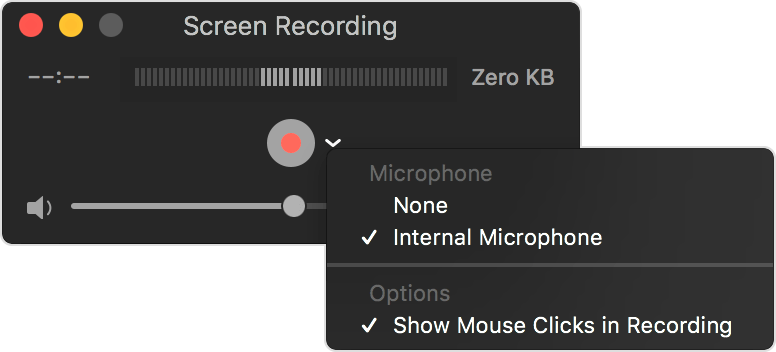
Record Your Voice or Other Audio
Step 4. Press the red “Record” button. Click anywhere for full-screen recording or drag to select an area.
How to Record a Video on Mac with iMovie?
iMovie is primarily a video editor, but it can also be used to record tutorials. The biggest advantage of it is that you can add titles, effects, and transitions after recording, which will make your tutorials stand out.
Its timeline editing mode allows you to delete unnecessary sections and add background music or overlays. iMovie is an excellent option if you want to record and edit excellent tutorial videos on the move on your Mac.
Here are the steps to do this method:
Step 1. Open “iMovie” from the Applications folder.
Step 2. Navigate to “File” in the menu and choose “New Movie”. Click “Import Media”.
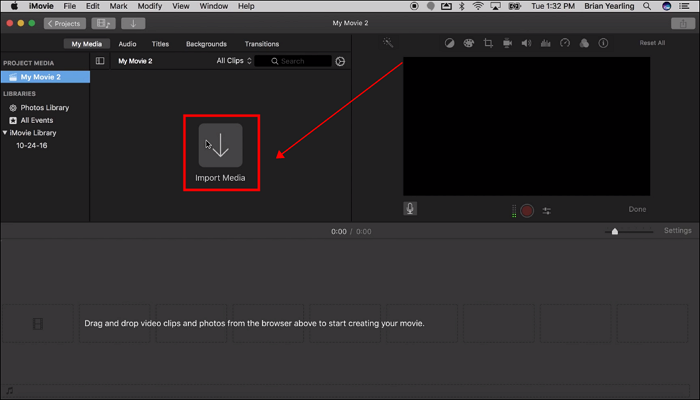
Import Media
Step 3. Choose “FaceTime HD Camera” to start recording. Press the red “Record” button to begin, and press it again to end. Your clip will be in the iMovie library, where you can edit it.
Step 4. Drop the clip onto the timeline by dragging and dropping it to edit. Trim, cut, or add effects with tools to make a professional video.
Step 5. Next, navigate to “File” and then to “Share” to share your video.
FAQs on Making a Tutorial Video on Mac
How do I record a tutorial video on a Mac?
To record a tutorial video on a Mac, choose a screen recorder, prepare your script, record your screen and voiceover, then edit the footage with captions, highlights, and annotations before exporting the final video.
How do I screen record on a Mac for a tutorial?
You can use QuickTime Player to record your screen or use a dedicated tutorial video recorder like FocuSee for additional features such as automatic zoom effects, cursor highlighting, annotations, and AI-powered editing.
How do I record a video of myself on a Mac?
You can record yourself using your Mac’s built-in camera with apps like QuickTime Player. For tutorial videos, many creators combine webcam recording with screen recording to show both the presenter and the on-screen actions.
How do I record video with sound on my Mac?
Select your microphone before starting the recording and make sure audio input is enabled. Most screen recording tools, including FocuSee, allow you to record your screen and microphone audio simultaneously.
What is the best software for recording tutorial videos on Mac?
The best software depends on your needs. QuickTime Player is suitable for basic recordings, while dedicated tools like FocuSee offer advanced features such as automatic zoom effects, cursor tracking, annotations, AI captions, and built-in video editing.
Can I record my screen, webcam, and audio at the same time on a Mac?
Yes. Many screen recording tools allow you to capture your screen, webcam, and microphone simultaneously, making it easier to create professional tutorials, online courses, and product demonstrations.
Final Words
With the help of proper tools, recording tutorials on a Mac can be an easy task, and you have a variety of built-in tools to choose from, including Screenshot Toolbar, QuickTime, and iMovie. Each of these has its advantages, be it rapid recording or professional editing. Your needs determine your tool, whether you want simple screen capture functionality or more advanced output. These tools enable teachers, professionals, and creators to record high-quality and informative tutorial videos easily.
For even better results, consider using FocuSee. It provides auto-zoom, automatic captions, and Watermark facilities, making your tutorial video more professional and interesting.