
How to Screen Record on Computer
If you need to design a product description, tutorial, or any other content, recording your computer screen is a simple yet powerful solution. It allows you to present software workflows, highlight product features, or showcase gaming moves clearly and engagingly — even record in full HD quality. Screen recording is widely used in content creation and education because it saves time and improves clarity.
In fact, video tutorials significantly enhance learning outcomes, and businesses that adopt them report a 30% reduction in customer support costs. In education, more than 70% of U.S. school districts use tools like Screencastify, producing over 5 million videos for classrooms worldwide. This dynamic recording method makes screen recording far more effective than static screenshots for teaching, demonstrations, and professional communication, according to Wikipedia.
Before diving into details, please take a quick look at the possible solutions in accordance with operating systems.
| Solutions | Operating Systems | Quick Steps |
| FocuSee | Windows/Mac | Open FocuSee > Choose record model > Record your screen |
| Xbox Game Bar | Windows | Enable Xbox Game Bar > Press Win + G |
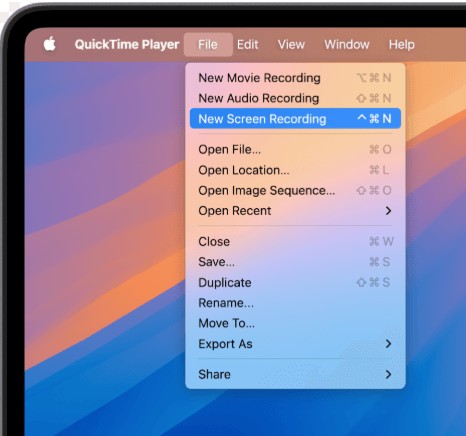
| Quick Time Player | Mac | Open Quick Time Player > Click New Screen Recording |
| Screen Recorder Chrome Extension | Web | Find Screen Recorder Chrome Extension > Add to Chrome > Hit Only Screen |
A Complete Way to Screen Record on a Computer
Windows and Mac computers may offer tools to screen record on Windows or Mac computers, but you may look for a more professional and efficient solution to screen record on your computer. Don’t worry. You have many choices to try, and you can record your computer screen without Game Bar or other basic screen recording tools. Among the most popular screen recording software for 2025, FocuSee is worth your attention.
As a professional screen recorder, FocuSee offers you a complete solution to record your computer screen with simple clicks. On one hand, you are flexible to screen record on your computer. On the other hand, it also provides you with a wide range of customization. You can choose from different cursor styles, and layouts for the selfie and screen, customize the appearance with camera frames and filters, and add backgrounds, rounded corners, shadows, and padding to make the video more appealing.
Key Features of FocuSee:
To figure out more of its features, free try FocuSee and check out its key features listed below and detailed instructions.
- It automatically follows the cursor movement and applies dynamic zoom-in effects to enhance the video.
- Screen record in various different situations – record gameplay on computer, music from Youtube, meetings, a live stream, etc.
- You can easily share the recorded videos via links or embed them on websites, with interactive elements like quizzes and call-to-action buttons.
- Support most computer models, including Mac, Windows 11/10/8 and low-end PC.
Check out the detailed instructions below and learn how to screen record on your computer.
Detailed Steps of Screen Recording on Computer
Step 1. Free install FocuSee and launch it on your computer. Choose a recording mode you like. Click on the Start Recording button to initiate the process.
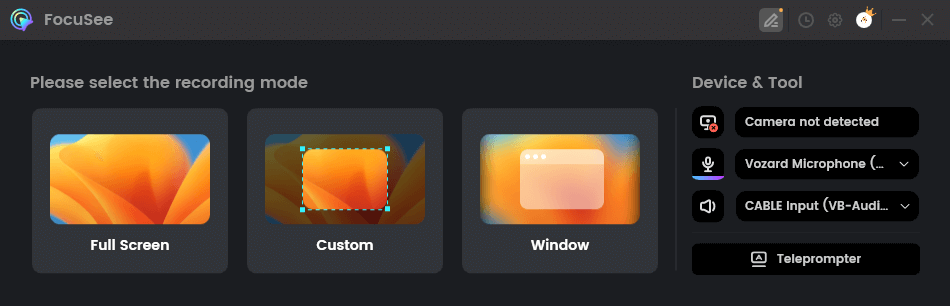
Choose the Recording Mode
Step 2. Now, just focus on your screen recordings. Let FocuSee handle the post-production automatically. It will track your cursor movement.
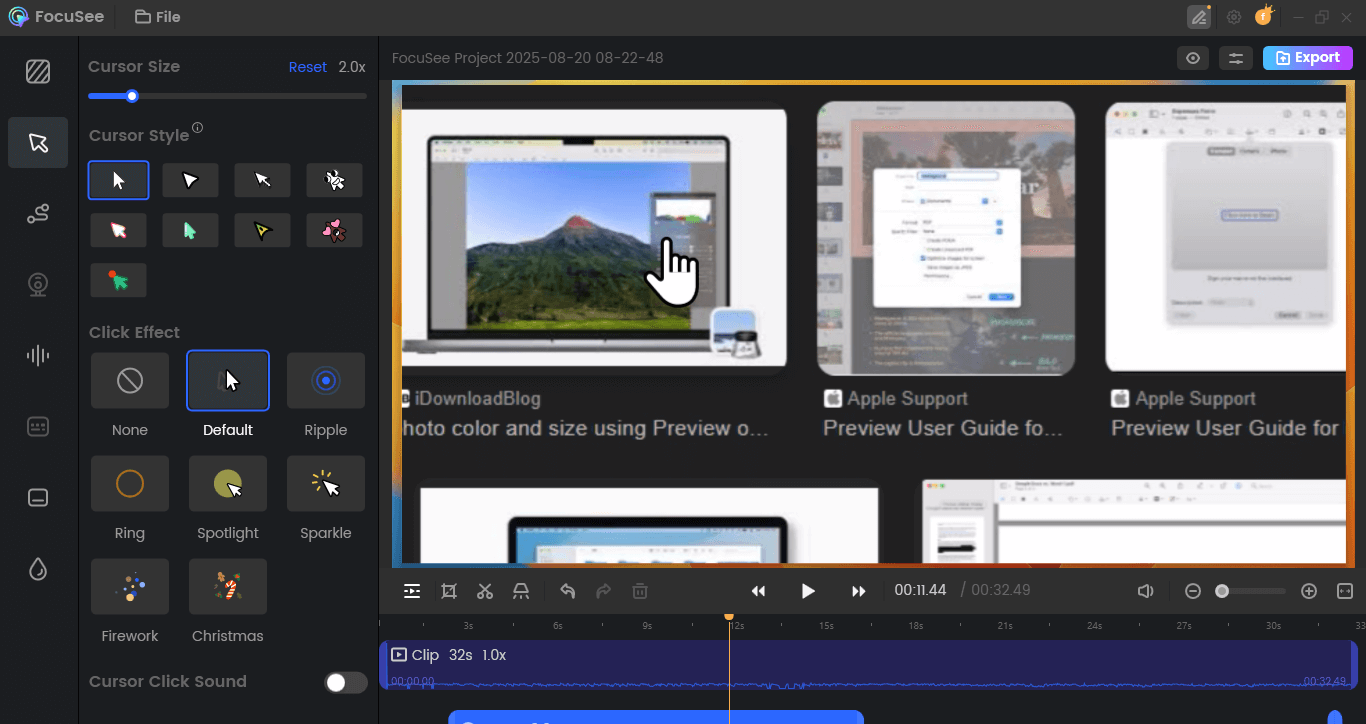
Change Cursor Style
And it will automatically zoom in on the key points you just clicked.

Step 3. Export your recordings as an MP4 or GIF file or share it with a link easily.
How to Export the Video
Screen Record on Windows Computer
Windows allows screen recording as it comes with a built-in video capture tool. It may, however, be used for any open program, providing a simple way to record the screen and even add audio if necessary, although it’s geared toward gamers.
Follow the steps to get to know how to screen record your computer using Xbox on your Windows computer.
Step 1. On your computer screen, press the Start button, followed by the gear icon in the Start Menu. Choose the Gaming option from the Settings menu. You may also choose the All Settings option in the Action Center by clicking the notifications icon on the taskbar. Both approaches will help you to launch the Setting app.

Launch Settings on Windows Computer
Step 2. By default, the Xbox Game Bar area will open. Under the first paragraph, there is a toggle that should be turned to ON. If the toggle is set to Off, click it. To examine and alter other customization options, select Captures from the left-hand menu.
Step 3. When you have finished tweaking your settings, press Win + G on your keyboard to bring up the Xbox Game Bar. You may alter the place where your recordings and screenshots are saved, allow background recording, and record even when your laptop isn’t plugged in under Captures. You may also choose to record while projecting your screen, set a maximum recording time, and tweak your audio and video quality settings.
Start Recording
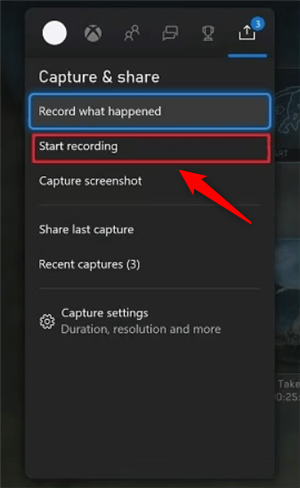
Step 4. Near your screen’s top-center edge, the Xbox Game Bar emerges. It has buttons that enable users to access the overlays and settings you choose, Widget, Audio, Capture, etc.
Step 5. To get started, go to the Capture overlay and click the circular Start Recording button. Press the purple Stop Recording button to end the recording.
With Xbox Game Bar enabled, you may also start and stop recording by using the Win + Alt + R key combination.
Screen Record on Mac Computer
You may always use QuickTime Player for rudimentary screen recording and audio recording if you’re running an earlier version of macOS. QuickTime recordings aren’t easy to edit, yet they are one of the most straightforward recording methods.
Here are some of the steps that you can use to know how to screen record your computer on your Mac computer using QuickTime Player.
Step 1. On your Mac, after opening the QuickTime Player from your Applications folder, click on File and then on New Screen Recording. The onscreen controls or the Screen Recording window will be the next window to appear.
Step 2. You can adjust the recording parameters by clicking the arrow adjacent to the Record Button before starting your recording.
Choose a microphone to capture your voice or the audio you want to record alongside the screen recording. Adjust the volume slider to keep an eye on the audio while it’s being recorded. Reduce the level or use headphones with a microphone if you experience audible feedback. While you click, select Show Mouse Clicks in recording to see a black circle around your pointer.
Screen Record on Your Mac Computer
Step 3. Tap on the Record button to begin recording, then choose one of the following options: to record the entire screen, click anywhere on it. Alternatively, you can also drag the cursor to select a recording region, then start recording inside that area by clicking Start Recording.
Step 4. To end this recording session, press Command-Control-ESC or click the Stop option in the menu bar
Screen Record on Web – FocuSee Online
An online screen recorder allows you to record video messages from your screen, camera, microphone, or all three, as well as edit and share your videos in the website. Record protected videos, entire screens, cameras, or videos from websites to make educational films and record lectures. Add your face and voice to make it more personal, and it will automatically save to Google Drive. The recorded videos may be exported as MP4 files and shared on YouTube, Gmail, or via a shared link. It’s a far more effective method of communication.
Here are some steps that you should follow to know how to screen record your computer on the web via the FocuSee Online.
Step 1: Setup
Navigate to the homepage and click the “Start Recording” button. Select your preferred recording mode: screen & camera, camera only, screen only, or mic only.
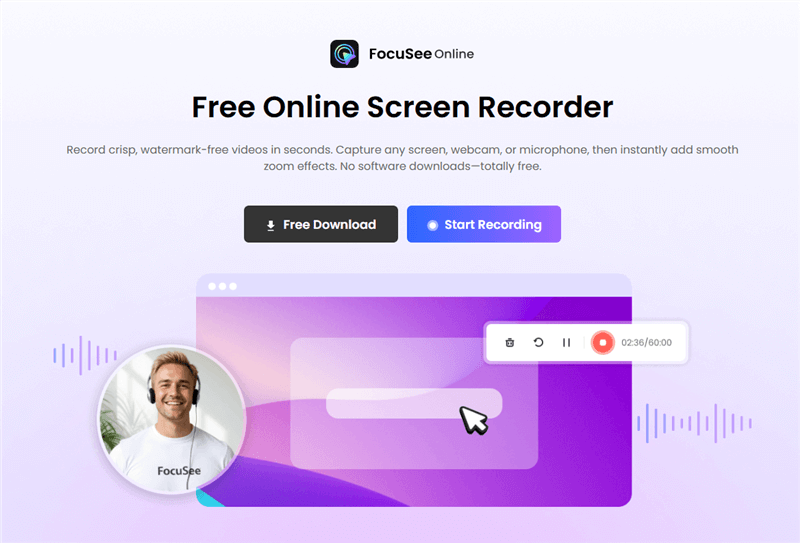
FocuSee Online Screen Recorder Free
Step 2: Start Recording
Press the record button and monitor the live indicator in the upper right corner. Adjust the border to precisely outline the area you wish to capture.
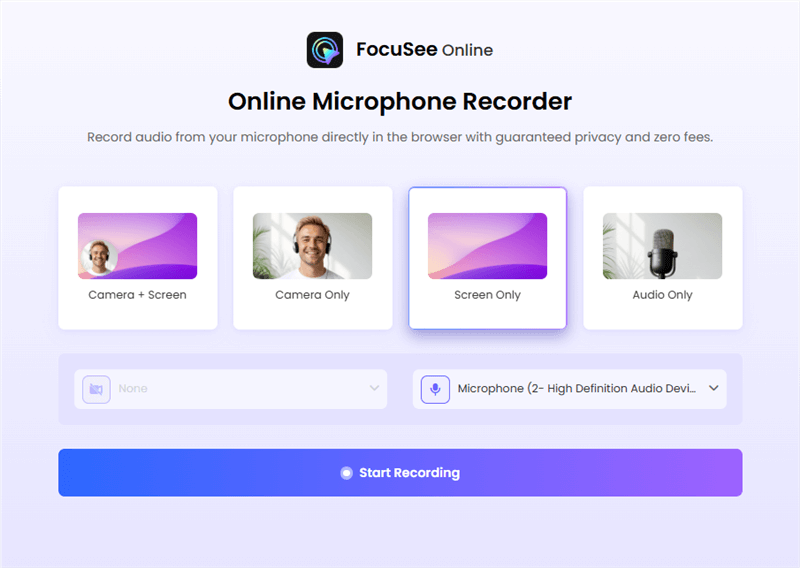
Choose The Recording Model
Step 3: Preview & Export
Click “Stop” once you’ve finished recording. You can either save the recording directly to your computer or open it in the built-in editor to add zoom effects. Exporting is also available in seconds.
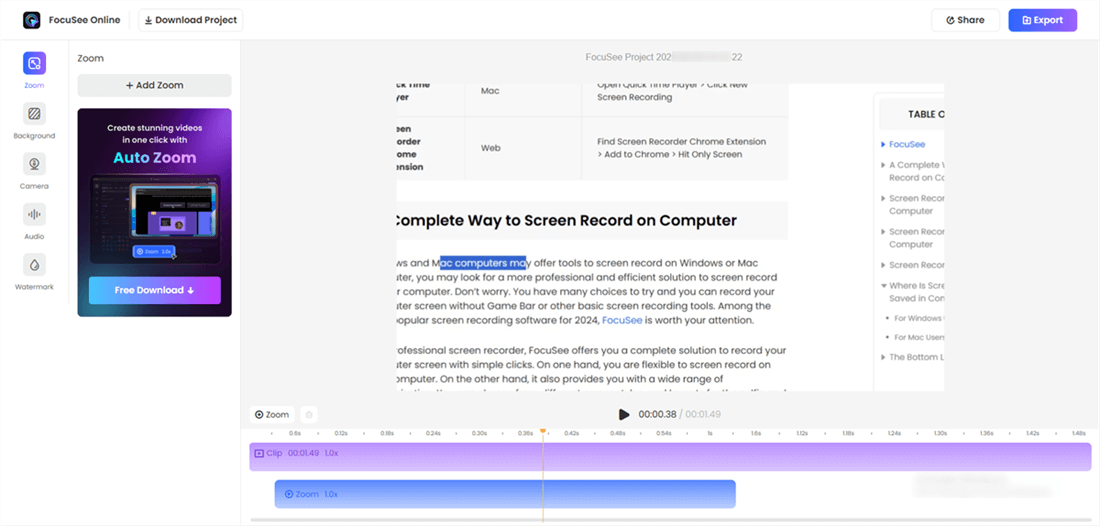
Preview & Export
Where Is Screen Recording Saved on a Computer?
After screen recording on a computer, one question that often arises is where the screen recording is saved on the computer. In this part, we will further explore the answers to this question.
When you record your screen on a computer, the recording is saved as a video file. The location of the file depends on the software you are using to record your screen. Most screen recording software allows you to choose the location where you want to save the recording. However, if you do not specify a location, the recording will be saved in the default location set by the software.
For Windows Users
On Windows computers, the default location for screen recordings is the Videos folder. To access the Videos folder, open File Explorer and navigate to This PC > Videos. You should see a folder named “Captures” where your screen recordings are saved. If you are using a different screen recording software, the location may vary, so it is best to check the settings of the software to find out where the recordings are saved.
For Mac Users
On Mac computers, the default location for screen recordings is the Desktop. When you start a screen recording, a small recording icon will appear on the top menu bar. Once you stop the recording, the video file will be saved on the Desktop. If you want to change the location where the recording is saved, you can do so by going to System Preferences > Screen Recording and selecting the desired location.
More importantly, saving screen recordings will save your computer’s internal storage, especially when you need to store a large amount of captured video recordings.
The Bottom Line
Here, we have mentioned some of the best and simplest ways to screen record on a computer, whether you are using a Windows or Mac computer. You can also record the screen on the web using any Chrome extension. We hope that these ways are best for recording the screen of your computer in an easy and efficient way.
