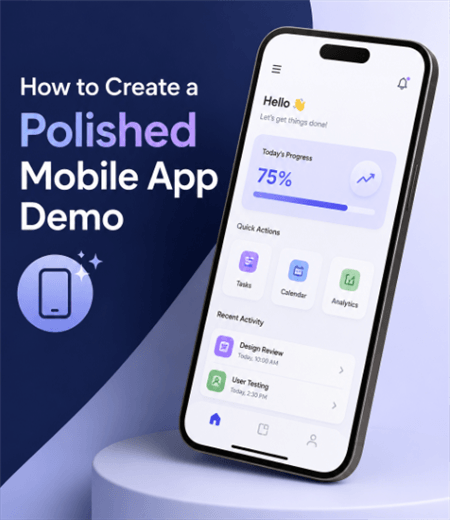
How to Create a Polished Mobile App Demo (Without Complex Editing)

The core goal of a professional mobile app demo is simple: show your app’s value quickly and clearly. A great demo skips the unnecessary steps and guides the viewer’s attention directly to the features that matter, using clear visual focus, sleek device frames, smooth pacing, and a clean background.
However, marketers and developers often struggle to find the right way to build one. Today, there are four main ways to create an app demo:
- Native screen recording: Free and fast, but often looks amateur, static, and hard to follow on a small mobile screen interface.
- Advanced motion graphics: Using professional software like Adobe After Effects yields beautiful results but takes hours of complex manual animation.
- Interactive HTML: Click-through web embeds are great for landing pages but cannot be exported as MP4s or GIFs for social media.
- Auto-editing video tools: A new middle-ground workflow that automatically adds zoom effects and device frames for instant MP4 exports.
If you have ever recorded a basic mobile screen capture and felt it looked too boring—but then opened After Effects and immediately felt overwhelmed—you are not alone. Building a polished video shouldn’t require advanced editing skills. In this guide, we will break down the essential preparation steps, compare the different creation methods, and show you a step-by-step auto-editing workflow that bridges the gap between basic recordings and overly complex software.
How to Create a Polished Mobile App Demo
Crucial Preparation Steps Before You Record
No matter which tool you use to create your mobile app demo, good preparation saves hours of editing and retakes later. An amateur recording often reveals messy status bars, low battery icons, or sudden text messages. Before you hit record, use this quick checklist to ensure your device is ready for a professional presentation:
- Turn on Do Not Disturb (DND) mode: Block all incoming calls, text messages, and distracting app notifications so they don’t interrupt your recording flow.
- Clean up the status bar: If possible, hide your carrier name, ensure the battery icon shows 100%, and set a standard time (like 9:41 AM, the industry standard for polished iOS demos).
- Close background apps: Force-quit all unnecessary background applications to ensure your device runs smoothly without lag during your app walkthrough.
- Plan the “happy path”: Script your workflow in advance. Focus only on the core feature and avoid unnecessary clicks so the recording remains concise and impactful.
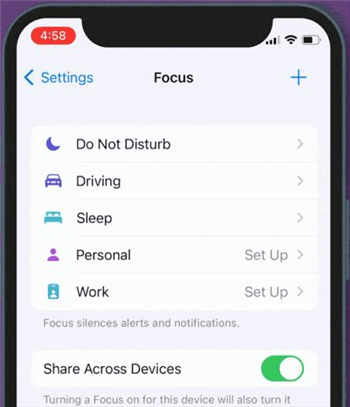
Turn on Do Not Disturb mode
Comparing 4 Ways to Create an App Demo
When choosing how to create your mobile app demo, it is vital to match the method to your final marketing goal. A common mistake is confusing interactive HTML web demos (which require users to click through a website embed) with standard video demos (which autoplay on YouTube, social media, and App Stores).
Here is how the four primary methods compare:
| Output Format | Complexity | Best Use Case | Time Required | |
| Native Screen Recording | MP4 | Low | Quick sharing, bug reports | Minutes |
| Manual Editing (After Effects) | MP4 | High | Cinematic commercials | Hours to Days |
| Interactive HTML Builders | Web Embed | Medium | Landing pages, product tours | Hours |
| Auto-Editing Video Tools | MP4 / GIF | Low–Medium | YouTube, social media, app promos | Minutes |
Native screen recording is fast but lacks the visual polish needed for marketing. Interactive HTML builders (like Supademo or Navattic) are excellent for website engagement, but because they aren’t video files, they cannot be uploaded to YouTube, X (Twitter), LinkedIn, or Apple’s App Store. Manual editors like Premiere or After Effects produce stunning standard videos, but animating every swipe and zoom takes immense time and skill.
For creators who need exportable MP4s or GIFs but don’t want to spend hours manually editing keyframes, auto-editing video tools provide the most efficient path forward.
The Middle Ground: Creating Polished Video Demos with Less Editing
If you need a standard MP4 or GIF demo but want to avoid the steep learning curve of professional video software, transferring screen recordings from your phone to your computer for editing can become a frustrating bottleneck.
This is where FocuSee becomes a massive time-saver for teams looking to make product demo videos. Rather than recording on your phone and AirDropping files to manually edit later, FocuSee offers a direct USB-to-desktop workflow for Mac and Windows.
As an AI-powered auto-editing screen recorder, FocuSee acts as the perfect middle ground. Once you connect your phone and record your app walkthrough via your computer, FocuSee automatically applies smart zoom effects, cursor highlights, custom backgrounds, and sleek device frames to your mobile recording under supported conditions.
Record iPhone Screen
Because it is a desktop application designed to create standard video files, it produces the high-quality MP4s and GIFs you need for broad distribution—delivering a professional look without requiring you to manually track motion or hunt for external device frame templates.
Step-by-Step: How to Record and Auto-Edit Your App Demo
Using a tethered desktop workflow is much faster than trying to edit mobile recordings on a small phone screen. Here is how you can record and automatically enhance your app demo using FocuSee where compatible:
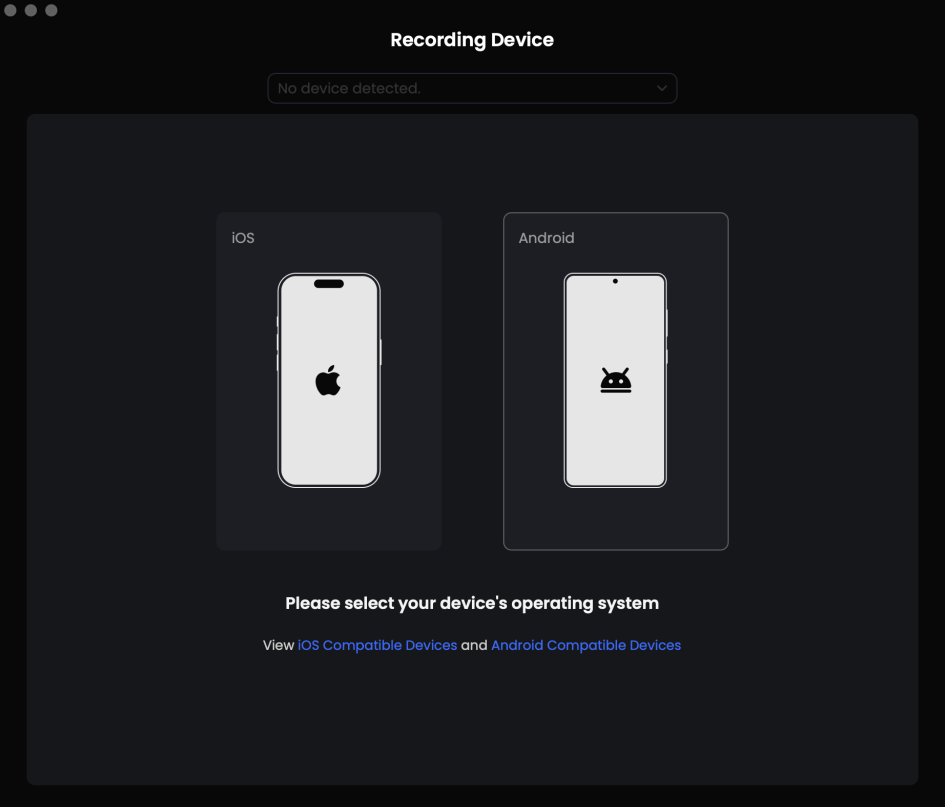
Step 1. Connect your device: Plug your iOS or Android phone into your Mac or Windows computer via a USB cable and launch the FocuSee desktop application. This direct connection instantly bypasses the frustrating need to AirDrop or cloud-sync heavy video files before editing.
Step 2. Record your workflow: Choose the Device record model.
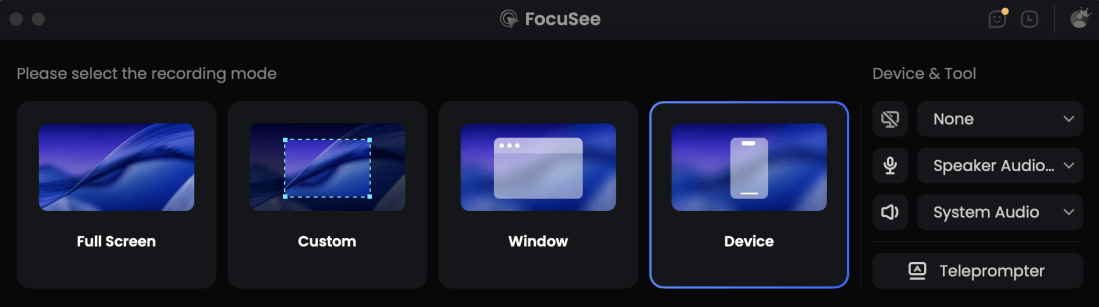
Choose the Device Recording Model
Select your mobile device as the recording source within FocuSee. Navigate through your app’s workflow on your phone while the software captures the screen directly to your computer.
Connect your mobile device
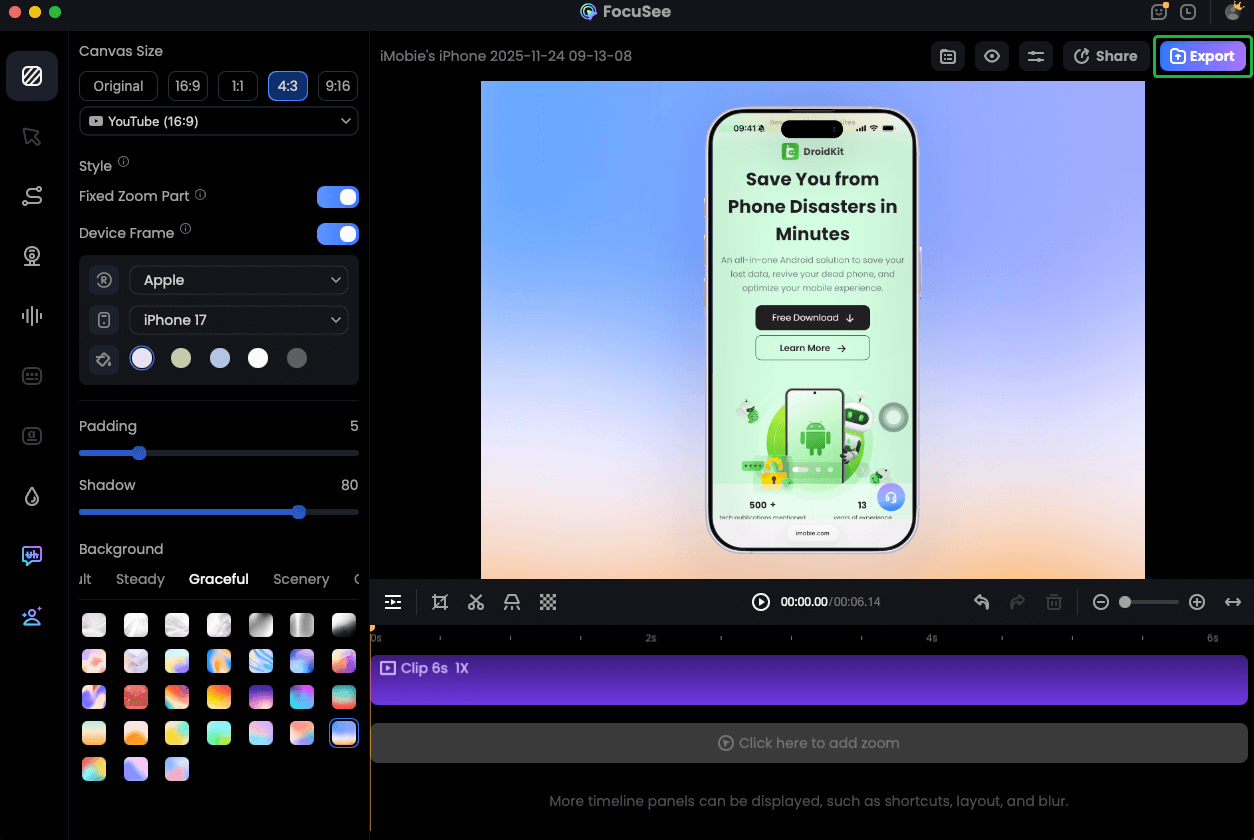
Step 3. Review automated edits: Once you finish recording, FocuSee automatically applies smart focus and automatic zoom and cursor effects, tracking your actions so you don’t have to manually animate every tap and swipe.
Record iPhone Screen
Step 4. Customize the presentation: Use built-in options to automatically wrap your recording in a professional device frame (like an iPhone bezel) and apply a clean, branded background.
Step 5. Export the final video: Export your polished demo as an MP4 for YouTube, social media, or App Store listings, or save it as a lightweight GIF for blog embeds and email newsletters.
By letting the software handle the zooming and framing, you get the visual appeal of a high-end motion graphic without the tedious manual labor.
Examples and Best Practices for App Demos
Creating a successful app demo requires more than just good software; you also need to tailor the pacing and structure to where the video will be seen. Adding a device frame and a clean background instantly upgrades a demo from amateur screen capture to a professional marketing asset. Here is how to adapt your presentation and export specifications for different scenarios:
Scenario 1: App Store Promo Videos
Users scrolling through an App Store have short attention spans. Keep your demo under 30 seconds. Focus strictly on 1 to 3 core features. Export the video in the device’s native aspect ratio (typically 9:16 for portrait apps or 16:9 for landscape) to ensure it fills the user’s screen naturally. Use clean device frames and avoid cluttered backgrounds so the user interface remains the undeniable star of the video.
Scenario 2: Social Media & YouTube Shorts
Social feeds are highly competitive. To stop the scroll on platforms like TikTok or YouTube Shorts (which require a vertical 9:16 aspect ratio), try adding a dynamic 3D camera effect and fast pacing. The camera should constantly guide the viewer’s eye to the specific button being tapped or the swipe gesture occurring, keeping the energy high.
Scenario 3: Help Center/Support GIFs
When creating documentation or internal SOPs, users don’t want cinematic trailers; they want clear answers. Use short, focused GIFs that seamlessly loop a specific UI action. Exporting these in a standard aspect ratio with a compressed file size—or cropping tightly around the specific action—helps the page load quickly. Stripping away heavy intros and using straightforward visual highlights helps the user solve their problem immediately.
Frequently Asked Questions
How do I add device frames to my mobile screen recording?
You can add device frames manually by downloading PNG templates, placing them over your video in an editor like Premiere, and carefully scaling your recording to fit. Alternatively, you can use automated desktop tools that instantly apply device bezels and backgrounds to your recording with a single click.
What is the difference between a video app demo and an interactive HTML demo?
A video app demo is a standard, exportable media file (MP4 or GIF) that autoplays on social media, YouTube, and App Stores. An interactive HTML demo is a clickable website embed that allows users to manually click through screens. They serve different marketing goals: video is for broad reach, while HTML is for hands-on landing page engagement.
Can I add zoom effects to a mobile app recording automatically?
Yes. While traditional editing requires manually setting zoom keyframes, modern AI-assisted screen recorders can track your clicks and automatically generate smooth zoom-in and zoom-out effects to highlight specific UI elements.
Is it better to record on the phone or tethered to a computer?
Recording a mobile device while tethered via USB to a desktop computer is generally better for professional work. It offers better precision, avoids the hassle of AirDropping heavy video files, and allows you to edit instantly on a larger screen.
Final Thoughts: Choose the Right Workflow for Your App Demo
Creating a compelling mobile app demo doesn’t have to be an overwhelming task. By preparing your device carefully, deciding on the right output format, and guiding your viewer’s focus, you can showcase your app’s value clearly and effectively.
Crucially, you no longer have to choose between sharing boring, static screen captures and spending hours fighting with complex keyframes in professional video editing software. The right workflow makes all the difference.
If you want a faster way to produce polished MP4 and GIF app demos, try upgrading your process. With FocuSee, you can connect your mobile device, record your workflow, and let the software automatically apply smart zooms, cursor highlights, and sleek device frames. Check out the FocuSee website to explore how auto-editing can streamline your next product launch.