The Ultimate Interactive SaaS Walkthrough Guide: Driving Activation in 2026

Many SaaS products struggle with the same challenge: users sign up, but never reach their first meaningful outcome. In many cases, the problem isn’t the product—it’s the onboarding experience.
A SaaS walkthrough helps users complete key actions, understand product value faster, and improve activation rates. Unlike traditional product tours that simply introduce features, effective walkthroughs guide users toward specific goals through contextual, task-based experiences.
In this guide, you’ll learn SaaS walkthrough best practices, see real examples, compare interactive and video-based approaches, and discover the best tools for creating walkthroughs without heavy engineering effort.
What Is a SaaS Walkthrough?
A SaaS walkthrough is a guided onboarding experience that helps users complete key tasks and reach value faster. Unlike traditional product tours that introduce features, walkthroughs focus on helping users achieve specific goals, such as creating a project, connecting an integration, or inviting teammates.
By providing contextual guidance at the right moment, walkthroughs reduce onboarding friction and improve user activation. Whether delivered through interactive in-app flows or video tutorials, their purpose is the same: help users take action and experience product value as quickly as possible.
SaaS Walkthrough Micro-Flows: A Proven Strategy to Increase User Activation

Micro-walkthroughs Flowchart
Many SaaS walkthroughs fail because they try to explain every feature instead of helping users reach a meaningful outcome. Unlike a product tour, which provides a broad overview, a SaaS walkthrough should guide users toward a specific action that delivers value.
A proven approach is to use short, task-focused micro-flows with just 3–5 steps. These walkthroughs should appear when users are ready to take action, such as creating their first project, connecting an integration, or inviting teammates.
Each step should serve one of two purposes:
- Reduce uncertainty before an important action.
- Confirm success after the action is completed.
If a step only provides information, move it to documentation, tooltips, or help resources. Effective walkthroughs focus on activation, not feature explanations.
Interactive SaaS Walkthroughs vs Video Walkthroughs: Which Onboarding Method Is Better?
Before selecting a tool, you must determine the optimal format for your SaaS onboarding walkthrough. There is often confusion here. “Interactive” typically implies code-based overlays (tooltips, modals, hotspots) that sit on top of your UI. However, these come with high technical debt.
To make an informed decision, you must weigh the engineering cost of “true” interactivity against the speed of video guidance.
Comparing Walkthrough Formats
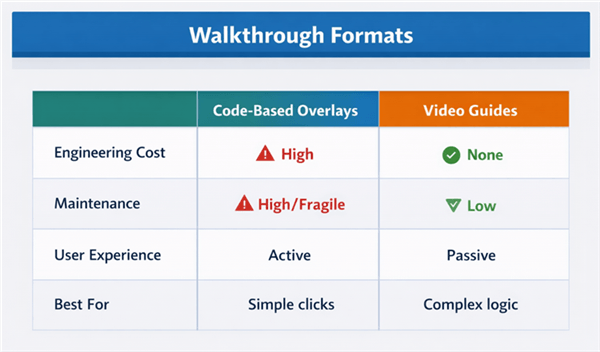
Walkthrough Formats
Interactive Overlays (Code-based):
- Pros: The user acts as the product. Highest learning-by-doing value.
- Cons: High maintenance. If your engineering team changes a CSS class ID, the tour breaks. Requires third-party script integration (e.g., Appcues, Pendo).
Video Walkthroughs (The Low-Code Alternative):
- Pros: Zero engineering debt after embedding. Great for complex workflows where you need to show the “why” alongside the “how.”
- Cons: Passive. The user watches, then does. It is not strictly “interactive” in the UI sense, but it solves the activation problem for teams with limited dev resources.
If your platform undergoes frequent UI updates, relying solely on hard-coded interactive product tours leads to broken experiences. In such cases, high-fidelity video walkthroughs often provide a better balance of clarity and maintainability.
SaaS Walkthrough Template: Copy and Trigger Logic for Your First Onboarding Flow
You don’t need to reinvent the wheel. Below is a “stealable” template for a standard First Project Setup micro-flow. This example assumes you are using an overlay tool, but the script applies equally to a video script.
| Purpose | Example | |
| Hook | Explain value | Create your first project |
| Action | Guide task | Name your project |
| Success | Reinforce progress | Project created successfully |
Best SaaS Walkthrough Tools in 2026
The best SaaS walkthrough tool depends on whether you need interactive onboarding, product demos, or video-based guidance. Here are some of the most popular options for SaaS teams.
| Best For | Walkthrough Type | |
| FocuSee | Automated product demos and walkthrough videos | Video |
| Supademo | Interactive product demos | Interactive |
| Userflow | No-code onboarding flows | Interactive |
| Appcues | Product adoption and onboarding | Interactive |
| Pendo | Enterprise user guidance | Interactive |
| Loom | Quick walkthrough recordings | Video |
FocuSee
FocuSee helps teams create professional walkthrough videos with automatic zoom effects, cursor tracking, and AI-powered editing. It is ideal for onboarding videos, product demos, customer education, and feature announcements.
Supademo
Supademo enables teams to build interactive product demonstrations that users can explore step by step. It is commonly used for sales demos, self-serve product tours, and customer onboarding.
Userflow
Userflow is a no-code onboarding platform that helps product teams create in-app walkthroughs, checklists, and guided experiences without heavy engineering support.
Appcues
Appcues offers a comprehensive set of onboarding and product adoption tools, including tooltips, hotspots, surveys, and feature announcements.
Pendo
Pendo combines in-app guidance with product analytics, making it a popular choice for larger organizations that need both onboarding and user behavior insights.
Loom
Loom is a simple screen recording tool for creating and sharing walkthrough videos quickly. It works well for internal communication and basic product demonstrations.
Which Tool Should You Choose?
- Choose FocuSee for polished walkthrough videos and product demos.
- Choose Supademo for interactive product experiences.
- Choose Userflow or Appcues for in-app onboarding flows.
- Choose Pendo for enterprise-level product adoption programs.
- Choose Loom for fast screen recordings and team communication.
Video SaaS Walkthroughs: A No-Code Alternative to Interactive Product Tours
For many teams, the “Interactive Overlay” route is blocked by budget or engineering bandwidth. Maintaining the selectors for those tooltips requires constant vigilance. This is where FocuSee serves as a vital tool for generating automated product walkthroughs.
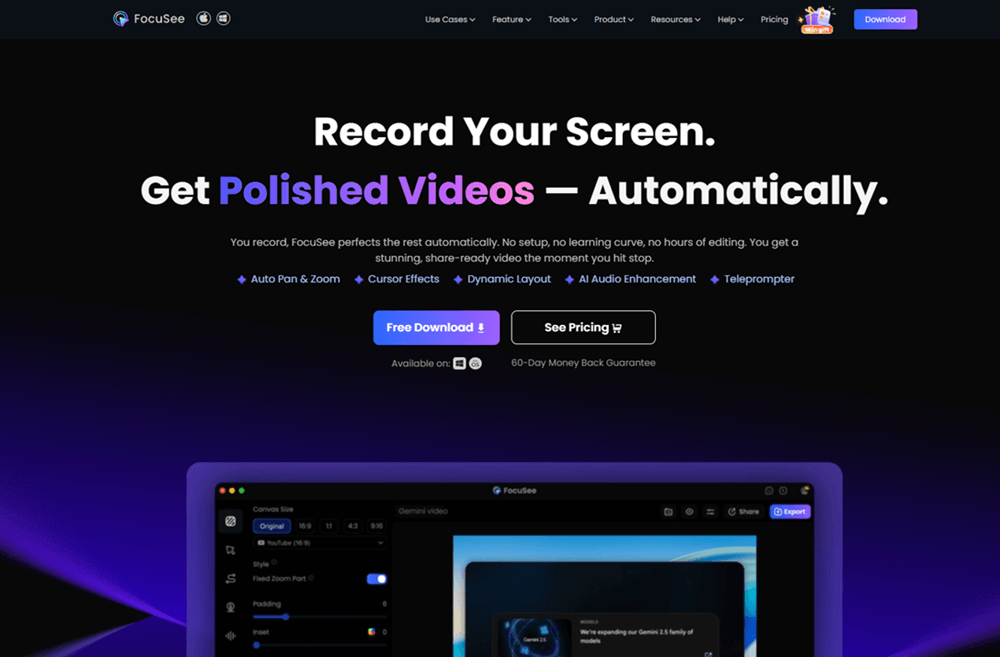
FocuSee Official Website
It is important to be transparent: FocuSee creates a video, not an in-app overlay. However, it replicates the focus of an overlay without the code debt.
The No-Code Solution for Walkthroughs
FocuSee handles the post-production work that typically requires a video editor. When you record a workflow, the software’s Smart Focus & Auto-Zoom feature detects your cursor clicks and automatically zooms in to direct the user’s attention to critical interface elements.
This solves the “Maintenance” problem. If your UI changes, you don’t need to ask a developer to fix a broken JavaScript selector. You simply record the new flow in 3 minutes, and the zoom/pan effects are generated automatically. This allows you to produce polished SaaS walkthrough examples for complex setups—such as integrations or data imports—where a tooltip simply isn’t enough explanation.
How to Maintain SaaS Walkthroughs and Prevent Broken Product Tours
A major operational challenge with in-app walkthrough SaaS tools is “walkthrough rot.” This happens when your product evolves, but your walkthrough relies on old code.
The Technical Reality of Rot
Most overlay tools target elements using CSS selectors.
- The Scenario: You target a button with the ID #submit-btn.
- The Update: Your dev team refactors the code and changes that ID to #submit-btn-v2 or switches to a dynamic class like .css-1r56d.
- The Result: Your walkthrough breaks, or worse, points to nothing.
The Fix: When asking engineering to set up your tool, request stable data attributes. Ask them to add tags like data-testid=”onboarding-submit-btn” to key elements. These attributes are much less likely to change than CSS classes, ensuring your interactive onboarding walkthrough remains stable.
Accessibility and Guardrails
Beyond maintenance, strict UX guardrails are necessary.
- Keyboard Navigation: Ensure all modals are accessible via keyboard (Tab and Esc keys).
- Dismissibility: Always provide a clear “Skip” option. Users who are re-activating or exploring a secondary account do not need to see the same tour twice.
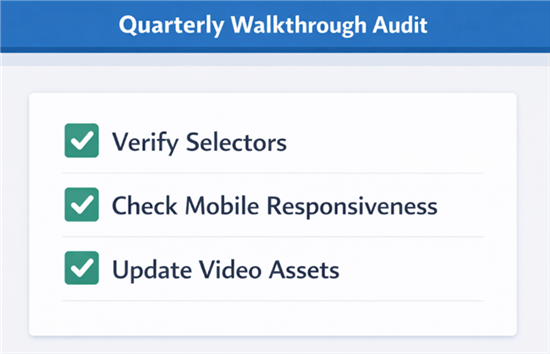
Quarterly Walkthrough Audit
Measuring ROI: From Completion Rates to Activation
To validate your strategy, you must move beyond vanity metrics like “views.” You need to correlate walkthrough behavior with retention.
Instrumentation: How to Measure It
You cannot improve what you cannot track. Here is a simple stack approach using tools like PostHog, Mixpanel, or Amplitude:
Tag the Start: Fire an event Walkthrough_Started with a property flow_name: project_setup.
Tag the End: Fire an event Walkthrough_Completed.
Create the Funnel: Build a funnel visualization:
- Step A: Walkthrough_Started
- Step B: Walkthrough_Completed
- Step C: Activation_Event (e.g., Project Created)
Analyze Drop-off: If 80% start but only 20% finish, look at the step where they drop off. Is the instruction unclear? Is the UI broken?
For Priya, the PM we mentioned earlier, this data revealed that users who completed the “Invite Teammate” micro-walkthrough retained 30% longer than those who skipped it. That data point turned a “nice-to-have” UI feature into a critical business KPI.
SaaS Walkthrough FAQ
What are the best SaaS walkthrough tools, and how do I choose?
For code-based interactive product tours, tools like Appcues, Pendo, and Userflow are industry standards but require engineering setup. If you need a faster, lower-cost alternative that avoids technical debt, FocuSee is ideal for creating video-based walkthroughs that simulate the “zoom-in” focus of a tour.
How do I decide what steps belong in a walkthrough vs docs?
Use the “Rule of Action.” If the user must perform the step right now to achieve value, put it in an in-app walkthrough. If the content explains “why” or covers edge cases, put it in documentation. Do not clog your interactive SaaS walkthrough with conceptual explanations.
How do I create a SaaS walkthrough without coding?
You have two options. You can use a no-code overlay builder (like Userflow) which requires an initial snippet installation from a developer. Alternatively, you can record your screen using FocuSee, which automatically generates a zoomed, polished video guide that you can embed anywhere, requiring no integration with your app’s code.
Conclusion
Creating a successful SaaS walkthrough isn’t about forcing users through a twenty-step tour; it is about removing barriers to value. By shifting your focus from “showing features” to “driving activation events” via micro-flows, you solve the core problem of low engagement.
Whether you choose the high-investment route of code-based overlays or the agile speed of high-fidelity video guidance, the goal remains the same: help the user achieve their first win quickly.
If you are ready to build professional, automated walkthroughs that guide users without the risk of broken selectors or engineering delays, FocuSee provides the toolkit you need. It allows you to generate polished, zoomed-in video assets in minutes, giving you control over your onboarding experience immediately.