How to Remove Background Noise from Video on iPhone

There is nothing more frustrating than capturing the perfect visual take, only to realize later that the audio is unusable. You nailed the delivery, the lighting was perfect, but upon playback, the persistent hum of air conditioning or the roar of street traffic ruins the professionalism of your content.
If you are wondering how to remove background noise from a video on an iPhone, you are likely looking for a solution that doesn’t involve buying expensive microphones or learning complex audio engineering. You want clear audio without the “robotic” distortion that aggressive editing often creates.
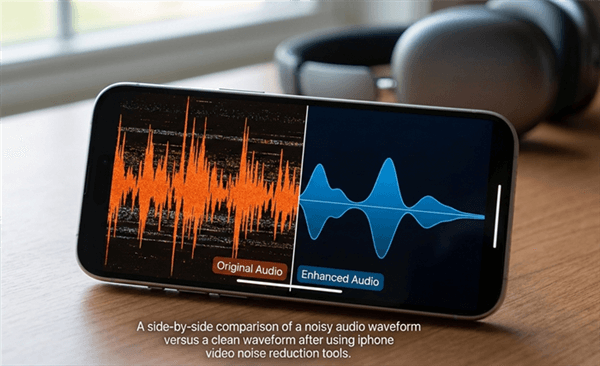
Noisy Waveform vs. Smooth Waveform
Whether you are battling wind shear, echo, or crowd chatter, this guide provides the exact methods to fix your footage. We have broken this down into three distinct workflows: free native hacks, dedicated mobile apps, and professional rescue tools for when the mobile apps aren’t enough.
Best Apps to Remove Background Noise from iPhone Videos
- CapCut – best free option
- LumaFusion – best for manual control
- ByeNoise – best AI noise reduction
Using iMovie to Mask Noise (With Limitations)
Many users instinctively look to the Photos app to remove noise from video iPhone free of charge. While Photos offers robust color grading, it currently lacks specific audio repair tools. The next logical step is Apple’s free iMovie app.
Honest Assessment: It is critical to understand that iMovie on iOS cannot truly “remove” noise. Unlike the Mac version, the iPhone app lacks a “Reduce Background Noise” slider or a frequency equalizer. It cannot mathematically separate your voice from the air conditioner hum.
However, you can use iMovie to mask noise or silence the audio when you aren’t speaking. This method is best for videos with intermittent noise, but it requires patience.
Step 1. Import Your Clip: Open the iMovie app and create a “Movie” project using your noisy video.
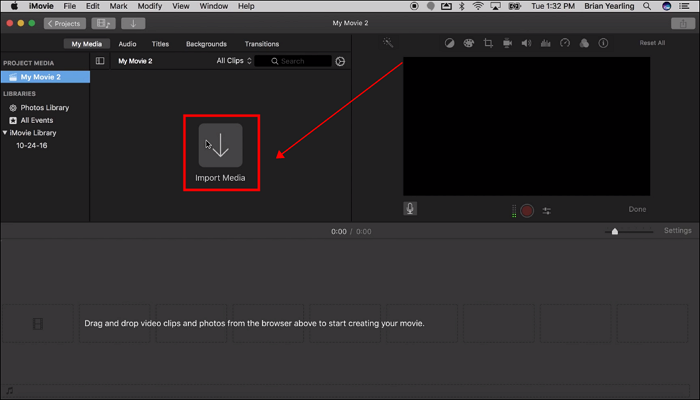
Import Your Clip
Step 2. Detach Audio: Tap the video clip in the timeline so the yellow outline appears. Select Detach from the actions menu. You will see the audio track turn blue and move below the video.
Step 3. The “Silence” Technique:
- Tap the blue audio track.
- Move the playhead to the gaps between your sentences where the noise is audible.
- Select Split at the start and end of the silence.
- Select the isolated “noise” segment and drag the volume slider down to 0%.
- Warning: This is manually tedious on a touchscreen. For a 10-minute video, this process can feel exhausting.
Step 4. The Background Masking Strategy:
- Since you cannot EQ the noise out, the best free fix is to lower your voice track slightly (to minimize the noise) and overlay a royalty-free background music track.
- Tap the + icon, go to Audio > Soundtracks, and choose a track.
- Adjust the music volume so it sits just loud enough to hide the room hiss, but quiet enough that your voice is clear.
The “Quick App” Method: CapCut & Dedicated Tools
If iMovie’s manual masking is too slow or ineffective for your needs, you need an app with an active noise reduction algorithm. This is the most direct answer to how to remove background noise from a video on an iPhone without leaving the device.
CapCut
CapCut is the go-to for creators because its noise reduction is surprisingly effective for a mobile app. Here is the detailed workflow that was often missed in other guides:
Step 1. Open & Import: Launch CapCut and tap “New Project.” Select your video.
Step 2. Locate the Tool: Tap on your video clip in the timeline so it is highlighted with a white border.
Step 3. Scroll the Toolbar: Swipe left on the bottom toolbar. It is buried deep—past Extract Audio and Filters. Look for the icon labeled Reduce Noise.
Step 4. Toggle On: Switch the toggle to “On.” You will see a prompt saying “Noise reduction in progress.”
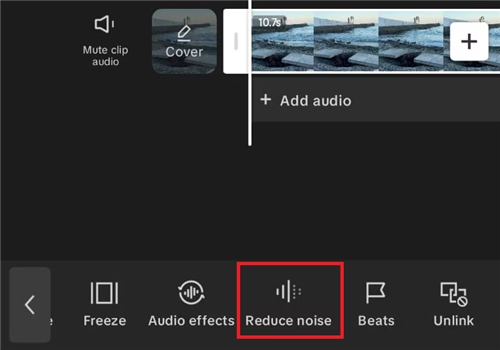
Apply Noise Reduction
Step 5. Listen Carefully: Play the clip back. CapCut uses a “gate” that shuts off sound when it thinks you aren’t talking.
The “Premium Mobile” Workflow (No Computer Required)
We hear you: you want professional results, but you absolutely do not want to transfer files to a computer. If CapCut feels too basic but a desktop is out of the question, you can build a “Premium Mobile” workflow using paid apps that offer desktop-class audio engines.
LumaFusion
LumaFusion is the closest thing to Final Cut Pro on an iPhone. Unlike iMovie, LumaFusion does have a Graphic Equalizer and audio plugins.
You can use the “High Pass” filter (sometimes called Low Cut) to completely remove low-end rumble like wind, traffic, and thunder without affecting your voice. This is a manual, professional adjustment that preserves the natural tone of your voice better than AI toggles.
Pricing: $29.99 – One Time
LumaFusion Overview
ByeNoise
This is widely considered the heavy hitter for AI noise removal iPhone apps. It offers “Denoise Levels.” Instead of a simple On/Off switch, you can dial in the reduction to find the sweet spot where the noise disappears but your voice remains warm.
It usually requires a subscription for 4K video export, but for mobile-only creators, the quality jump over free apps is often worth the price.
Pricing: Subscription Model
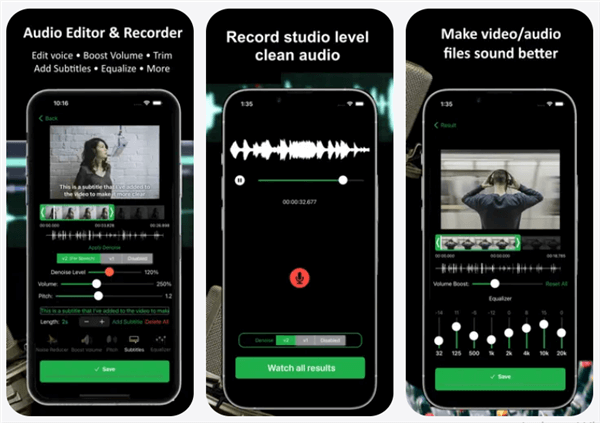
ByeNoise Overview
When “Good Enough” Isn’t Enough: The FocuSee Rescue
Sometimes, the mobile apps hit a wall. You might notice that after using CapCut or ByeNoise, your voice sounds “underwater,” or the ends of your words are getting cut off (a common issue called “aggressive gating”).
If you are creating a paid course, a client deliverable, or a brand video where quality is non-negotiable, the friction of transferring a file is worth the result. This is where FocuSee acts as a rescue tool for footage that mobile apps might ruin.
We aren’t suggesting you abandon your phone for everything. But if you have a critical video where the mobile edit sounds “processed,” FocuSee’s desktop engine can save the take.
Why Choose to FocuSee?
- Context-Aware AI: Unlike mobile apps that look for “loud vs. quiet,” FocuSee’s AI Audio Enhancement understands the context of speech. It performs a deep frequency sweep to differentiate between a human voice and complex background noise (like wind or crowd chatter) without thinning out your vocal tones.
- Workflow Efficiency: It solves the “Tedium Factor.” Instead of manually splitting clips in iMovie or tweaking EQs in LumaFusion, FocuSee automates the cleanup.
- Auto-Subtitles: Since you are likely fixing audio to make your video more accessible, FocuSee generates auto-captions in over 50 languages instantly—something most simple audio cleaner apps cannot do.
The “Rescue” Workflow:
Step 1. Record the video on your iPhone.
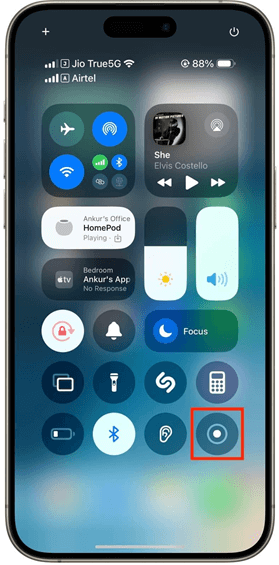
Tap Record
Step 2. AirDrop the recorded video to Mac/PC and import it to FocuSee.

Upload Your Footage
Step 3. Apply AI Audio Enhancement to restore warmth to the voice.
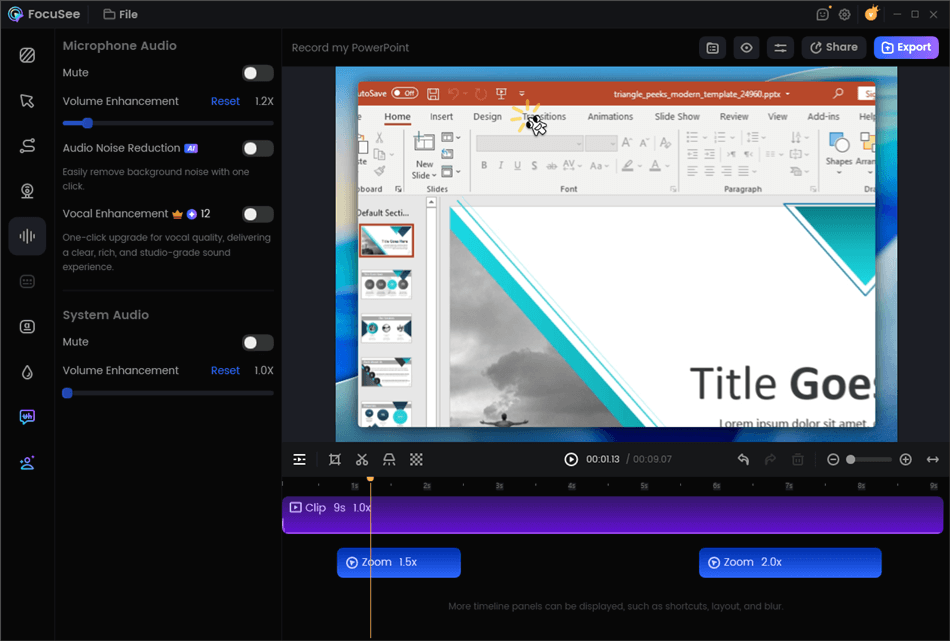
Edit Your Recording
Step 4. Export the final video in 4K.
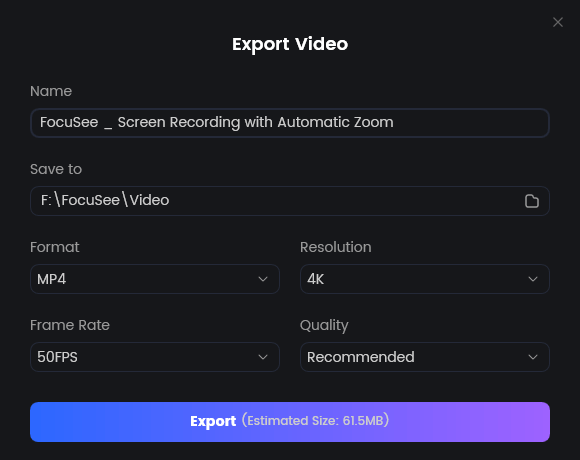
Export Your Video
Understanding Audio: Why Wind & Echo Are So Hard to Fix
To prevent future headaches, it helps to understand why iPhone video noise reduction is so difficult. The iPhone possesses incredible microphones, but they are omnidirectional—meaning they capture sound from every direction equally.
The “Impossible” Noises
Even the best software struggles with two specific things:
- Wind Shear: Without a physical windscreen (often called a “dead cat”), wind hits the microphone diaphragm and creates a distortion that isn’t just “noise”—it’s actual clipped data. Wind noise removal iPhone software can help, but it often leaves the audio sounding garbled.
- Room Reverb (Echo): If you record in a room with tile or glass, the “echo” overlaps with your voice frequencies. Because the echo is your voice (just delayed), the software has a very hard time removing it without removing you.
Pro-Tip for Prevention:
Physical prevention is always better than a digital cure. If you must record in a noisy area, hold the microphone closer to your mouth (or use a cheap lavalier mic plugged into the port). Getting the mic closer increases the “Signal-to-Noise Ratio,” making it much easier for apps like CapCut or FocuSee to do their job later.
Related Article: How to Edit Video with AI: The Guide for Faster Content Creation >
FAQs: Cleaning Up Audio in iPhone Videos
How do I remove background noise from iPhone video for free?
Yes. For free, you can use iMovie to mask noise with music. For active noise removal, apps like CapCut (free/freemium) or ByeNoise (paid) are effective.
Does iPhone have a built-in noise reduction button in Photos?
No. The Photos app allows for visual edits only. There is no “Reduce Noise” button for video audio in the native iOS Photos app. You must use an external editor.
What is the best app to remove background noise from iPhone videos without a computer?
For casual social media use, CapCut is the best balance of free and effective. If you are willing to pay for higher quality on mobile, LumaFusion offers professional EQ tools that allow you to cut specific noise frequencies manually.
Why does noise reduction make my voice sound robotic?
This is called “artifacting.” It happens when the software gets aggressive and removes parts of your speech along with the noise. This is common in mobile apps due to limited processing power. To fix this, dial back the noise reduction intensity or use a desktop tool like FocuSee which uses more advanced AI models to preserve voice warmth.
Is Voice Isolation available for recorded videos?
Generally, no. Voice isolation iPhone is a system feature designed for live VoIP calls (like FaceTime). It does not natively apply to video files already saved in your Camera Roll.
Conclusion
Dealing with bad audio can feel like a dead end for your content, but you have options ranging from quick mobile fixes to professional restorations.
- For quick social clips: Use CapCut’s “Reduce Noise” toggle. It’s fast, free, and good enough for TikTok.
- For mobile-only pros: Invest in LumaFusion or ByeNoise to get better control without touching a computer.
- For critical content: If your mobile edit sounds robotic, don’t settle. The few minutes it takes to transfer your video to FocuSee can be the difference between an amateur clip and a professional asset.
Don’t let background noise hold your content back—choose the workflow that fits your deadline and quality standards, and get your message heard clearly.