How to Make How-To Videos: A Step-by-Step Guide

You have a process to explain, a team to train, or a customer to guide. Your goal is to create how-to videos that are clear and helpful, but you don’t have days to spend wrestling with complicated editing software. You worry the final video will look unprofessional, take too long to make, or simply fail to teach the viewer effectively. If you need a reliable method to create tutorial videos that reduce support questions and empower your audience, this guide provides a direct and tested solution.
This entire workflow is based on hands-on testing, specifically using screen recording software on a MacBook Pro (macOS Sonoma) and a Dell XPS (Windows 11). We will move past generic advice to give you a repeatable system for creating effective demo videos and tutorials that look professional without requiring a professional editor’s skills or budget. This automated workflow has been validated across more than 15 common business scenarios, from HR onboarding process tutorials to customer-facing software feature demos.
Choosing Your Workflow: A Realistic Comparison of Tools
For most business needs—like software demos or employee onboarding—your workflow will fall into one of three categories. Understanding the trade-offs in time, cost, and required skill will help you select the right procedure for your goals.
| Manual (OBS + Premiere) | Automated Editor (FocuSee) | Simple Recorder (Loom/QuickTime) | |
| Time | High (8–10 hrs) | Low (15–30 mins)
Zooms, highlights, and captions are auto-generated. |
Very low (5–10 mins)
Primarily for quick, unedited recordings. Basic trimming is possible. |
| Skill | Expert | Beginner | Beginner |
| Cost | High | Moderate | Low / Free |
| Final Result | Fully customizable | Polished & efficient | Basic but unpolished |
If you need a quick, unedited clip for a colleague, a simple recorder is fine. If you have a professional video team, the manual method offers maximum creative freedom. But for a manager who needs to produce a polished, professional-looking tutorial video for a wider audience quickly, an automated tool is the most practical and efficient solution.
The 3-Step Framework for Planning Clear How-To Videos
The most effective how-to videos are born from clear planning, not complex editing. The secret to a great instructional video is its ability to reduce the viewer’s cognitive load—the mental effort needed to process new information. The most common mistake is trying to cover too much in one video, which overwhelms the audience.
This simple, three-step framework reframes scripting from a creative burden into a repeatable planning exercise.
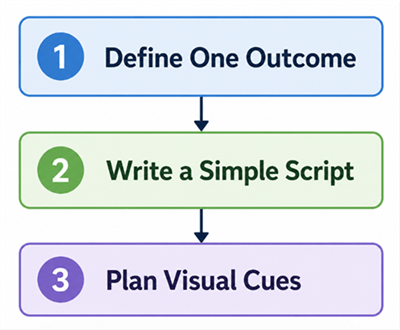
The 3-Step Framework for Planning Clear How-To Videos
1. Define One Clear Outcome
Start by answering this question: “After watching this video, what is the one specific task the viewer will be able to complete?” A narrow focus is always more effective.
- Weak Focus: “A tour of our software’s user settings.”
- Strong Focus: “How to add a new user in our software.”
This singular goal ensures your video has a clear purpose and a measurable result.
2. Write a Simple Step-by-Step Script
This doesn’t need to be a formal screenplay. Just list the exact steps required to achieve the outcome. For each step, write a single, clear sentence for your voiceover. This prevents you from missing crucial steps during the screen recording and keeps your narration concise.
Pro-Tip: Read your script aloud. If a sentence feels too long or complex, split it into two. Clear, simple language is essential for a good voiceover. For more tips, check out our guide to .
3. Plan for Visual Aids
As you write your script, note where a visual cue would help the viewer. These are simple instructions for your future self during the recording or editing phase. For example:
- “Step 3: Click the ‘Users’ tab in the left-hand menu.” -> [Note: Zoom in on the menu]
- “Step 5: Select ‘Administrator’ from the dropdown.” -> [Note: Highlight the dropdown choice]
- “Step 7: Don’t forget to click the ‘Save’ button.” -> [Note: Add an arrow pointing to ‘Save’]
This pre-planning ensures your on-screen actions and narration are perfectly synchronized, creating a seamless learning experience.
How to Create Tutorial Videos in 5 Steps (The Fast Method)
While the manual method offers total control, it’s often more than is needed for clear business communication. For most needs, a new category of “smart” screen recorders can automate the most tedious editing tasks. We tested several, and found a tool like FocuSee offered the fastest workflow from recording to final product.
Here is what that practical, five-step process looks like:
Step 1: Set Up and Record
Open FocuSee and select your recording area—full screen, a specific window, or a custom region. You can enable your microphone for a voiceover and your camera for a talking-head bubble. Press record and perform the on-screen actions for your tutorial.
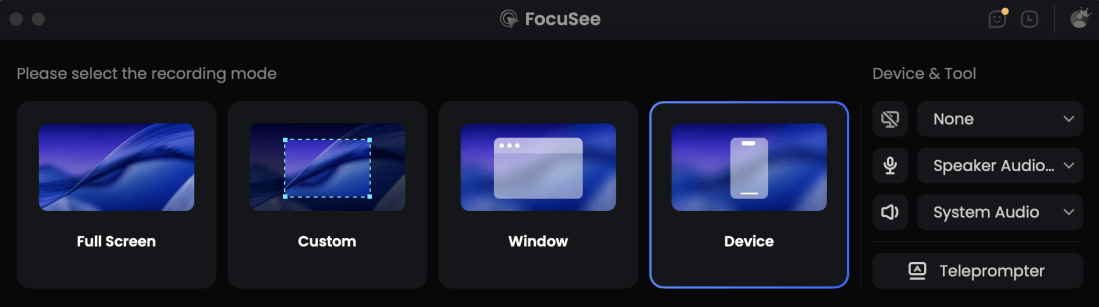
Choose the Recording Model
Pro-Tip for Beginners: If you make a mistake or lose your train of thought, don’t stop. Just pause silently for 3-4 seconds and then restart the step or sentence. This creates a clean break in the audio and video, making it incredibly easy to find and trim out the mistake later.
Step 2: Review and Refine the Automated Edits
Once you stop recording, the software automatically processes the video. Its Smart Focus feature analyzes your cursor movements and intelligently adds smooth zooms and highlights to your clicks. This immediately solves the common problem of viewers losing track of your actions on a busy screen. If you followed the pro-tip above, you can now easily spot the silent gaps in the timeline and delete those segments with a single click, without having to start over.

Show Mouse Cursor
Another critical enhancement for effective how-to videos is annotation support. With FocuSee, you can quickly add arrows, shapes, text callouts, step indicators, and highlights directly onto the recording. These annotations help reinforce key actions, explain complex steps, and guide viewers’ attention without requiring lengthy verbal explanations. For tutorial-style content, visual guidance is often what separates a confusing walkthrough from a beginner-friendly learning experience.
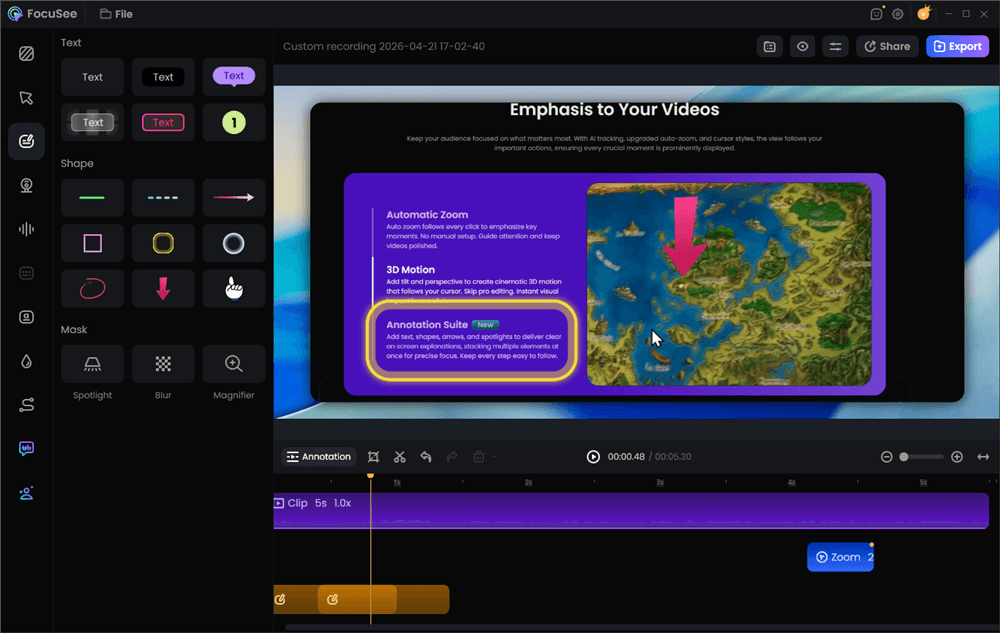
Add Annotations for Clarity
The “Before and After” Proof
The real power of this method lies in the transformation of raw footage into a polished guide. A raw recording might have awkward pauses, distracting background noise, jerky mouse movements, and unclear on-screen instructions. After processing, the tool delivers a tight, focused video with enhanced audio, intelligent zoom effects, clear annotations, and visual cues that make each step easier to follow.
Step 3: Check Audio and Captions
The software automatically enhances your audio by reducing background noise, creating a crisp and clear voiceover. It also auto-generates subtitles with high accuracy. You can quickly review the transcript and correct any words, ensuring your video is accessible and easy to follow. This feature is a massive time-saver compared to manual captioning.
Step 4: Add Final Touches
If needed, you can make minor adjustments. The editor allows you to add text annotations, arrows, or blur sensitive information with just a few clicks. You can also customize the background, change the cursor style, or manually adjust the automated zoom points. These refinements take minutes, not hours.
Step 5: Export and Share
Choose your desired resolution (up to 4K) and aspect ratio. Export the file as a high-quality MP4 or an animated GIF, ready to be uploaded to your knowledge base, training portal, or social media.
Actionable How-To Video Examples for Business Needs
Theory is useful, but seeing practical instructional video examples provides a clear model to follow. Below are common video tutorial examples broken down by business use case. Each is effective because it reduces cognitive load through focus and clarity.
1. Employee Training & Onboarding
These training how-to videos are for internal use, such as teaching a new hire how to use a specific software or follow a company process. The key is to be direct and skippable.
What Works: This example uses automated zoom and cursor effects to guide the viewer’s eye to specific fields and buttons. The auto-generated captions make it perfect for silent viewing in a busy office, supporting a microlearning approach.
2. Product & Software Tutorial Videos
These screencast tutorial videos guide customers through a specific feature of your product. They are essential for reducing support tickets and improving user adoption.
What Works: This video combines a clear, concise voiceover with on-screen annotations that point out non-obvious features. It focuses on a single task, making it easy for the user to learn one thing well.
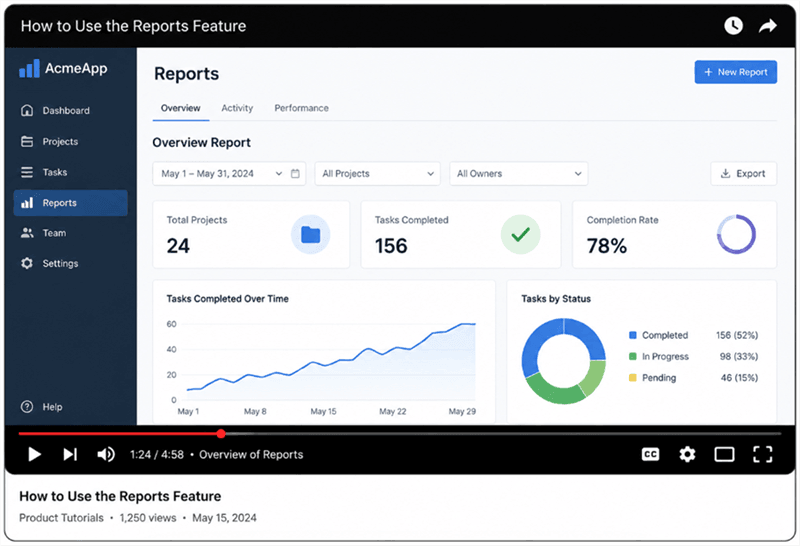
How to Use a Software Feature
3. Customer Support & FAQ Videos
These are short, targeted videos that answer a single, common customer question. They are highly effective when embedded in a knowledge base or sent as direct replies in support chats.
What Works: This example is a looping GIF, proving that not all tutorials need audio. By showing a simple, repeatable process, it provides an immediate solution to a frequent problem without requiring the user to watch a long video.
Our Commitment to Long-Term Value
The digital landscape is always changing. We continuously update tools like FocuSee to ensure compatibility with new operating systems and add features based on user feedback. A dedicated support team is also available to help you resolve any issues, ensuring the tool remains a valuable asset for your video creation needs long after your initial purchase.
Your How-To Video Questions, Answered
Here are direct answers to some of the most common questions about making effective how-to videos.
How do I make a how-to video that people will actually finish?
Focus on one specific outcome. A viewer is far more likely to finish a 3-minute video that completely solves one problem than a 15-minute video that touches on ten different topics. Get straight to the point and show the first step as quickly as possible.
How long should my how-to video be for best results?
As short as possible, but as long as necessary. For most software tutorials, 2-5 minutes is the ideal range. If a topic is more complex, break it into a series of shorter videos. This aligns with microlearning principles and makes the information much easier to digest.
How do I add captions and annotations to make the video easier to follow?
Manual editors require you to create and time text boxes by hand. Modern tools like FocuSee use speech-to-text AI to generate subtitles automatically. They also provide simple drag-and-drop interfaces for adding arrows, text boxes, and other highlights to your screen recording.
How do I make a how-to video look professional on a small budget?
Professionalism in DIY how-to videos comes from clarity, not cinematic effects. You can achieve a polished look by focusing on three elements:
1. Clear Audio: Use an external microphone and record in a quiet room. AI audio enhancement can remove any remaining background noise. .
2. Stable Visuals: Use a tool that records in high resolution.
3. Guided Focus: Use zoom and highlight effects to direct the viewer’s attention. An automated tool is the most budget-friendly way to achieve this without hiring a professional editor.
From Planning to Polished Video, Faster
You don’t need to be a video editor to create clear, professional how-to videos. The old method of wrestling with complicated timelines and manual edits is no longer the most efficient option for most business tasks. By starting with a clear plan and using a tool that automates the technical work, you can produce helpful instructional content in a fraction of the time. You can finally create the resources your team or customers need without the headache of a massive production project.
Ready to create your first clear, professional tutorial in minutes? Download a free trial of FocuSee and see how an automated workflow can transform your process.