How to Make a Promo Video in Premiere Pro (2026 Step-by-Step Guide)

Creating a social media promo video that stops the scroll and drives results can be a frustrating process. You know what you want to achieve—a polished, high-energy video for a campaign—but wrestling with the correct settings for a Premiere Pro vertical promo 9:16 sequence, fixing muddy audio, and ensuring brand consistency can feel like a significant technical hurdle. This isn’t just about editing; it’s about building a reliable system for every video you produce.
This Premiere Pro promo video tutorial provides a clear, step-by-step workflow designed to solve those exact problems. We will cover the entire procedure from project setup to the best export settings, giving you a repeatable method for every campaign. You will learn how to create professional, high-impact promotional videos without the guesswork.
How to Make a Promo Video in Premiere Pro: Your Step-by-Step Workflow
To make these technical steps practical, we’ll follow the story of Nia, a marketer creating a 20-second promo for her fitness studio’s New Year challenge. Her goal is a compelling vertical video for Instagram Reels and TikTok, plus a horizontal version for YouTube.
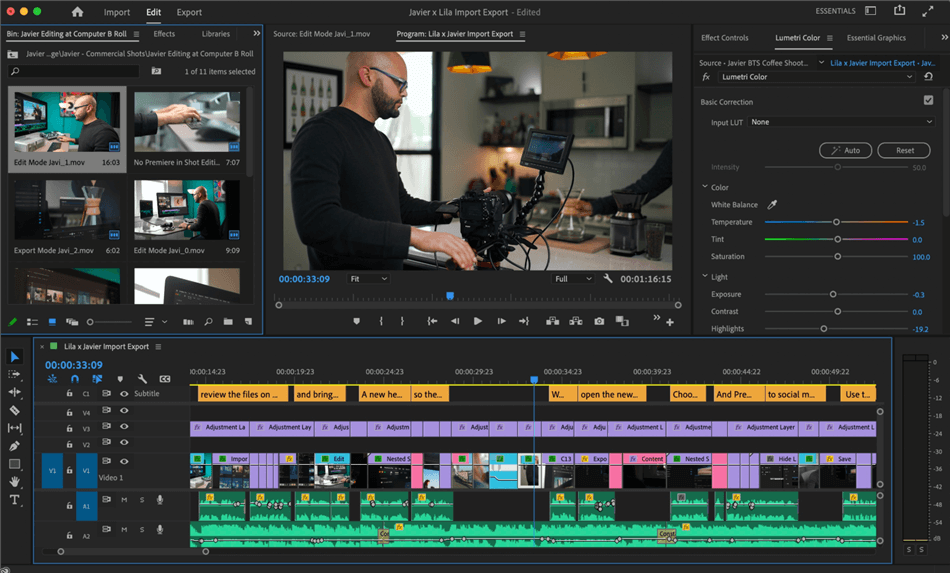
Premiere Pro Interface
1. Project Setup: The Right Sequence for Every Platform
The foundation of a great video is a correctly configured sequence. The best practice is to edit natively in your target aspect ratio instead of relying on the Auto Reframe tool. This gives you complete control over your composition.
Here are the precise settings for both vertical and horizontal videos.
For Vertical Video (9:16 – Instagram Reels, TikTok, Shorts):
- Navigate to File > New > Sequence.
- In the Settings tab, select Custom for the Editing Mode.
- Set the Frame Size to 1080 horizontal and 1920 vertical.
- Set the Frame Rate to 29.97 or 30 Frames/Second.
- Click Save Preset, naming it “Vertical Social Promo (9:16)” for future use.
For Horizontal Video (16:9 – YouTube, Website):
- Follow the same steps above.
- Set the Frame Size to 1920 horizontal and 1080 vertical.
- Click Save Preset, naming it “Horizontal Promo (16:9)” for easy access.
2. Building the Story: Pacing with Markers and Beat Edits
Nia imports her footage (class b-roll, two testimonials) and a high-energy music track.
She drops the music onto the timeline first.
While playing the track, she presses the ‘M’ key on every major downbeat to add markers. These markers are her guide for pacing.
Pro Tip: For a strong hook, a visual change should occur every 0.5 to 0.7 seconds within the first 5 seconds. Nia places a powerful before-and-after shot at the very beginning, ensuring it aligns with the first marker. This technique is critical when you create a promotional video in Premiere Pro meant for short attention spans.
3. Creating On-Brand Graphics You Can Reuse (MOGRTs)
Brand consistency is key, but creating titles from scratch for every video is inefficient. The solution is to create your own reusable Motion Graphics Templates (MOGRTs).
Here’s how Nia creates a branded lower-third for testimonials:
- Create a Graphic: Use the Type Tool (T) to add text directly on the Program Monitor. In the Essential Graphics panel, style it using your brand’s font and colors.
- Add Brand Assets from CC Libraries: For instant access, add your brand’s hex codes, fonts, and logos to your Creative Cloud Library. In the Essential Graphics panel, you can apply these saved assets with a single click.
- Export as a Motion Graphics Template: Once the graphic looks perfect on the timeline, right-click it and select Export As Motion Graphics Template. Give it a clear name (e.g., “Testimonial Lower Third”) and save it to your local templates library.
Now, this branded graphic appears in the Essential Graphics panel for all future projects. She can just drag, drop, and customize the text.
4. Achieving a Professional Audio Mix
Poor audio can ruin a great video. Nia follows a professional audio mixing procedure. She records a quick voiceover. In the Essential Sound panel, she tags the audio clip as Dialogue. She applies the Clarity and Dynamics presets for initial noise reduction and speech enhancement.
Crucially, she normalizes the dialogue to an integrated loudness of -14 LUFS, the standard for clear speech on most social platforms.
She tags the music track as Music and enables Auto Ducking. She sets it to reduce the music volume by -10 dB during the voiceover, a technique known as sidechain music ducking.
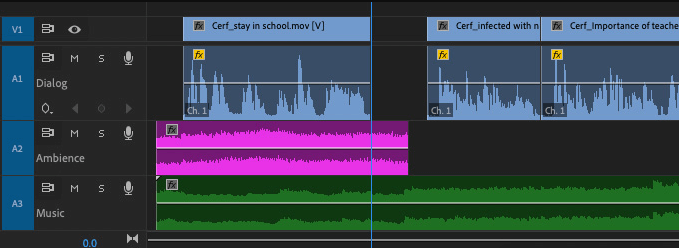
Auto Ducking
5. Quick Color Correction and Grading with Lumetri
To create a cohesive look from different camera sources, Nia uses an adjustment layer. She first selects individual clips and uses the Lumetri Color panel’s Basic Correction tab to fix white balance and exposure. Next, she adds an Adjustment Layer above her entire timeline. On this layer, she applies a creative LUT at 20% intensity.
To ensure professional quality, she opens the Lumetri Scopes and checks the Vectorscope. This tool helps her confirm that skin tones remain on the natural skin tone line, preventing an oversaturated or unnatural look.
6. Generating and Styling Captions for Social Media
Captions are essential for engagement. Premiere’s built-in Speech to Text feature automates this. With the edit finalized, Nia uses the Text panel to generate a transcription. From the transcription, she clicks Create Captions.
In the Essential Graphics panel, she styles the caption track with the brand font and a subtle background for readability.
Crucial Step: To avoid captions being covered by platform UI, she enables safe margins. In the Program Monitor, she clicks the wrench icon and selects Safe Margins. She then positions the captions inside the inner-most box.
7. Finalizing the Best Export Settings for Your Promo Video
The final step is exporting with the correct settings for maximum quality. Nia adds a 3-second branded end card with a clear call-to-action (CTA). In the Export window, she selects the H.264 format and chooses the Match Source – High bitrate preset.She confirms Hardware Encoding is enabled for a faster export.
- For a 9:16 vertical promo, she sets the bitrate to CBR (Constant Bitrate) at 16 Mbps.
- For a 16:9 horizontal promo, she uses VBR, 2 pass with a target bitrate of 20 Mbps and a maximum of 35 Mbps for excellent quality on YouTube.
How to Edit a Promo Video in Premiere Pro Without Lag
A laggy timeline is a major frustration. Here are three techniques to ensure a smooth editing experience on any computer.
Use a Proxy Workflow for 4K Footage
If you’re editing high-resolution 4K footage, a proxy workflow is essential. This procedure creates low-resolution copies for editing, which dramatically improves performance.
- In the Project panel, select your 4K clips.
- Right-click > Proxy > Create Proxies.
- Choose a lightweight format like ProRes Proxy.
- In the Program Monitor, click the Toggle Proxies button to switch between the smooth proxies for editing and the full-resolution originals for export.
Optimize Your Media Cache Location
Premiere Pro’s cache files can slow down your system if stored on your main drive. Move them to a fast SSD for a significant speed boost.
- Go to Premiere Pro > Settings > Media Cache.
- Click Browse and select a folder on your fastest SSD.
- Pro Tip: Use the Delete button in this menu monthly to purge the cache and prevent stuttering.
Enable Hardware Encoding for Faster Exports
Use your computer’s GPU to speed up exports. In the Export window’s Video settings, find the Encoding Settings. Choose Hardware Encoding. This is labeled as Quick Sync (Intel), NVENC (NVIDIA), or Apple VT (Apple Silicon) and can reduce export times substantially.
Advanced Strategy: A/B Testing, Tracking, and Compliance
A promo video’s job isn’t done until it achieves its business goal. This requires a strategic approach that goes beyond the edit.
A/B Testing Hooks and CTAs
To find what resonates with your audience, test variants. In Premiere Pro, duplicate your final sequence. In the new sequence, change one key element, like the first 3-second hook or the final CTA. Export both versions with clear filenames (e.g., Promo_Hook-BeforeAfter, Promo_Hook-Testimonial) for easy tracking.
Tracking Performance with UTMs
When you publish your promo variants, use unique UTM parameters in the associated links. This allows your analytics platform to tell you exactly which video drives more clicks and conversions. Nia’s A/B test revealed her “before/after” hook improved view duration by 28% and reduced cost-per-signup by 21%—a clear winner identified through data.
Paid Promo Compliance Checklist
When running promos as paid ads, legal compliance is critical.
- Music Licensing: Does your license cover paid advertising?
- Stock Footage: Does your license permit commercial/promotional use?
- Talent Releases: Do you have signed releases from every identifiable person?
- Brand Assets: Are you authorized to use any third-party logos shown?
When to Speed Up Your Workflow with Automation
The Premiere Pro workflow offers detailed creative control. However, if your role requires you to produce multiple high-quality promos every day, the manual process of styling captions, removing silences, and adding engaging zooms for each video can become a bottleneck.
This is where a dedicated AI-powered promo video maker tool like FocuSee can complement your process. It is designed to automate the most repetitive parts of creating a Premiere Pro product promo video.
For fast captions: FocuSee’s Auto Subtitles generate and style synchronized captions that match your brand with one click.
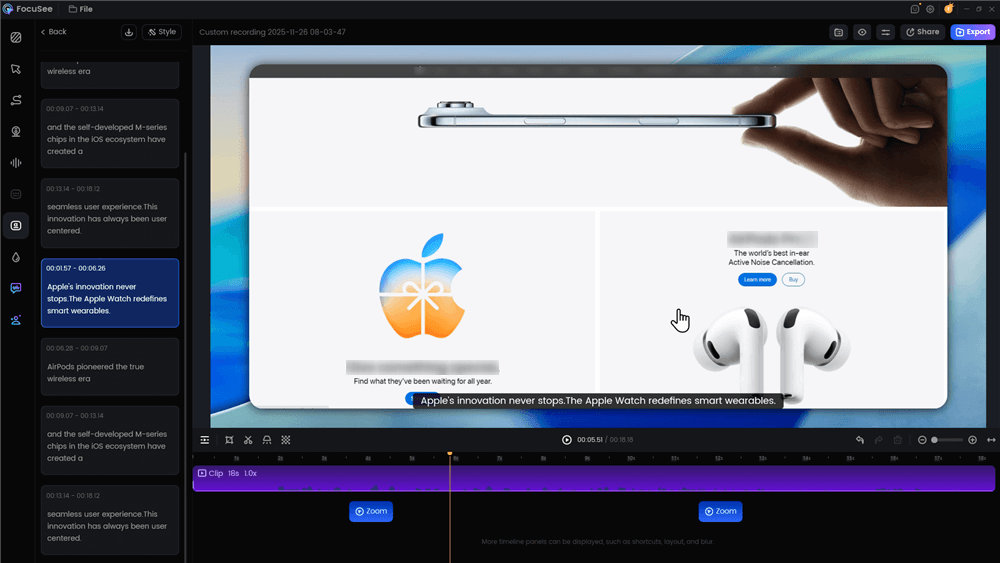
Automatic Subtitle Generation
For engaging visuals: Its Intelligent Visual Focus automatically adds smooth zooms and highlights to direct viewer attention where it matters most, saving significant keyframing time.
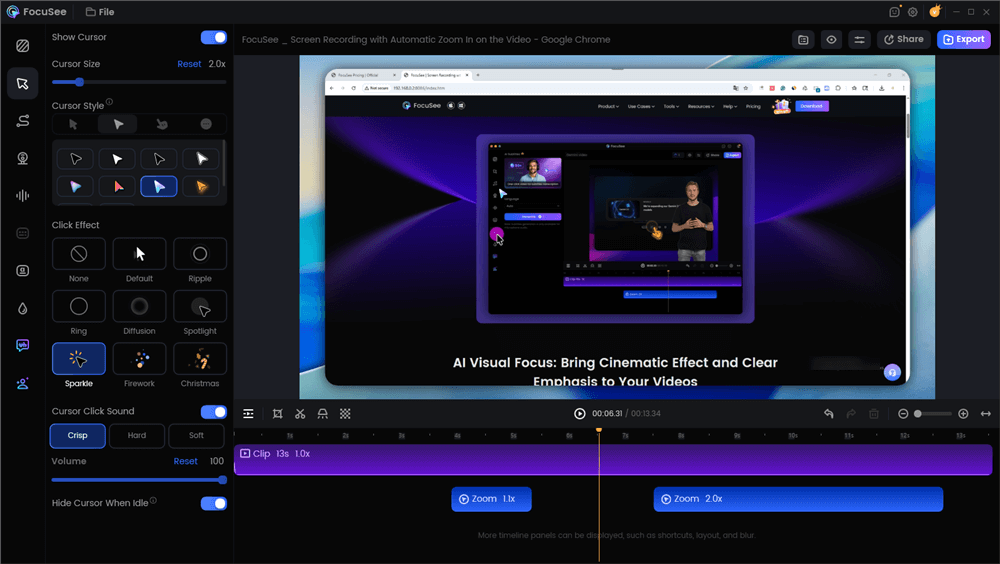
Edit the Promo Video with Auto Effects
For marketers who need to produce content at scale, integrating an automation tool for specific tasks can be a powerful efficiency gain.
FAQs on How to Make a Promo Video in Premiere Pro
What are the best sequence settings for a promo video?
For vertical social media (Reels, TikTok), use a custom 1080×1920 (9:16) sequence. For YouTube or websites, use 1920×1080 (16:9). A frame rate of 29.97 or 30 fps is standard for both.
How do I structure a 15-30 second promo video?
Focus on a strong hook in the first 2-3 seconds. Follow with quick cuts (a new shot every 1-2 seconds) to show value. End with a clear call-to-action (CTA) in the final 3 seconds.
What’s the easiest way to add on-brand titles and captions?
Create a graphic once in the Essential Graphics panel, then right-click it on the timeline and Export As Motion Graphics Template (MOGRT). This saves your brand kit fonts, colors logos for easy reuse.
How do I fix bad audio and set the correct loudness?
Use the Essential Sound panel. Tag your clips (e.g., as “Dialogue”), apply presets like “Clarity,” and normalize your dialogue to approximately -14 LUFS to meet platform standards.
How can I color correct quickly while keeping skin tones natural?
Use the Basic Correction tab in the Lumetri Color panel to balance shots. Apply creative LUTs on an adjustment layer at a low intensity (10-30%). Always check the Vectorscope to ensure the skin tone indicator stays on the skin tone line.
What are the best export settings for TikTok, Instagram Reels, and Shorts?
Use the H.264 format with hardware encoding. For a 1080×1920 vertical video, a Constant Bitrate (CBR) of 12-16 Mbps provides excellent quality.
Conclusion
You now have a complete, repeatable system for producing professional promo videos in Premiere Pro. This guide gives you the precise settings and creative control needed to build content that is technically sound and strategically effective, from setting up the right sequence to exporting for multiple platforms.
The frustration of guesswork is gone. You have a reliable method to handle audio, color, graphics, and captions for every project. The next step is to save these settings as presets and build your own library of branded templates. This initial investment of time will dramatically speed up your workflow, allowing you to focus less on the technical setup and more on creating content that achieves your marketing goals.