How to Edit a Promo Video That Converts in 2026: A Step-by-Step Guide

Creating a promo video can feel like having a brilliant idea, but no tools to build it. You have compelling footage, but turning it into a high-energy video that drives results feels just out of reach. This is a common obstacle for creators, from startup founders launching a new app to marketers on a tight deadline. The frustration of dealing with slow pacing, inconsistent audio, and blurry uploads can make the entire process feel overwhelming. You need more than just tips; you need a repeatable editing workflow.
This guide provides that exact procedure. We will show you how to edit promotional videos that look professional and are strategically structured to convert. We’ll cover everything from file organization to final export, providing the specific technical settings professionals use to get consistent, high-quality results.
Our Testing Methodology: To ensure our recommendations are accurate and up-to-date, every procedure and tool mentioned has been verified through hands-on testing. This guide is based on a standardized workflow using an iPhone 15 Pro, a MacBook Pro M3 (macOS Sonoma), and a Windows 11 PC. We tested the latest versions of CapCut, Adobe Premiere Pro, and FocuSee to validate every technical setting and outcome.
The 7-Step Promo Video Editing Workflow
Before making a single cut, understanding the entire editing process prevents wasted time and costly revisions. When Max, a solo marketer, had only 72 hours to launch his brand’s coffee promo, he relied on a structured workflow to stay on track. This same systematic approach will guide you through the technical and creative decisions needed to produce a high-quality video efficiently.
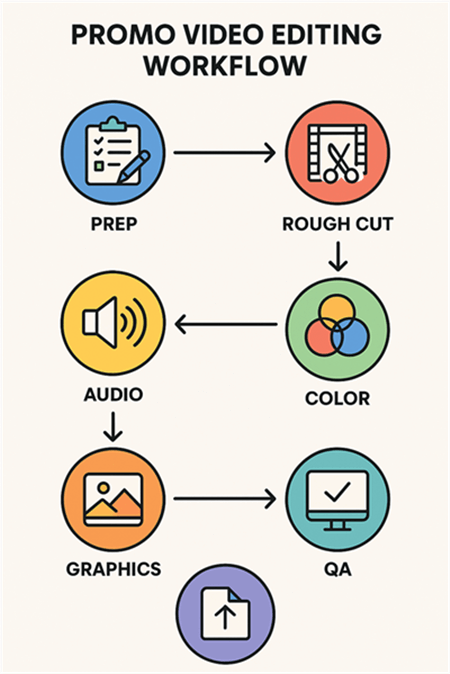
Promo Video Editing Workflow
Here is the complete 7-step promo video editing workflow professionals use:
- Prep & Organization (Estimated Time: 30 minutes): Import all raw footage, audio files, and brand assets into a structured folder system. Create your main project file and set the timeline to your final delivery aspect ratio (e.g., 9:16 for TikTok/Reels).
- Story Assembly (Rough Cut) (1-2 hours): Arrange your best clips on the timeline to form a compelling story arc (Hook → Value → Proof → CTA). Focus on pacing and the core message, ignoring minor imperfections for now.
- Audio Polish (1 hour): Clean up your voiceover with noise reduction, balance levels between dialogue and music, and add sound design (SFX) to emphasize key moments.
- Color Correction & Grading (1 hour): Correct exposure or white balance issues to make shots look consistent. Apply a creative color grade (using LUTs or manual adjustments) to establish a mood.
- Branding & Graphics (1 hour): Add your brand kit elements using reusable templates for efficiency. Insert lower thirds, callouts, and dynamic captions or subtitles for accessibility.
- Quality Assurance (QA) (30 minutes): Watch the entire video from start to finish, checking for technical glitches, spelling errors in text, and inconsistencies in branding.
- Platform-Specific Exports (30 minutes): Export final video files using the correct codec, bitrate, and resolution for each target platform (e.g., TikTok, YouTube, LinkedIn).
Automated Alternative: FocuSee for Rapid Promo Video Creation
While the manual workflow offers complete creative control, many creators need to produce high-quality promo videos quickly without compromising professional results. FocuSee is an AI-powered video editing tool specifically designed to automate the most time-consuming aspects of promo video production.
What is FocuSee?
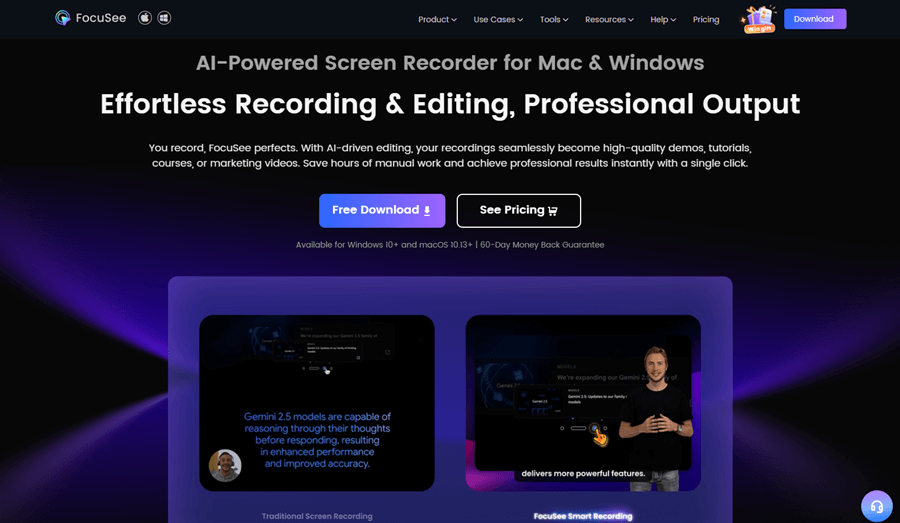
FocuSee Overview
FocuSee is a smart screen recording and video editing platform that transforms raw footage into polished promotional videos in minutes. Unlike traditional video editors that require manual keyframing and timeline adjustments, FocuSee – the promo video maker– uses AI to automatically apply professional editing techniques, including dynamic zooms, smooth transitions, and engaging animations.
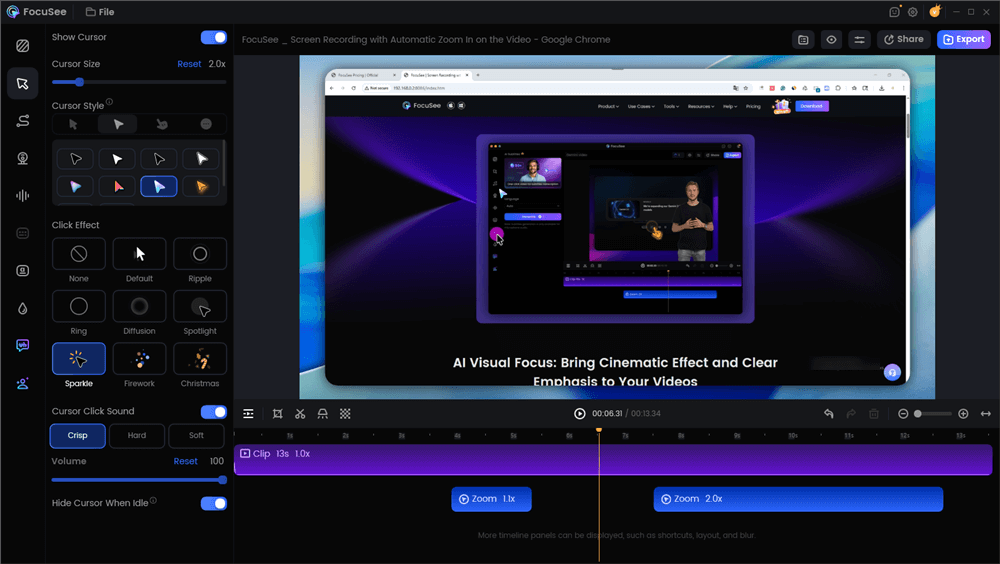
Edit the Promo Video with Auto Effects
Key Features for Promo Videos:
- Auto Zoom & Camera Movement: FocuSee intelligently analyzes your content and automatically adds cinematic zoom effects and smooth camera movements that keep viewers engaged—eliminating the need to manually keyframe dozens of zoom points.
- Smart Cut Technology: Automatically detects and removes awkward pauses, filler words, and silent gaps in your narration, creating a tight, professional pacing without tedious manual editing.
- AI-Powered Captions: Generates accurate, perfectly timed subtitles in seconds, with customizable styling to match your brand kit. This is especially valuable for social media, where 85% of videos are watched without sound.
- Branded Templates: Save your brand colors, fonts, and logo as reusable templates for one-click application across all your promo videos, ensuring consistent branding.
- Background Customization: Replace plain backgrounds with gradient overlays, blur effects, or custom colors to create a more polished, professional aesthetic without green screen filming.
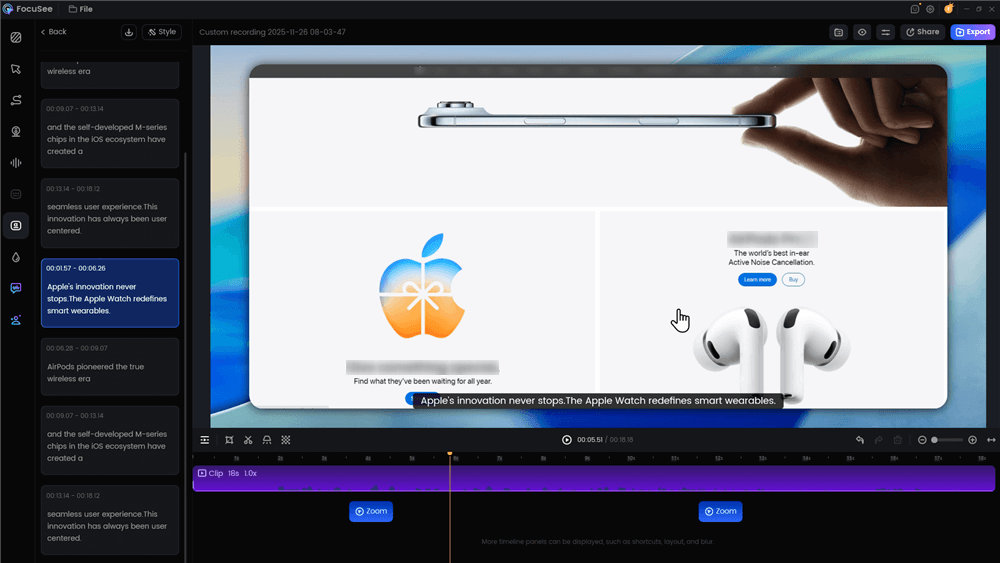
Automatic Subtitle Generation
FocuSee is particularly effective for product demos, app walkthroughs, software tutorials, and social media ads where dynamic screen content needs to be presented engagingly. For creators working on tight deadlines or producing high volumes of promotional content, FocuSee can reduce editing time from hours to minutes while maintaining professional quality standards.
Step-by-Step Promo Video Editing: The Manual Workflow
For complete creative control, a manual workflow in an NLE like CapCut or Premiere Pro is the standard. Let’s use Max’s 20-second coffee promo as our guide.
1. Structure Your Story for Conversion
A high-performing promo video follows a clear story arc:
- Hook (0-2s): Dramatic slow-motion shot of coffee pouring
- Value Prop (3-6s): Text overlay: “The smoothest cold brew, delivered.”
- Proof (7-12s): UGC clip with a 5-star review graphic
- CTA (13-20s): Product shot with discount code and “Shop Now” button
2. Master Pacing with Cuts on the Beat
Maintain viewer attention by introducing a new visual element every 0.8 to 2.0 seconds—whether it’s a hard cut, text overlay, or zoom effect. Use speed ramping to add energy to static shots.
3. Achieve Professional Audio Polish
Clear audio signals quality and builds trust:
- Normalize your voiceover to -14 LUFS with peaks below -1 dBTP
- Use audio ducking to lower music by 8-12 dB during speech
- Apply a high-pass filter around 100-120 Hz to remove rumble
- Cut out silences and filler words for a tight narrative—or use FocuSee’s Smart Cut to automate this in seconds
4. Basic Color Correction and Grading
For footage from different cameras, use your editor’s white balance eyedropper to sample a neutral object in each scene. Adjust temperature and tint until colors match, then apply a creative LUT for your brand’s mood.
5. Add Branding & Graphics the Efficient Way
Create reusable templates to save time. In Premiere Pro, export Motion Graphics Templates (.mogrt). In CapCut, save customized text styles as presets. For captions, use your editor’s auto-captioning feature or tools like FocuSee that generate accurate, branded subtitles instantly.
Best Settings to Export Your Promo Video for Social Media
Incorrect export settings are a primary cause of blurry videos on social media. Each platform has its own compression algorithm, and feeding it a properly encoded file is crucial for maintaining quality.
Mind the Safe Zones: Avoid UI Obstructions
A technically perfect export can still fail if your key message is covered by the platform’s user interface. Captions, logos, and CTAs can get cut off by usernames, like buttons, and progress bars. Always edit with these “safe zones” in mind.
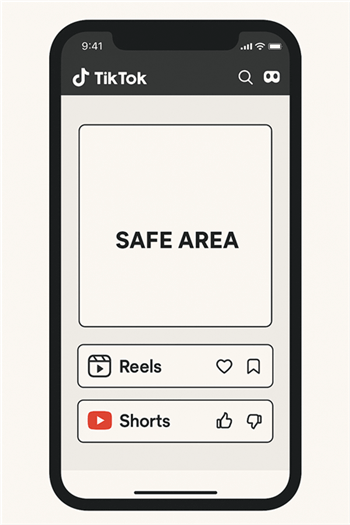
Social Media Safe Zones
Promo Video Export Cheat Sheet
As a best practice, create export presets for the H.264 codec, which is universally compatible. For most social media platforms, exporting at a Constant Bitrate (CBR) between 12 and 16 Mbps for 1080p footage is a reliable starting point.
| Platform | Aspect Ratio | Resolution | Codec | Bitrate (Target) | Notes |
| TikTok | 9:16 | 1080×1920 | H.264 | 12-15 Mbps | Audio: AAC, 192 kbps. |
| Instagram Reels | 9:16 | 1080×1920 | H.264 | 12-16 Mbps | Max file size: 4GB. |
| YouTube Shorts | 9:16 | 1080×1920 | H.264 | 12-16 Mbps | HEVC also supported. |
| LinkedIn Video | 1:1 or 16:9 | 1920×1080 | H.264 | 10-15 Mbps | 9:16 is less common. |
Conclusion
Learning how to edit a promo video that truly performs doesn’t have to be a frustrating, time-consuming process. By following a structured workflow and paying attention to key technical details, you can move past the common hurdles of poor pacing, inconsistent audio, and blurry uploads. The goal is to produce a professional video that connects with your audience and converts.
For creators who want to accelerate their workflow, incorporating smart tools for specific tasks can save hours. Solutions like FocuSee are built to automate the most repetitive parts of editing—like removing silences, generating captions, and creating dynamic zooms—freeing you to focus on the creative story. Download a free trial to see how it can fit into your process.
FAQs on Editing a Promo Video
How do I structure a promo video so it converts?
Structure your video using a four-part story arc: Hook (grab attention in the first 2 seconds), Value Proposition (clearly state the benefit), Proof (show testimonials or results), and Call to Action (tell the viewer exactly what to do next).
What’s the ideal length and pacing for TikTok, Reels, and YouTube promos?
For short-form platforms like TikTok and Reels, aim for 15-30 seconds. Maintain fast pacing with a new visual element or cut every 0.8 to 2.0 seconds. For YouTube, promos can be longer (30-60 seconds) if the content is highly engaging.
How do I fix bad audio and set music/voice levels correctly?
Use noise reduction to clean up background hiss. Normalize your main voiceover to a professional standard of -14 LUFS. Set your background music to be 8-12 dB quieter than the voiceover during speech to ensure clarity.
How can I keep fonts, colors, and logos on-brand efficiently?
Create reusable templates. In Premiere Pro, build and export Motion Graphics Templates (.mogrts). In CapCut, save your customized text styles as presets. This ensures consistency without re-creating graphics for every video.
What are the exact export settings to avoid blurry uploads?
Refer to the detailed export cheat sheet in this guide. For social media, use the H.264 codec, 1080×1920 resolution (for vertical video), and a Constant Bitrate (CBR) between 12-16 Mbps. Critically, design your graphics within the platform’s “safe zones” to avoid being covered by UI elements.
How do I add captions quickly and make them look professional?
Use an auto-captioning feature in your software (like CapCut or FocuSee). After generating, proofread for accuracy and customize the font, size, and color to match your brand’s style guide.