When recording or broadcasting, it is essential to capture and guide your audience’s attention. OBS Studio Zoom in and out can help you do this effectively. It allows you to highlight specific areas, emphasize important details, or give your viewers a closer look without disrupting the flow.
Using zoom in your videos can make them easier to follow and more
engaging, whether you’re teaching, presenting, or sharing knowledge online. This article shows that zooming in OBS takes just a few simple steps, and once you master it, you can do it effortlessly whenever needed.
OBS Studio Zoom In and Out: A Step-by-Step Guide
Zooming in and out when recording using OBS Studio is a great way to keep viewers interested and highlight the key components on the screen. Using a straightforward script, you may activate this functionality from within OBS, removing the need for modification afterwards.
The “Zoom to Mouse” script allows you to zoom in at the location of your cursor and out at any time. Adding hotkeys makes it simple to set up and allows you to zoom in real time while recording or broadcasting. This is a detailed instruction on how to use OBS Studio to zoom in and out.
Step 1: Get the script:
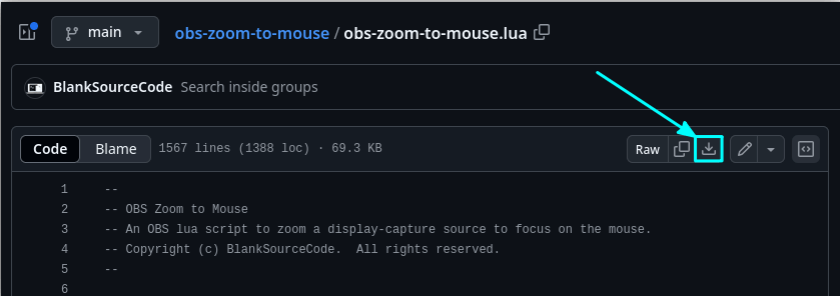
Go to the GitHub page of Zoom to Mouse. Click on obs zoom to mouse.lua.

Click on OBS Zoom to Mouse.lua
The file will be downloaded to your PC.
The File Will be Downloaded
Step 2: Include the OBS script
Open OBS Studio. Click Tools → Scripts from the menu.
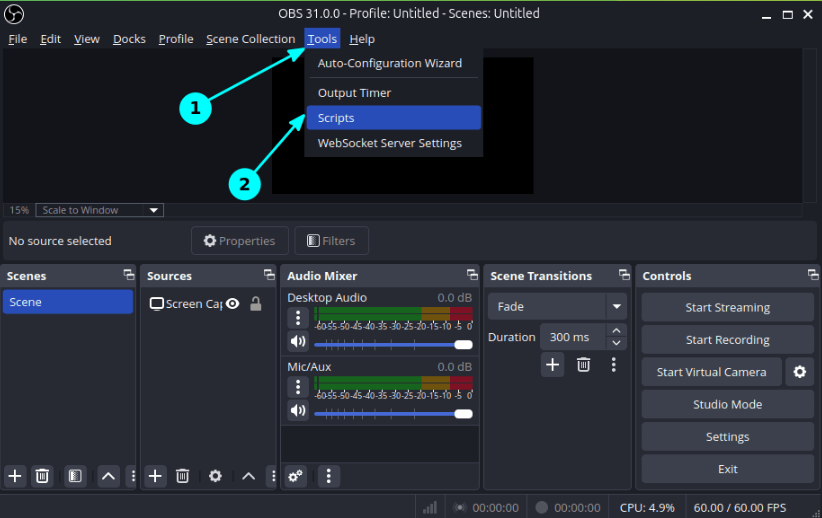
OBS Studio Zoom in Script
Click the + button in the Scripts box.
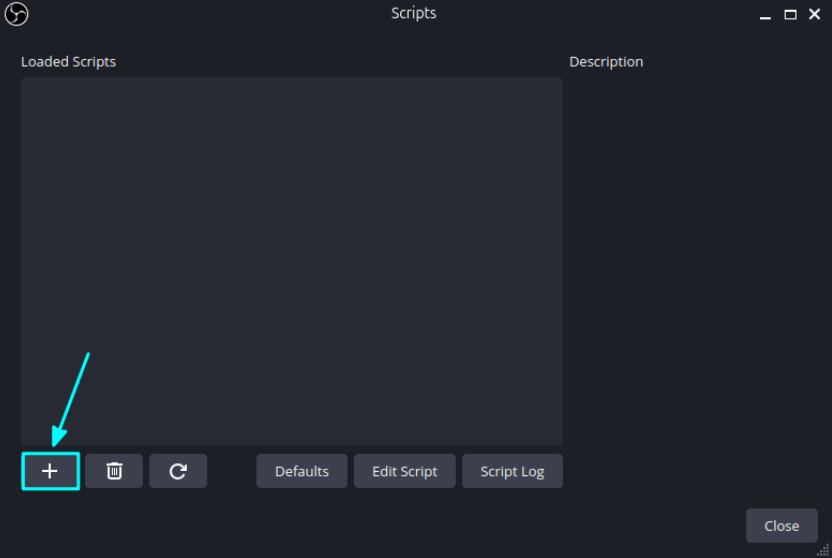
Add Script
Find and select the script file you downloaded.

Zoom to Mouse
Set the Zoom Source (this should be your screen capture source).
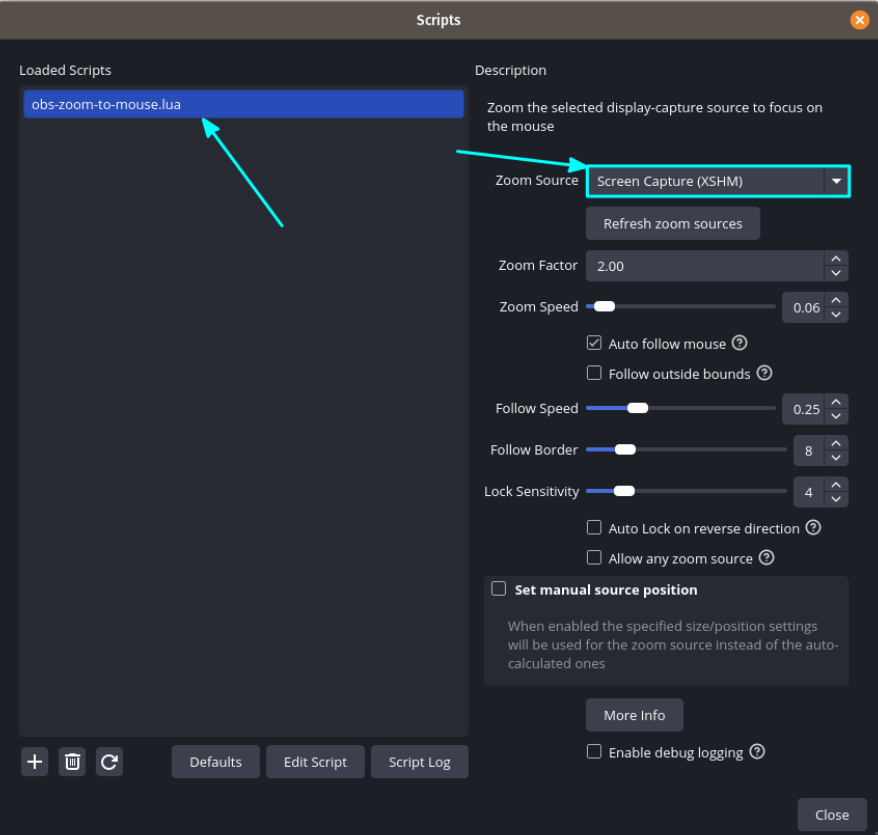
Set the Zoom Source
Step 3: Set Hotkeys for Zooming
Go to File and then go to Settings and look for Hotkeys in OBS.
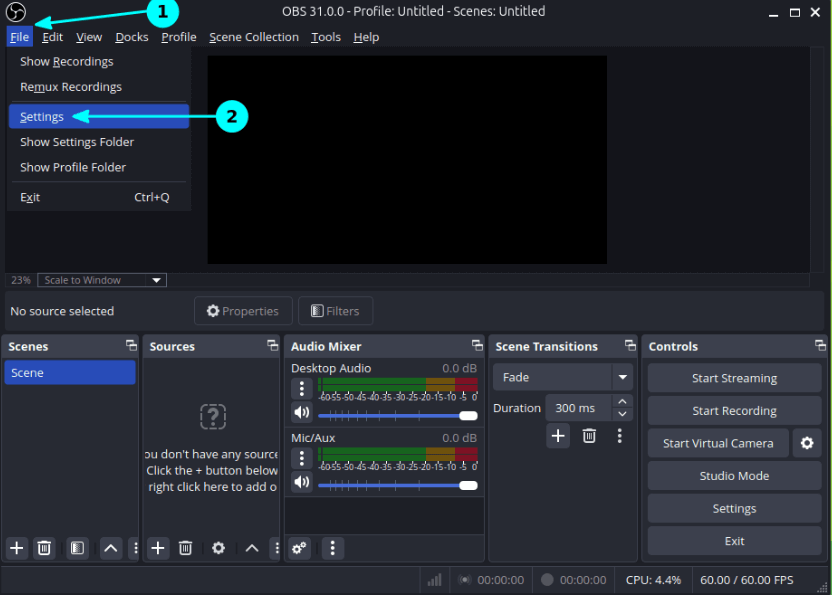
Go to File and Settings
Look for Toggle zoom to mouse and Toggle follow mouse during zoom.
Add shortcut keys for them (pick keys that won’t mess with other shortcuts).
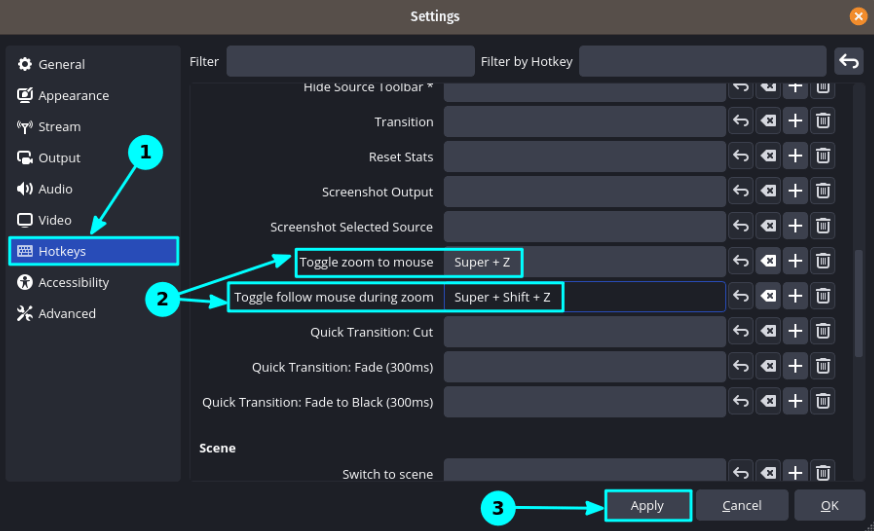
Add Shortcut Keys
To activate the changes, click Apply and restart OBS.
Now, while you record or broadcast, you may effortlessly zoom in and out anytime you push your hotkeys.
Further Reading: Top 16 OBS Studio Alternatives >
How to Zoom In and Out via OBS Studio Alternative FocuSee
When it comes to recording tutorials or presentations, zooming in and out makes a big difference. While OBS Studio requires extra scripts or manual setup, FocuSee makes it much simpler. With its built-in zoom in effect, you don’t need any complex configurations; everything happens automatically or with just a few clicks.
FocuSee is designed to save you time while keeping your videos engaging and professional. Whether you want the software to auto zoom on mouse clicks or add zoom manually to highlight specific details, the process is smooth and beginner-friendly. Here’s how you can use FocuSee to zoom in and out effortlessly.
Features of FocuSee:
- Zoom in and out automatically while recording with little configuration.
- The software follows your cursor and zooms in on clicked areas.
- When necessary, add custom zooms to draw attention to certain elements.
- For optimum effect, change the time, zoom positions, and magnification.
- You can highlight with 2X Spotlight for clarity.
- To direct the viewer’s attention, combine zoom with visual cursor effects.
- You may save your zoom settings and use them immediately in other movies.
Steps to Use Zoom In and Out with FocuSee
Step 1: Install and Open FocuSee
Download and install FocuSee on Windows or Mac. Launch the app, then prepare to record.
Step 2: Get the recording going
You have the choice of capturing the entire screen or only specific parts of it. Press Record to begin.
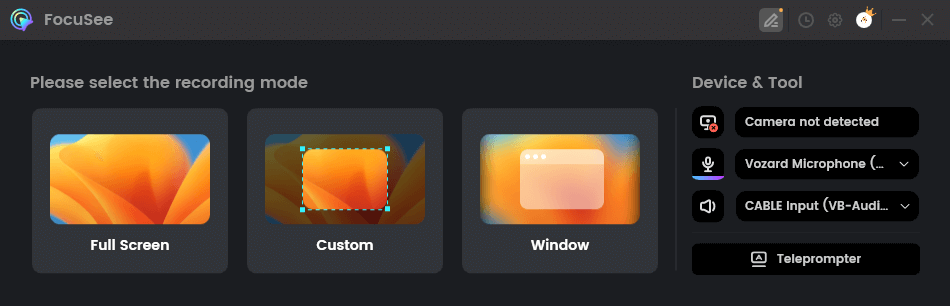
Choose the Recording Mode
Step 3: Give Auto Zoom controls
When you click with your mouse while recording, FocuSee will automatically zoom in. You can edit these zoom effects to the editing timeline.
Add Auto Zoom Effect on FocuSee
Step 4: Manually Add Zoom (Optional)
Open the Zoom Track in the editor after recording. Choose where you’d like to zoom in and add the effect yourself. When you want to direct attention without clicking, this is ideal.
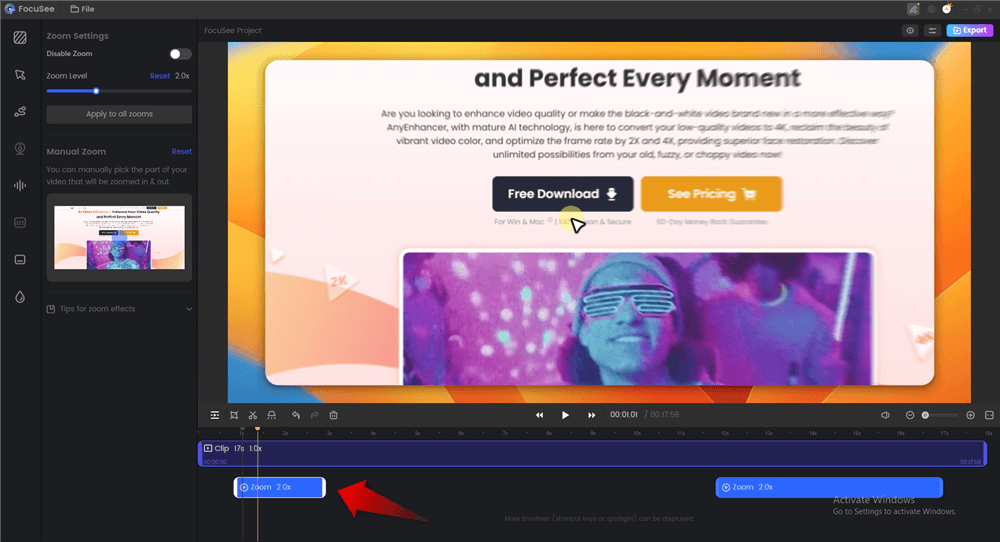
Step 5: Modify the Zoom Settings
To adjust a zoom effect, click on it. The zoom level may be changed from 1.0x to 4.0x, turned off, or set to the same values for all of the zooms in your film.
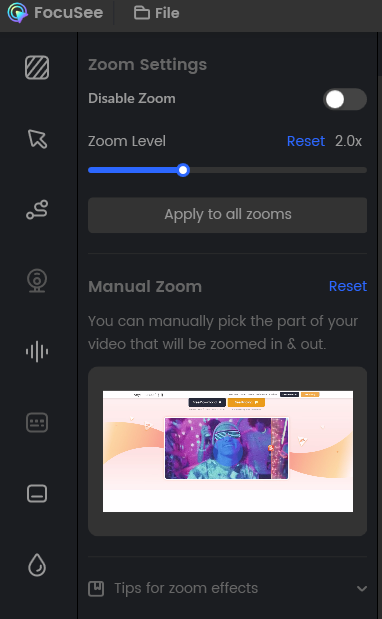
Change the Zoom Settings
Step 6: Take Your Video and Export It
Export your video after everything appears to be in order. You may share it directly with people or save it to your PC.
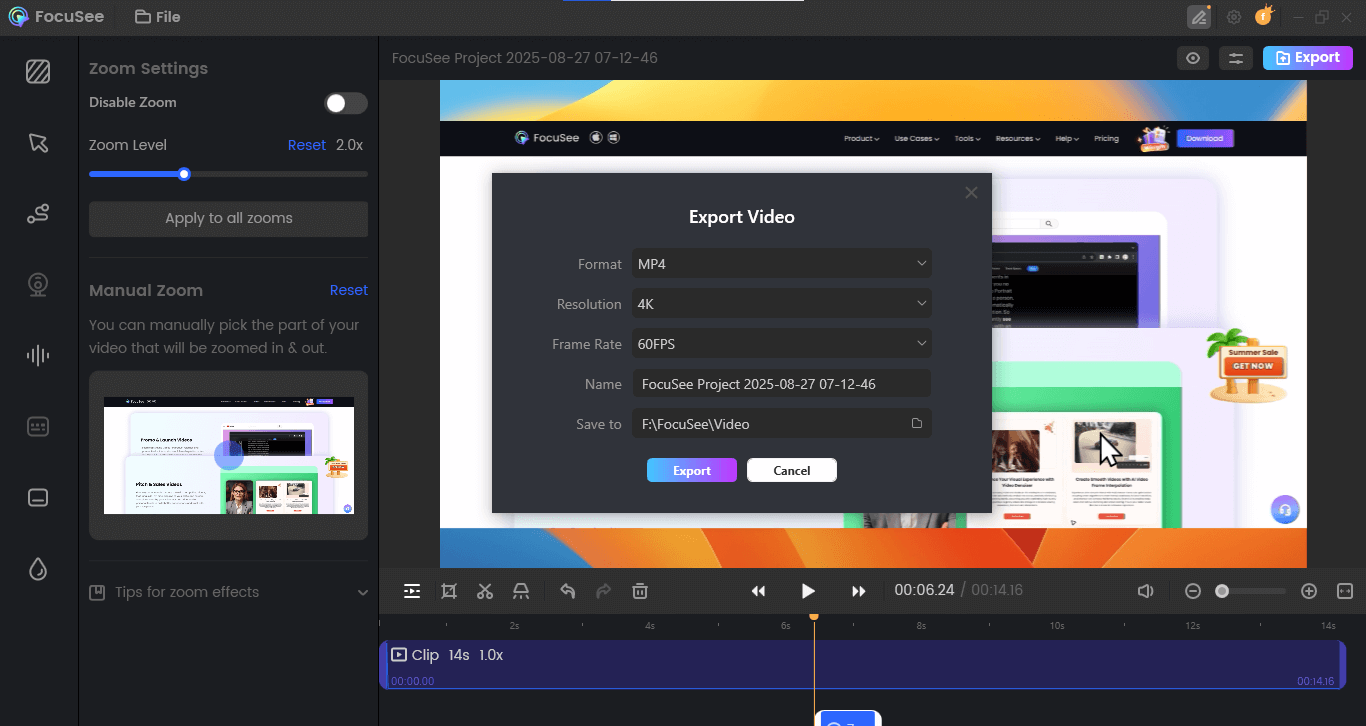
Export Your Zoom In Video
Why Zooming In and Out Matters in OBS
In OBS, zooming in and out gives you greater control over your recordings and presentations. You can direct viewers’ attention to a specific button, setting, or training step that needs focus, keeping your audience engaged by showing only what’s important at the right moment. This makes your videos more professional and polished.
However, OBS is a powerful but resource-heavy software. Smooth zooming requires a good-spec device with strong CPU and GPU performance, and setting it up can be complex. Without a capable system, recordings may lag or stutter, affecting quality.
FAQs on OBS Studio Zoom In and Out
How can I zoom in on an OBS recording?
Hotkeys in OBS allow you to swiftly zoom in and out when recording, which makes it simple to concentrate on important information.
How can I zoom in and out of OBS Studio the simplest?
Resizing your source in the preview window is the easiest method. You may also use a script or application to get a smoother zoom effect.
How do I add live chat to OBS?
Just add a “Browser Source” in OBS and paste your Twitch or YouTube chat link. This way, your chat will show up directly on your stream or recording.
Final Words
OBS Studio zooming in and out is a practical way to give your recordings more interest and focus. It enables you to draw attention to specifics, direct users’ focus, and simplify your information.
FocuSee is an even more straightforward choice. Zoom effects are handled automatically, and you have the freedom to change them as you see fit. In this manner, you may spend more time producing videos that appear professional and less time setting things up.
