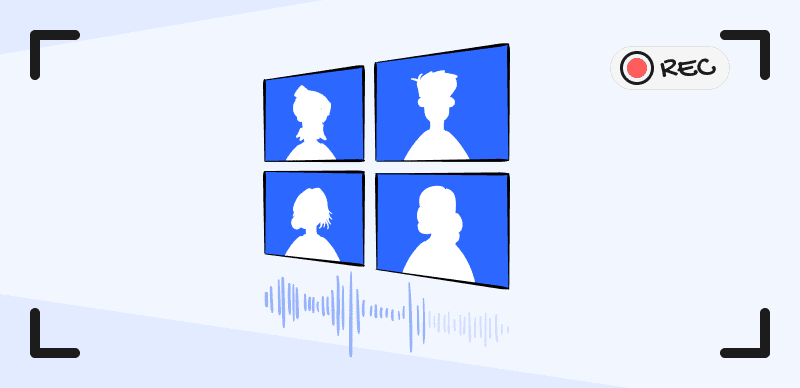
How to Record Screen on Windows 10 with Audio

Recording screen on Windows with audio is necessary when you seek to make a video tutorial or record an important online meeting. As simple as recording full of part of your Windows screen, you can screen record on Windows 1o with audio if you have the right software. Except for turning to a built-in recording tool, there are several available screen recorders for Windows to help you record in terms of your needs. Since there are multiple options at your disposal, it’s worth investing some time to learn how they operate and conclude which one would be well-suited for the job you have in mind.
Record Screen on Windows 10 with Audio
Also read: How to Record Screen on Windows 10 with Audio? >
Table of Contents:
How to Screen Record on Windows 10 with Audio via FocuSee
Screen Record on Windows 10 with Audio via Game Bar
Screen Record on Windows 10 with Audio via Microsoft Stream
How to Screen Record on Windows 10 with Audio via FocuSee
With its auto-zoom effects and mouse highlight function, FocuSee simplifies the recording process, making it more efficient and concise. It provides you with the freedom to record the entire screen, a custom section, or a specific window. When it comes to recording tutorial videos, product demos, promo videos, and more, FocuSee ensures a seamless experience. It also provides effortless recording of selfies and voiceovers, catering to your specific needs.
Key Features:
- Dynamic Zoom: Automatically zooms in on cursor movement for enhanced video focus.
- Customization: Offers various cursor styles, layouts, camera frames, and filters for personalized video appearance.
- Real-Time Transcription: Get live auto-captions during recording for better accessibility and engagement.
- Flexible Selfie Layouts: Switch between preset layouts or freely adjust camera size and position anytime while recording.
- Smart Privacy Blur: Automatically blur sensitive content (faces, text, or objects) to safeguard privacy and ensure compliance.
- Multiple Export Options: FocuSee offers preset sizes for social media platforms and allows the export of videos up to 4K resolution or high-quality GIFs.
Step 1. Free download and launch FocuSee on the computer and enter your account and password to log in to FocuSee.
Step 2. FocuSee supports 3 recording modes: record the full screen, custom the recording area, or record the window. You can choose the one you want to record.
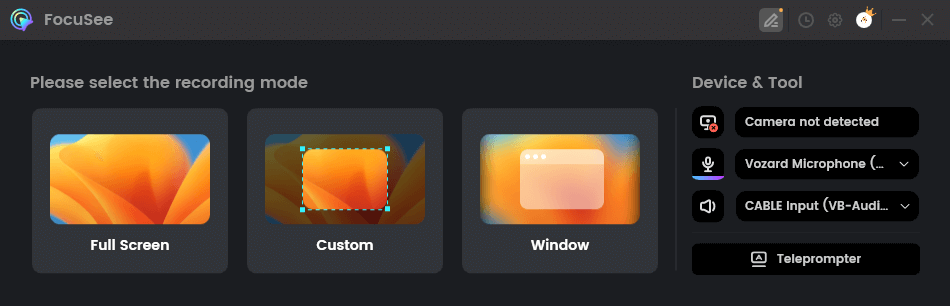
Choose the Recording Mode
Step 3. After choosing the recording mode, please just focus on your screen recordings. Let FocuSee handle the post-production automatically. You can get a visually appealing video as soon as you finish recording. After recording, you can change the background, adjust the cursor style, add captions and more.
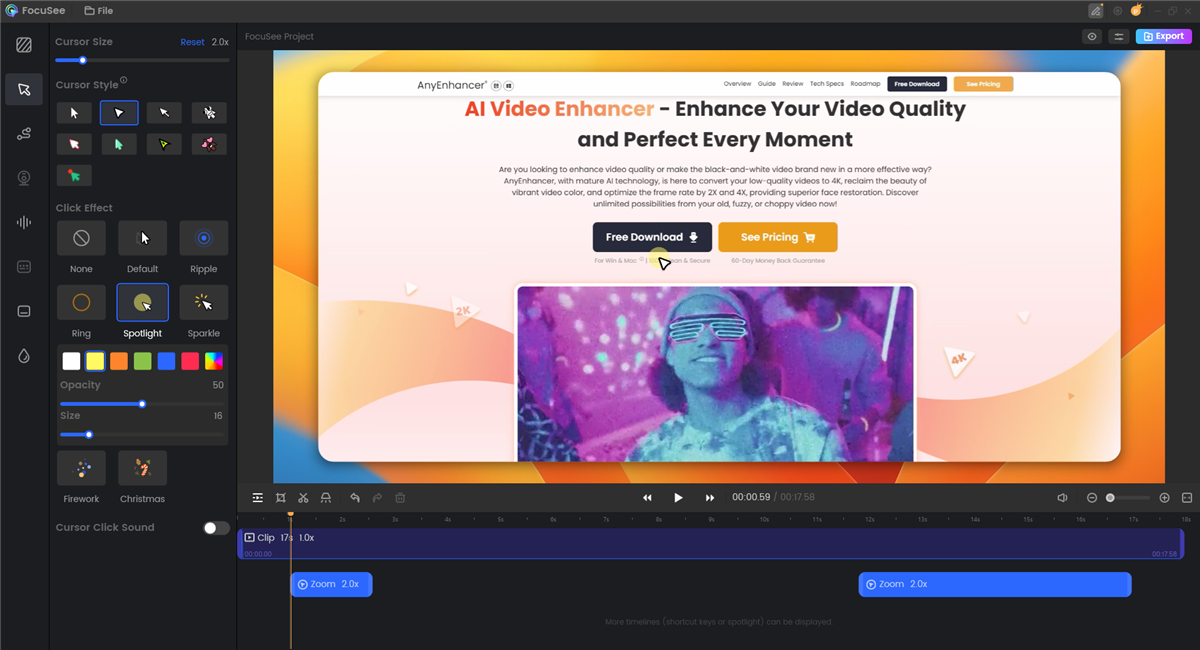
Edit Your Video with Automation
Step 4. Then, export your recordings as an MP4 or GIF file or share it with just a link easily.
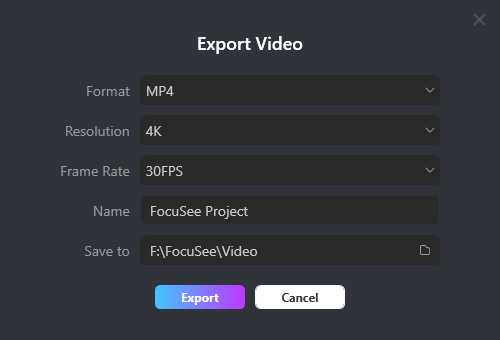
Export Your Video
How to Screen Record on Windows 10 with Audio – Record via Game Bar
Another fast and least demanding method for screen recording with audio is to use a tool that you can already find on your computer after you install Windows 10. This built-in tool is called the Game Bar, but in addition to gaming action, it can also capture the screen visuals from many other apps. Activating this feature and recording the screen while you play or complete other tasks is very simple and intuitive, so it won’t take you too long to start using it without thinking. With this in mind, Game Bar can be the best answer to the question of how to record screen on Windows 10 with audio, but only if you intend to record within a particular app rather than the entire desktop.
The steps you need to take to capture both the visuals and the sounds include the following:

Record Screen and Audio via Game Bar
Step 1. Run the game or application from which you would like to capture content
Step 2. Once the program is running, press the combination of the Windows key and letter G to start the Game Bar
Step 3. Check the box next to “Yes, this is a game” message when prompted
Step 4. Set up the sound source by clicking on the Audio tab and selecting the appropriate option
Step 5. Press Win + Alt + R or click on the Record icon in the menu bar to start capturing the action
Record via Microsoft Stream
There is another convenient method that allows you to create videos with sound using a native tool created by Microsoft. Microsoft Stream is a popular video-sharing service that can also serve as a screen recorder. The main limitation of this approach is that videos created with this tool may not exceed 15 minutes in length, and you also need to have the latest version of Chrome installed on your PV. If those conditions are met, Screen record function of the Microsoft Stream can be a fantastic way to capture everything you are doing on your computer.
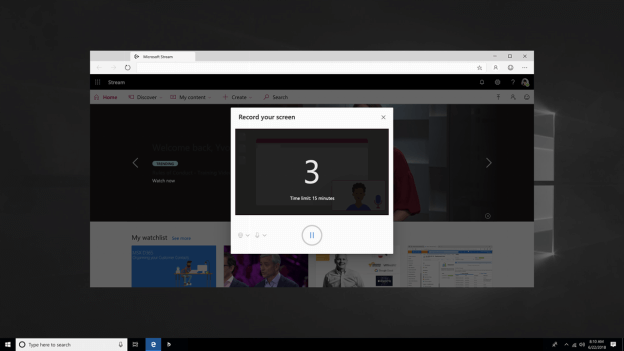
Screen Record on Surface Pro via Microsoft Stream
Step 1. Run Microsoft Stream, open the Create menu, and select Record screen
Step 2. Provide permissions to your Chrome browser to access your camera and microphone, or block them if they are not needed for your video
Step 3. Click Record and decide whether you want to record the entire screen, a selected portion of it, or just an individual app
Step 4. The timer will count down to zero and your recording will start
Step 5. Navigate to the screen you want to capture and perform all the required actions. You can come back to Microsoft Stream window if you want to pause or finish the recording.
Why Is There No Sound When I Screen Record on Windows?
As you can see, recording your Windows 10 screen with either internal audio or external audio can be easy if you choose the right recording toolkit. Nevertheless, sometimes you may also find there is no sound when you screen record on Windows. Let’s take a quick look at the possible reasons and fixes.
- Device drivers are out of time: Update your computer driver and try to record screen with audio again.
- Microphone issues: Check if your microphone are connected properly.
- Disabled Audio Recording in Settings: Give audio and voice recordings permissions on your computer.
- Computer stuck issues: Restart your computer and try to initiate a recording again.
- Encounter audio recording issues: Run Windows audio troubleshooter and fix the problem if needs.
FAQs About Screen Recording on Windows 10 with Audio
In this part, we collect several frequently asked questions about screen recording on Windows 10 with audio, its max recording length is up to 2 hours. This might not be satisfactory when you attempt to record an important online conference or record your favorite podcast. Therefore, if you want to screen record with audio without a time limit, you can turn to FocuSee as suggested.
How long can you screen record on Windows 10?
If you choose to use the built-in too – Game Bar to screen record on Windows 10,
Does Windows 10 screen recorder capture audio?
Yes, when you run the screen recording feature in Microsoft Stream, you can also select whether to use the microphone and record ambient sound and your own voice.
Can Windows 10 Game Bar record internal audio?
Since Game Bar was created primarily to capture gaming moments, it is possible to include system sound in your video provided you enabled this option in Settings.
Final Words
There is no shortage of screen recording tools that are compatible with Windows 10, you don’t have any justification for using suboptimal software. You can take advantage of native tools such as Stream or Game Bar, or use a third-party suite like Gemoo Recorder. Either way, when you become well-versed in how to screen record on Windows 10 with audio or record screen and webcam. Your range of creative possibilities will be greatly expanded.