How to Record Screen and Webcam at the Same Time

Recording your screen and webcam simultaneously is necessary when you seek to demonstrate your instructional tutorials, demos, or video content for your business or personal use. By capturing both your screen and your face, you can provide a more engaging and informative experience for your viewers and audience. Webcam and screen recording can be done in the same session relatively easily. However, if you’re unaware of how to do it on Windows and Mac, this article offers 6 easy methods to record screens and webcams on Windows and Mac simultaneously. Let’s explore together!

Record Screen and Webcam Simultaneously
Can I Record Video with Webcam?
Yes, it is possible to record videos with a webcam. Nowadays, many users might need to record themselves with their webcam to create video content such as vlogs, tutorial videos, or live streaming. If you don’t know how to record video with webcam, there are some third-party software programs and online webcam recorders that can help you: FocuSee, Gemoo Recorder, OBS, Game Bar, or QuickTime Player. You can take a quick look at these solutions.
| Solutions | Operating Systems | Quick Steps |
| FocuSee | Windows/Mac | Open FocuSee > Start to Record > auto zoom effect > Edit the Recording |
| Gemoo Recorder | Windows/Mac | Open Gemoo Recorder > Tap Screen + Camera > Start to record |
| OBS Studio | Windows | Open OBS Studio > Select Display Capture > Choose the Webcam |
| Game Bar | Windows | Enable Xbox Game Bar > Press Win + G |
| QuickTime Player | Mac | Open Quick Time Player > Click New Screen Recording |
| Photo Booth | Mac | Run Photo Boot > Click Video recording > Click Camera icon |
If the above steps are too simple for you, don’t worry, we will provide more detailed guidance in the following sections.
How to Record Screen and Webcam via FocuSee
As a powerful screen recorder, FocuSee allows you to effortlessly record screen and webcam footage on either Windows or Mac computers. With FocuSee, you have the flexibility to select the webcam and screen layout that best suits your purpose. After recording, you can further customize the output by changing the background, adjusting the cursor style, adding captions, editing zoom effects, and applying other enhancements to create a refined, professional video. With its user-friendly interface and cross-platform compatibility, FocuSee offers a seamless experience for users seeking to capture dynamic content from their computers while maintaining full control over their desired layout.
Main Features of FocuSee:
- Supports recording screen and webcam on both Windows & Mac.
- Allows changing webcam layout, borders, and filters when recording the screen.
- Automatically follows the cursor movement and applies dynamic zoom-in effects to enhance the video. Highlight key actions to keep viewers focused and reduce editing time.
- Auto-hide cursor with adjustable styles and click animations for clearer navigation.
- Use a virtual character instead of appearing on camera for a consistent, professional look.
- Remove noise and unwanted sounds automatically for clear, high-quality audio.
- Automatically captures and shows keyboard shortcuts used during recording. Enhances the learning experience for viewers, particularly in software training videos.
Here is guidance on how to record video with webcam via FocuSee:
Step 1. Free install FocuSee and open it on your computer. Under the Device Setup, allow the webcam recording. Select a recording mode and hit the REC button to get started.
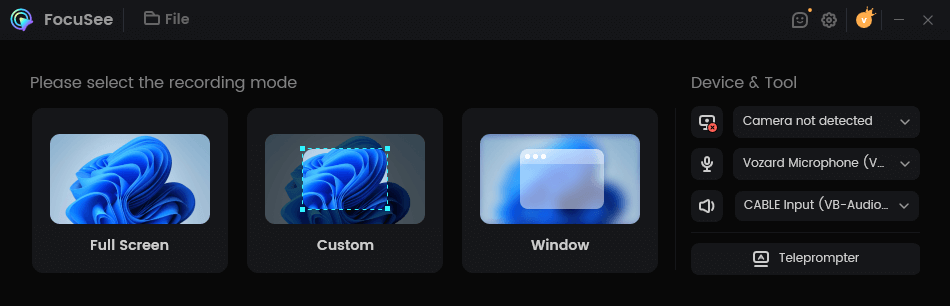
Choose a Recording Mode
Step 2. Record the screen and webcam at the same time and click the red Stop icon when finished recording.
Step 3. Go to the video editing interface and adjust the webcam’s layout, size, filter, roundness, and other parameters.
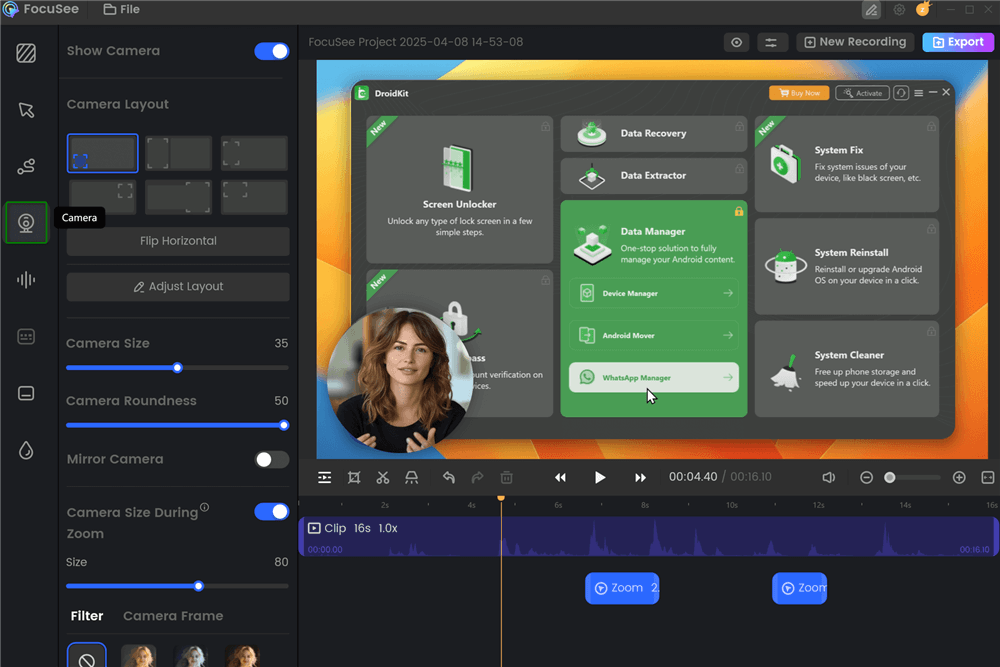
Change Camera Layout
How to Record Video with Webcam via OBS Studio
Another choice is OBS Studio (Open Broadcasting Software Studio), an open-source program for recording and making live-streaming videos. It is commonly used to record and stream video content from a computer, including the ability to record both the screen and webcam simultaneously. OBS Studio is a popular choice for those looking to create tutorial videos, demos, or live streams, as it provides a wide range of features and customization options.
Here is how to record a video playing on your computer via OBS Studio:
Step 1. Download and install OBS Studio on your PC and launch the tool.
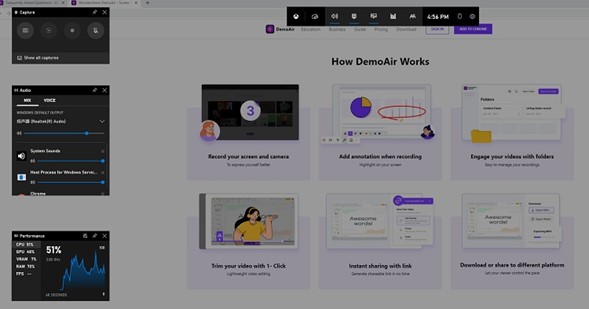
Step 2. Simply click the + icon under Sources at the bottom. Select Display Capture and then OK on the following window.
Step 3. Select the appropriate display, decide whether you want the cursor to appear, and then click OK again.
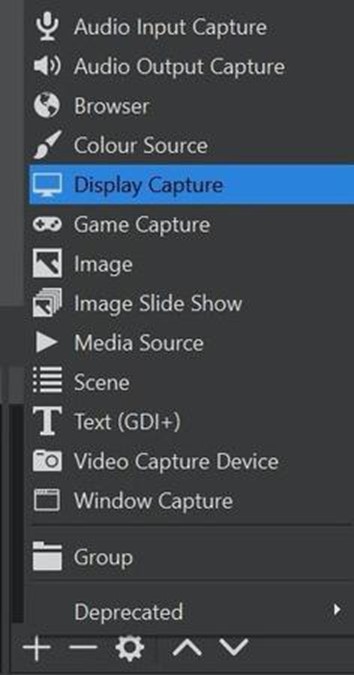
Click on Display Capture
Step 4. Now, you should look at a preview of the screen you’re recording. Select Video Capture Device using the + icon. Then, choose the webcam you want to use and confirm with OK.
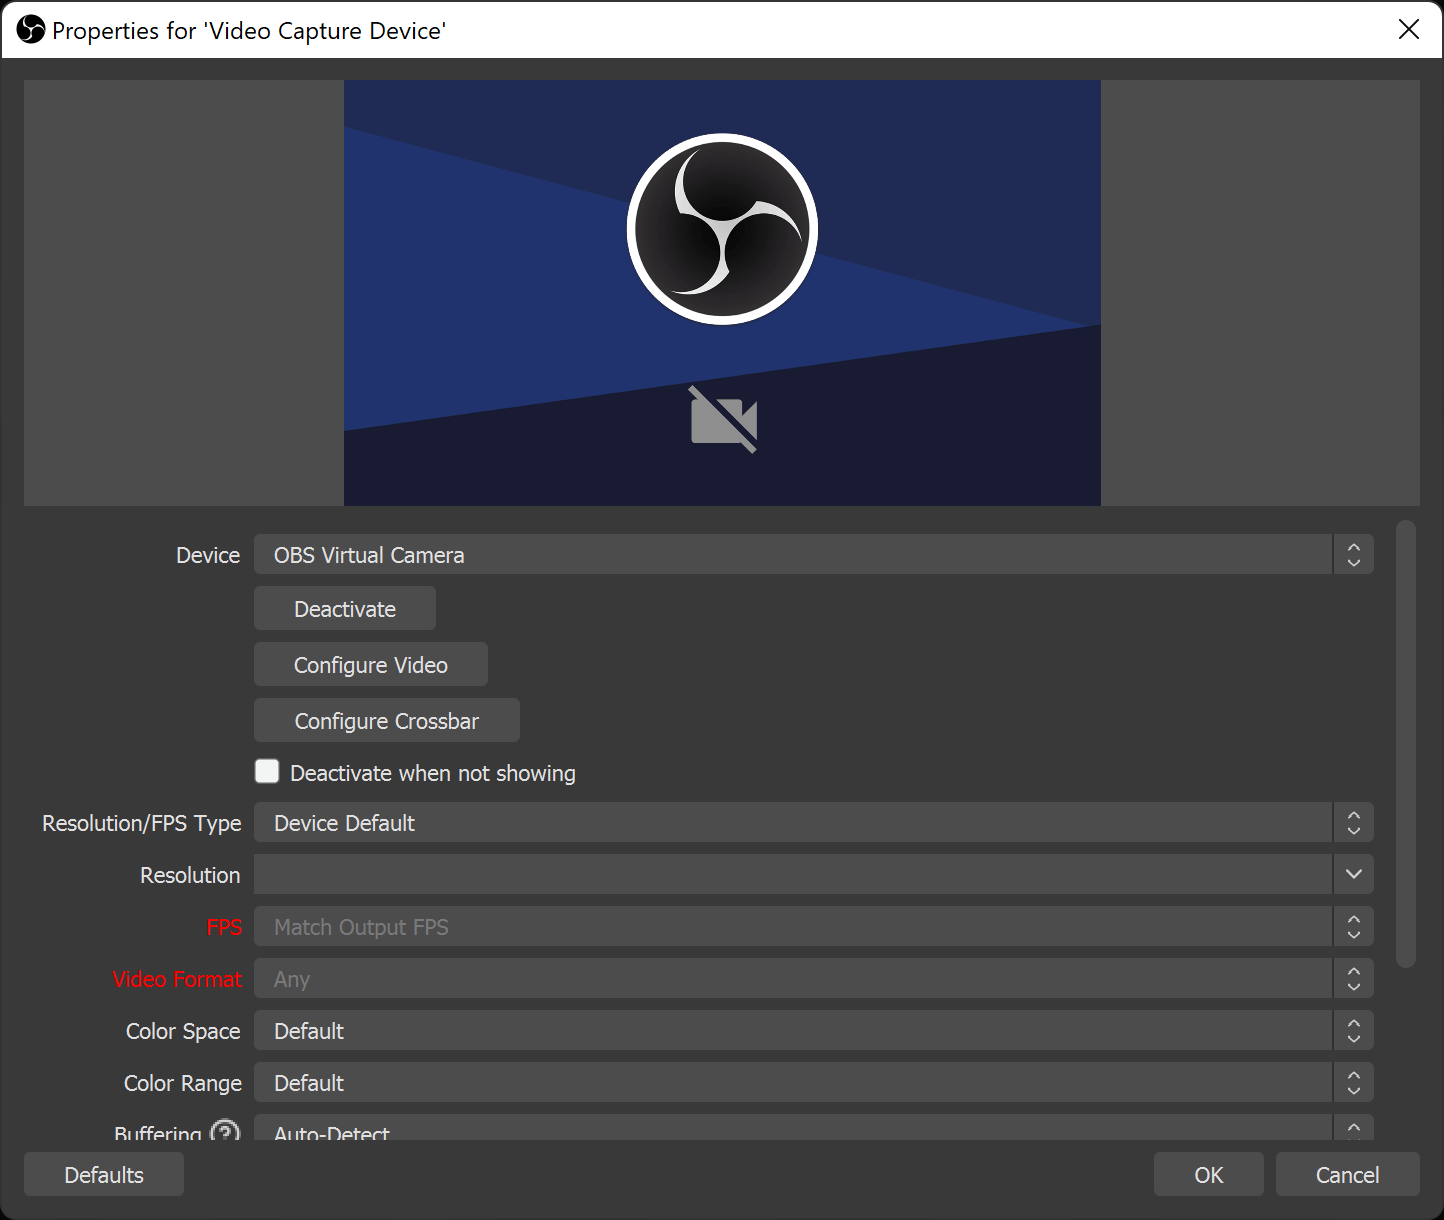
Select Video Capture Device
Step 5. Your camera will now appear on top of the area you’re capturing. Drag the corners with your mouse to make your webcam bigger or smaller. Once done, click on Start Recording.
Record Screen and Webcam via Gemoo Recorder
As a screen recorder with webcam, Gemoo Recorder can make it possible when you need to record screens and webcams at the same time. You can use Gemoo Recorder to easily capture your face and show your face while recording the screen. You can zoom in and zoom out the webcam as you wish by using Gemoo Recorder to record your screen. Besides, you can add annotations during the recordings, in a bid to make your recordings more attractive and instructive.
Here are steps to record screen on PC via Gemoo Recorder:
Step 1. Open Gemoo Recorder and choose the Screen+Camera mode. Click on the Start Recording option when you are prepared.
Step 2. After a 3-second countdown, the recording will begin.
Step 3. During the recordings, you can add annotations via the left toolbar. You can add symbols, texts, numbers, stylus, and other marks to highlight your ideas when you demonstrate your products, video courses, and others.
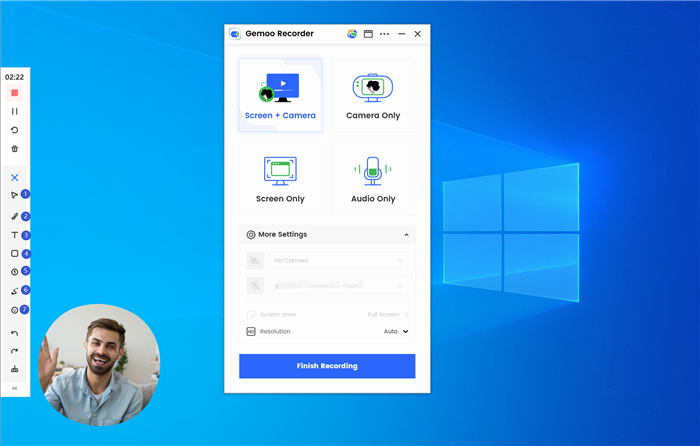
Record Screen and Camera at the Same Time
Step 4. When you finish recording, you can tap on the Finish Recording button.
Screen Record and Webcam on Windows 10
Xbox Game Bar is a built-in application on Windows 10 that allows you to record, broadcast, and take screenshots of your gameplay while playing on your PC. It also allows you to use a webcam to record yourself while playing. Xbox Game Bar can be used to record and stream video games, and it also can record both the screen and webcam simultaneously. This makes it a good option for those who want to create video content, such as tutorial videos or Let’s Play videos while playing on their PC.
To use Xbox Game Bar for recording screen and webcam, follow the steps below:
Step 1. Press Windows + G to access Xbox Game Bar. If you visit the game bar for the first time, a new window will open asking whether you want to open it; choose “Yes, this is a game,” even if it isn’t.
Step 2. Hit the red record button on the Xbox Game Bar to start recording. The recording will start. However, the current app window will be recorded, not the whole screen.
Record Screen and Webcam via Xbox Game Bar
Step 3. To stop the recording, press Windows + G shortcut again to bring up the game bar and then click on the Stop button.
Record Screen and Webcam via QuickTime Player
QuickTime Player is a free media player with the macOS operating system. It can play, record, edit, and share video and audio files. QuickTime Player can be used to record screen and webcam at the same time Mac. It allows you to record your computer’s audio and video, and it can also record from an external microphone or camera.
To understand the right way to record both screen and webcam using QuickTime Player, follow the steps below:
Step 1. Open QuickTime Player. Go to File and click on New Movie Recording from the dropdown menu.
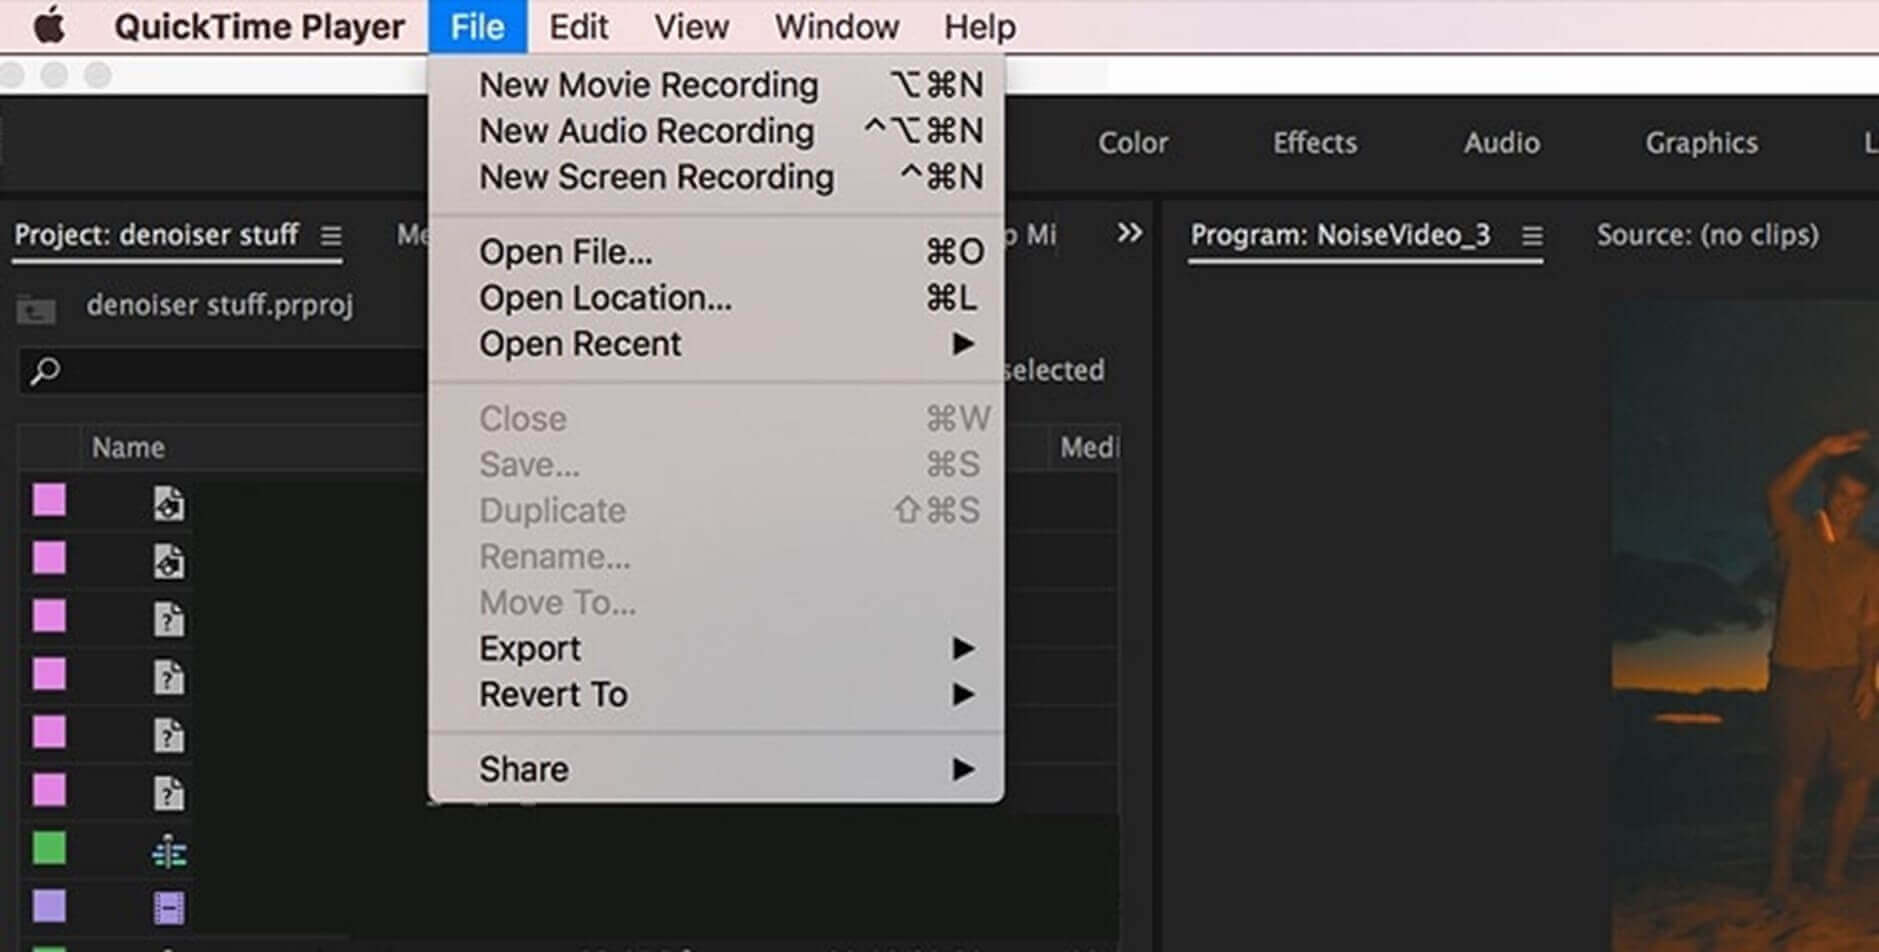
Click on New Movie Recording
Step 2. Then click on View and select Float on Top from the menu to open the camera window.
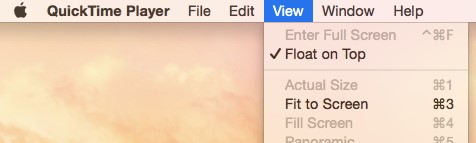
Click on Float on Top
Step 3. The camera window can now be resized according to the needs. After resizing, select File and click on New Screen Recording in QuickTime Player.

Click on New Screen Recording
Step 4. After that, click on Record button to start recording. Once done, you can click the Stop button to stop recording your screen with a webcam.
Record Screen and Webcam on Mac via Photo Booth
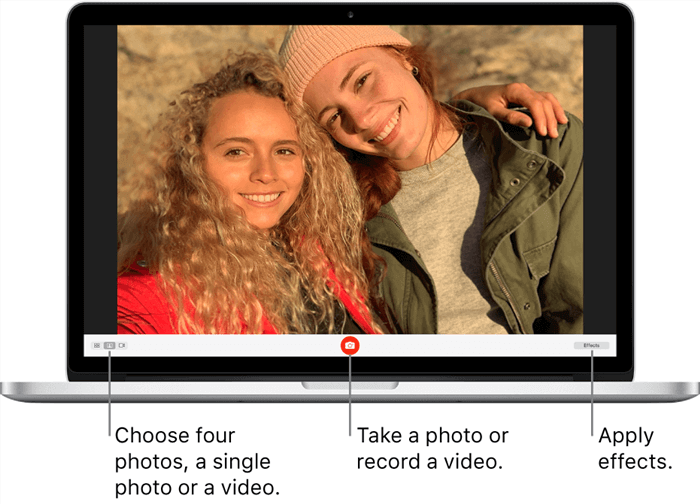
Photo Booth for Mac is a built-in application on macOS that allows you to take photos and videos with the built-in camera on your Mac. It also allows you to use external cameras and webcams to take pictures and videos. Photo Booth can be used to record video with your webcam; you can also record yourself while playing games or recording a tutorial.
For recording screen and webcam via Photo Booth, follow the steps below:
Record Screen and Webcam via Photo Booth
Step 1. Find and launch Photo Booth on your Mac.
Step 2. In the left corner, you’ll see three options. Click on the third option, which is Video recording.
Step 3. Now, click on the Camera icon in the center to start recording. Once done, click the Camera icon again to stop the recording.
FAQ about Screen Record and Webcam
How do I position my webcam video during recording?
In FocuSee or similar software, you can drag and resize your webcam overlay before or during recording—placing it anywhere on the screen (e.g., bottom-right corner).
Will the webcam recording affect screen performance?
If you’re using optimized tools like FocuSee, performance impact is minimal since it’s designed for simultaneous multi-source recording.
Can I edit the webcam clip after recording?
Yes. Tools like FocuSee allow you to trim, move, resize, or even hide the webcam overlay during editing, giving full flexibility to refine your presentation.
Final Thought
In conclusion, this article mentioned 6 useful tools to record your screen and webcam at the same time. Both built-in tools and third-party software are included. Considering the ease of use and specialty, FocuSee is worth trying. This reliable tool allows you to adjust the recording layout and trim the recorded files as you like. Free download FocuSee now!