How to Create a Video Presentation: A Beginner’s Guide

Learning how to create a video presentation can be a stressful task, especially on a tight deadline. You have your slides ready, but turning them into a polished video with clear audio feels like a technical hurdle you weren’t prepared for. If you’re facing an assignment and wondering how to make a video presentation for class or work, you need a reliable workflow and the right video presentation maker, not just a list of software.
This guide provides that clear process, walking you through everything from scripting and recording to exporting a professional-quality video you can submit with confidence. We’ll show you exactly how to record yourself presenting a PowerPoint and other slide decks.
Your 5-Step Workflow for a Professional Video Presentation
A successful video presentation comes from a structured process, not improvisation. Following a consistent workflow reduces the risk of technical issues and produces a much higher quality result. We’ve broken the entire process down into five clear stages from start to finish.
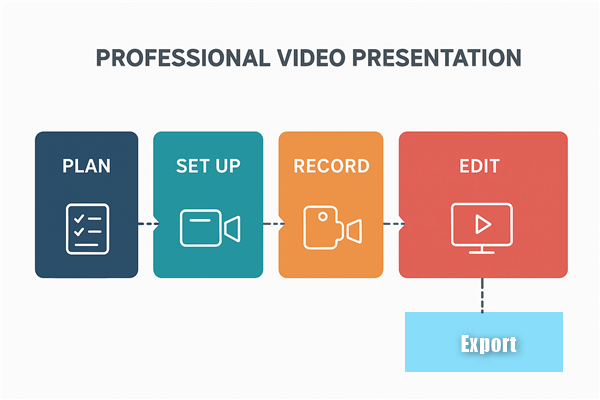
5-Step Workflow for a Professional Video Presentation
- Plan & Script: Outline your key points for each slide. A clear script keeps you focused, confident, and on time.
- Set Up Your Space: Find a quiet room, arrange simple lighting (face a window), and position your microphone for clear audio. A few minutes of setup prevents hours of editing later.
- Record Your Slides & Voice: Record your voiceover slide-by-slide rather than in one continuous take. If you mess up slide four, just re-record that segment—not the entire presentation. This reduces pressure and improves quality.
- Edit & Refine: Trim awkward pauses, check audio levels, and add any required elements like a title slide. Keep it simple.
- Export & Share: Export as MP4 and upload to your platform (YouTube, Canvas, etc.).
Choosing Your Tool: Built-in vs. Dedicated Software
Before you record, you need to select the right tool. Your choice depends on your deadline, your technical comfort level, and the quality you need to achieve. The main factors are usually time cost and the ability to produce a professional-looking video without a steep learning curve. We’ve compared three common methods based on the criteria that matter most.
| Method | Success Rate (Pro Outcome) | Time Cost | Skill Required | AV Quality |
| PowerPoint / Keynote Recorder | Good | Medium | Low | Good |
| Google Slides + Free Recorder | Fair to Good | High | Medium | Fair to Good |
| Dedicated App (e.g., FocuSee) | Excellent | Low | Low | Excellent |
We tested each method on a Dell XPS 15 (Windows 11) and MacBook Air M2 (macOS Sonoma), measuring setup-to-export time, evaluating audio/video quality, and documenting the exact steps a first-time user would need to follow.
How to Create a Video Presentation for Free (Using What You Have)
If you prefer to use software that is already installed on your computer, you can create a high-quality video presentation with a few simple steps. The following instructions provide distinct procedures for the most common presentation tools.
How to Create a Video Presentation with PowerPoint
PowerPoint has a powerful, built-in recording studio that works on both Windows and macOS. It is one of the best ways to record a slideshow with audio on a per-slide basis, which takes the pressure off getting everything perfect in one take.
Step 1. Open your presentation and navigate to the Record tab in the top ribbon.

How to Create A Video Presentation with PowerPoint
Step 2. Click From Beginning to enter the recording interface.
Step 3. Select your microphone and camera sources from the options at the bottom right.
Step 4. Click the red Record button at the top left and begin speaking. Advance slides using the arrow keys.
Step 5. When finished, click Stop. If you made a mistake on one slide, you can click Clear and choose “Clear Recording on Current Slide” to re-record just that part.
Step 6. Click Export in the top right corner, name your file, and choose MP4 as the format to save your video. This is the simplest method to turn a PowerPoint into a video.
How to Make a Video Presentation on Mac with Keynote
Keynote on macOS offers a straightforward way to turn your slide deck into a movie file with a recorded voiceover.
Step 1. Open your Keynote presentation and go to File > Record Slideshow.
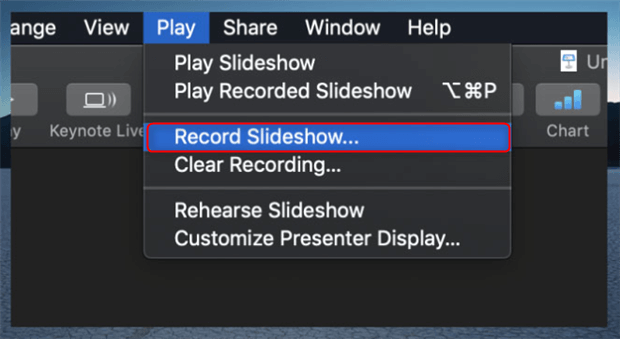
Record Slideshow
Step 2. The recording window will appear. Click the red record button at the bottom to begin your narration.
Step 3. Advance through your slides as you speak.
Step 4. When you are done, click the record button again to stop.
Step 5. To save the file, go to File > Export To > Movie. In the dialog box, select Slideshow Recording for Playback and choose your desired resolution (e.g., 1080p). Click Next to save the MP4 video.
How to Make a Video Presentation from Google Slides
Google Slides does not have a native video export feature, so you must use a screen recording tool. Both Windows and macOS have free, built-in screen recorders that get the job done.
- On Windows: Press Windows key + G to open the Xbox Game Bar. Click the Capture button (the camera icon) and then the Start Recording button. You may need to grant permission the first time.
- On macOS: Press Shift + Command + 5 to open the Screenshot and recording toolbar. Select the option to record the entire screen or a selected portion.
- With the recorder running, open your Google Slides presentation in Present mode and narrate your slides.
- When finished, stop the recorder. Your video file will be saved to your computer. On Windows, this is usually in the Videos > Captures folder. On macOS, it’s typically your Desktop.
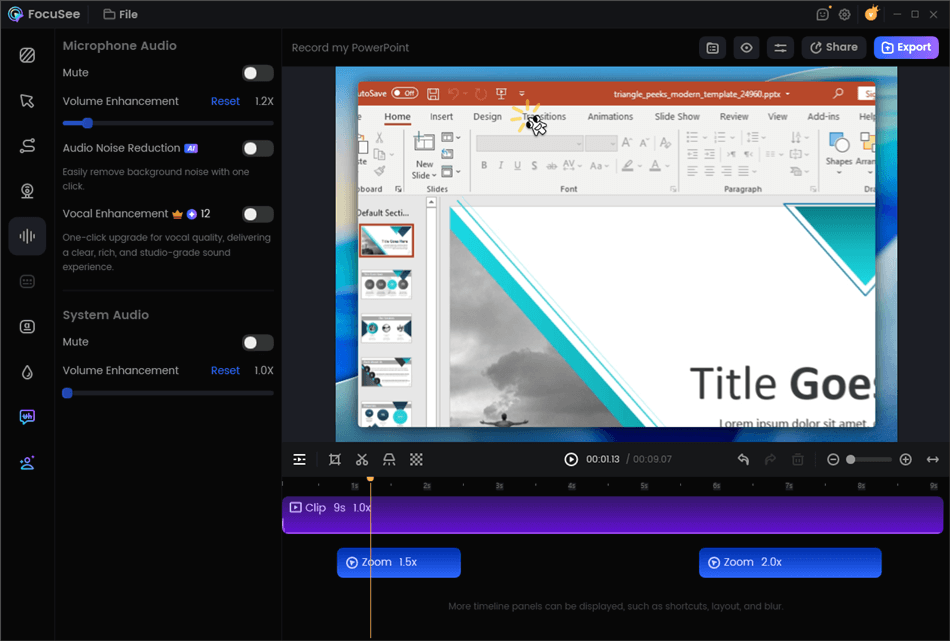
The Fastest Method: A Dedicated App like FocuSee
The free methods work well, but they can be time-consuming, especially when it comes to editing. If you are on a tight deadline or need a more polished result, a dedicated application like FocuSee is the most effective solution.
FocuSee is a premium screen recording tool with editor that automates the tedious tasks that take up the most time. It directly solves the most common obstacles in creating a video presentation.
- To fix poor audio quality: FocuSee’s AI noise removal cleans up your audio, reducing background noise for a clearer voiceover.
- To avoid an unprofessional look: The Auto Zoom feature automatically follows your cursor and zooms in on key areas of your slides, directing your audience’s attention and creating a dynamic, polished feel. This prevents the static, flat look of a basic screen recording.
- To reduce recording anxiety: The built-in teleprompter allows you to read your presentation script directly on screen, helping you maintain eye contact with the camera and deliver a smooth, confident performance. This is especially helpful if you need to include webcam recording with your slides.
Here is the basic procedure for using FocuSee:
Step 1. Set Up Your Recording: Open FocuSee and select the area of the screen you want to record (your slide deck). Choose to record your microphone and webcam if needed.
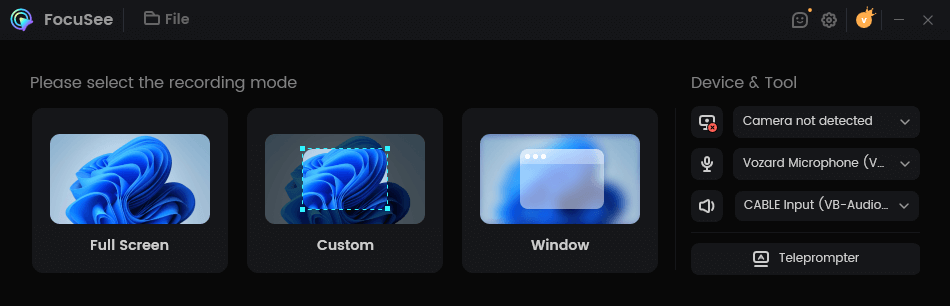
Choose a Recording Mode
Step 2. Start Recording: Click the record button and present your slides. If you’re using the teleprompter, your script will scroll as you speak.
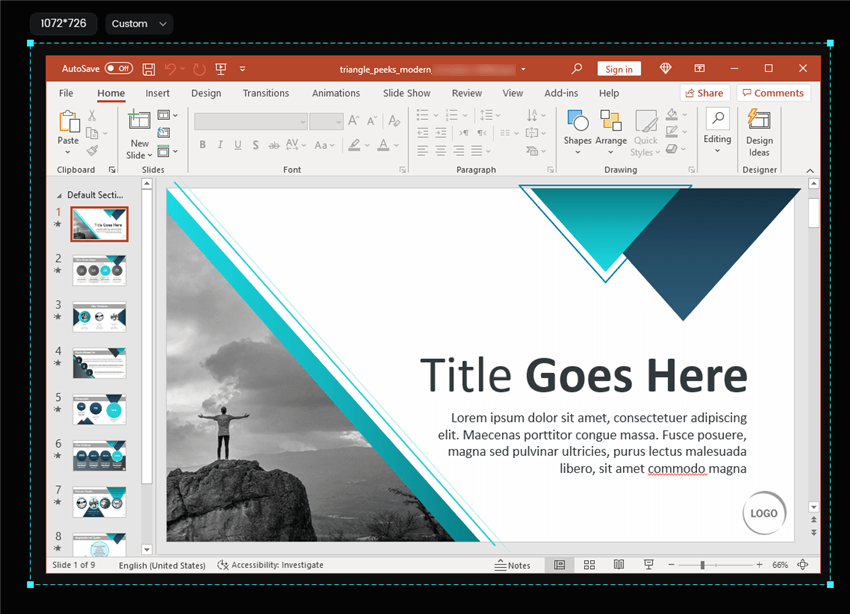
Frame an Area to Record
Step 3. Apply AI Edits: After recording, FocuSee’s AI Smart Cut automatically detects and removes awkward silences from the editing timeline. The AI also enhances your voice clarity and removes background noise, ensuring professional-quality audio without manual editing.
Edit Your Recording
Export: Choose your desired resolution and format, and export your finished MP4 video.
Pro Tips for Polished Audio, Lighting, and Editing
Small details can make a big difference in the final quality of your video. Focusing on your setup, basic edits, and export settings will elevate your project from amateur to professional.
Improve Your Audio and Lighting
You don’t need expensive equipment for good results. For clear audio, find a quiet, small room with soft surfaces (like carpets or curtains) to reduce background noise. For lighting, face a window to get soft, natural light on your face. Avoid sitting with a bright light or window behind you, which creates a silhouette.
Quick Pro-Tips for Better Quality:
Use a Headset: The microphone on your phone’s earbuds is a huge step up from your laptop’s built-in mic.
Elevate Your Camera: Place your laptop on a stack of books so the webcam is at eye level. This creates a much more direct and professional angle.
How to Make Basic Edits (Trimming Your Video)
Nearly every recording will have an awkward start or a long pause at the end. Trimming these parts is the easiest way to make your video look more professional.
- If you recorded in PowerPoint: After you finish recording but before you export, you can trim your video. Click the Video Trim button in the recording studio. A simple timeline will appear, allowing you to drag the start and end points to cut out unwanted sections.
- If you made a screen recording: You will need a simple video editor. Both Windows and macOS have excellent free options.
- On Windows: Use the built-in Clipchamp app. Open your video, drag it to the timeline, and then drag the green handles at the beginning and end of the clip to trim it.
- On Mac: Use the built-in iMovie app. Import your video, drag it to the timeline, then click and drag the edge of the clip to shorten it from the start or end.
Choose the Right Export Settings
When you export, you must balance quality with file size. A large file can be difficult to upload to a platform like Canvas or YouTube.
- Resolution: Exporting in 1080p (1920×1080 pixels) provides excellent quality and is standard for most platforms. If your file size is too large, exporting in 720p (1280×720 pixels) is a good alternative that still looks sharp on most screens.
- Format: The most compatible video file format is MP4. It offers a good balance of quality and compression for nearly all devices and platforms.
- Font Size: Use a large, clear font on your slides (at least 24pt). This ensures your text is readable even on smaller mobile phone screens.
Add Subtitles for Accessibility
Adding subtitles makes your presentation accessible to a wider audience and is often a requirement for academic and corporate settings. Many platforms, including YouTube, can automatically generate captions after you upload your video. You can then review and edit these for accuracy. Some dedicated screen recorders can also add subtitles and captions automatically, saving you a step. You can read more about making accessible video content.
Frequently Asked Questions
Here are answers to some of the most common questions that arise when you need to make a video presentation.
Do I need to appear on camera, and how do I record my face and slides at the same time?
Appearing on camera is often optional but can improve engagement. Most recording tools, including PowerPoint, Keynote, and dedicated apps like FocuSee, have a feature to record your webcam simultaneously with your screen. Your face will typically appear in a small circle or box in the corner of the video.
How do I create a video for class to upload to an LMS or Google Classroom?
Follow the steps to record and export your video as an MP4 file, which is the most universally accepted format. Check your LMS (Canvas, Blackboard, etc.) for any specific file size limits. If your file is too large, re-export it at a lower resolution, such as 720p instead of 1080p.
How can I add background music without copyright issues?
To add background music, you must use royalty-free music from a service like YouTube’s Audio Library or Epidemic Sound. When editing, lower the music’s volume significantly so it doesn’t overpower your voiceover.
What’s the difference between exporting a PowerPoint as a video and just recording my screen?
Exporting from PowerPoint directly creates a clean video file where each slide is a high-quality image with perfectly synced audio. A screen recording captures your entire screen in real-time, which can result in lower video quality, larger file sizes, and potential stutters if your computer is slow. The PowerPoint export to MP4 feature is generally the superior method.
What should I do if my video file is too big or won’t play?
If the file is too large, the best solution is to re-export it at a lower resolution (e.g., 720p). If the video won’t play on another device, it might be an uncommon file format. Ensure you have exported it as an MP4, as this is the most compatible format for nearly all devices and platforms.
Your Next Step: From Slides to a Polished Video
The anxiety of turning a slide deck into a professional video presentation is a common obstacle, but it doesn’t have to stop you. By following a clear workflow and choosing the right tool for your needs, you can create a high-quality video without the stress. You now know how to record using free, built-in tools and how to perform simple edits to give your project a clean finish. You have a clear process to produce a video you can be proud to share.
If you found the free methods required too many manual steps for your deadline, consider an automated tool. Stop worrying about the technical details and start creating. Download FocuSee for free and see how you can deliver a professional video with confidence.