How to Master Pan and Zoom in Premiere Pro: The Cinematic Guide

There is nothing more discouraging for a creator like “Chris”—our example user who edits YouTube tutorials—than realizing his hard work feels dull. Chris notices that his static screen recordings lack energy, but when he tries to add movement, the results are jerky, “robotic,” or pixelated. If you are in the same boat, searching for how to pan and zoom in Premiere Pro to transform static clips into engaging stories, you are not alone.
Most beginners fail because they rely on the wrong tools, resulting in motion that feels unnatural to the human eye. Whether you need to highlight a specific detail in a software demo or add life to a talking head, this guide covers the definitive industry methods. We will move beyond basic settings to master cinematic movement editing, ensuring your audience stays glued to the screen.
How to Master Pan and Zoom in Premiere Pro
Why Motion Controls Fail and the Transform Effect Wins
Here is a critical expert insight that most standard tutorials miss: relying solely on the default motion effect controls often results in unnatural animation. By default, the native “Motion” tab (Scale and Position) in the Effect Controls panel does not apply motion blur. This makes rapid movement look strobe-like or jumpy, contributing to that amateur “digital” feel.
For true cinematic movement editing, you must use the transform effect in Premiere Pro. Located inVideo Effects > Distort > Transform, this tool mimics the parameters of the standard Motion tab but includes a crucial feature for realism: Shutter Angle.
How to Apply the Transform Effect Correctly
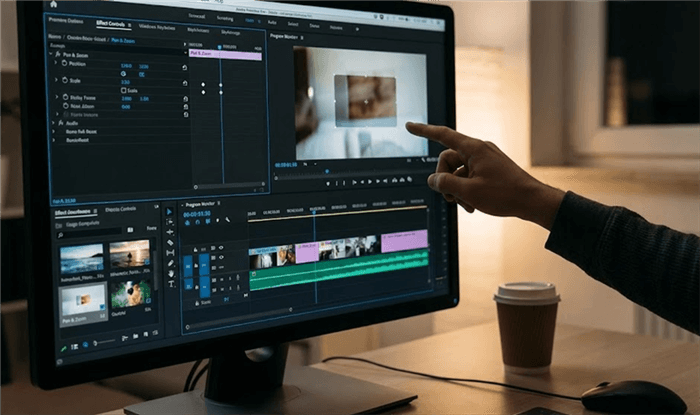
Step 1. Apply the Effect: Do not animate the clip directly yet. Instead, drag the “Transform” effect onto your clip.
Apply this effect to an adjustment layer in Premiere Pro placed above your footage. This creates a technical safety net. If you apply the Transform effect directly to a clip that also uses “Warp Stabilizer,” Premiere Pro will flag a conflict. Using an adjustment layer separates the motion from the clip attributes, keeping your timeline error-free.
Step 2. Set Keyframes: In the Effect Controls panel, scroll down to the Transform effect. Click the stopwatch icon next to “Scale” or “Position” to toggle animation.
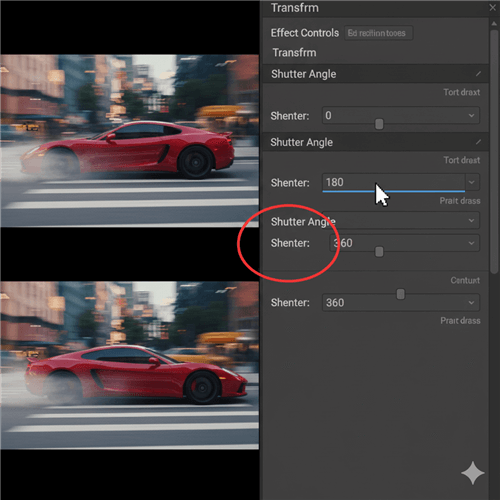
Step 3. The Secret Sauce (Shutter Angle): Uncheck the box labeled “Use Composition’s Shutter Angle.” Increase the Shutter Angle value to 180 (standard cinematic look) or 360 (heavy blur).
Shutter Angle
This workflow solves the “robotic” feel of standard pan and zoom Premiere Pro techniques. The added blur bridges the gap between frames during fast zooms, making the animation appear organic to the human eye. If you find your zooms look jumpy or unnatural, switching to the Transform effect is the immediate solution.
Manual Keyframing vs. Automated Smart Tools
For a creator like Chris, deciding between manual animation and automated tools is strictly about the task at hand. If you are editing a narrative film, you need manual control. However, if you are editing a software tutorial and trying to make the camera follow a mouse cursor manually, you are likely wasting hours of your time.
Here is the breakdown to help you decide which method fits your current project:
| Feature | Manual Premiere Pro Editing | Automated Smart Zoom Tools |
| Best For | Narrative films, docs, complex VFX | Software tutorials, screen recordings |
| Time Cost | High (15–30 mins per sequence) | Low (Instant to < 5 mins) |
| Skill Level | Intermediate to advanced | Beginner to intermediate |
| Physics Control | Full control via velocity graphs | Standardized smooth motion |
| Main Pain Point | Repetitive strain on long edits | Limited artistic customization |
The “Mouse Tracking” Headache: The FocuSee Alternative
For users who frequently record software demonstrations, the primary obstacle isn’t just “editing”—it’s the specific pain of tracking the mouse cursor. Manually animating a Premiere Pro pan and zoom effect every time the mouse moves to a menu is exhausting and rarely looks perfectly smooth.
FocuSee serves as a powerful workflow accelerator for this specific problem. It is not a replacement for Premiere Pro’s full NLE capabilities, but rather a specialized pre-production tool that handles the specific grunt work of cursor tracking.
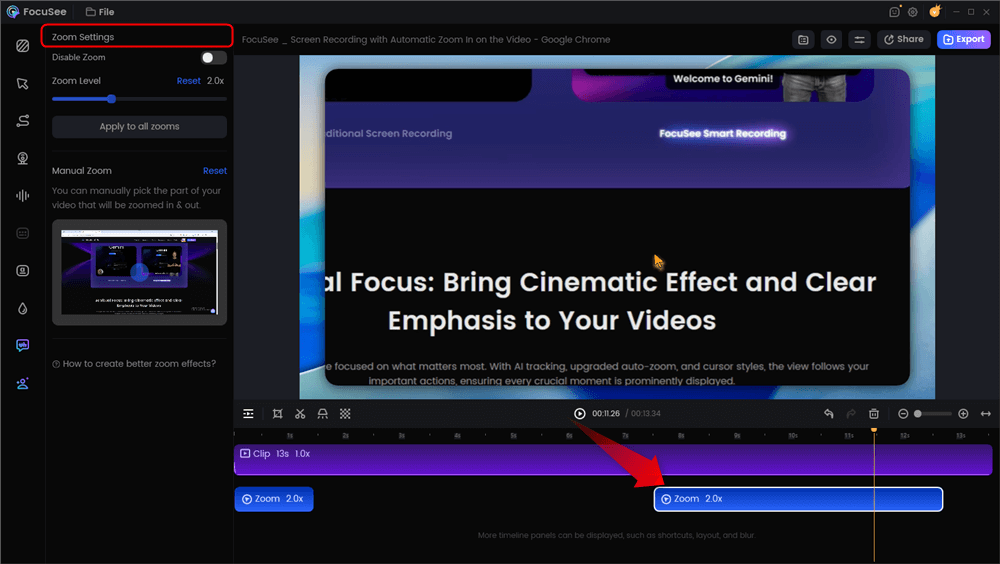
Automatic Zoom Effects
Instead of manually setting keyframes for every mouse click, FocuSee’s Smart Focus & Auto-Zoom feature detects onscreen action and automatically applies smooth zooms. This directly addresses the fatigue of repetitive editing, allowing you to generate a dynamic tutorial in minutes rather than hours.
Enhancing Viewer Focus with Cursor Effects
A common issue with raw screen recordings is that viewers lose track of the mouse. FocuSee addresses this with Cursor Effects, which add customizable highlights and click animations. This ensures your audience follows your navigation effortlessly, solving the problem of “confusing or hard-to-follow” tutorials.
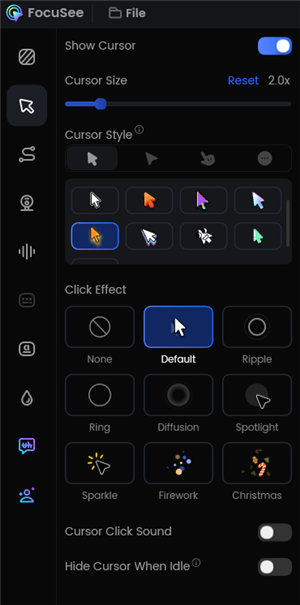
Change the Cursor Settings
Once you have generated the polished screen recording with automatic zooms, you can export the clip and bring it into Premiere Pro for final color grading, audio mixing, or combining with other footage.
Creating the Ken Burns Effect for Photos in Premiere Pro
The Ken Burns effect is the industry standard for adding emotion to static photography by slowly panning and zooming across the image. While the concept is simple, the execution in Premiere Pro requires precise control over scale and position in Premiere Pro settings.
The Anchor Point Strategy
Before adding any keyframes, you must set your Anchor Point. This acts as the pivot for your zoom. If you want to zoom into a person’s eye, the Anchor Point must be directly over that eye before you start animating.
- Select the Clip: Click your image in the timeline and open the Effect Controls panel.
- Visualizing the Wireframe (Critical Step): Click the word “Motion” at the very top of the Effect Controls list. This is the step most beginners miss. Clicking the header activates the blue wireframe and target overlay on your Program Monitor.
- Set the Anchor Point: Now that you can see the blue target in the center of the image, drag that target (not the image itself) to your desired focal center.
- Animate the Movement:
- Move the playhead to the start of the clip. Click the stopwatch for Scale and Position.
- Move to the end of the clip. Increase the Scale by 10-15% for a subtle push-in.
By securing the Anchor Point first, you ensure the zoom in and out premiere pro movement remains focused on your subject, creating a professional, documentary-style aesthetic without erratic drifting.

Effect Controls
Preventing Blurry Zooms: Resolution and Scaling Best Practices
A common anxiety among editors is: “Does zooming in reduce video quality?” The answer depends entirely on your source footage relative to your sequence settings.
A vital expert insight is that many editors ruin their quality by zooming on 1080p footage inside a 1080p sequence. As soon as you scale above 100%, you lose pixel density, resulting in a blurry image.
The 4K Rule
To perform a crisp Premiere Pro pan zoom tutorial style edit, you should ideally film in 4K (3840×2160) but edit on a 1080p (1920×1080) timeline. This gives you 200% of a “safe Zoom” room. You can scale the footage up to fill the frame or zoom in up to 2x without any quality loss because you are simply displaying the original pixels.
“Set to Frame Size” vs. “Scale to Frame Size”
When importing 4K footage into a 1080p timeline, avoid the “Scale to Frame Size” option. This option rasterizes the image to 1080p immediately, discarding your extra resolution data. Instead, use “Set to Frame Size.” This adjusts the Scale property (e.g., to 50%) but keeps the full 4K resolution available, allowing you to zoom in and out of Premiere Pro cleanly later in the edit.
Troubleshooting: Smoothing Out Jumpy Keyframes
If your animation feels mechanical, it is likely because your keyframes premiere pro are set to “Linear” spatial interpolation. This means the speed of the zoom is constant from start to finish. In the physical world, objects accelerate and decelerate.
Basic Smoothing: Ease In and Ease Out
To fix the initial stiffness, right-click your starting keyframe and select Temporal Interpolation > Ease Out. Then, right-click your ending keyframe and select Temporal Interpolation > Ease In. This creates a generic curve where the movement starts slowly and ends slowly.
Advanced Control: Mastering the Velocity Graph
For that truly “snappy” Apple-style zoom, basic easing isn’t enough. You need to adjust the Velocity Graph.
- Click the small arrow next to the “Scale” or “Position” stopwatch to expand the view.
- You will see a graph representing the speed of your animation.
- Click your keyframe to reveal blue Bezier handles.
- Drag these handles horizontally to adjust the curve. Dragging them inward creates a steeper peak, meaning the zoom will happen faster in the middle and softer at the ends. This is the secret to professional video animation in Premiere Pro.
The “Boomerang” Bug
Occasionally, you may notice your image drifting or looping strangely between two keyframes, even if the values are correct. This is known as the “boomerang effect,” caused by Premiere Pro attempting to smooth the path spatially. To correct this, select your keyframes, right-click, and choose Spatial Interpolation > Linear. This forces the motion path to be a straight line, eliminating the unwanted drift while keeping your speed ramps (Temporal Interpolation) intact.
Also Read: DaVinci Resolve Pan and Zoom Guide>
Frequently Asked Questions
How do I apply pan and zoom to multiple clips at once?
The most efficient method is to use an adjustment layer in Premiere Pro. Create a new adjustment layer in your Project panel, drag it onto a track above your video clips, and apply the Transform effect to it. Any keyframes you set on the adjustment layer will apply to all clips beneath it. This is ideal for applying a subtle, continuous camera drift across an entire sequence.
What is the best way to create a Ken Burns effect in Premiere Pro?
For the cleanest results, ensure your photos are high resolution (at least 2x your sequence size). Import them, place them on the timeline, and use the Effect Controls panel. Crucially, click the “Motion” header to visualize your Anchor Point and set it to your subject before adding keyframes to prevent the image from drifting away from the focal point.
Should I use Motion or Transform for pan and zoom?
Use the standard Motion controls for simple static resizing where no animation is involved. Use the transform effect Premiere Pro for any active video animation, specifically because it allows you to add motion blur (via Shutter Angle), which creates much smoother, more realistic movement.
Why does my Zoom look choppy in Premiere Pro?
Choppy zooms are usually caused by a lack of motion blur or linear keyframe interpolation. To fix this, switch to the Transform effect, set the Shutter Angle to 180, and expand the keyframe properties to adjust the Velocity Graph handles for smoother acceleration.
Can I use pan and zoom on photos in Premiere Pro?
Yes, absolutely. The workflow is identical to video clips. However, because photos do not have inherent grain or noise, aggressive zooming can sometimes look too sterile. Adding a subtle “Grain” effect over the photo can help integrate it better with video footage.
Conclusion
We have moved from the frustration of static, robotic edits to mastering the pan and zoom premiere pro workflows that define professional content. By swapping basic Motion controls for the Transform effect, correctly managing your Anchor Points, and manipulating the Velocity Graph, you now have the toolkit to turn dull footage into cinematic storytelling.
However, if you are strictly looking to solve the headache of manual mouse tracking for tutorials, FocuSee offers an immediate path to polished results. It automates the cursor-following zooms that take hours to do manually, ensuring your viewers never lose track of the action.
Ready to streamline your editing workflow?
Download FocuSee for Free to experience automatic zooms and cursor highlights on your next project, or stick with Premiere Pro’s manual tools for your custom cinematic work. The choice is now yours.