What is the Best Free Screen Studio Alternative for Creating Polished Screen Demo Videos in 2026?

Preparing for a critical Product Hunt launch is stressful enough without wrestling with complex video editing. For indie SaaS founders, creating a high-converting product demo is essential. You’ve probably seen those slick, professional videos with smooth cursor tracking and automatic zooms made by Screen Studio. But with a tight startup budget, you are likely searching for the best free Screen Studio alternative.
The problem? Most free tools fail you. You test a few screen recorders only to find that basic, raw recordings leave your software UI completely unreadable on mobile devices. Or worse, you try a “free” browser alternative that slaps a massive watermark over your final export.
If you want Screen Studio-style polish but have a strict zero-dollar budget right now, this guide provides a brutally honest, battle-tested solution. We will cut through the marketing fluff, separate truly free open-source tools from restrictive freemium plans, and show you exactly how to build a polished product demo without getting tricked into an immediate paywall.
Why Basic Raw Screen Recordings Fail SaaS Demos
For early-stage founders, the turning point often comes after recording a five-minute full-screen walkthrough of an app, only to realize the text is completely illegible when viewed on a mobile device. Basic raw screen recordings fail because they ignore the viewer’s experience. If you are worried that a cheap-looking, static demo video will make your product look less trustworthy, you are correct.
When you capture a full 4K external monitor without applying an auto-zoom or a crop, the software interface shrinks to fit the viewer’s screen. Your potential customers cannot see the specific buttons you are clicking. Furthermore, raw recordings suffer from erratic, jittery cursor movement, which distracts from the core message of your product demo.
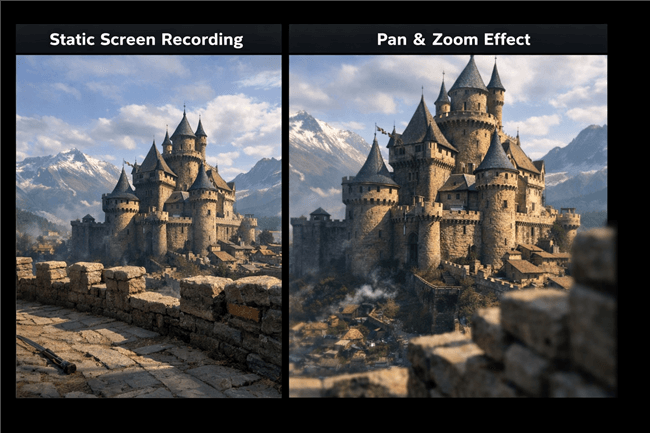
Static Footage vs. a Dynamic Pan and Zoom effect
A successful SaaS demo requires high conversion value, which is driven by clarity and pacing:
- Readability: Your audience must be able to read the UI effortlessly, even on an iPhone.
- Pacing: Dead air, “ums,” and long pauses while a page loads will cause viewers to abandon the video.
- Guidance: You need a clear voiceover, accurate captions, visible click highlights, and a strong CTA (Call to Action) to guide attention.
Golden Rule: If your potential customer has to squint to read your software’s navigation bar on their smartphone, they will scroll past your video. Cinematic motion is not just an aesthetic bonus; it is a functional requirement to keep your audience engaged.
Decision Guide: Free Manual Workflows vs. Automated Cinematic Tools
Here is a crucial expert insight that most software marketing guides intentionally hide: the best free Screen Studio alternative is not a single tool.
The non-obvious reality is that “free” simply shifts the cost from your bank account to your workflow time. When evaluating a free screen recorder for polished demos, you must compare manual open-source methods against automated tools across real-world scenarios.
| Truly Free Workflow (OBS + DaVinci Resolve) | Paid Automated Tools (e.g., FocuSee, Screen Studio) | Freemium Browser Tools (e.g., Loom, Cap.so) | |
| Budget Cost | $0 forever | Paid (one-time or subscription) | Free with limitations |
| Time Cost | High (manual editing) | Low (auto recording & editing) | Low (quick recording) |
| Export Quality | 4K, no watermark | 4K with automated polish | 720p–1080p, often limited |
| Best Use Case | Zero-budget, high-quality videos | Fast professional SaaS demos | Bug reports and quick support videos |
To make the correct choice, evaluate your launch deadline and your budget.
FocuSee: The Best Automated Alternative (Paid, but Cheaper Than Your Time)
Let’s be brutally honest: no truly free tool perfectly automates Screen Studio effects.
Many users search for a free Windows screen recorder for product demos that matches Mac-exclusive tools in quality. While we highly recommend FocuSee as the best 1-to-1 alternative to Screen Studio for both Windows and Mac, we are not going to insult your intelligence by calling it “free.” FocuSee is a paid tool.
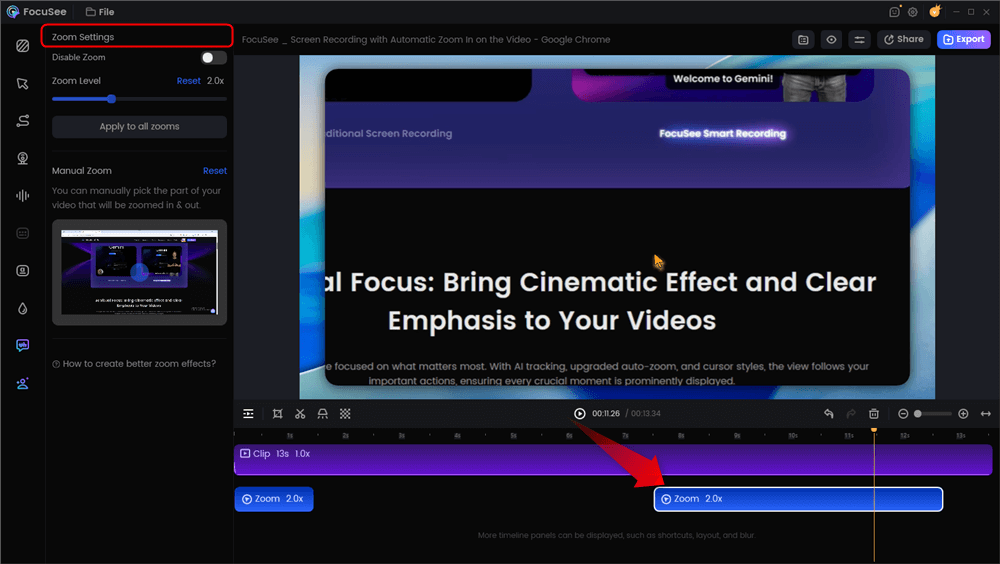
Automatic Zoom Effects
However, if your Product Hunt launch is in three days and you cannot afford to spend 10 hours learning video editing timelines, buying a cross-platform tool like FocuSee is significantly cheaper than your hourly rate. It eliminates the technical barriers:
- Cross-Platform Parity: Works natively on macOS and Windows 11, ensuring your entire team can use the same tool.
- Complex Editing Eliminated: If you need fast recording without learning Premiere Pro or Final Cut Pro, FocuSee’s Smart Focus and Auto-Zoom instantly highlight clicked areas, keeping viewers focused on the UI.
- Professional Appearance: It applies instant 3D motion and smooth cursor tracking automatically.
- Smart Audio Cleanup: FocuSee’s AI Smart Cut feature instantly trims filler words, awkward pauses, and background noise so your pacing remains energetic.
The Step-by-Step Truly Free Workflow: OBS Studio + DaVinci Resolve
If you absolutely must maintain a $0 budget, you can still achieve professional, Screen Studio-quality results. OBS Studio is the best open source screen recorder because it never imposes recording limits, paywalls, or watermarks.
However, OBS Studio only captures raw video; it does not edit. Past guides have suggested “switching scenes live in OBS” to mimic an auto-zoom. Do not do this. A live scene switch is a jarring, hard cut, not a smooth cinematic zoom.
To build a truly free editing workflow, you must capture a static, high-resolution wide shot in OBS, and then manually construct the cinematic auto-zooms and cursor tracking in a free editor like DaVinci Resolve or CapCut. Here is the realistic, tested workflow:
Step 1: Add Proper Cursor Highlights (Before Recording)
OBS does not natively feature cursor smoothing or highlighting. Before you hit record, run a free, lightweight background utility to add click highlights.
- On Windows: Download Microsoft PowerToys and use the “Mouse Utilities” feature. Change the highlight color to a subtle, semi-transparent black or gray (opacity at 20%). Avoid the cheap, neon yellow halo look from 2005.
- On Mac: Use the built-in Accessibility settings to increase pointer size slightly, or use a free open-source tool like Mac Mouse Fix.
Step 2: Configure a Clean OBS Capture
Open OBS Studio. Under Settings > Video, ensure your Canvas and Output Resolution are set to match your monitor (preferably 3840x2160 for 4K).
Under Sources, add a Window Capture. Select your web browser or SaaS application. Do not capture your whole desktop—you want to hide your messy desktop icons and taskbar. Hit Start Recording and perform your demo smoothly.
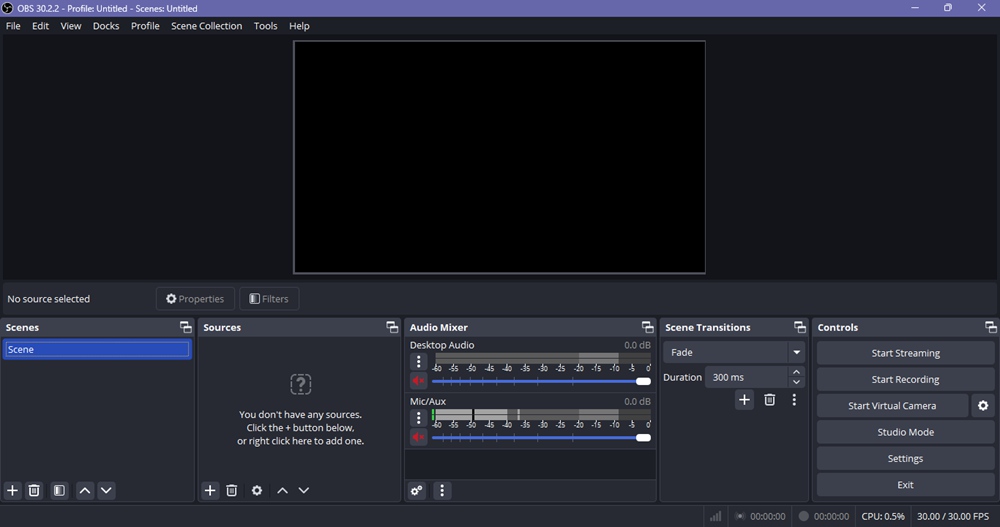
OBS
Step 3: Keyframing the Polish in DaVinci Resolve (Post-Production)
Import your OBS video file into DaVinci Resolve (free version). This is where you pay with your time:
1. Drag your clip onto the timeline. Find the exact moment you click a button in your app.
2. Open the Inspector panel. Click the diamond icon next to Zoom and Position to drop a keyframe.
3. Move the timeline playhead forward by one second. Increase the Zoom value (e.g., from 1.0 to 1.5) and adjust the Position X/Y axes to center your app’s button on the screen.
4. The Pro-Tip: Linear keyframes look robotic. Open the Spline editor in your timeline, select your keyframes, and hit the “Ease In / Ease Out” button. This creates the smooth, spring-like physics that make Screen Studio famous.
This method provides a stunning, watermark-free 4K export. It will cost you exactly $0, but expect to spend about 30 to 45 minutes manually adjusting keyframe curves for a 2-minute demo video.
Top Freemium and Browser Alternatives Ranked
Many browser-based platforms aggressively market themselves as a “free screen recorder with auto zoom,” but lock the essential features you need for a SaaS launch behind restrictive paywalls.
Here is an honest breakdown of the freemium landscape, so you know exactly what you are getting into:
- Loom (Free Plan): Loom is unparalleled for asynchronous team communication. However, it is not a demo creator.
> WARNING: Loom’s free tier severely limits you. It caps your export at 720p, which makes standard SaaS text blurry and unreadable on mobile. It also cuts your recording off at exactly 5 minutes and lacks advanced auto-zoom features. Use this strictly for internal bug reports, not public landing pages. - Cap.so: In a direct Cap.so vs Screen Studio comparison, Cap.so offers a highly accessible browser-based cinematic experience. However, its free tier often applies a watermark to your final export and restricts access to custom backgrounds.
- OpenScreen / ScreenKite: These are capable browser-based screen capture tools that let you record quickly without installing software. Unfortunately, they lack built-in timeline editors. You will still need an external editor to make a polished product demo.
Before investing time into recording on a “free” web platform, always check their pricing page to verify if they cap your export resolution or brand your video with a watermark.
Frequently Asked Questions: Matching Tools to Use Cases
Instead of generic questions, let’s break down exactly which tool you should choose based on your specific daily tasks as a founder:
What is the best free tool for a high-stakes SaaS landing page video?
If you have zero budget, OBS Studio paired with DaVinci Resolve is your only truly free option for a launch video. It guarantees a watermark-free 4K export, provided you are willing to spend the hours required to manually edit the zoom keyframes and clean up the audio.
What is the best tool for sending a quick bug report to my developer?
Loom (Free). When you just need to show a developer how a button is broken, cinematic zooms do not matter, and a 720p resolution is fine. It’s fast, hosts the video in the cloud instantly, and requires zero editing.
Which free screen recorder works natively on both Mac and Windows?
OBS Studio is fully open-source and operates natively on macOS, Windows, and Linux. If you decide to upgrade to a paid automated workflow, FocuSee is the best cross-platform alternative to the Mac-only Screen Studio.
Are there automated Screen Studio alternatives without watermarks?
Yes, but they are not free. Any freemium browser tool offering automated cinematic effects (like auto-zooms and smooth cursor tracking) will add a watermark unless you pay for their premium tier. If you want no watermarks for free, you must use OBS and do the editing manually.
When is it worth upgrading from a free manual workflow to a paid cinematic recorder?
It is strictly a calculation of your hourly rate. If learning DaVinci Resolve takes you 5 hours, and your time as a founder is worth $50 an hour, that “free” video just cost your business $250. If you find yourself consistently needing fast, 4K export-ready demos with click highlights and smooth pacing for social media, upgrading to a dedicated paid tool is the smartest move.
Final Thoughts: Regain Control of Your Launch
You want polished, highly readable product demos, but you should not have to sacrifice video quality just because you are bootstrapping.
If you have the time but no budget, OBS Studio paired with DaVinci Resolve offers a completely free, watermark-free path to stunning SaaS demos—as long as you are willing to learn manual keyframing. Avoid the trap of freemium browser tools that ruin your software’s readability with 720p export caps and branded watermarks.
However, if your launch is rapidly approaching and you need cinematic auto-zooms, smooth cursor tracking, and clean audio without the steep learning curve of advanced editing software, acknowledge that a paid tool is worth the investment. By automating the entire editing workflow, tools like FocuSee allow Windows and Mac users to generate stunning, export-ready demos in minutes. Choose the workflow that matches your current resources, regain control of your launch schedule, and build immediate trust with your audience.