How to Screen Record on Windows Without Game Bar

After Windows 10, Microsoft added the Xbox Game Bar, which is useful for recording games with a simple shortcut. However, it can sometimes slow down your PC or cause the screen to freeze, especially if your computer isn’t very powerful. The Game Bar is free and basic, but it’s not always the best choice.
If you want to create tutorials, share game clips, or show someone how to do something, knowing how to screen record on Windows without using the Game Barcan be very helpful. In this guide, we’ll show easy tools, tips for smooth recording, and how to handle your videos after recording.
Why Not Use Xbox Game Bar?
While Xbox Game Bar is a convenient built-in tool for Windows, it has several limitations that make it less than ideal for all users.
- Can’t record desktop or File Explorer: Xbox Game Bar only works with certain apps and games. If you try to record your desktop, File Explorer, or other system windows, it won’t capture them.
- No advanced editing features: The Game Bar only records basic video. You can’t trim clips, add annotations, or do other editing tasks directly, which means you’ll need extra software to polish your recordings.
- Performance issues on some PCs: Recording with Xbox Game Bar can slow down your computer or cause lag, especially if your system has limited resources or an older graphics card.
Record Screen on Windows without Xbox via Built-In Windows Alternatives
Windows Snipping Tool (Screen Recording in Windows 11)
The Snipping Tool has long been used for screenshots, but in Windows 11, it can now record videos too. It’s great for quick tutorials, demos, or troubleshooting. Keep in mind, not all Windows PCs have the updated version with recording, and it usually doesn’t capture audio.
How to record screen on Windows 10 without Xbox using Snipping Tool:
Step 1. Search for “Snipping Tool” in the Start menu. If your version is outdated, update it via the Microsoft Store.
Step 2. Click the video camera icon on the top toolbar.
Click the Video Camera
Step 3. Click “New.” Your screen will dim, allowing you to select the recording area.

Click New
Step 4. Draw a rectangle around the part of the screen you want to capture, or drag across the full screen to record everything.
Step 5. Click “Start.” A 3-second countdown will appear, then the recording begins.
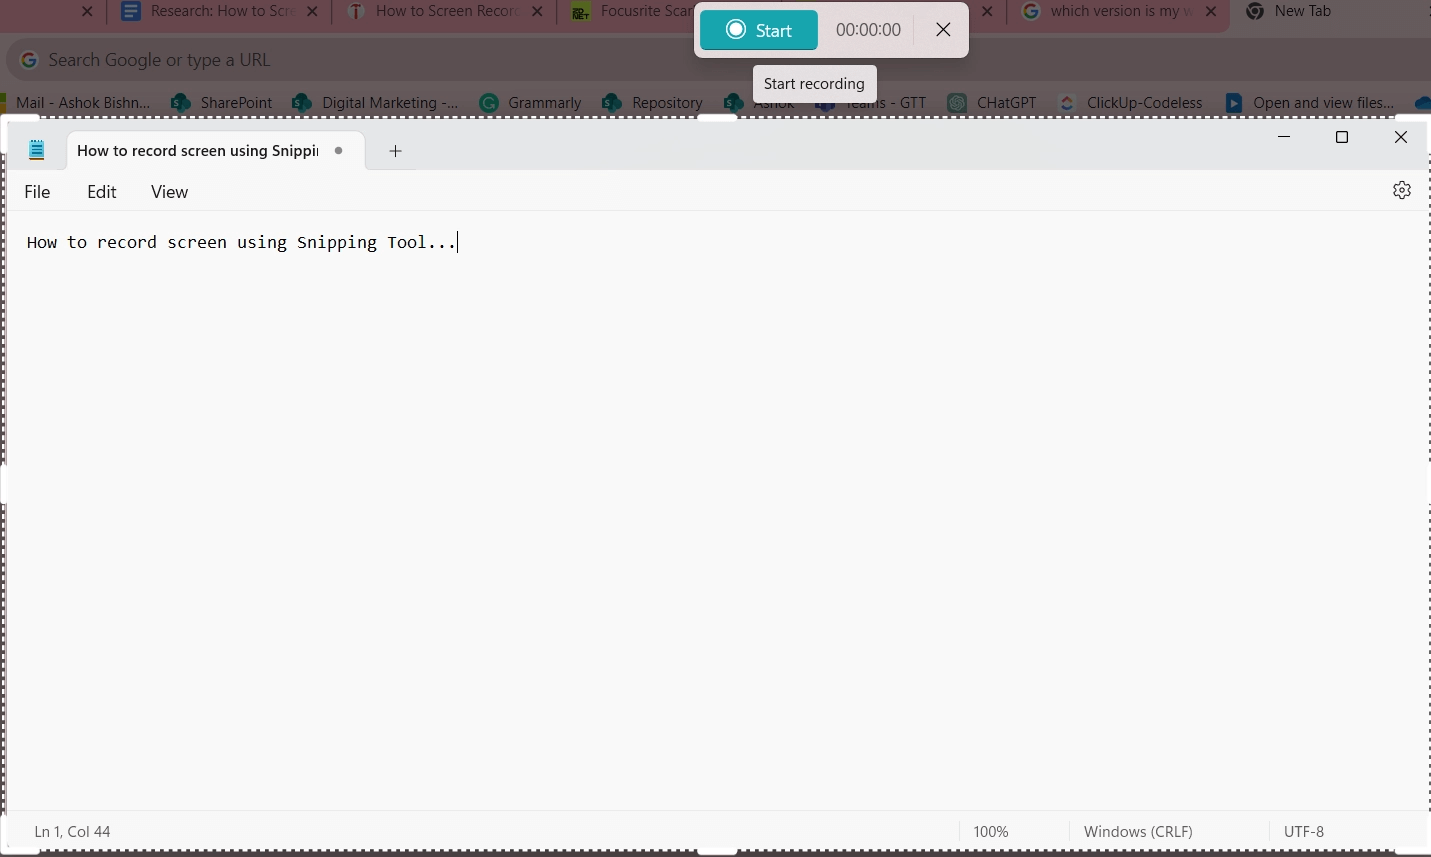
Click the Start Recording Button
Step 6. When finished, click “Stop recording” in the toolbar.
Step 7. Preview your recording, then click “Save” and choose a location. The file will be saved as an MP4.
Pros:
- Built-in and free, no extra software needed
- Simple and quick for basic recordings
- Works well for tutorials or demos
Cons:
- Doesn’t capture system audio
- Only available on Windows 11 updated versions
- Limited editing options
Microsoft PowerPoint (Hidden Screen Recording Feature)
Microsoft PowerPoint can also be used to record your screen. It’s great for capturing presentations, slideshows, or any on-screen activity. You can even add annotations and record audio along with the screen. This feature is available in Microsoft Office 2013 and later, so make sure your version is up to date. By default, PowerPoint records both audio and the mouse cursor, but you can turn them off if you don’t need them.
How to record screen on Windows 10 without Xbox with PowerPoint:
Step 1. Start a new PowerPoint presentation or open an existing one.
Step 2. Click the Insert tab and select Screen Recording.
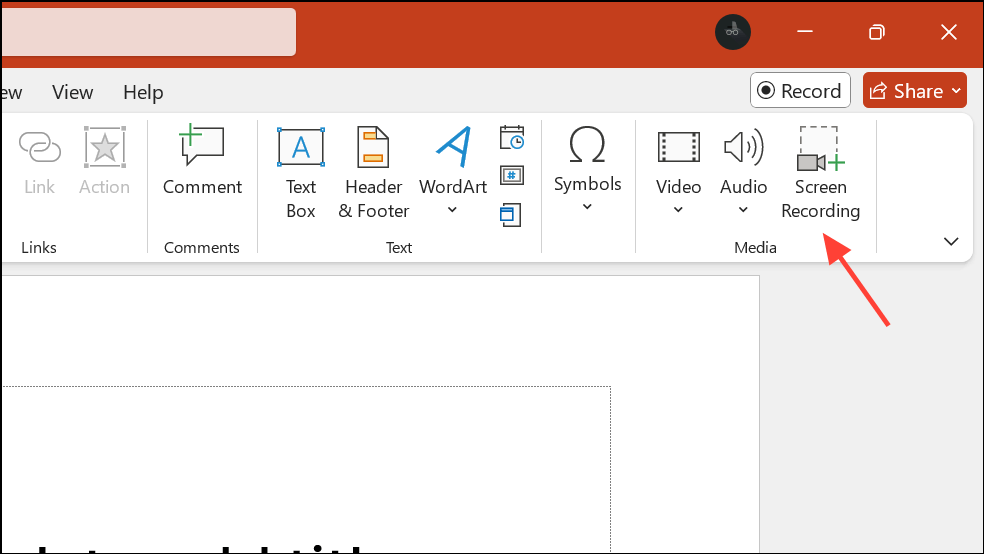
Screen Recording Option
Step 3. A recording dock will appear. Click and drag to select the area you want to capture. (By default, audio and cursor are included — you can disable them if not needed.)
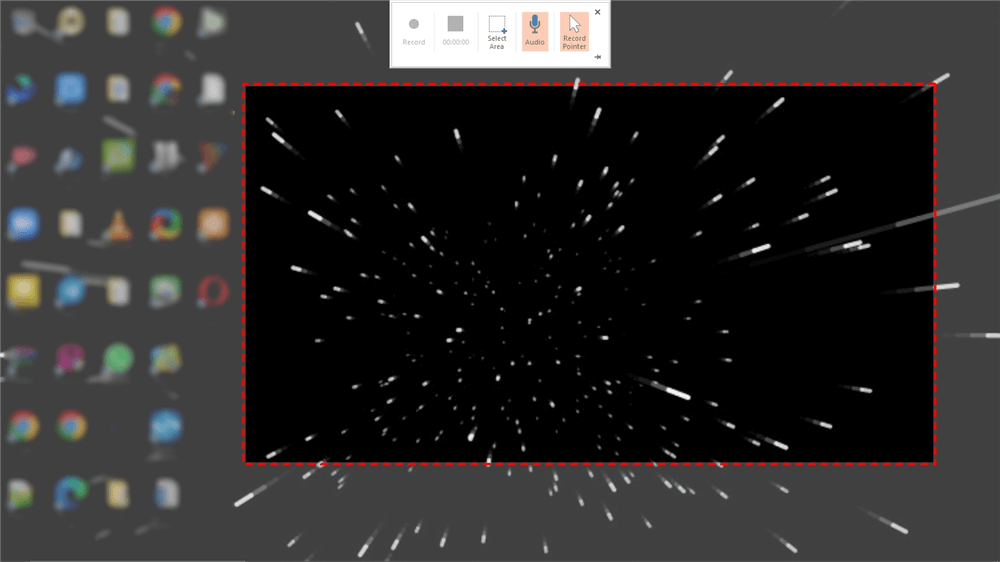
Drag to Select the Area
Step 4. Click the Record button or press Windows + Shift + R. You can pause and resume using the same shortcut. PowerPoint will keep recording even if you switch windows.
Step 5. Click the Stop button on the dock or press Windows + Shift + Q to end the recording.
Step 6. Right-click the video in your slide, choose Save Media As, select a location, and save the file as an MP4.
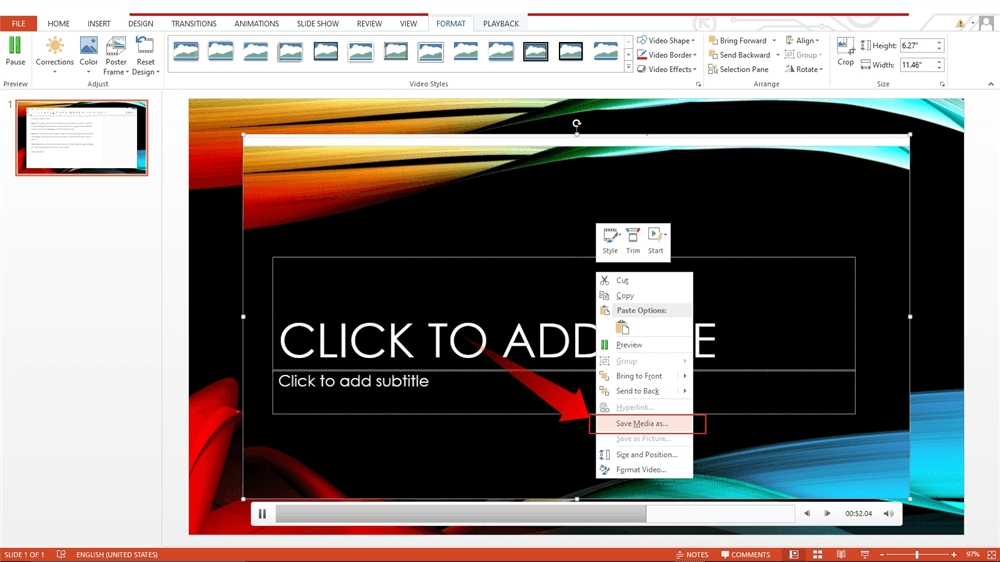
Choose Save Media As
Pros:
- Built-in feature, no extra software needed
- Can record audio and mouse cursor
- Works across multiple windows
- Good for presentations and tutorials
- Allows basic editing inside PowerPoint
Cons:
- Limited recording area control
- Not designed for high-quality gameplay recording
- Editing options are basic compared to dedicated screen recorders
- Available only in PowerPoint 2013 or later
VLC Media Player
VLC Media Player is a free and versatile tool, well known for playing videos and converting files but it can also record your screen. It’s a good option if you want a free recorder without using Xbox Game Bar, though it’s a bit less straightforward than other tools.
How to screen record on Windows without Game Bar with VLC:
Step 1. Launch VLC Media Player on your PC. If you don’t have it, download it for free from the official VLC website.
Step 2. Click Media in the top menu, then select Open Capture Device.
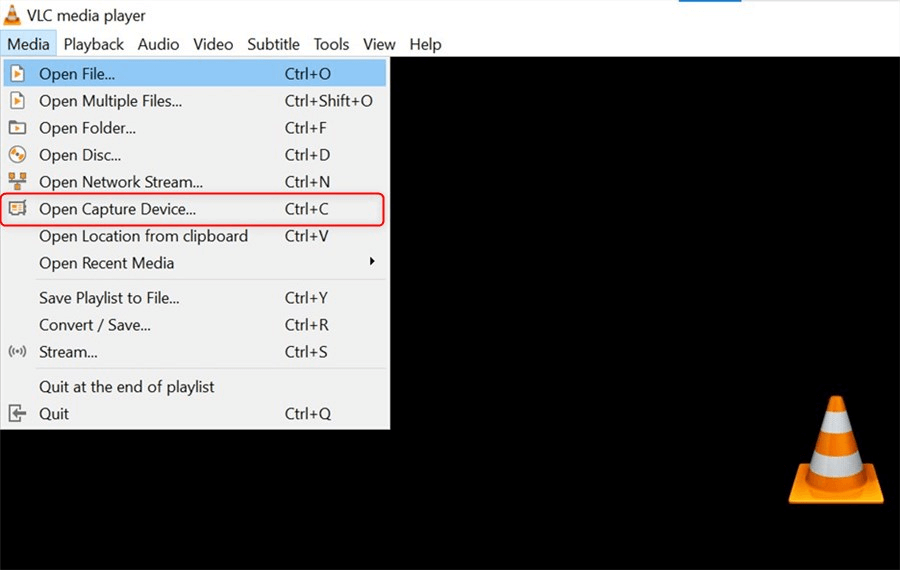
Choose Open Capture Device
Step 3. In the dialog box, choose Desktop as the capture mode. You can also set your preferred frame rate for smoother recording.

Choose Desktop As the Capture Mode
Step 4. At the bottom, click the dropdown arrow next to Play, then select Convert.
Step 5. Choose a folder to save your video and give the file a name.
Step 6. Click Start to begin recording. When finished, click Stop. Your video will be saved in the selected folder.
Limitations:
- Not very beginner-friendly; settings can be confusing
- Limited editing features
- The audio recording setup is not straightforward
- Mainly suitable for basic screen captures, not advanced tutorials or gameplay
How to Screen Record on Windows Without Game Bar via FocuSee
Creating professional-quality screen recordings on Windows doesn’t have to be complicated. With FocuSee, you can record, edit, and enhance your videos effortlessly, no Game Bar required. Its AI-powered tools automatically optimize your recordings, highlight key actions, and polish both audio and visuals.
Whether you’re making tutorials, product demos, online courses, or marketing content, FocuSee simplifies the process while delivering results that look and sound professional.
Key Features of FocuSee:
- AI Visual Focus & Auto Zoom: Highlights important screen areas and zooms in automatically to keep viewers’ attention.
- Smart Spotlight & Cursor Effects: Emphasize key actions with customizable cursor styles and click animations.
- AI Audio Enhancement: Crystal-clear voice recordings with noise reduction, smart cut, and studio-level polish.
- Virtual Avatar: Produce engaging videos using a lifelike AI avatar—no need to appear on camera.
- Subtitle Generation: Instantly add accurate, AI-powered subtitles in over 50 languages.
- Privacy & Blur Masking: Hide sensitive areas in your recordings effortlessly.
- Dynamic Video Editing: Smooth pacing, motion blur, filters, and reusable templates for consistent professional output.
- Multi-Platform Export & Sharing: Export in MP4, GIF, or shareable links optimized for YouTube, TikTok, Instagram, and more.
How to record screen on Windows 10 without Xbox with FocuSee:
Step 1: Download, install, and launch FocuSee on your Windows PC. Choose your preferred recording mode and click Start Recording.
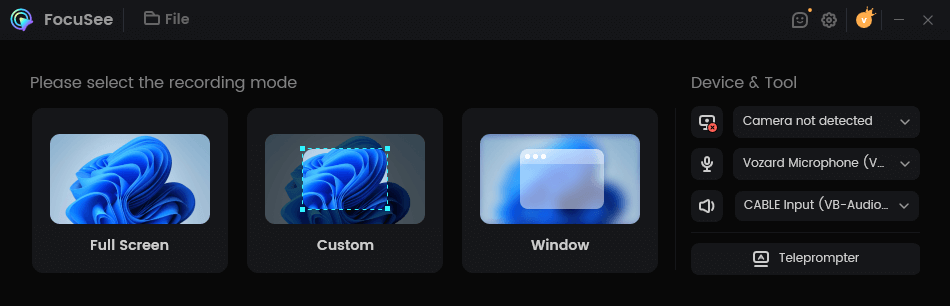
Choose a Recording Mode
Step 2: Focus on your screen activities while FocuSee automatically tracks your cursor, applies auto-zoom on key points, and highlights important actions with smart spotlight.
Step 3: Once the recording is complete, preview your video. Use built-in editing tools to trim, adjust pacing, or apply templates for a polished result. Customize your cursor style, add effects, or enable AI enhancements like voice optimization and background blur during or after recording.
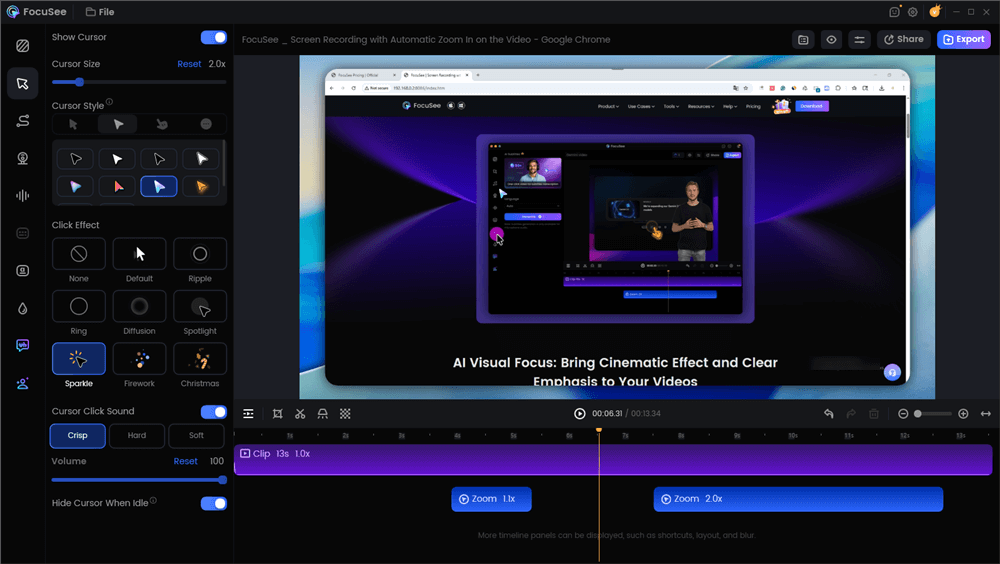
Edit Your Recording
Step 4: Export your final video as MP4 or GIF, or generate a shareable link for easy distribution across platforms.
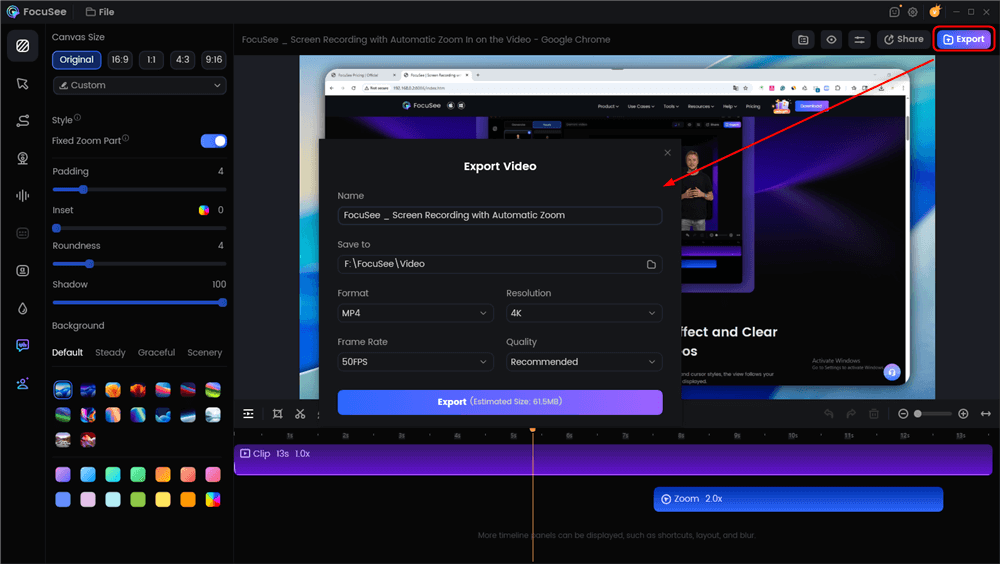
Click the Export Button
FAQs: Recording Screen on Windows Without Game Bar
How to screen record on Windows if Game Bar is not working?
Use third-party tools like FocuSee, OBS Studio, or Bandicam to record your screen without relying on Game Bar.
Does Windows 10 have a screen recorder?
Yes, Xbox Game Bar is built into Windows 10 and allows screen recording, but it has limited features compared to third-party software.
How to hide Game Bar while recording?
You can hide it by opening Win + G, going to settings, and turning off the overlay. Or simply use a recorder like FocuSee that doesn’t need Game Bar.
Final Words
Recording your screen on Windows doesn’t have to be frustrating, even if the Game Bar isn’t working. With FocuSee, you can easily capture high-quality videos, highlight key actions, and enhance both audio and visuals effortlessly. For anyone looking for a reliable solution on how to screen record on Windows without Game Bar, FocuSee is the perfect tool to simplify the process and deliver professional results every time.