How to Screen Record on iPhone 17 Pro Max: Audio, Editing & Pro Tips

You have just unboxed the iPhone 17 Pro Max, loaded up your favorite game or app, and swiped open the Control Center to capture a clip—only to find the record button is missing. It is a confusing experience for such a capable device, but you are not alone. Apple does not enable the screen recording feature by default on the iPhone 17 series, leading many new users to believe the feature has moved or disappeared.
Whether you need to capture a software bug to show a developer, save a gaming highlight, or create a quick tutorial for a friend, the process should be reliable. This guide provides a verified workflow to enable the feature, capture clear audio (including the often-missed microphone settings), and secure high-quality results every time. By the end, you will understand how to screen record on iPhone 17 Pro Max, manage your audio sources, and choose the right tools for editing your footage.
Quick Start: Enable and Start Screen Recording on iPhone 17
If you are looking for the screen recording icon in your Control Center and coming up empty, do not worry. This is the most common pain point for new users. Before you can capture any footage, you must add the tool to your active menu.
Procedure: Adding the Screen Record Button
Step 1. Unlock your device and open the Settings app.
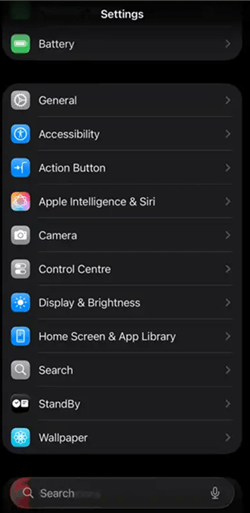
Open the Settings App
Step 2. Scroll down and select Control Center.
Control Center Settings
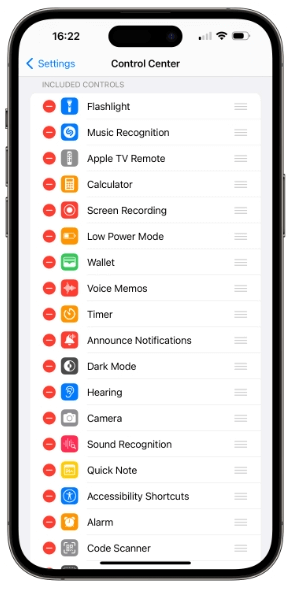
Step 3. Scroll to the “More Controls” section (or the equivalent “Add Controls” list in iOS 19).
Step 4. Locate Screen Recording.
Step 5. Tap the green + (plus) button next to it. The control is now active and will appear in your swipe-down menu.
Add Screen Recording to Control Center
Starting and Stopping Your Recording
Step 1. Once the button is added, starting an iPhone 17 Pro Max screen recording is straightforward:
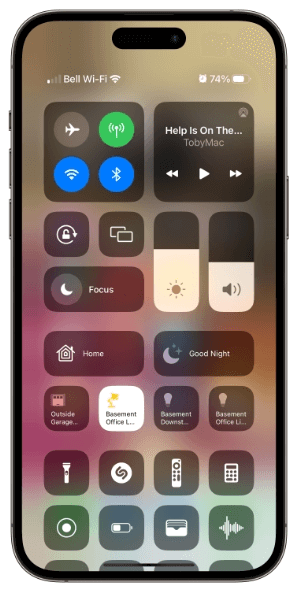
Step 2. Swipe down from the top-right corner of your screen (near the battery icon) to open the Control Center.
Tayp Screen Recording Icon
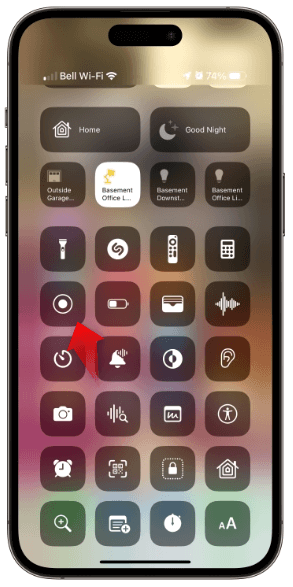
Step 3. Tap the circular Record button (a solid circle inside a ring).
Step 4. You will see a three-second countdown inside the Dynamic Island. This gives you a brief moment to close the menu and prepare your screen.
Step 5. To stop recording: Tap the red status indicator in the Dynamic Island or the red time pill in the top left corner.
Important: A system prompt will appear asking, “Stop Screen Recording?” Tap Stop to confirm. Your video will automatically save to the Photos app.
Mastering Audio and Focus: Avoid Silent or Interrupted Recordings
One of the most frustrating aspects of recording is reviewing your clip only to find it completely silent. By default, the iPhone 17 records internal system audio (game sounds, music) but keeps the microphone off. To screen record on iPhone 17 with sound, specifically your own voiceover, you must change a setting hidden within the Control Center.
How to Enable Microphone Audio
To narrate your recording:
- Open the Control Center.
- Long press (press and hold) the Screen Recording icon. Do not just tap it.
- A menu will expand. Tap the Microphone icon at the bottom of the screen to toggle it to “Microphone On.”
- Tap Start Recording from this same menu.
Expert Insight: The “Sticky” Mic Setting
This is a critical detail most general guides overlook: The microphone setting is “sticky.” Once you turn the microphone on for a recording, iOS keeps it on for all future recordings until you manually turn it off. Always double-check this setting before recording sensitive content to ensure you are not accidentally capturing background conversations or room noise when you only intended to capture screen audio.
Preventing Interruptions with Focus Mode
A banner notification popping up mid-recording can ruin a perfect take. To prevent this:
- Activate Do Not Disturb or a specific Gaming Focus Mode before you hit record.
- Why this matters: This specifically prevents notification banners from sliding down over your content. The recording will remain clean, and your private texts will stay private.
Advanced Mobile Recording: Using Third-Party Apps
While the native iOS tool is powerful, it lacks certain features favored by content creators, such as “Face-Cam” (Picture-in-Picture) capabilities for reaction videos. If you need to record your screen and your face simultaneously, or if you need more granular control over resolution settings directly on the device, third-party apps are the solution.
Recommended Apps for Reaction Videos
If your goal is to create gaming reactions or instructional videos with a personal touch, consider these App Store options:
- Record it!: A popular choice that allows you to add a face-cam commentary to your recordings immediately after capturing them. It is user-friendly and great for social media clips.
- TechSmith Capture: Excellent for users who need to share content directly to platforms like Camtasia or Snagit for work.
- Go Record: Offers a straightforward suite for recording the screen and then adding audio commentary or face-cam reactions during the edit.
Note: Just like the native tool, these apps respect DRM restrictions. You still cannot record protected content like Netflix or Apple TV+.
Post-Production: How to Edit Your Footage on iPhone
Once you have finished your iPhone 17 Pro Max screen recording, the video file resides in your Photos app. The raw file usually begins and ends with footage of you swiping the Control Center. Sharing this unpolished clip can look messy. Fortunately, iOS provides robust built-in tools to fix this.
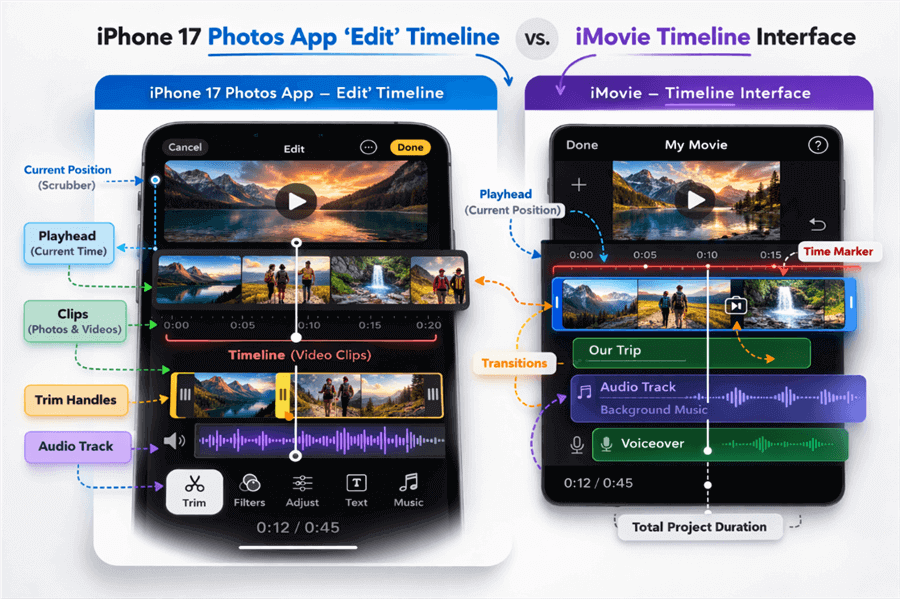
Editing on Photos App or iMovie
Quick Trimming (Photos App)
For simple cleanups:
- Open the Photos app and select your screen recording.
- Tap the Edit button in the top right corner.
- Locate the timeline at the bottom. You will see yellow handles at the beginning and end.
- Drag the left yellow handle to the right to cut out the start setup, and the right handle to the left to remove the stop action.
- Tap Done and select “Save Video as New Clip” to preserve your original footage.
Advanced Editing (iMovie)
If you need to combine multiple clips, add a soundtrack, or overlay text, the native editing tool in Photos might be too limited.
- Open iMovie: This free Apple app comes pre-installed or is available in the App Store.
- Create a Project: Select “Movie” and import your screen recordings.
- Edit: You can split clips, add transitions, and even detach audio to adjust volume levels independently. This bridges the gap between a quick crop and a produced video without leaving your phone.
Alternative Method: Desktop-Based Recording with FocuSee
The iPhone 17 Pro Max is a powerhouse capable of 4K ProRes recording, and for 90% of users, the on-device workflows above are perfect. However, if you are producing a high-volume series of tutorials or need to integrate your mobile footage into a desktop presentation seamlessly, a tethered workflow can save time on storage management and file transfers.
FocuSee offers a streamlined alternative for these specific “desktop-first” creators. By connecting your iPhone 17 via USB to your Mac or PC, you can record the screen directly to your computer.
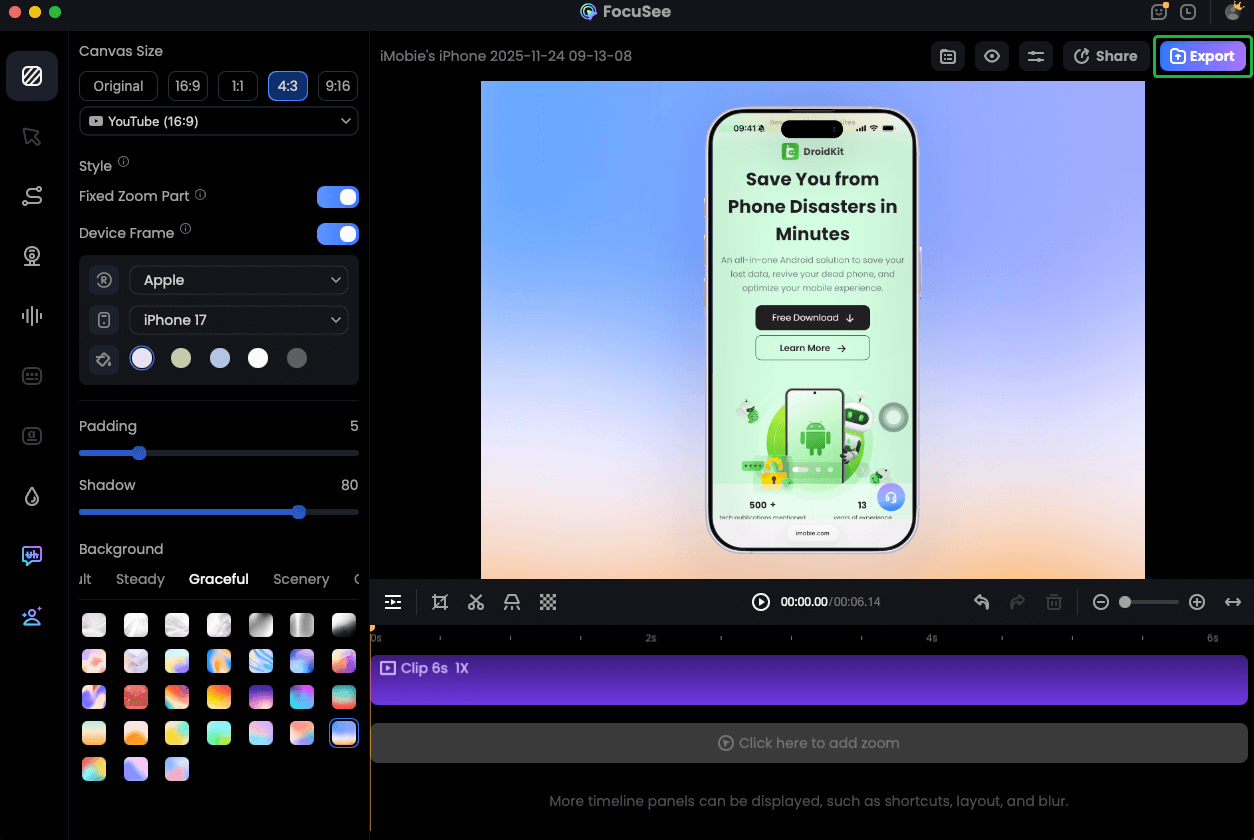
Record iPhone Screen
When to Consider This Workflow
- Storage Management: Keeps large video files off your phone’s internal storage.
- Instant Polish: FocuSee automatically applies cursor effects (simulating touch), zoom-ins on key actions, and wraps the video in a realistic iPhone device frame.
- Presentation Ready: If you are presenting live or recording for a professional webinar, this tool removes the “raw” look of a screen capture and adds a professional background instantly.
Troubleshooting Common iPhone 17 Recording Issues
Even with advanced hardware, you might encounter technical obstacles. Here are solutions to the most common issues.
Why is my screen recording black?
If you try to record apps like Netflix, Disney+, or Apple TV, the resulting video will be black with audio only. This is Digital Rights Management (DRM) protection implemented by streaming services to prevent piracy. Screen capture functions cannot bypass this.
Is there a time limit for recording?
There is no software limit for recording your screen on the iPhone 17. The limit is your available storage space. However, recording high-resolution video for hours generates massive files. If you plan a long gaming session, ensure you have at least 10-20GB of free space.
Will recording cause lag in games?
The iPhone 17 Pro Max handles gameplay recording alongside high-end graphics easily. However, if you notice the device getting warm, try closing background apps. If the phone overheats, iOS may dim the screen or stop the recording to protect the hardware.
Frequently Asked Questions (FAQ)
How do I screen record on my iPhone 17 Pro Max?
Go to Settings > Control Center and add the Screen Recording control. Then, swipe down from the top-right corner and tap the circular Record button. A countdown will appear in the Dynamic Island.
Why can’t I find the Screen Record button?
It is not enabled by default. Navigate to Settings > Control Center and tap the green “+” icon next to Screen Recording to add it to your menu.
How do I record my voice with the screen recording?
Open Control Center, long press the Screen Recording icon, and tap the Microphone icon to turn it on. Then tap Start Recording.
Why does my recording have no sound?
The microphone is off by default. Also, check that your device volume isn’t muted if you are trying to capture system audio.
Where do screen recordings save?
They are automatically saved to the Photos app. You can find them under “Recents” or the “Videos” media type.
Does screen recording notify apps?
Generally, no. iOS does not notify users when you screen record native apps. However, apps like Snapchat detect recording and will notify the other user.
Conclusion
Mastering how to screen record on iPhone 17 Pro Max unlocks the full potential of your device’s sharing capabilities. By manually adding the shortcut, verifying your “sticky” microphone settings, and using Focus Mode to block banners, you can capture clean, professional clips without the stress of interruptions.
For most users, the native tools and apps like Record it! provide everything needed for high-quality sharing. However, if your workflow demands desktop integration or automated editing effects, tools like FocuSee offer a powerful alternative. Whichever method you choose, you now have the knowledge to capture your screen with confidence.