How to Record Google Slides: A Complete Guide

Sometimes, you may offer your Google Slides report to people who missed the live session. Your teacher requested that you make a video, or your boss asked for your presentation to be sent later. Sometimes, you can explain your slides remotely, even without being present. When encountering these problems, recording your presentation is often the easiest way.
You’re in luck; you can record your presentations on Google Slides at no cost. When presenting your slides, you can record your screen, webcam, or both. In this article, we will walk you through recording your Google Slides. If you follow the steps, you’ll easily make and post your recorded presentation. Let’s dive in and start making your slides useful.
Why Record Google Slides?
There are many cases in which recording Google Slides is useful. It helps you take online classes, join team calls, or show presentations. People can watch your videos whenever they like, whether you are present or not. Here are the benefits of recording presentations:
- Makes your content reusable for future lessons or meetings
- Helps people understand better with voice and visuals together
- Increases engagement by adding a personal touch
- Useful for training, teaching, or customer support videos
- Helps people review important information later
How to Record Google Slides with Built-in Tools
Now, let’s have a detailed look at the methods to record Google Slides with built-in tools:
Using Google Meet (for live presentations)
Google Meet lets you record your Google Slides while presenting live to others. It’s useful for classes or meetings where you speak and show slides simultaneously. You can save the recording and share it later. Here are the simple steps to do this:
Step 1. Open your Google Slides and set up everything you want to present.
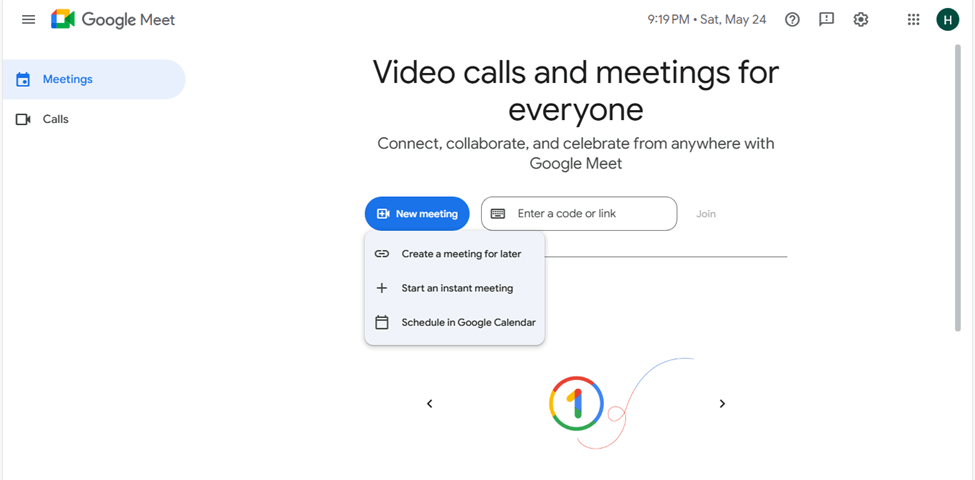
Step 2. Go to Google Meet website and log in. Click “New meeting,” then click “ Start an instant meeting,” and a new meeting will start.
Click Start An Instant Meeting
Step 3. If others are joining, share the meeting link. If not, close the info box.
Step 4. Click the three dots at the bottom right and choose “Record meeting.”
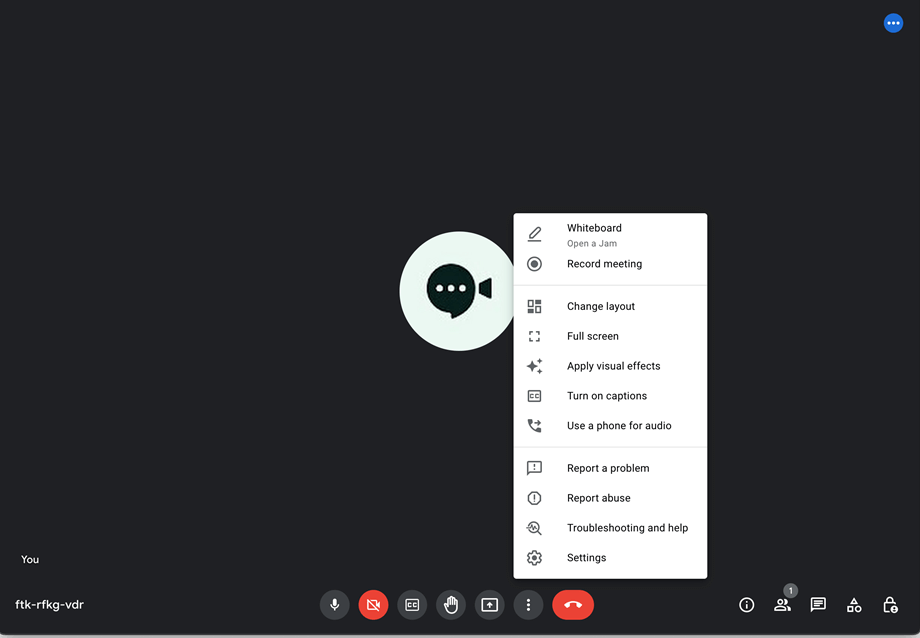
Choose Record Meeting
Step 5. Click “Present now” > “Your entire screen,” then start your presentation.
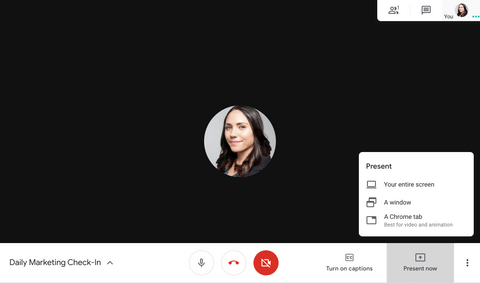
Click Present Now
Step 6. When done, go back to the Meet tab. Click the three dots again and choose “End recording.”
Step 7. You’ll receive an email with the video. Click “Open in Drive,” then “Share” > “Get shareable link” > “Copy link” > “Done.”
Using Screencast Tools (for offline recordings)
Screencast tools are great for recording your Google Slides presentation without being live. You can use many free or paid screencast programs on your computer or phone. These tools let you record your screen while you talk, so your voice explains each slide. Certain tools allow you to show your face in the presentation, helping you connect better with your audience. If you make a mistake, you can pause the recording and start again whenever you choose. Once you have recorded, you may save the video to your device and easily send it by email or upload it to a website. Screencast tools allow you to work at your convenience and present professionally.
How to Record Google Slides with FocuSee
FocuSee is an easy-to-use tool that helps you record Google Slides with great quality and simple steps. It works well on both Windows and Mac computers. FocuSee allows you to record your screen, voice, and webcam simultaneously. This allows you to display your slides and still appear on camera, making your video more personal for everyone watching.
FocuSee Official Website
FocuSee is a powerful screen recorder that includes an automatic zoom that your mouse can control to help viewers focus on the main points. Following your recording, FocuSee handles the edits so you don’t need to spend time doing them. You can add captions, making your video easier for anyone to enjoy. You can easily stay focused during recording by reading your script from the teleprompter. You may use FocuSee to save your content in exceptional quality, such as 4K, for visuals that stand out. It’s simple to share your videos using the export features on FocuSee.
Key Features:
- It is possible to capture your screen, voice, and webcam at the same time for better presentations.
- The program automatically zooms in and tracks your mouse for easier focus on the slides.
- Subtitles are automatically generated and can be updated to be accurate.
- The teleprompter ensures you don’t skip over anything in your script.
- Videos are saved in 4K, allowing you to share them online quickly.
Here’s how you use FocuSee:
Step 1. Go to the FocuSee website and download the software. Check that your internet connection is good. When the installation file is ready, open it and complete the set of installation steps.
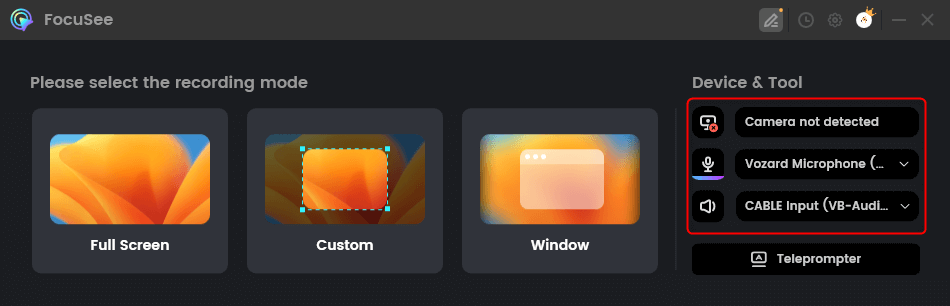
Step 2. Open FocuSee. On the first page, find and choose your camera, microphone, and speakers from the list. Pick if you wish to record your entire screen, a part of it, or only one window.
Choose From the Options
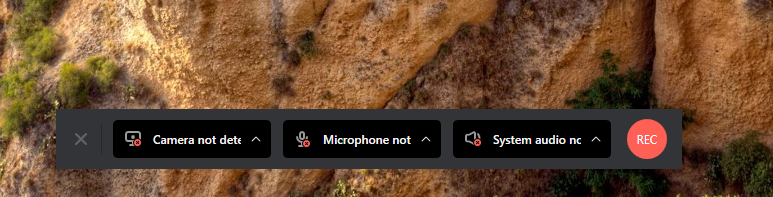
Step 3. Check that your camera and sound are configured as you wish. After you are set, press the red button marked “Record.” You will see a 3-second countdown. Get ready, and recording will start automatically.
Start to Record Screen and Webcam
Step 4. To stop recording, click the red “Stop” button. Your video will appear with automatic effects. You can also trim, change speed, or add highlights.
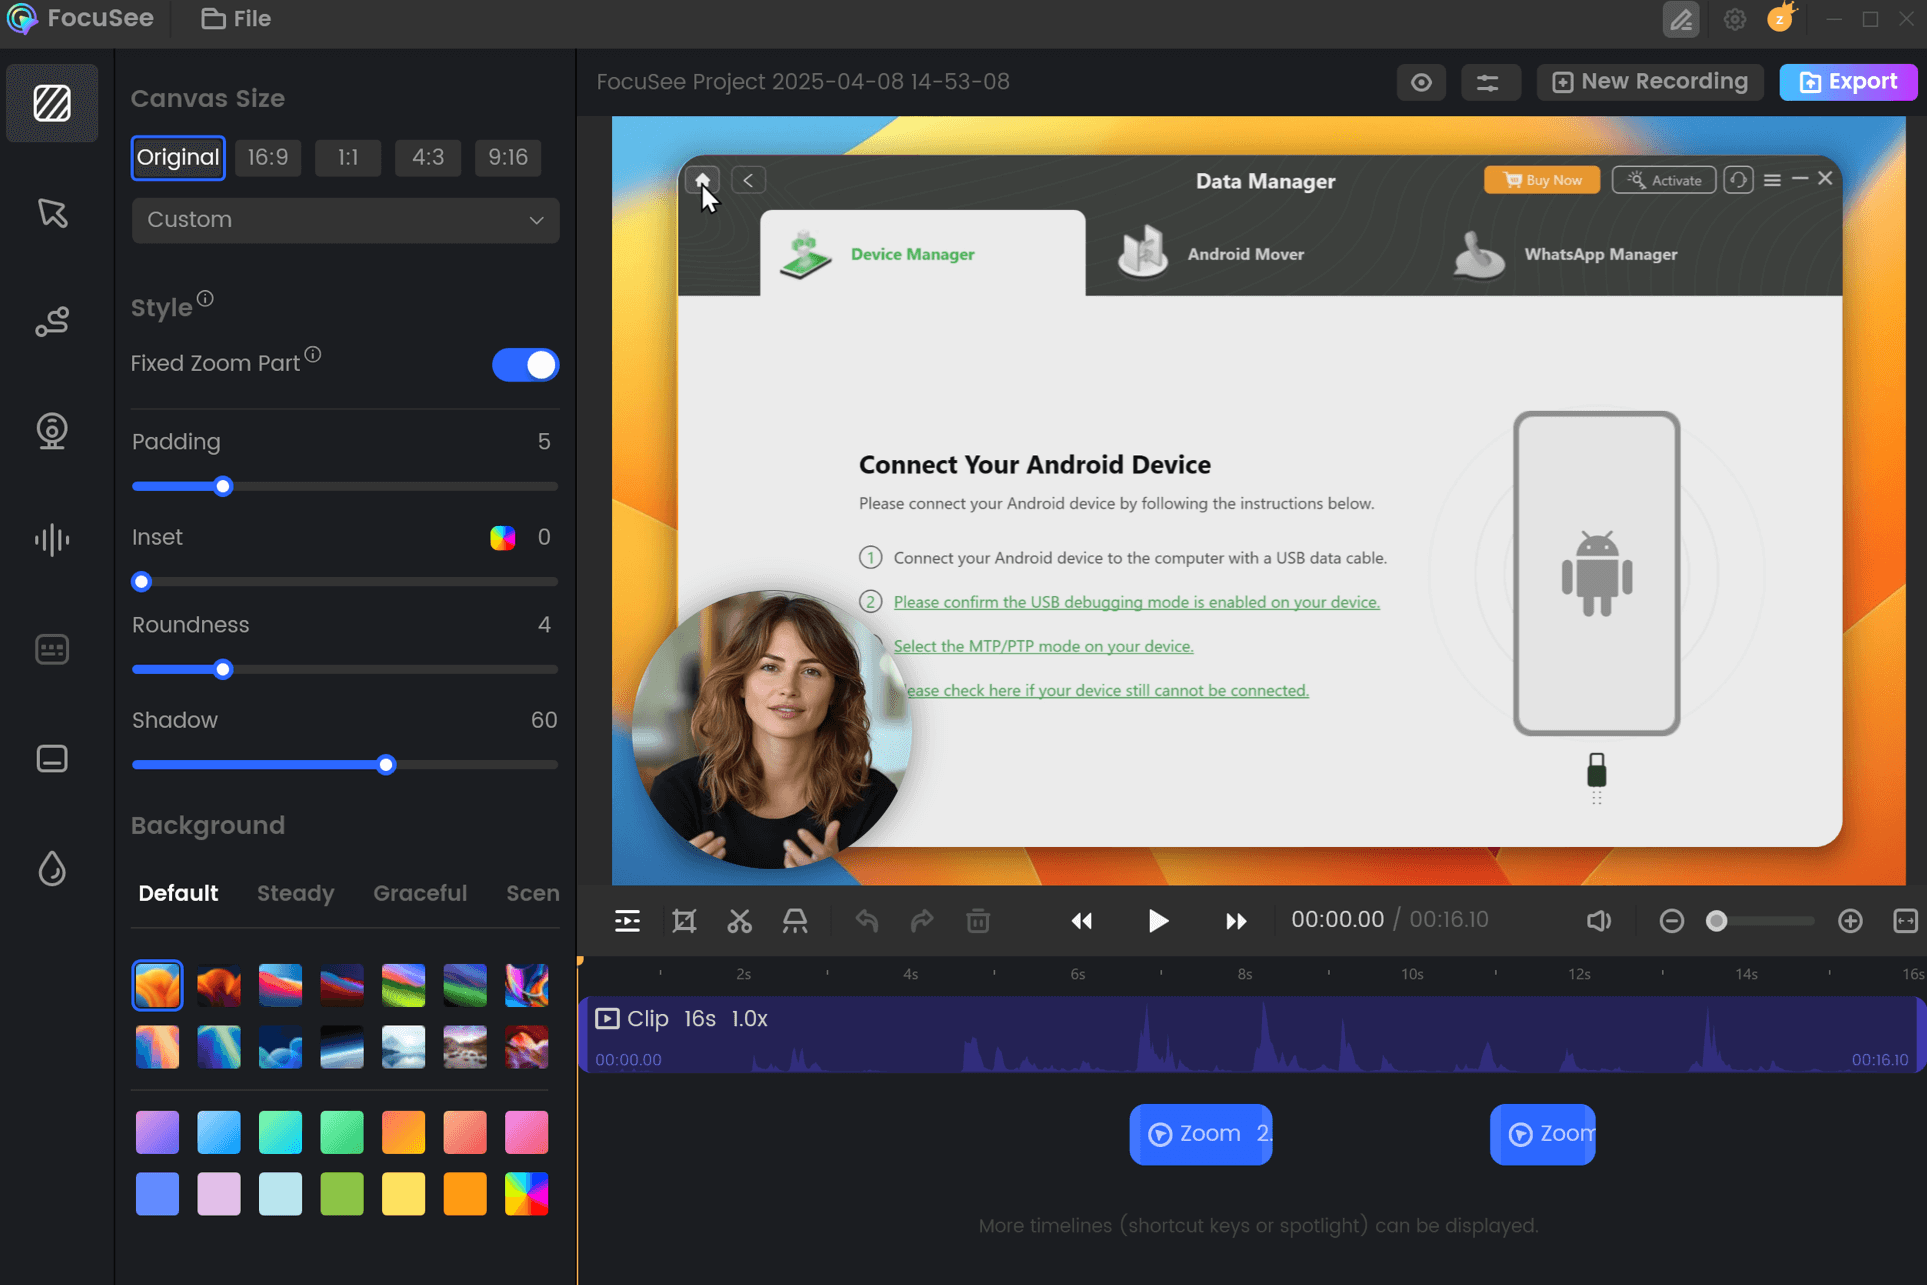
FocuSee Edit the Recording
Step 5. Finally, click “Export” to save your video as an MP4 or GIF file.
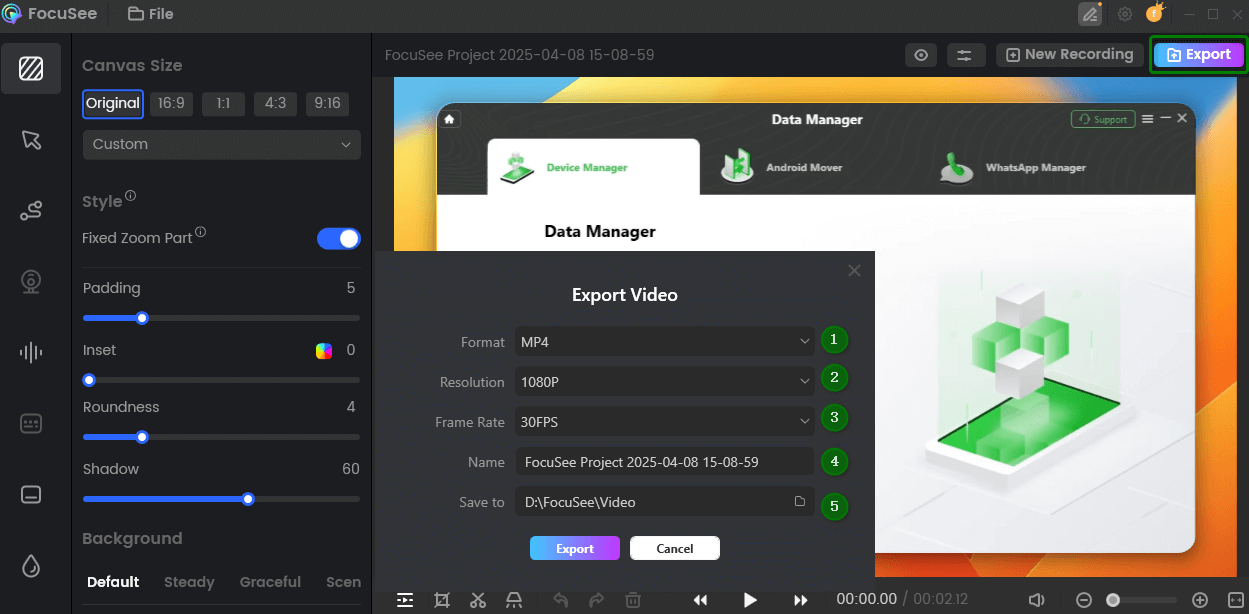
Export and Save Recording Video
Recording Google Slides with PowerPoint (Alternative Method)
Another simple way to record your Google Slides is by using PowerPoint. This method is great if you are more comfortable with Microsoft tools. You can easily turn your slides into a video with voice and webcam. It’s a helpful option for creating presentations and tutorials. For this:
Downloading Google Slides as PowerPoint (PPTX)
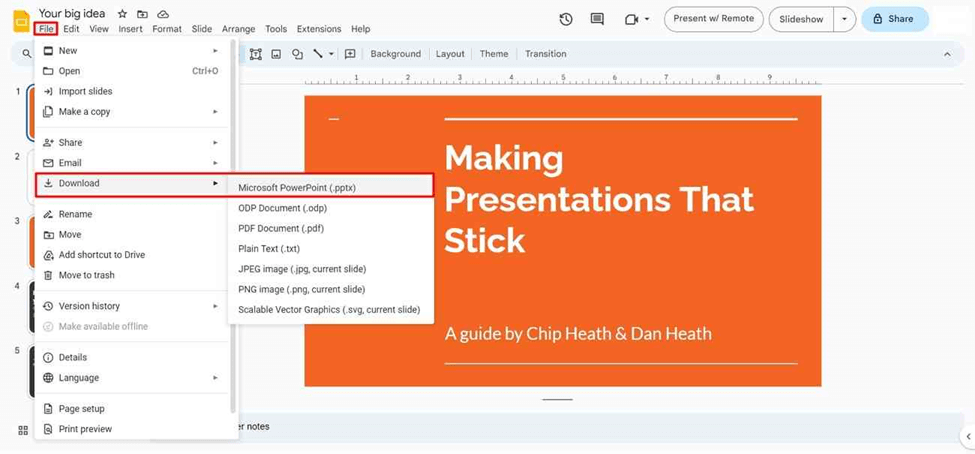
Step 1. Open your Google Slides presentation.
Step 2. Click on “File” in the top-left corner.
Step 3. Hover over “Download” in the menu.
Step 4. Click on “Microsoft PowerPoint (.pptx)” from the list.
Download as Microsoft PowerPoint
Step 5. The file will download to your computer as a PowerPoint file.
Using PowerPoint’s Built-In Recording Feature
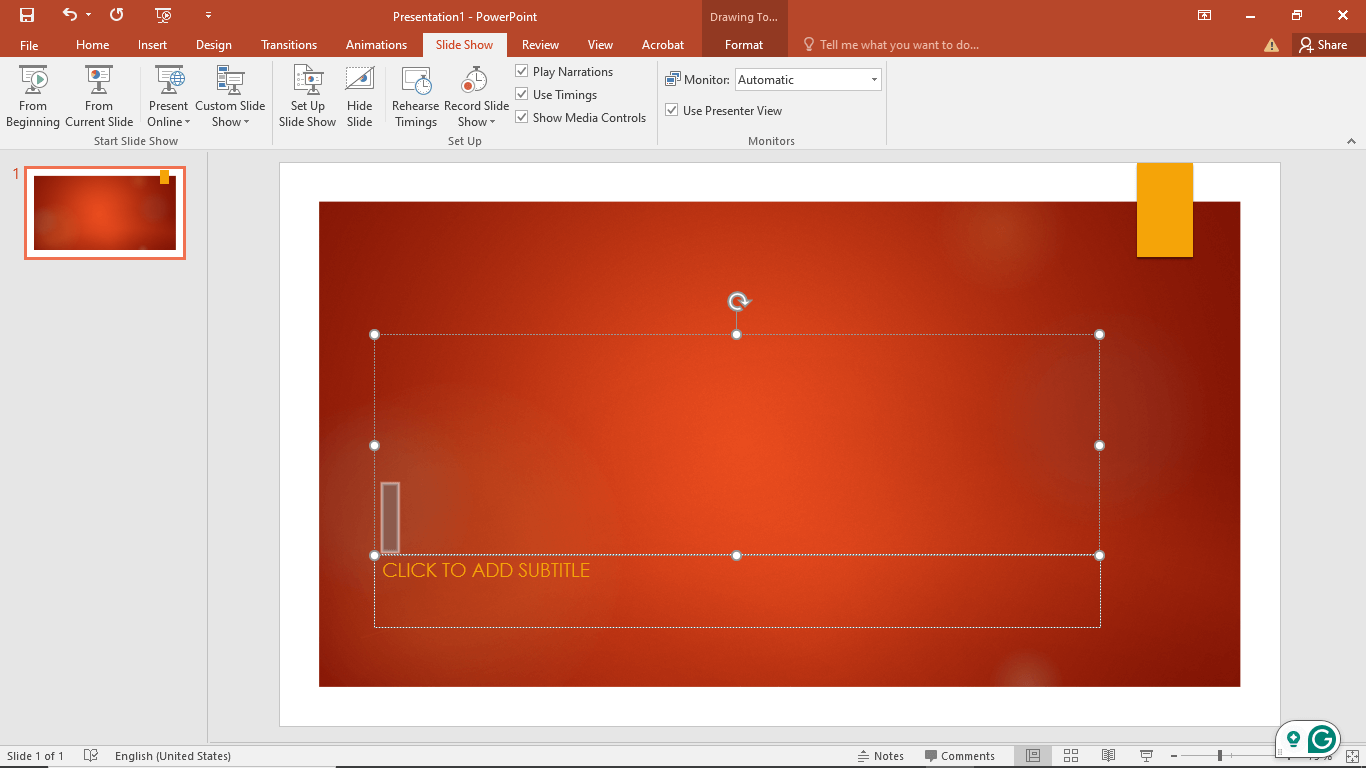
Step 1. Open your PowerPoint file.
Step 2. Click on the “Slide Show” tab at the top.
Step 3. Select “Record Slide Show” from the options.
Click Record Slide Show
Step 4. Choose “Record from Beginning” or “Record from Current Slide.”
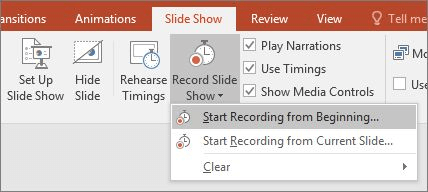
Choose Option
Step 5. A recording window will open. Use your microphone and webcam if needed.
Step 6. Click the “Start Recording” button to start recording. Speak and move through your slides.
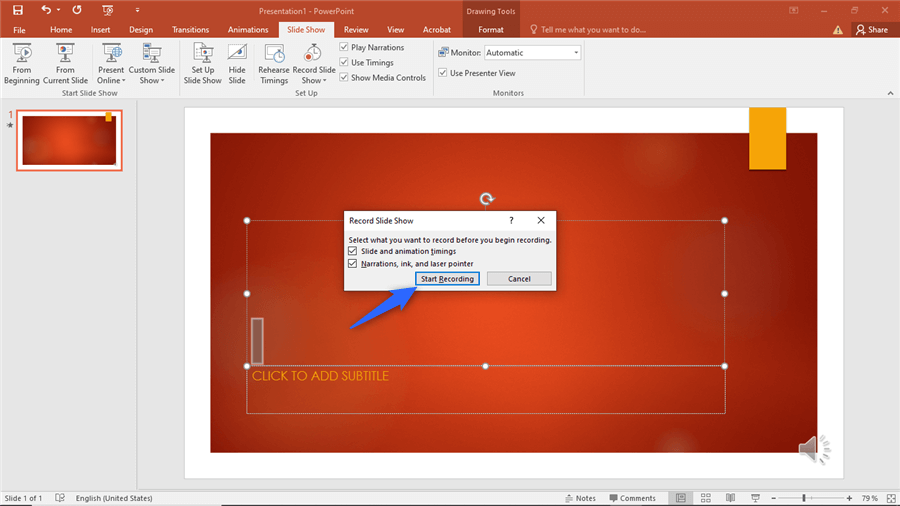
Click Start Recording
Step 7. Click “Stop” when you’re done.
Step 8. Click “Export” or “Save As” to save your recorded presentation as a video.
FAQs on Recording Google Slides
Can I use my voice while recording slides?
Yes, you can record your voice during the presentation. Just choose your microphone before recording and make sure it’s working properly.
What is the easiest way to record and edit slides?
FocuSee is a good choice. It automatically adds zooms, captions, and effects—no editing needed. It supports screen, voice, and webcam together in high quality.
Do I need the internet to record slides?
You only need the internet if using Google Meet. Once installed, offline tools like PowerPoint or FocuSee work without the internet, making them great for flexible recording.
Final Words
Recording Google Slides is easy with the right tools. You can use Google Meet, PowerPoint, or screen recording software to make and save your presentation videos. PowerPoint allows you to record slides after downloading them as a PPTX file. It also lets you add your voice and webcam. These methods are helpful for teaching, training, or sharing ideas. You can save your video and watch it anytime. Always check your microphone and camera before starting. If you want something even easier, try FocuSee. It records in 4K quality, adds automatic effects, and lets you edit quickly. It’s a smart and fast way to make videos without needing any editing skills.