How Do I Record on My iPhone? The Ultimate Guide for Video, Audio, & Screen

If you are searching for how do I record on my iPhone, you are likely holding your phone right now, facing a moment of friction. You have something important to capture—a software bug to show tech support, a lecture you need to review later, or a quick video instruction for a colleague—but the method isn’t immediately obvious.
Facing a locked device or a confusing interface when you need to capture a critical moment can be a significant obstacle. You do not want to waste time on trial and error, only to find out later that your video has no sound or was saved to a folder you cannot find.
This guide provides a verified solution. Whether you need to learn how to record on iPhone for screen tutorials, capture high-quality video of your surroundings, or save audio notes, we cover every method below.
Quick Start: Choosing the Right Recording Method
Many people feel overwhelmed because the iPhone offers multiple recording tools across different apps. The biggest usability barrier is usually not the lack of features, but the lack of clarity around which tool to use.
To save you time, use this decision-making guide to select the correct mobile recording tool immediately:
1. Intent: Capture What is on Your Display
Tap Record
- Tool: Screen Recording (via Control Center).
- Best For: Creating tutorials, showing software bugs to IT, saving social media clips, or demonstrating app workflows.
- Key Feature: Captures system audio and allows for microphone access for narration.
2. Intent: Record Your Surroundings
- Tool: Camera App.
- Best For: Filming events, physical demonstrations, real estate walkthroughs, or vlogs.
- Key Feature: High-resolution video recording (up to 4K) with optical stabilization.
3. Intent: Record Voice Only
Voice Memos
- Tool: Voice Memos.
- Best For: Interviews, lectures, personal notes, song ideas, or meetings where video is unnecessary.
- Key Feature: Optimized for clear vocal audio without video files consuming your storage space.
How to Screen Record on iPhone (Step-by-Step)
The most common question people ask is how to screen record on iPhone because the button is often hidden by default. If you cannot find the record button, you need to add it to your Control Center first. Follow these steps to set up and start recording.
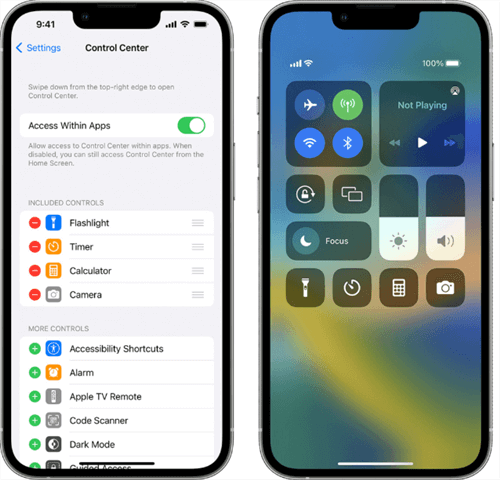
Step 1: Enable the Screen Recording Button
- Open Settings and tap Control Center.
- Scroll down to the “More Controls” section.
- Find Screen Recording and tap the green + (plus) button next to it.
- The feature is now accessible from your main swipe-down menu.
Control Center
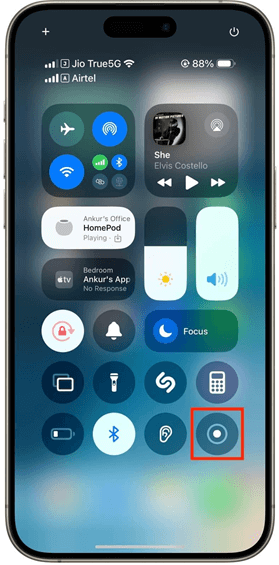
Step 2: Start Recording
Open the Control Center.
- iPhone X and newer: Swipe down from the battery icon in the top-right corner.
- iPhone 8 and older: Swipe up from the very bottom edge of the screen.
Tap the Screen Recording button (a solid circle inside a ring). A three-second countdown will begin, giving you a moment to swipe the Control Center away and open the app you want to record. You will know the recording is active when the clock in the top-left corner is highlighted in red.
Step 3: How to Record with Sound (The Hidden Feature)
A frequent oversight is failing to enable the microphone. By default, the iPhone only records system audio (internal sounds like app music or clicks). To narrate your video:
- Open the Control Center.
- Long-press (press and hold) the Screen Recording button. A new menu will pop up.
- Tap the Microphone icon at the bottom until it turns red and says “Microphone On.”
- Tap Start Recording from this menu.
Pro Tip: Once you enable the microphone here, the iPhone remembers this setting for next time. Always double-check it if you need silence.
Step 4: Stop Recording Clearly
To stop recording, you do not need to open the Control Center again (which adds an awkward end to your video). Simply tap the red clock or red status bar at the top of your screen, then tap Stop on the confirmation pop-up.
Recording Audio and Video: Camera & Voice Memos
If your goal is to capture the world around you rather than your screen, you will need to use the Camera app or Voice Memos. Understanding how to record video on iPhone versus audio-only helps keep your storage organized and your files accessible.
Recording Video (Camera App)
For high-quality visuals, the native Camera app is the industry standard.
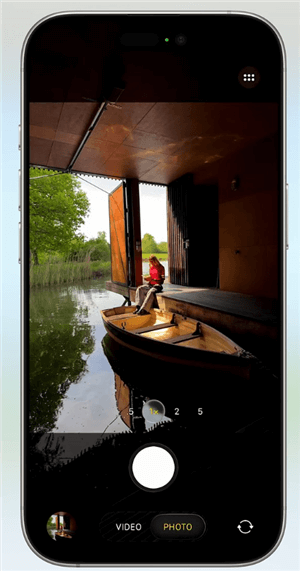
Camera app
- Open the Camera app.
- Swipe the mode selector above the shutter button to Video.
- Check your resolution: In the top right corner, you might see “HD 30” or “4K 60.” Tap these labels to toggle between higher quality (4K) or smoother motion (60fps) depending on your needs.
- Tap the red Record button to start.
- Tap it again to stop; the video saves directly to your Photos library.
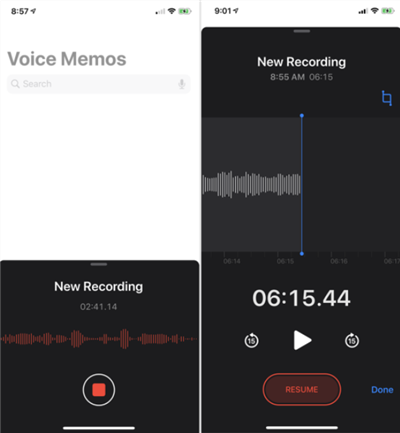
Recording Audio Only (Voice Memos)
When you need to record audio on an iPhone without video files taking up gigabytes of space, use Voice Memos.
- Open the Voice Memos app (usually in the Utilities folder).
- Tap the large red circle to begin.
- You can see the waveform moving as it captures audio. Tap the red square to stop.
- Important: The file is saved automatically inside the Voice Memos app, named by your location (e.g., “New Recording” or “Main Street”).
How to Get Voice Memos Out of the App
A common frustration is not finding audio files in the Photos app. To save a voice memo to a more accessible location:
- Tap the recording you just finished.
- Tap the three dots (…) inside the circle on the right.
- Select Save to Files.
- Choose a folder (like “On My iPhone” or “iCloud Drive”) and tap Save. Now you can email or upload the file just like a document.
A Note on iOS Privacy indicators
Whenever you use microphone access or the camera, iOS provides a visual cue for safety.
- Green Dot: Indicates the camera is currently active.
- Orange Dot: Indicates the microphone is listening.
Check the top of your screen to ensure you are only recording when you intend to.
Comparison: Native Recording vs. Professional Workflows
Native iPhone tools are excellent for quick, raw captures. However, they often fall short when you need to create professional documentation or tutorials for work.
If you have ever recorded a process for a colleague, you likely noticed that the raw footage can be messy. It might show you fumbling with menus, notifications popping up, or the viewer struggling to see which tiny button you tapped.
If you are creating a recording on iPhone step by step for professional purposes, consider the difference between raw mobile capture and polished production.
| Feature | Raw iPhone Recording | Polished Tutorial (Post-Production) |
| Visual Polish | Static, unedited footage. | Auto-zoom on clicks to guide the eye. |
| Cursor / Touch | No visual feedback for taps. | Highlights clicks and touch gestures. |
| Editing Speed | Requires manual export & complex editing. | Automates zoom, layout, and subtitles. |
| Audio | Often captures background hiss. | AI audio enhancement and noise reduction. |
For casual use, native tools function well. However, for creating instructional content, the lack of visual cues can create a bottleneck.
How to Edit and Polish Your Recordings (Back at Your Desk)
Once you have captured your screen recording or video on your iPhone, the next challenge is turning that raw file into something professional.
If you are sending instructions to a team member or posting a guide online, raw footage can be hard to follow on a desktop screen because vertical video often appears small with black bars on the sides.
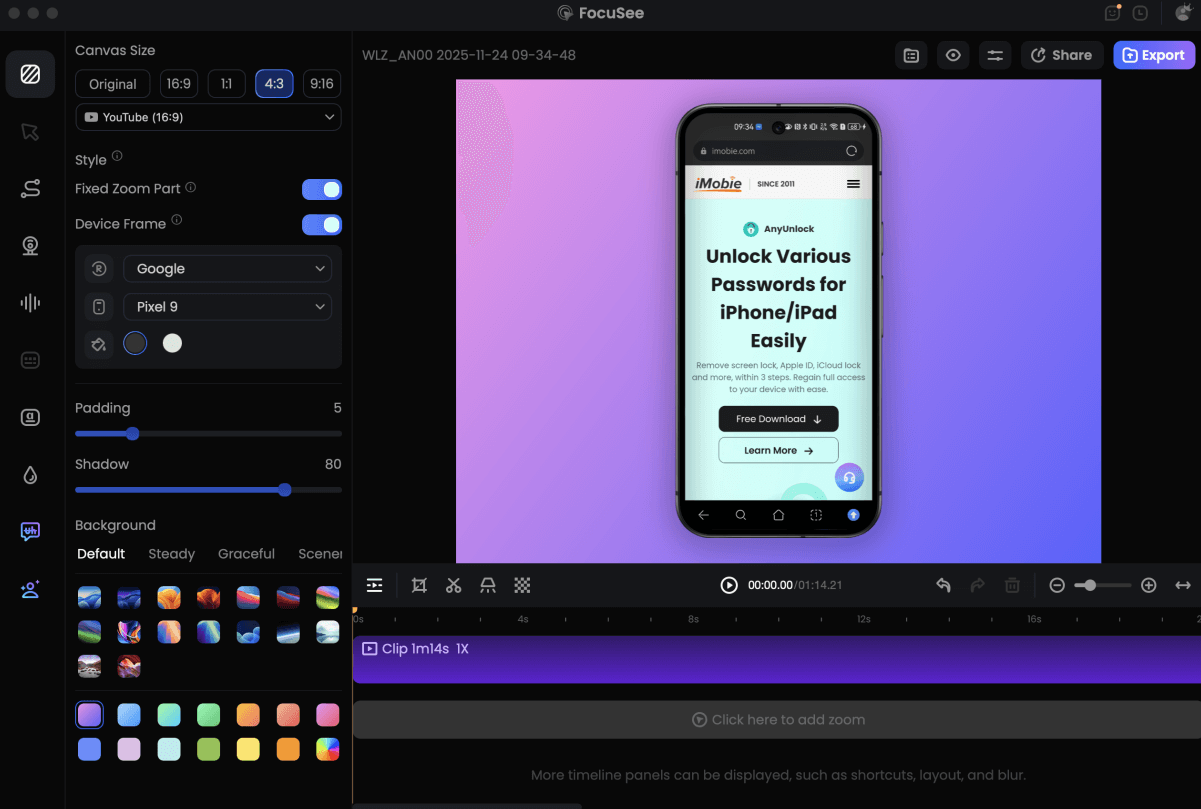
FocuSee is a screen recording and video creation tool that solves this specific “post-production” problem. While it runs on your desktop (Windows or macOS), it is the perfect companion for polishing mobile content. Instead of spending hours in complex editing software, FocuSee automates the cleanup process.
Transforming Raw Clips into Tutorials
You can transfer your iPhone recording to your computer (via AirDrop or cable) and import it into FocuSee. The software then applies professional touches automatically:
Record Android Phone Screen
- Auto-Zoom on Action: FocuSee analyzes the video and automatically zooms in on the areas of interest. This solves the issue where desktop viewers cannot read small text on mobile recordings.
- Instant Subtitles: For users who search for “how to record with sound” but end up with quiet audio, FocuSee’s auto-captioning ensures your instructions are readable even if the viewer has their sound off.
- Background Polish: Mobile recordings often have awkward black bars on the side. FocuSee automatically applies a professional background blur or canvas, giving your vertical video a polished look suitable for YouTube Shorts, TikTok, or professional presentations.
By automating zoom, captions, and layout, FocuSee allows you to produce high-quality iPhone recording tutorials without needing to be a video editor.
Storage & Troubleshooting: Where Did My Recording Go?
A common moment of panic occurs immediately after you hit “stop”: Where did the file go? Because iPhone separates media types, the destination depends on the tool you used. This section clarifies file storage and troubleshoots common errors.
Locating Your Files
- Screen Recordings & Camera Videos: These are automatically saved to the Photos app.
- Open Photos and look at your “Recents.”
- Scroll down to the “Media Types” section and tap Screen Recordings to see only your screen captures.
- Voice Memos: These do not go to Photos. They remain inside the Voice Memos app. Refer to the “How to Get Voice Memos Out of the App” section above to move them.
Troubleshooting Common Issues
If you find your recording didn’t save or has no audio, check these settings:
- Storage Full: If your iPhone settings indicate storage is at capacity, the recording will stop automatically and may fail to save. Check Settings > General > iPhone Storage to see if you need to delete old apps or photos.
- Protected Content: Some apps (like Netflix, Disney+, or banking apps) block screen recording for copyright and security. These recordings will result in a black screen with audio only.
- Silent Mode Switch: If your video has no sound, check the physical switch on the left side of your iPhone. While this usually controls ringtones, some third-party apps mute all audio if this switch is showing orange (silent).
- Microphone Permissions: If you are narrating, verify that the microphone was enabled in the Control Center (via the Long Press method) prior to recording.
Frequently Asked Questions
How do I record on my iPhone with sound?
To record external sound (your voice) during a screen recording, open the Control Center, long-press the Screen Recording icon, and tap the Microphone icon until it turns red. For video recording in the Camera app, sound is recorded by default unless your hand is blocking the microphone grid on the bottom of the phone.
Is recording on my iPhone private and safe?
Yes, all recordings are stored locally on your device by default. Apple does not upload screen recordings to the cloud unless you have iCloud Photos enabled. However, be aware that when you screen record, everything visible on your screen—including text notifications and passwords—is captured. It is best to enable Do Not Disturb mode before starting to prevent private messages from popping up in your video.
How long can I record on my iPhone?
There is no hard time limit for recordings. You are only limited by your battery life and available storage space. A 4K video can take up nearly 400MB per minute, so ensure you have ample space before starting a long recording session.
How do I record audio on my iPhone without video?
Use the native Voice Memos app. It is pre-installed on all iPhones (often found in the “Utilities” folder) and is designed specifically to capture high-quality audio notes, lectures, and interviews without using camera storage space.
Conclusion
Finding the right way to capture content shouldn’t feel like a puzzle. By now, you should know exactly how to record on iPhone based on your specific goal: use the Control Center for screen capture, the Camera for video, and Voice Memos for audio. You know to avoid the frustration of lost files and silent videos.
Remember: capturing the video is just the first step. If you need to turn those raw screen captures into professional, easy-to-follow guides for work or social media, simple phone editing often isn’t enough. FocuSee helps bridge the gap between a simple phone recording and a polished tutorial once you are back at your computer.
Ready to transform your iPhone recordings into professional videos instantly? Download FocuSee for free and let AI handle the zoom and polish for you.