Screen recording is an excellent way to provide online lectures, gameplay, and tutorials. Sometimes, you need to make a specific area of the screen visible, such as a mini-window, a particular application, or a single area of your desktop. Cropping your video makes it easier to follow and more engaging to watch by allowing you to focus on what matters rather than presenting everything at once.
This tutorial explains how to crop a screen recording easily. Learn how to remove the bits that you do not want and retain only the essential ones, whether you’re using a computer, a phone, or an online tool. The process of cropping will make your video appear better and more focused, and save a lot of time in editing. You don’t need any expert skills—follow our steps and make your videos cleaner and more professional.
Crop a Screen Recording on PC/Mac by FocuSee
FocuSee is a simple and powerful tool that makes it easy to crop a screen recording on a PC or Mac. Whether you want to remove unwanted areas or focus on just one part of the screen, FocuSee lets you crop with ease—no editing skills needed. Just record your screen, and the smart cropping and editing tools take care of the rest. You can cut out extra space, highlight the important sections, and keep your video clean and focused.
It also adds dynamic zoom effects that follow your mouse to keep attention on key actions. Choose from 8 mouse styles and 3 click effects for a better look. Add automatic captions, pick from 6 layout options, and apply a clean background or motion blur for a smooth finish. To create the ideal video, you may also add your watermark, edit the pace, and trim. The best part is that you can export videos in 4K quality, which ensures that your cropped recordings always look crisp and expert.
Key Features:
- Smart auto zoom follows your cursor and maintains focus only where needed.
- Automatic background cleanup ensures your video appears clean without showing messy screens.
- Instant layout switch to match different parts of your video—no manual editing needed.
- One-click cropping presets help you crop consistently, saving time and effort.
- The auto keyboard shortcut display shows which keys you press, making it perfect for teaching software.
Now, let’s explore two detailed methods to use this tool and crop a screen recording:
Way 1. Crop Using Upload Feature
Using the new Upload Feature of FocuSee, it is very easy to crop a screen recording using any video file that is available on your device. This gives you an opportunity to edit your video, which you have already recorded, cut pieces you do not need, and add many effects like zoom, captions, and so on to your video. It is ideal to polish some tutorials, demos, or presentations.
Note: You don’t have to re-record anything, as it allows you to create a clean and polished video. These are the steps to crop a screen recording:
Step 1. Head over the top menu and press ‘File’, then select ‘Import video to create project’ option.
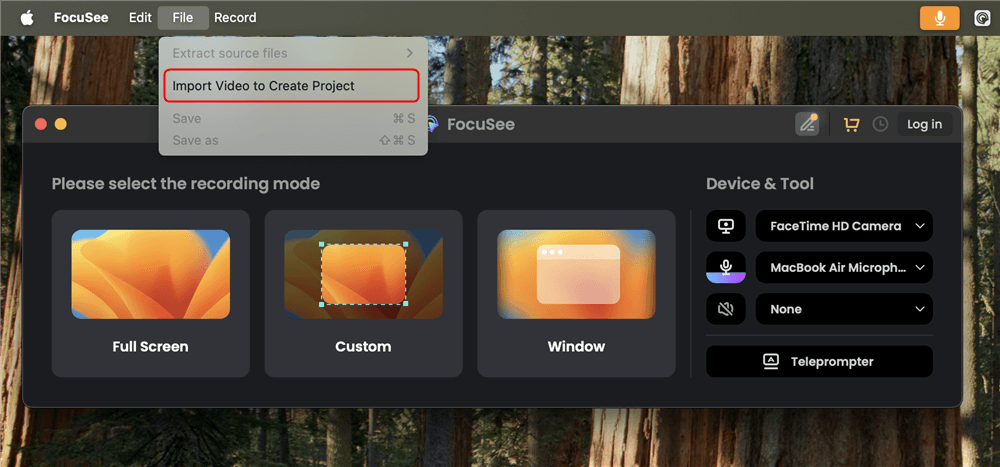
Import Video to Create Project
A pop-up window will appear for you to select the pre-recorded video file. Search and select the file you want to edit and crop the screen recording.
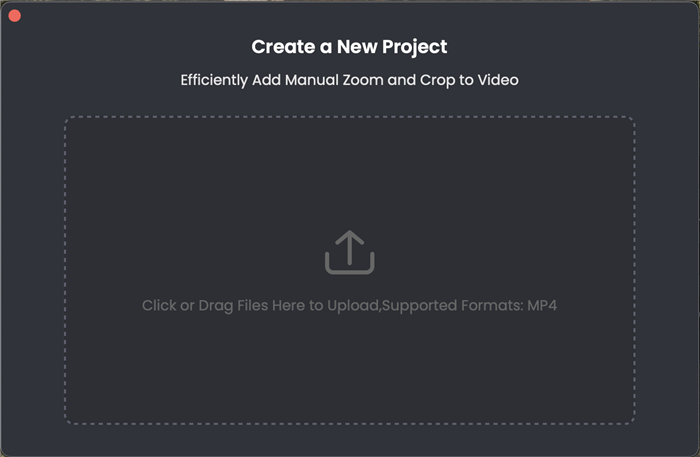
Select the File to Upload
Once the file is added, FocuSee will automatically open it in the editing screen.
Edit the Uploaded Video
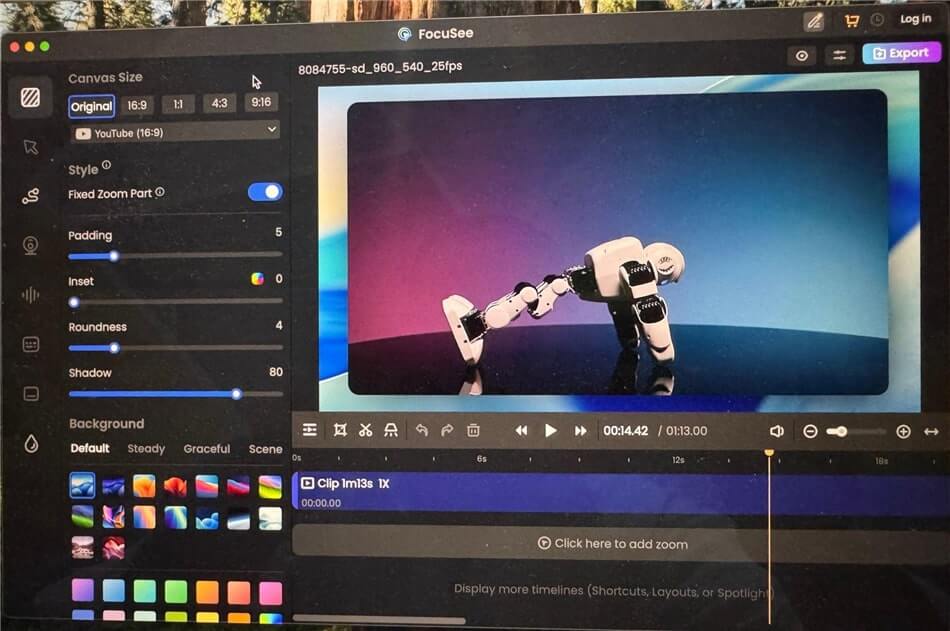
Step 2. Select and click the Cropicon to begin cropping your video. Select from preset sizes, such as 16:9, 4:3, 1:1, or 9:16. Alternatively, you can drag to set a custom size.
Step 3. Move and resize the crop area to focus on the desired part, then apply the changes.
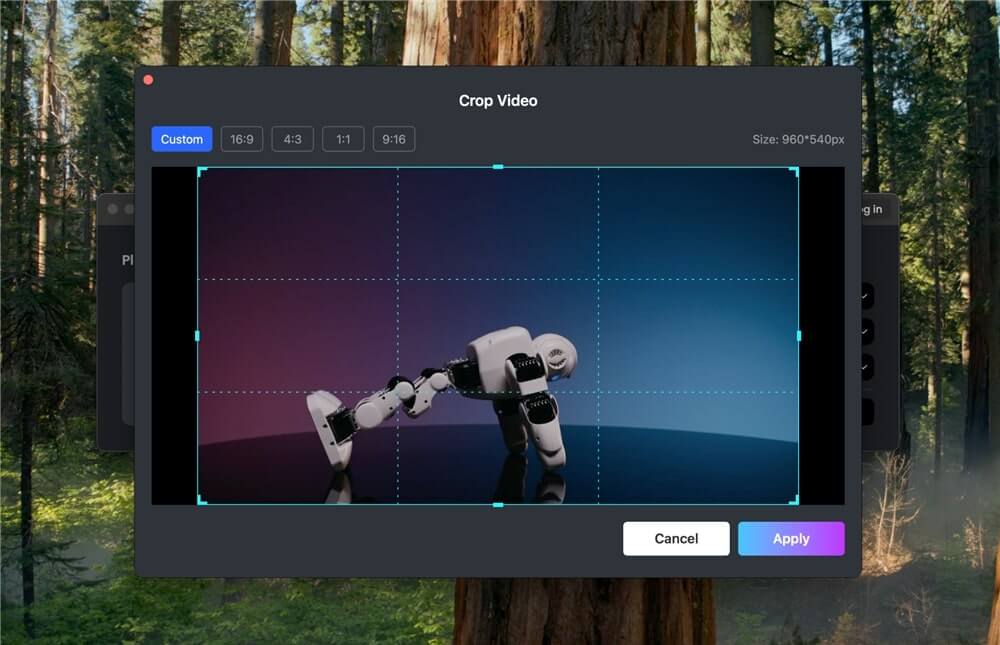
Crop the Video
Way 2. Record and Crop Directly via FocuSee
If you haven’t recorded your screen yet, FocuSee lets you do it all in one place. You can record your screen and crop it right after without switching tools. Here are the steps for recording and cropping directly via FocuSee:
Step 1. Go to the FocuSee website and download the app. Make sure your internet is working. Open the file and install the app. Launch the app. Choose your camera, speaker, and microphone from the main screen.

Set up Your Devices
Step 2. Select what you want to record—your full screen, a window, or just one part of the screen.
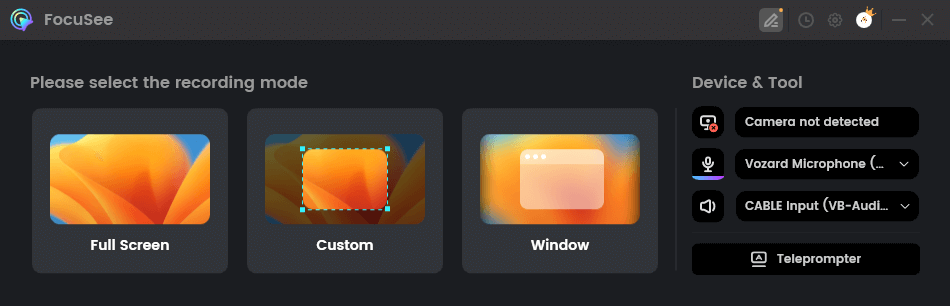
Choose the Recording Mode
Step 3. Check your video and sound settings. Click the red “Record” button when you’re ready.
Click Recording
A 3-second countdown will start. Get ready to record your screen during this time.
Wait for the Countdown
Click the red “Stop” button when you are done recording your video.
Step 4. Your recording will open on the editing screen. Now, you can crop your screen recording, trim parts, or speed it up. Add effects like auto-zoom, mouse styles, cursor resizing, highlight clicks, and click animations to make a clean and clear demo video.
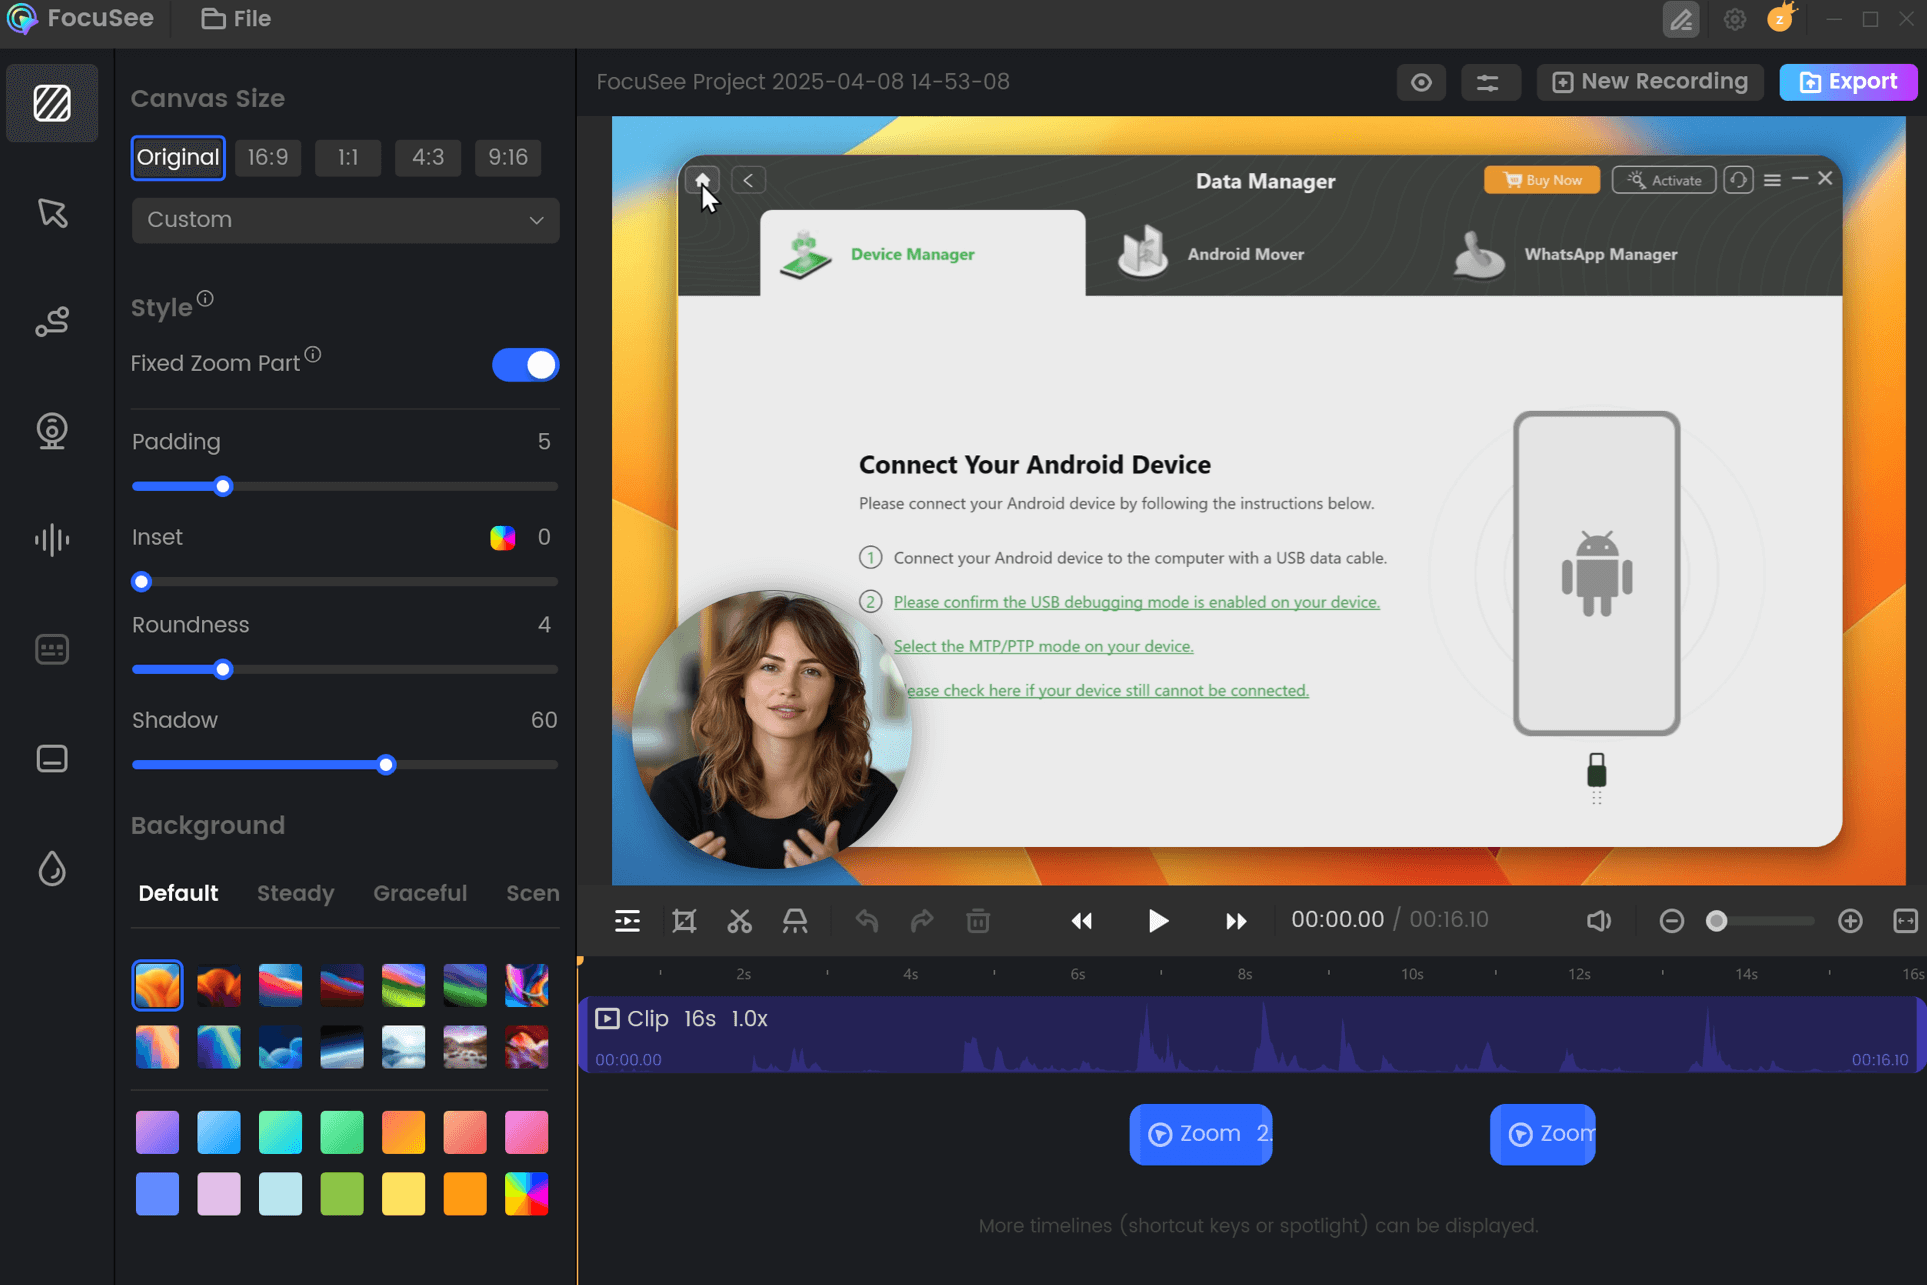
FocuSee Edit the Recording
Step 5. Click “Export” to save your final video as an MP4 or GIF.
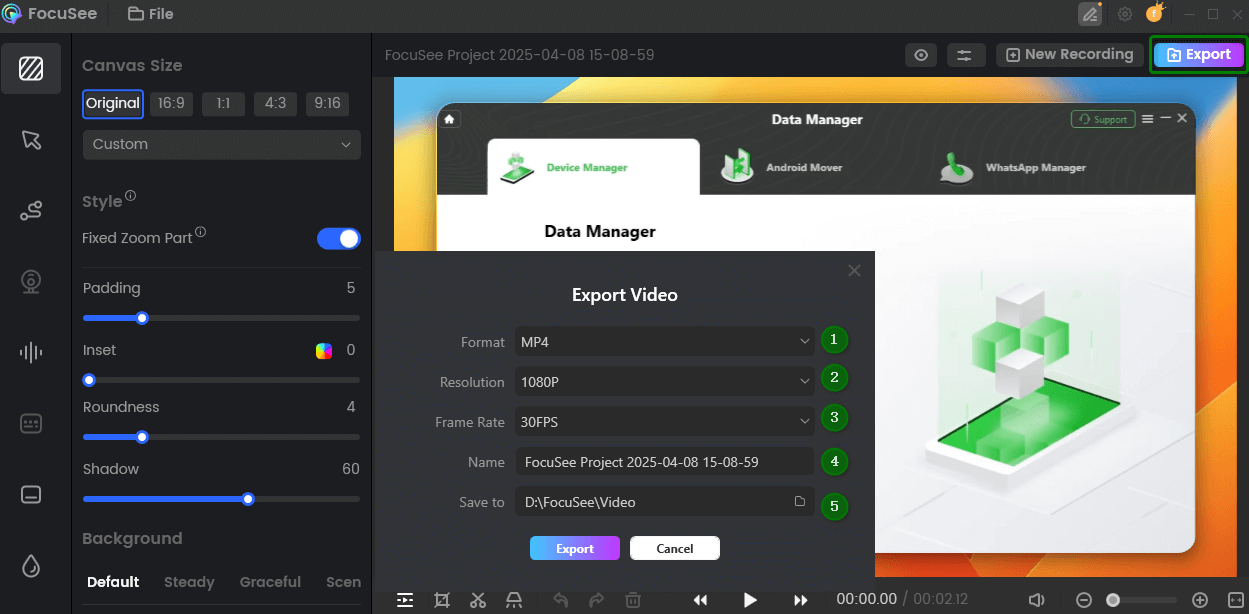
Export and Save Recording Video
How to Crop Your Screen Recording Using Photos App (on Mobile Phone)
The Photos app on more recent phones makes it simple and quick to crop your screen captures without the need for external downloads. You may frame and remove undesired parts of your video with the crop tool. Additionally, it features helpful tools, including options for rotation and straightening, filters to enhance colors and style, and predefined aspect ratios. Your edited clips will be of high quality and professional appearance due to a recent upgrade that has improved the output quality. It’s ideal when you want to quickly and without sacrificing quality highlight key elements in your video, modify it for social media, or remove distractions. For this:
Steps to Crop a Video on iPhone
Step 1. Open the Photos app and tap on the screen recording you want to crop.
Step 2. Tap “Edit” from the bottom toolbar, then tap the “Crop” icon.
Tap the Crop Icon
Step 3. Drag the edges of the video frame to crop it as needed. Tap “Done” to save.
Steps to Crop a Video on Android
Step 1. Open the Google Photos app and select your screen recording.
Step 2. Tap “Edit,” then choose “Crop.”
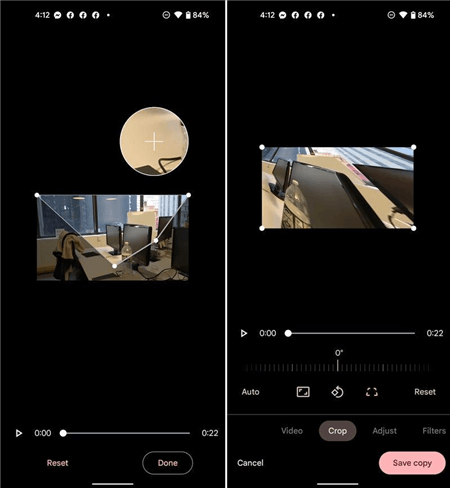
Crop a Video in Android
Step 3. Move the corners to adjust the size. Tap “Save copy” when you’re finished.
Crop Screen Recording Online with Video Cropper Tool
Online video croppers allow you to crop your screen recordings in the browser of your choice without downloading anything. Kapwing is a well-known online video editor that helps you crop screen recordings quickly and easily. Kapwing supports several video file types, and you can choose from a predefined aspect ratio or create your own crop size. In addition to that, Kapwing provides the user the opportunity to add the texts as overlays, subtitles, as well as basic editing of the timeline. For this method:
Step 1. Open your browser, search for “Kapwing,” and access the website interface.
Step 2. Click “Edit a video” to start a new project.
Step 3. Click “Click to upload” and choose your screen recording from your device.
Step 4. Once the video has loaded, go to the right menu and click “Resize Canvas” under the “Project” section.
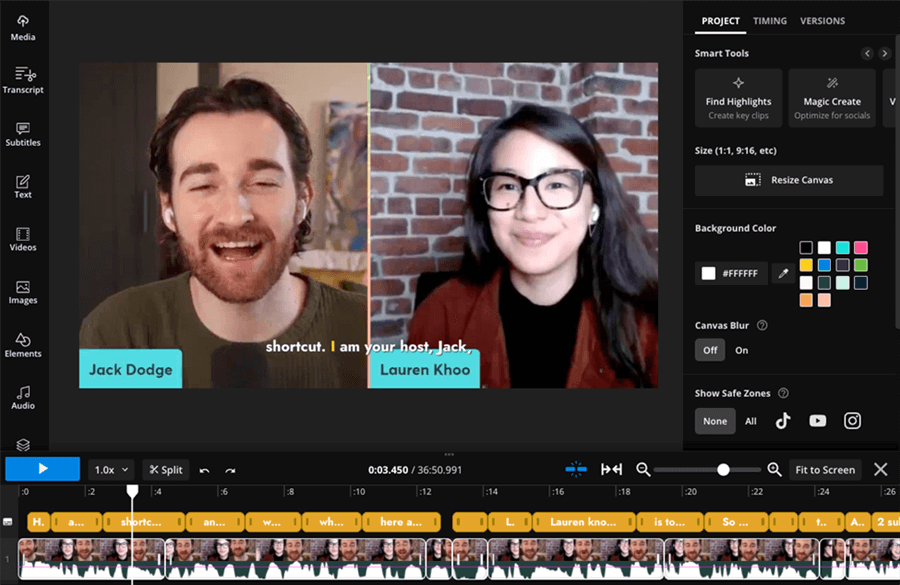
Click Resize Canvas
Step 5. Pick a crop size, such as 16:9, 9:16, or 1:1, then click “Fill and Crop” and tap “Apply.”
Step 6. Click “Export Project,” then select “Export as MP4” to save your video.
Step 7. After export, click “Download” to save the cropped video to your computer.
FAQs on How to Crop a Screen Recording
Is it possible to crop a screen recording without poor quality?
Indeed, many tools do not reduce your video quality upon cropping. Tools like FocuSee will allow you to crop without decreasing resolution, and even allow exporting in HD or 4K.
Can you crop a screen recording on iPhone?
Yes, with an iPhone on iOS 13 or newer, you can use the built-in Photos app. All you need to do is open your recording, press Edit, and move the video frame with the crop tool.
How do you quickly crop a screen recording on PC?
The simplest solution is to have a tool such as FocuSee, and you can record and crop at the same time. It includes features of automatic zoom and cursor effects that will save your time and energy in editing.
Final Words
To improve the quality and focus of your movie, cropping a screen recording is one of the simplest yet most effective techniques. With basic tools like Kapwing or the Photos app, you can effortlessly crop screen recordings on any device without the need for editing knowledge. It is a handy way to create tutorials, demos, and social media-related content. FocuSee is a great option to help you save time and achieve professional results. It features auto-cropping and dynamic zoom, as well as simple 4K export, making it great for professional screen recordings.
