How to Convert PPT to Video: The Complete Guide for 2025

You’ve spent hours perfecting your PowerPoint slides, and now you face the final step: turning them into a video. The frustration is real when you invest an evening recording a detailed narration, only to export a silent MP4 file. For instructors like Jordan, who need to create lecture videos for an LMS, this is more than a technical issue—it’s a roadblock on a tight deadline. The maze of options for resolution, timings, and export formats can be confusing.
This guide provides a clear, reliable procedure to make a PowerPoint into a video with audio and animations intact. We will show you how to record your presentation correctly and choose the right export settings to avoid common failures like missing audio, blurry visuals, or embedded media that won’t play.
How to Record a PowerPoint Presentation as a Video Natively (Windows & Mac)
Using PowerPoint’s built-in tools is the most direct method. Success depends on one critical concept: audio narration and slide timings are stored on a per-slide basis. To successfully export a PPT as MP4 with audio, you must first record these elements and then explicitly tell PowerPoint to use them during the export process.
Phase 1: Record Your Narration and Timings
Step 1. First, open your presentation. The primary tool you will use is on the Record tab in the main ribbon.

How to Create A Video Presentation with PowerPoint
Step 2. Open the Recording Studio: Navigate to the Record tab. Select From Beginning to record the entire presentation, or go to a specific slide and choose From Current Slide to record or re-record just that section.
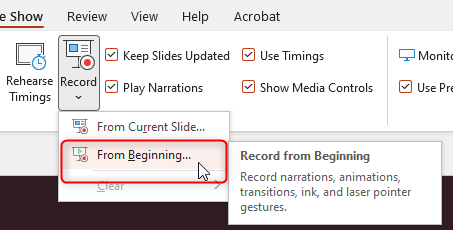
Select From Beginning
Step 3. Check Your Equipment: In the recording window, verify that your microphone is selected and not muted. If you want your face to appear in the corner (picture-in-picture), turn your camera on here as well.
Step 4. Start Recording: Click the red Record button. Speak clearly as you advance through your slides using the arrow keys. Any animations, transitions, and digital ink or laser pointer movements will be captured along with your voice. The time you spend on each slide sets its timing in the final video.
Step 5. Stop and Verify: When finished, press the Stop button. In the normal slide editor view, you should now see a small speaker icon on each slide that contains audio narration. This is your proof that audio was captured for that slide.
Phase 2: Export Your Presentation as an MP4 Video
With your timings and narration recorded, you are ready to create the final video file. The interface for this step differs slightly between Windows and macOS.
On Windows PowerPoint:
- Go to File > Export > Create a Video.
- Select your desired video resolution. Full HD (1080p) offers the best balance of quality and file size for most uses, including uploading a presentation to YouTube.
- CRUCIAL STEP: Ensure the second dropdown menu is set to Use Recorded Timings and Narrations. If this is not selected, PowerPoint will export a silent video with default slide timings.
- Click Create Video, choose where to save your MP4 file, and wait for the rendering process to complete.
On Mac PowerPoint:
- Go to File > Export.
- In the dialog box, choose a save location and select MP4 from the File Format dropdown menu.
- Select your desired quality under the Presentation Quality dropdown.
- CRUCIAL STEP: Make sure the checkbox for Use Recorded Timings and Narrations is checked.
- Click Export.
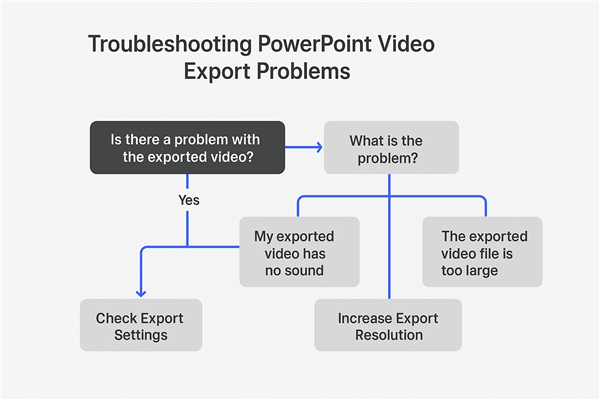
Troubleshooting Common Export Issues
Exporting your presentation only to find a flawed video is a common frustration. These problems usually stem from a few specific settings.
Troubleshooting Common Export Issues
Problem: My exported video has no sound.
This is the most frequent issue and is almost always caused by the export settings.
- Solution 1: Check Export Settings. During the export process, you must select Use Recorded Timings and Narrations. If this option is ignored, your recorded audio will be discarded. Re-export your file with the correct setting selected.
- Solution 2: Verify Per-Slide Audio. Before exporting, return to the Normal view in PowerPoint. Check that a small speaker icon appears on the bottom-right of each slide that should have audio. If the icons are missing, the narration was not captured correctly, and you must re-record those slides. For more tips on audio, see our guide to recording high-quality voiceovers.
Problem: My embedded video or GIF doesn’t play.
PowerPoint can be particular about embedded media during video export. Often, a format that plays perfectly in presentation mode fails to render in the final MP4.
- Solution: Convert your media to a more standard format before inserting it into PowerPoint. For videos, use an MP4 file with H.264 video encoding. For animated GIFs, the most reliable fix is to convert the GIF into a short, looping MP4 video file using a free online converter, then insert that MP4 into your slide.
Problem: The final video looks pixelated or blurry.
This occurs when the export resolution is too low for the screen it’s being viewed on.
- Solution: When you save your PowerPoint as a video, choose a higher resolution. Full HD (1080p) is the recommended standard for clear playback on computer monitors and platforms like YouTube. Avoid lower settings like Standard (480p) unless minimizing file size is your absolute priority.
Problem: The exported video file is too large to email or upload.
A long, high-quality presentation can result in a very large file.
- Solution (Windows): Go to File > Info > Compress Media and select a lower quality setting (e.g., from Full HD to HD). This reduces file size with a minimal loss in visual quality.
- Solution (Mac): For Mac users, the best option is a free external tool like HandBrake. It’s simpler than it looks:
- Download HandBrake (it’s free and safe).
- Open the app and drag your exported video onto its window.
- From the Preset menu, choose a web-optimized option like
Fast 1080p30. - Click the green Start button. This will create a new, much smaller video file.
Pro Tips for Exporting for YouTube, LMS, or Zoom
Creating the MP4 is only half the process. Optimizing it for its final destination ensures the best experience for your audience.
| Platform | Recommended Resolution | Key Considerations |
| YouTube | Full HD (1080p) | Excellent compression—export at the highest quality. |
| LMS (Canvas, Moodle) | HD (720p) | Keeps file sizes manageable for upload limits. |
| Email / Zoom | 480p–720p | Compress to ensure smooth sharing and small attachments. |
For YouTube & Public Sharing
For online courses, upload your video to YouTube and set its visibility to Unlisted. Only people with the direct link can view it. You can then embed this unlisted video in your LMS, keeping it out of public search results. Looking for more ways to optimize your channel?
For an LMS (Canvas, Moodle, Google Classroom)
Always test playback within the LMS itself. Some systems re-compress videos upon upload, which could affect quality. Confirm that all your animations and embedded media play correctly inside the LMS environment.
Enhancing Accessibility with Subtitles
Adding captions is essential for accessibility and is highly recommended for all educational and corporate content.
How-To: Upload your final MP4 to YouTube. Once it has processed, go to the video in YouTube Studio, select Subtitles, and use the auto-captioning feature. You can then review and edit the automatically generated text for accuracy before publishing.
For the most up-to-date details on export options, you can also consult Microsoft’s official support documentation for Windows and Mac. These resources provide additional technical specifications.
For More Control and Reliability: Using a Dedicated Tool
If you’ve followed the steps above and still find the process unpredictable—or if you need to produce professional videos regularly on a tight deadline—a dedicated tool can save you a lot of frustration. A solution like FocuSee is purpose-built to bypass PowerPoint’s common export issues while giving you far more control over video quality, pacing, and presentation style.
FocuSee isn’t a traditional video editor. It is a professional screen recording tool enhanced with AI, specifically designed to turn your slide presentations into smooth, polished videos with minimal effort. Instead of relying on PowerPoint’s internal export engine, FocuSee captures the exact playback on your screen and layers on intelligent enhancements that dramatically reduce post-production work.
Why FocuSee Works Better
| Feature | PowerPoint’s Built-in Tools | FocuSee |
| Success Rate & Reliability | Needs careful setup to avoid media or audio glitches. | Stable engine captures exactly what you see with fewer failures. |
| Time Cost & Efficiency | Mistakes often require re-exporting or external edits. | AI Smart Cut removes silences & errors, cutting edit time by ~80%. |
| Final Video Quality | Quality depends fully on slide design. | Adds smart zooms, cursor highlights, and smooth transitions. |
| Technical Skill Required | Moderate — hidden settings require tweaking. | Low — optimized for fast, predictable workflows. |
| Best For… | Quick, simple videos where perfection isn’t essential. | Professional tutorials, courses, and marketing videos. |
FocuSee is ideal for creators who want efficiency, reliability, and higher engagement without dealing with complex editing software.
How to Record a Professional Slideshow with FocuSee
Here’s the recommended step-by-step workflow:
Step 1: Open Your PowerPoint and Switch to Full-Screen Slide Show
Arrange your slides exactly the way you want them. FocuSee will capture what appears on screen, so animation and timing will render perfectly.
Step 2: Launch FocuSee and Choose Your Recording Mode
Select Screen Recording (full screen or a specific window). FocuSee automatically detects the slide show window for a clean capture.
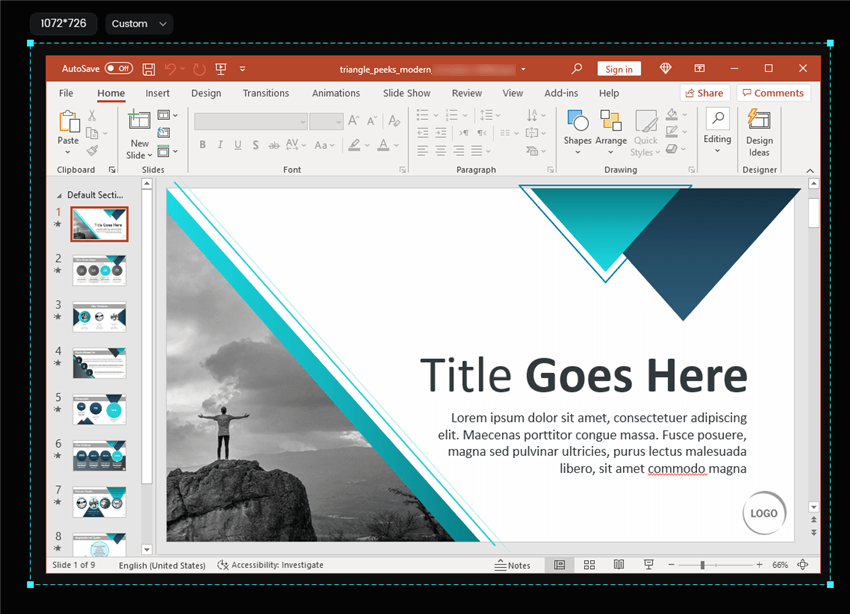
Frame an Area to Record
Step 3: Start the Recording and Present Naturally
Flip through your slides at your own pace. FocuSee captures smooth transitions, animations, and cursor movement without stutter. Enable System + Mic audio if you’re narrating.
Step 4: Customize Your Recording Settings (Optional)
Choose a cursor style (highlight ring, spotlight, subtle tracking).
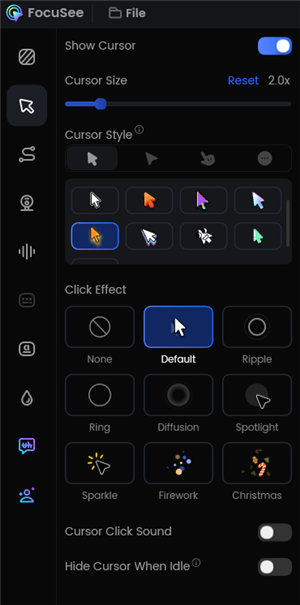
Change the Cursor Settings
Step 5: Let FocuSee Auto-Enhance the Recording
After recording, FocuSee can automatically:
- Remove long pauses or verbal fillers
- Clean up audio background noise
- Apply subtle pan-and-zoom motions
- Smooth cursor movement
- Trim dead sections at the start or end
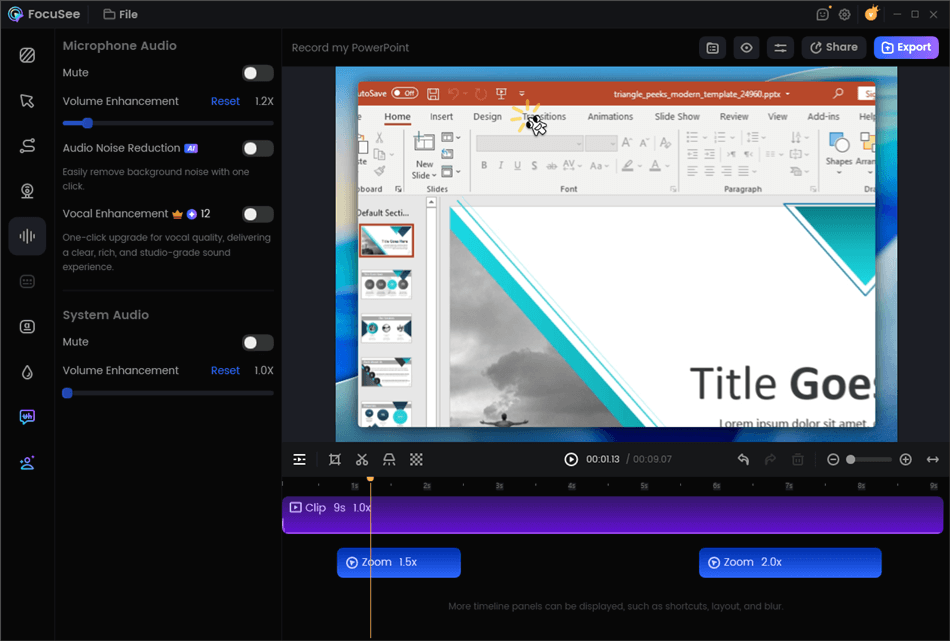
Edit Your Recording
You get a clean, polished presentation without manual timeline editing.
Step 6: Export in High-Quality MP4
With one click, export in stable, platform-ready 1080p or 4K—ideal for YouTube, LMS platforms, internal training, or marketing pages.
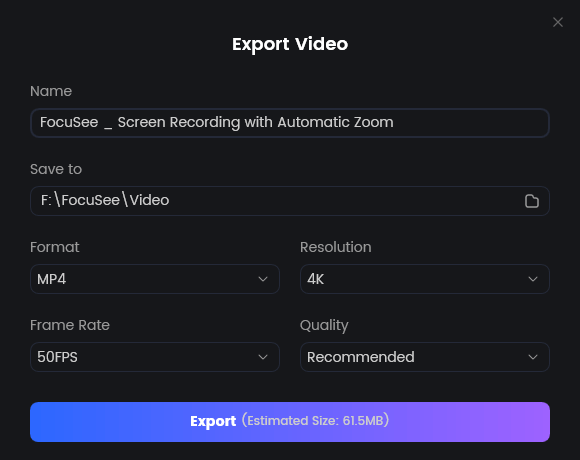
Export Your Video
FAQs about converting PPT to Video
What’s the difference between ‘Record’ and ‘Rehearse Timings’?
Record captures your audio narration and sets slide timings as you speak. This is what you need to create a narrated video. Rehearse Timings only records how long to display each slide, without audio. It’s meant for creating a silent, self-running presentation, like for a kiosk.
How do I make my face appear in the corner (picture-in-picture)?
Modern versions of PowerPoint (Microsoft 365) allow you to enable your webcam during the Record process. Your camera feed will appear in the corner. For more control over size and position, a tool like FocuSee provides a more robust solution. Learn more about effective presentation techniques. [Internal Link Suggestion: Link the preceding phrase to ‘/engaging-video-presentation-tips’]
What if my PowerPoint version doesn’t have a ‘Create a Video’ option?
This feature is standard in PowerPoint 2010 and newer. If you are using a much older version, your best alternative is to use a screen recording tool like OBS Studio, Camtasia, or the Xbox Game Bar built into Windows to capture your slideshow as you present it.
Why is there no sound in my exported video?
This is typically because the “Use Recorded Timings and Narrations” option was not selected during the export process. Re-export and ensure that critical setting is enabled.
How do I turn my PowerPoint into a video without losing animations?
When you use the Record feature, PowerPoint automatically captures all animations and transitions as they play. As long as you export using the recorded timings, your animations will appear in the final video exactly as you presented them.
Can I make a video from slides if I’m using PowerPoint for the web?
PowerPoint for the web has very limited video export functionality and does not support narration recording. The most reliable workaround is to present your slides in the browser while using a separate screen capture tool like Screencastify or Loom to record your screen and microphone.
Conclusion
You no longer have to face the uncertainty of PowerPoint’s export process. By understanding how narration and timings are saved and by following the correct export steps, you can reliably create videos using the tools you already have. You are now equipped to handle the most common issues, from silent exports to misbehaving GIFs.
For those who need to produce polished, engaging videos without the risk of technical failures, a dedicated tool is the superior solution. Don’t let a failed export derail your deadline again. FocuSee provides a controlled, efficient environment to turn your presentations into professional videos in minutes, not hours. With AI-powered editing and dynamic camera effects, you can create content that captivates your audience.