How to Add a Logo to a Video in 2026: A Step-by-Step Guide

Seeing your video content reposted without credit is frustrating. You know you need to brand your videos, but the thought of complex editing tools is overwhelming. You worry about a white box appearing around your logo, losing video quality, or the logo disappearing halfway through. If you need a simple, repeatable workflow to brand every video professionally in minutes, not hours, you’ve found the right guide. We’ll show you how to put a logo on a video efficiently, ensuring your content always looks polished and is clearly identified as yours. This guide is based on hands-on testing of multiple methods to give you clear, actionable instructions.
Step 0: The Most Important Step for a Professional Logo Overlay
Before you open any software, the quality of your final result is determined by one critical element: your logo file. Getting this preparatory step right solves the most common frustrations, like the distracting white box that instantly signals an amateur production.
Why a Transparent PNG Logo is Non-Negotiable
JPG Logo vs Transparent PNG Logo
To avoid the dreaded white box issue, your logo must be saved in a format that supports transparency. The industry standard is the transparent PNG logo (Portable Network Graphics). Unlike a JPG, a PNG file can have a transparent background, allowing your design to sit cleanly on top of your video footage without any unwanted borders. If a designer created your logo, always request the source file as a high-resolution, transparent PNG.
To ensure your logo looks crisp after video compression, create the file at a higher resolution than you think you need. A reliable rule of thumb is to export the PNG at 2x the intended display size. For instance, if you want your logo to be about 200 pixels wide in the final video, create a PNG that is at least 400 pixels wide. Scaling it down in the video editor preserves sharp edges and prevents pixelation.
How to Put a Logo on a Video: Choosing the Right Tool
Not all video editing tools are created equal. The best method depends on your priorities: a quick, one-time solution or a reliable workflow for branding many videos. We evaluated three main categories to help you decide.
Be cautious with browser-based video editors. While accessible, many free online tools add their own watermark to your final video, completely undermining your branding efforts. They can also pose data privacy risks. For these reasons, we recommend trusted desktop software.
Use this table to find the right fit for your needs:
| Method | Time Cost | Final Quality | Ease of Use | Key Risk |
| Specialized Tool (FocuSee) | Low | Excellent | Very Easy | Commercial software (offers a free trial) |
| Built-in OS Editors (Clipchamp/QuickTime) | Medium | Good–Excellent | Medium | Manual process for every video; some features are hidden |
| Free Online Tools | Medium–High | Variable | Easy | Adds an unwanted watermark logo; data privacy concerns |
Desktop editors offer more control and security, while specialized tools are designed for maximum efficiency.
How to Add a Logo to Video Files with FocuSee [Easiest Method]
For creators who need to brand videos with a logo consistently and quickly, a specialized tool offers the most efficient solution. While FocuSee is a powerful screen recorder, its ‘Import & Re-Edit Local Videos’ feature provides a streamlined workflow perfect for this task. This method directly addresses common pain points like quality loss and incorrect logo duration.
This procedure solves the frequent issue of a logo disappearing partway through. The simple timeline overlay makes it intuitive to stretch the logo’s duration to match the full length of your video with a simple drag-and-drop motion. To address the fear of losing quality, FocuSee supports high-quality export settings, including 1080p and 4K export, ensuring your final file looks as good as the original.
Here is the four-step procedure:
Step 1. Import Your Video: Open FocuSee and select the option to import and edit a local video file. Choose the MP4 or other video file you want to brand.

Upload Your Footage
Step 2. Add Your Logo: Drag your transparent PNG logo file directly onto the video timeline. It will appear as a separate layer above your main video.
Step 3. Adjust and Position: Click the logo in the preview window to resize it and drag it to your desired corner.
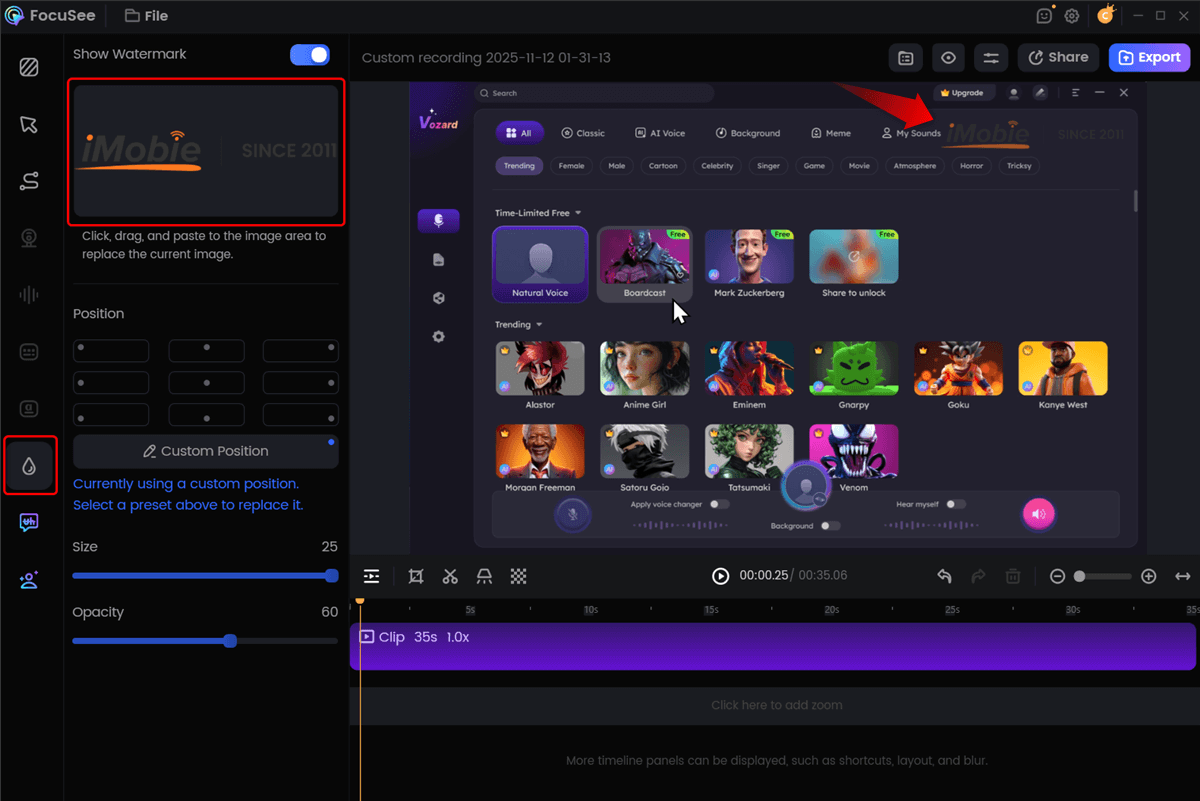
Add Custom Watermark
Step 4. Export: Click the “Export” button and choose your preferred resolution and format.
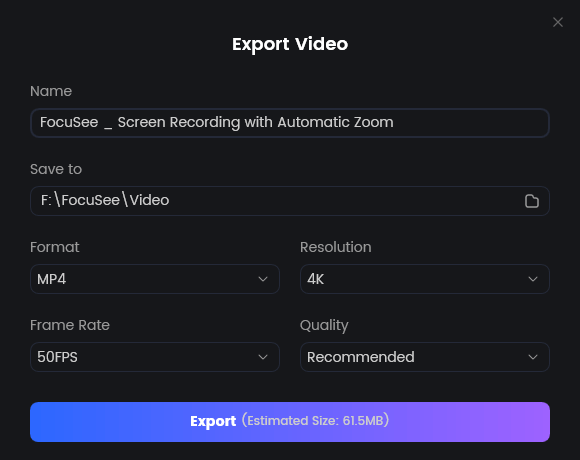
Export Your Video
Why FocuSee Is Ideal for Adding a Logo to Videos
- High-Quality Export (Up to 4K): Export branded videos in 1080p or 4K without visible quality loss, ensuring the logo remains sharp and professional.
- Flexible Aspect Ratio & Platform Presets: Export the same logo-branded video for YouTube, TikTok, Instagram, or other platforms without redoing the watermark placement.
- Non-Destructive Editing Workflow: Adding a logo doesn’t permanently alter your original footage—you can always reposition, replace, or remove it later.
- Beginner-Friendly Drag-and-Drop Editing: No complex video editor required; resizing, positioning, and timing the logo is intuitive even for first-time users.
Free Methods: How to Add a Logo to a Video on Windows and Mac
If you prefer to start with free tools you already have, both Windows and macOS offer capable built-in video editors. These methods require more manual adjustment but are excellent for occasional use without any additional cost. This is the best way to add a logo to a video without a watermark from the tool itself.
Add a Logo to Video on Windows Using Clipchamp
Microsoft Clipchamp is now included with Windows 11 and is available as a free download from the Microsoft Store. It uses a straightforward timeline-based system.

How to Add a Watermark on Windows 11 with Clipchamp
- Create a New Project: Open Clipchamp and import both your video and your transparent PNG logo into the media library.
- Build the Timeline: Drag your main video onto the timeline. Then, drag your logo file onto the track above the video.
- Adjust the Logo: Select the logo clip on the timeline. In the preview window, resize and reposition it. To make it last the entire video, drag the edges of the logo clip on the timeline until its length matches the video clip below.
- Adjust Opacity for a Pro Look: With the logo clip still selected, look to the right-side panel and click on “Adjust colors.” Inside this menu, you’ll find the “Transparency” slider. Reduce it to 25-40% to create a subtle watermark effect.
- Export: Click the export button and select your desired video quality.
Add a Logo to Video on Mac Using QuickTime + Preview
For Mac users who want a lightweight, no–video-editor workflow, QuickTime combined with Preview offers a surprisingly effective solution for adding a static logo to a video. This method is best for short clips or simple branding needs.
Step 1. Prepare Your Logo
Open your logo in Preview and make sure it’s a transparent PNG. Resize it to the approximate on-screen size you want before adding it to the video.
Step 2. Open the Video in QuickTime
Right-click your video file and choose Open With → QuickTime Player.
Step 3. Show the Markup Toolbar
In the menu bar, click Edit → Add Trim, then select View → Show Markup Toolbar. This enables image and shape overlays.
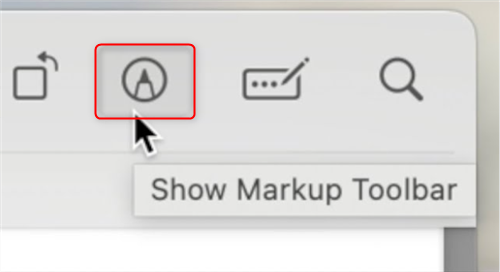
Show Markup Toolbar
Step 4. Add the Logo Overlay
Click the Image icon in the markup toolbar and select your logo file. The logo will appear on top of the video frame.
Step 5. Position the Logo
Drag the logo to your preferred corner and resize it using the blue handles. The logo will remain static in this position throughout the clip.
Step 6. Export the Video
Click Done, then go to File → Export As and choose your desired resolution.
Where to Place Your Logo for Maximum Impact
Knowing how to add a logo is only half the battle; knowing where to put it creates a professional look. Incorrect placement can cause it to be cropped or covered by platform interface elements.
Understanding Safe Margins for Video Branding
- For YouTube (16:9 Aspect Ratio): The bottom of the screen is where the progress bar appears. The top-right or bottom-right corners are generally the safest and most standard placements.
- For TikTok & Instagram Reels (9:16 Aspect Ratio): Vertical video is crowded with UI. The entire right side is covered with buttons (like, comment, share), and the bottom contains the caption. The safest zones for your logo overlay are the top-left or bottom-left corners, well inside the frame’s edges.
The Professional Touch: Why Opacity Matters
A fully opaque logo can be distracting. To achieve a more integrated and professional look, you should always use an opacity adjustment. As we demonstrated in the steps above, most video editors allow you to reduce the logo’s opacity (its level of transparency). Setting the opacity to a moderate level, typically between 25-40%, turns your logo into a subtle watermark logo. It remains visible for branding but doesn’t pull focus from your main content. This small tweak makes a significant difference in the perceived quality of your video branding.
Final Thoughts
You no longer have to feel overwhelmed by complex software or settle for unprofessional results. The key to effective video branding isn’t mastering a complicated editor; it’s establishing a simple, repeatable workflow. By preparing a high-quality transparent PNG and choosing the right tool for your needs, you can solve common frustrations like quality loss, incorrect duration, and intrusive watermarks for good.
Ready to establish a fast, professional branding workflow? If efficiency is your top priority, you can download a free trial of FocuSee and experience the simple drag-and-drop procedure for yourself. It’s a great way to see if a specialized tool is the right fit for ensuring every video you publish is protected and looks consistently professional.
Frequently Asked Questions
Here are direct answers to the most common questions about adding logos to videos.
1. How can I add my logo so it stays for the entire video?
In your editor’s timeline, the logo will be on a separate track above your video. You must click on that logo layer and drag its ends to stretch its duration, making it match the full length of the video clip below it.
2. What is the best file format for a video logo?
The best format is a transparent PNG logo. This supports a transparent background, so you won’t have a white or black box around your design. Avoid using JPGs.
3. Will adding a logo reduce my video quality?
No, the logo itself doesn’t reduce quality. However, your export settings do. To maintain quality, ensure you export your video at its original resolution (e.g., 1080p or 4K) and select a high-quality preset.
4. How do I adjust logo transparency to look professional?
Select the logo in your editor’s timeline. In Clipchamp, go to “Adjust colors” and use the “Transparency” slider. In iMovie, use the transparency control within the “Color Correction” panel. Reducing the opacity to around 25-40% creates a subtle watermark that looks professional.
5. Where should I place my logo so it doesn’t get cropped?
Place your logo within the “safe margins.” For YouTube (16:9), the top-right or bottom-right corners are best. For TikTok/Reels (9:16), use the top-left or bottom-left corners to avoid being covered by interface buttons.
6. How can I add the same logo to multiple videos at once?
To batch add a logo to videos, you need a tool with template or batch processing features. Specialized editors like FocuSee allow you to save your logo placement and settings as a template for quick, repeatable application.
7. Can I add a logo to a video for free without extra watermarks?
Yes. Using built-in desktop software like iMovie (Mac) or Clipchamp (Windows) is the most reliable way to add a logo to a video without a watermark from the tool itself.