How to Fix OBS Virtual Camera Not Showing Up?

OBS Virtual Camera is a powerful feature in OBS Studio that allows you to use your OBS output as a virtual camera source in other applications, such as video conferencing software, streaming platforms, or recording tools. It provides a seamless way to integrate your OBS scenes and sources into various software programs that support camera input. However, sometimes users may encounter an issue where the OBS Virtual Camera is not showing up or functioning correctly, which can be frustrating and hinder their intended workflow. In this guide, we will explore 5 effective fixes to address the common issue of OBS Virtual Camera not showing up.
Fix OBS Virtual Camera Not Showing Up
Table of Contents: hide
Why Can’t I See OBS Virtual Camera?
Where to Install OBS Virtual Camera?
Why Can’t I See OBS Virtual Camera?
If you’re having trouble seeing the OBS Virtual Camera in other applications, there could be several reasons why. Here are a few common issues:
- OBS Virtual Camera is not installed or enabled.
- OBS Virtual Camera is not selected in the target application.
- OBS Virtual Camera may conflict with other camera applications or virtual camera software.
- Some antivirus software or firewalls may block OBS Virtual Camera from being accessed by other applications.
- Some applications may not support virtual cameras or may have specific requirements for camera input.
Further Reading: How to Fix OBS Desktop Audio Not Working >
Where to Install OBS Virtual Camera?
OBS Virtual Camera is a feature that comes built-in with the latest versions of OBS Studio, a popular open-source software for video capture and live streaming. When you install OBS Studio on your computer, the Virtual Camera feature is automatically installed alongside it.
OBS Virtual Camera
Once installed, you can enable the OBS Virtual Camera from within the OBS Studio application by going to the “Tools” menu and selecting “Virtual Camera.” This allows you to use the output from your OBS Studio scenes and sources as a virtual camera input in other applications, such as video conferencing software, web browsers, or any program that supports camera input. With OBS Virtual Camera, you can enhance your video calls, presentations, or live streams by adding custom graphics, overlays, or combining multiple video sources into a single virtual camera feed.
How to Fix OBS Virtual Camera Not Showing Up?
In this part, we collect 6 fixes to help you address OBS Virtual Camera not showing up issue.
Restart the OBS Virtual Camera
To restart the OBS Virtual Camera, follow these steps:
Restart the OBS Virtual Camera
1. If OBS Studio is already running, make sure to bring it to the foreground.
2. In the OBS Studio menu bar, click on “Tools.” From the dropdown menu, select “Virtual Camera.”
3. In the Virtual Camera settings window, locate the “Stop” button. Click on the “Stop” button to stop the virtual camera output.
4. After stopping the virtual camera, the “Stop” button will change to a “Start” button. Click on the “Start” button to restart the virtual camera.
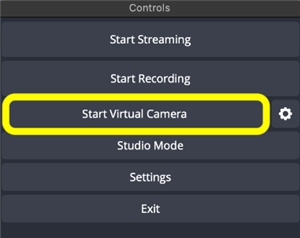
Ensure the OBS Virtual Camera is Enabled
OBS Virtual Camera allows you to use the output from your OBS Studio scenes and sources as a virtual camera input in other applications. If the virtual camera is not enabled, other applications won’t be able to detect or use the OBS Virtual Camera as a video source.
To make sure OBS Virtual Camera is enabled:
Ensure the OBS Virtual Camera is Enabled
1. Open the OBS Studio application on your computer.
2. In the OBS Studio menu bar, click on “Tools.” From the dropdown menu, select “Virtual Camera.”
3. In the Virtual Camera settings window, look for the “Status” section. If the virtual camera is enabled, you will see a message that says “Status: Running.”
Reinstall the OBS Virtual Camera
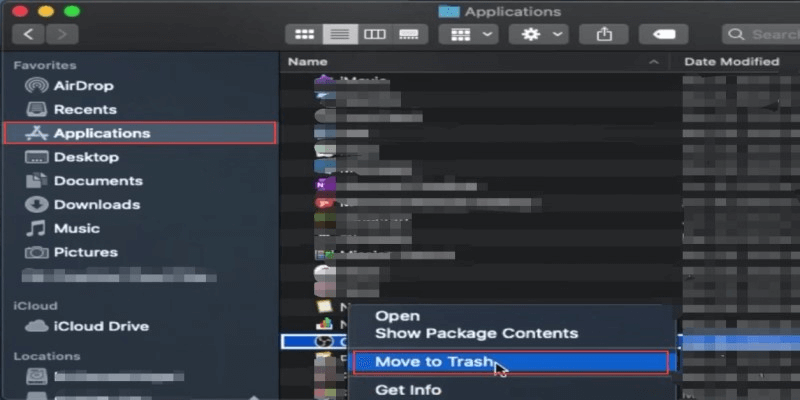
Reinstalling the OBS Virtual Camera can be helpful in resolving various issues and ensuring proper functionality. If you can’t find the OBS Virtual Camera option in OBS Studio’s tools menu or if it doesn’t appear in other applications’ camera selection, reinstalling can help resolve this issue. A fresh installation can properly register the virtual camera plugin and make it available for use.
Reinstall the OBS Virtual Camera
1. Uninstall OBS Studio
2. Remove the remaining files. After uninstalling OBS Studio, some files or folders related to OBS Studio may remain on your computer.
3. Open your web browser and go to the official OBS Studio website to reinstall the application.
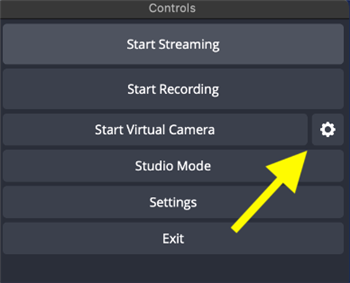
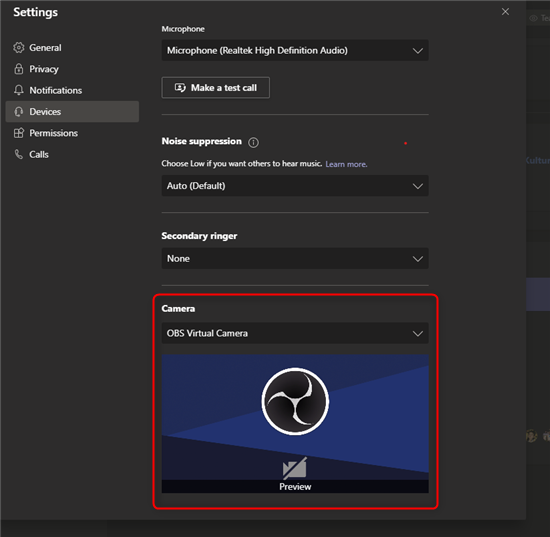
Check Application Settings
Many applications that support camera input have settings where you can choose which camera to use. If the OBS Virtual Camera is not selected as the active camera in the application’s settings, it won’t be visible or usable within that application. By checking the camera selection settings, you can ensure that the OBS Virtual Camera is properly selected and configured as the input source.
To check whether an application supports camera input and to review its camera settings, follow these general steps:
Check Camera Settings
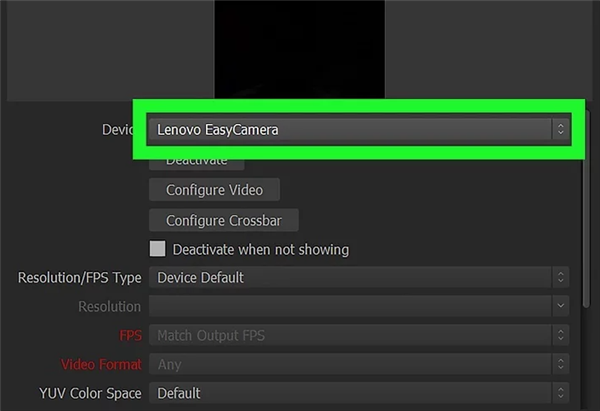
1. Launch the application where you want to use the camera.
2. Within the camera or video settings, look for options that mention camera, webcam, or video input.
3. Look for a dropdown menu, list, or selection option that displays available camera devices.
4. If you made any changes to the camera settings, make sure to save or apply the changes.
After restarting the application, verify if the camera is working as expected.
Update Your Computer’s Camera Drivers
OBS Virtual Camera relies on the underlying camera drivers to function properly. If the camera drivers are outdated or incompatible with your operating system or the current version of OBS Studio, it can cause the virtual camera to not show up or work correctly. Updating the camera drivers ensures that they are compatible with the latest software and hardware configurations.
To update your computer’s camera drivers, follow these step-by-step instructions:
Update Your Computer’s Camera Drivers
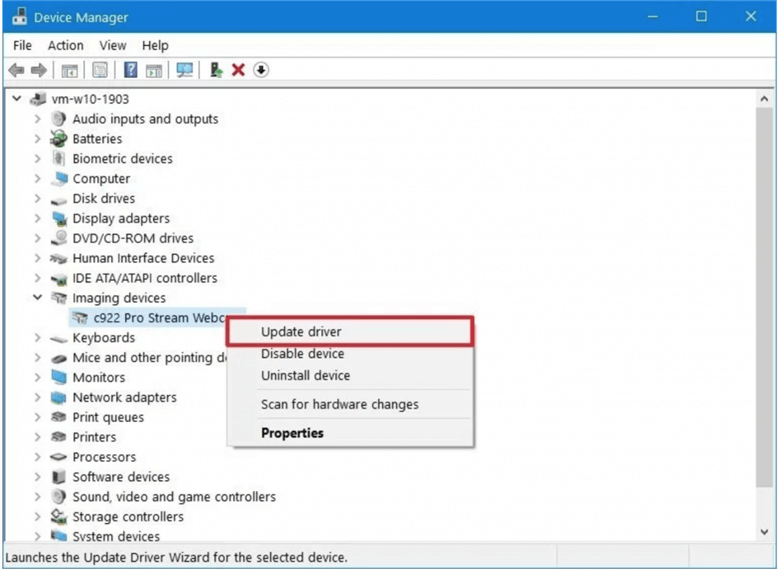
1. Open Device Manager and locate the camera device.
2. Right-click on the camera device and select “Update driver” from the context menu.
3. In the next window, choose “Search automatically for updated driver software.”
4. Windows will now search online for the latest available driver for your camera and attempt to install it automatically.
The driver update process may take a few moments, depending on your internet connection speed and the size of the driver package.
Bonus Tip. Alternative Way to Record Screen with Webcam
If the mentioned methods fail to address the OBS issue, you can turn to an OBS alternative – FocuSee. FocuSee is a comprehensive screen recording tool that offers a unique blend of functionality with its webcam integration, making it an ideal choice for users looking to create professional and engaging video content. When it comes to recoding screen with webcam, FocuSee offers a range of camera frames and filters to customize the appearance and reflect individual or brand style. Additionally, you can add a background, adjust rounded corners, set shadows, insets, and padding to make the video more visually appealing.
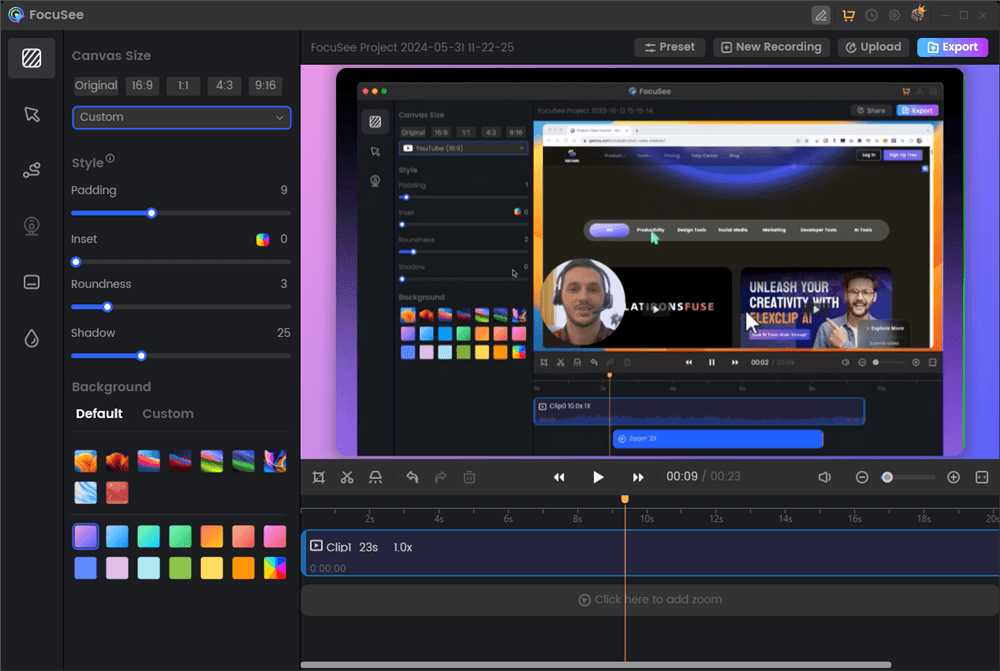
Screen Recording Editing Interface
Final Thought
In conclusion, the OBS Virtual Camera not showing up the issue can be a frustrating obstacle for users, but it is not an insurmountable one. By understanding the common causes and applying the five fixes outlined in this guide, users can effectively troubleshoot and resolve the problem. Whether you’re a content creator, streamer, or professional, having a reliable and functional virtual camera is essential for your work. By following the steps provided and staying informed about the latest troubleshooting techniques, you can ensure that the OBS Virtual Camera remains a valuable tool in your video production arsenal.