A mouse cursor seems harmless—until it starts distracting your viewers, ruining a clean recording, or lingering on screen when you’re not even using it. Whether you’re creating tutorials, presenting on a big screen, or just watching videos, a visible cursor can quickly become visual noise.
That’s why many users search for ways to auto hide the mouse cursor—not to remove it completely, but to make it disappear when it’s not needed. The challenge? Most systems don’t handle this well by default.
This guide shows you how to automatically hide your cursor across different scenarios—so it stays visible when you need it, and invisible when you don’t.
How to Auto Hide Mouse Cursor in Windows 10 & 11
If you prefer to manage Windows 10/11 cursor settings without recording software, you have two primary options: a built-in system setting for typing, and a lightweight utility for idle time.
Method 1: Native Windows Settings (Typing Only)
Many people are unaware that Windows has a built-in setting to hide the cursor, though it is limited to text input activities.
Step 1. Press the Windows Key and type “Mouse Settings.”
Step 2. Select Additional mouse settings (or “More mouse settings” in Windows 11) to open the traditional Mouse Properties window.
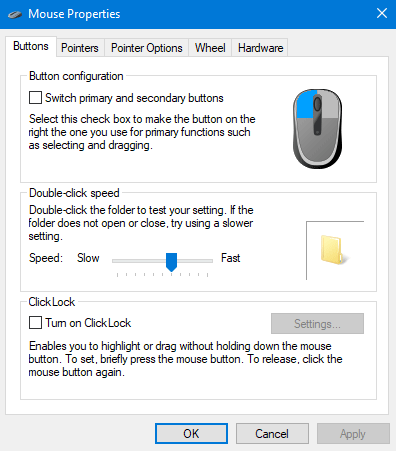
Mouse Properties
Step 3. Click the Pointer Options tab.
Step 4. Check the box labeled Hide pointer while typing.
Step 5. Click Apply and OK.
Note: This will not hide the mouse when you are watching a video or reading a webpage; it only triggers when keystrokes are detected.
Method 2: AutoHideMouseCursor (For Idle Time)
To truly auto hide cursor on Windows when you are simply reading or watching a video, the native settings fall short. A popular portable tool called AutoHideMouseCursor fills this gap effectively.
- Download the utility (it is a portable app, meaning it requires no installation).
- Launch the app. You will see a slider for “Timer.”
- Set the timer preference (e.g., 5 seconds).
- Once the mouse remains stationary for that duration, it will vanish. Moving the mouse instantly brings it back.
How to Make Mouse Disappear on macOS (Sonoma & Sequoia)
Apple handles macOS pointer options differently than Microsoft. Unlike Windows, macOS lacks a direct, system-wide “auto-hide” checkbox for general use. Furthermore, modern macOS security features often block older cursor-hiding tools unless you specifically permit them.
Critical Step: Enable Accessibility Permissions
Many users download mouse-hiding tools on Mac and claim they “don’t work.” This is usually because macOS requires you to approve apps that control the cursor. Before using any tool:
- Go to System Settings > Privacy & Security.
- Select Accessibility.
- Ensure your chosen mouse utility is added to this list and the toggle is turned ON.
Method 1: The “Shake to Find” Conflict
A common annoyance for Mac users is the cursor reappearing or growing large when moved slightly. If you are recording, you must disable this feature:
- Go to System Settings > Accessibility.
- Click on Display.
- Turn OFF “Shake mouse pointer to locate.” This prevents the cursor from ballooning in size if you bump the mouse during a recording.
Method 2: Third-Party Utilities (Verified for 2025)
Older tools like the original Cursorcerer preference pane are becoming less stable on Apple Silicon (M1/M2/M3) chips. For a modern solution:
Cursorcerer (Updated/Forked versions): Can still work if you permit it in Accessibility, allowing you to set a hotkey to hide the cursor instantly.
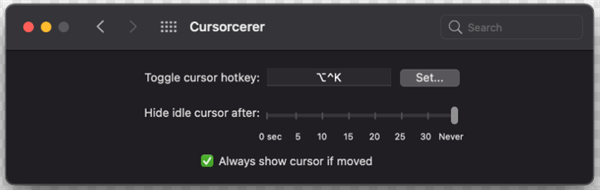
Cursorcerer Overview
For reliable auto-hiding while watching media, rely on the specific app’s full-screen mode (QuickTime, Netflix). For general use, newer App Store utilities like Cursor Pro (paid) offer more reliable hiding features compatible with macOS Sequoia than free legacy scripts.
How to Hide Cursors in OBS, Camtasia, and PowerPoint
For live streamers and professional trainers, relying on system hacks is risky. It is better to suppress the cursor at the source level using your recording software.
The OBS Studio Method (Free & Live)
If you use OBS Studio for screen recording or streaming, you do not need system-wide hacks. You can suppress the cursor directly in the source settings:
- Right-click your Display Capture or Window Capture source in the ‘Sources’ list.
- Select Properties.
- Uncheck the box labeled Capture Cursor.
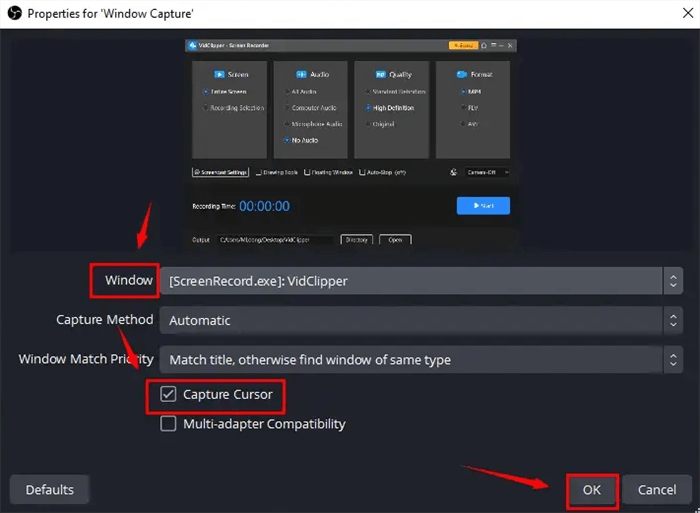
Hide the Mouse Pointer in OBS Studio
This renders the mouse invisible to your audience/recording, even if you can still see it on your screen to navigate.
The Camtasia Method (Post-Production)
For software trainers using Camtasia, you have granular control after you record.
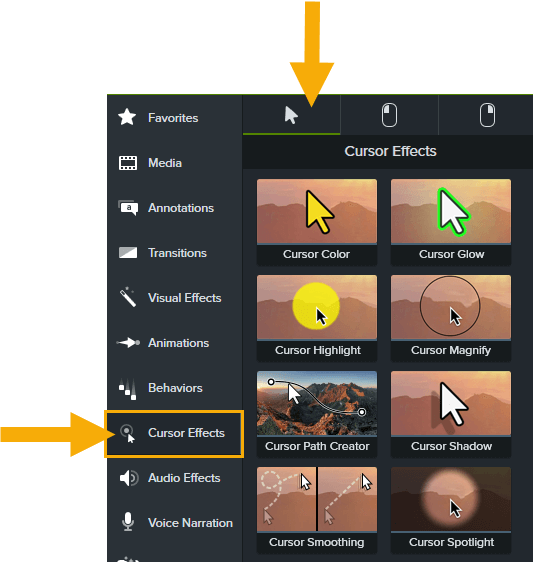
Click Cursor Effects
- Import your screen recording (.trec file).
- Click on the Cursor Effects tab in the sidebar.
- In the properties panel, adjust the Opacity slider to 0%.
- Alternatively, you can use “Cursor Smoothing” to hide the erratic movements while keeping the clicks visible.
PowerPoint and Keynote
In presentation mode, both tools have logic to disable mouse pointer when not in use.
- PowerPoint: Right-click during a slideshow, go to Pointer Options, and select Automatic. This ensures the cursor vanishes after 3 seconds of inactivity.
- Keynote: Press the C key during a presentation to toggle the cursor visibility instantly. This is a “hidden” shortcut that many pros use.
The Automated Fix: FocuSee for Tutorials & Recordings
If the manual settings above feel cumbersome—or if you simply cannot afford the risk of a cursor appearing during a critical take—automation is the answer.
For creators like Emma, the core problem wasn’t just hiding the cursor—it was the cognitive load of remembering to move it, park it, or edit it out later. She needed a solution that would hide the cursor automatically during video recording without complex post-production masking.
This is where FocuSee serves as a specialized alternative to general screen recorders.
Automating Visibility with Smart Effects
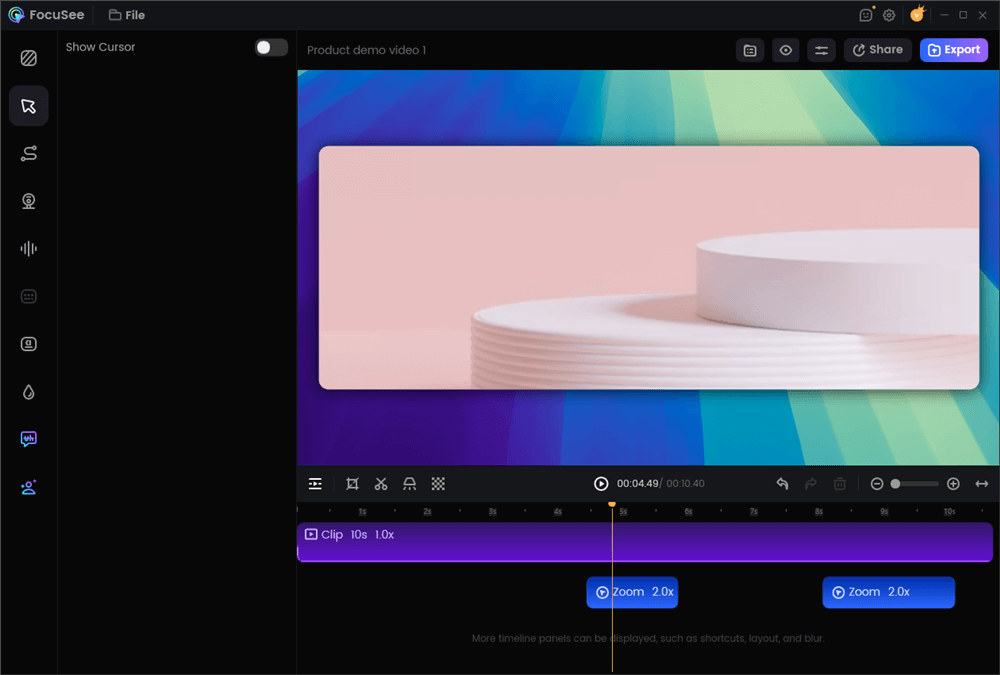
FocuSee is designed to solve the exact pain point of distraction in tutorials. Instead of relying on operating system hacks that might fail mid-recording, FocuSee’s Smart & Customizable Cursor Effects handle the heavy lifting for you.
You struggle to find a way to hide the cursor automatically without additional steps, often leading to a cluttered recording.

Show Mouse Cursor
The Solution: You can toggle the cursor to auto-hide when it isn’t needed. The software intelligently detects mouse movement; when the mouse stops or isn’t interacting with an element, it fades out automatically.
Hide the Mouse Cursor
Switching to a tool with built-in cursor logic means you can record naturally. You don’t have to remember to “park” your mouse in the corner or worry about shaking it. The software results in cleaner, more professional-looking tutorials that keep the focus on the content.
Conclusion
Don’t let a small detail like a visible cursor undermine your professional credibility. We’ve explored how native Windows settings and Mac workarounds can help with casual browsing, and how specific settings in OBS and Camtasia save the day for creators. You shouldn’t have to manually edit out cursors frame-by-frame or worry about them distracting your audience.
If you want to skip the manual configuration entirely, adopting a specialized tool like FocuSee eliminates this distraction at the source. It ensures your cursor disappears automatically when idle, keeping viewer attention exactly where it belongs—on your content. Choose the method that fits your workflow and start creating cleaner videos today.
Frequently Asked Questions About Cursor Visibility
Can I hide the cursor on just one monitor in a dual setup?
System-wide utilities usually hide the cursor on both screens simultaneously because the OS treats the mouse as a single input device. To hide it on only one screen, use the “Parking” technique described above, or use recording software like OBS that allows you to uncheck “Capture Cursor” for a specific display source.
Why doesn’t my cursor hiding tool work on my Mac?
90% of the time, this is a permissions issue. Navigate to System Settings > Privacy & Security > Accessibility and ensure your tool is checked. If it is unchecked, macOS blocks the app from controlling or hiding the cursor for security reasons.
Does hiding the cursor affect system performance?
Generally, no. Native Windows accessibility settings and lightweight utilities have a negligible impact on CPU or RAM. They are simple scripts that toggle visibility attributes and will not slow down your computer or affect video recording quality.
How do I make my cursor disappear automatically during a live presentation?
If you are using PowerPoint, right-click on the slide show, select “Pointer Options,” and choose “Automatic.” In Keynote on macOS, simply press “C” to toggle visibility. For Zoom or Teams shares, it is best to use a tool to ensure the pointer fades when you stop moving the mouse.
