How to Record Microsoft Teams Meeting?

Microsoft Teams is a software suite that’s commonly used by companies to facilitate online meetings between employees or to talk to external collaborators or important customers. This app allows for instant communication between thousands of users at any given time with video, audio, note sharing, and more. Compared to traditional means of business communication such as phone or e-mail, Microsoft Teams is a huge upgrade.
Since videoconferencing is such a big part of this app, the communication is largely visual and occurs in real-time. Video recording is popular. The same is true for meetings organized with Microsoft Teams, where invited users can chat with their webcams turned on or share the content of their computer screen with others. That’s great for brainstorming new ideas and discussing a detailed schedule of activities, but it can sometimes be hard to remember everything that was said during the meeting.
How to Record Teams Meeting
This is why many people are wondering how to record Teams meeting and be able to access its content whenever it’s convenient. This is possible to do, but you should be aware of certain limitations and conditions before you try executing it in practice.
Table of Contents: hide
Who Can Record a Meeting in Microsoft Teams?
How to Record Microsoft Teams Meetings [5 Methods]
Using Microsoft Meeting Built-in Recorder
Record a Teams Meeting Using FocuSee
Record a Teams Meeting Using OBS Studio
Who Can Record a Meeting in Microsoft Teams?
- All Teams meetings are initiated by an organizer and overseen by an admin, and both of those individuals have the power to record a meeting, or specifically issue permission for certain participants to do it.
- The administrator also has the power to extend expire date for the recording or to remove it altogether, depending on the type of meeting, the relevance of the content, company policies, etc.
- In addition to people assigned by admin and organizer, some individuals can independently start recording a meeting in Microsoft Teams based on the type of license they have. In particular, this pertains to holders of Office 365 Enterprise Business, Business Premium, or Business Essential licenses.
- Participants belonging to the same organization as the meeting organizer also have this possibility, even if the organizer is not currently present. With this in mind, it can be said the system is quite democratic and allows most shareholders to create recordings on their own initiative.
It’s important to know that the recording will continue even if the person that started it leaves the meeting, and will only end once all participants leave.

How to Record Microsoft Teams Meetings
On the other hand, if you are wondering if can you record a Microsoft Teams meeting as a guest, the answer is unfortunately negative. External guests and those who participate anonymously in the meeting are precluded from recording it without explicit permission from the admin. When the recording is started, Teams will notify all the participants with a direct message.
Depending on the jurisdiction it may be legally required to obtain a formal agreement from all participants before proceeding, which should be kept in mind when holding international meetings.
How to Record Microsoft Teams Meetings [5 Methods]
Using Microsoft Meeting Built-in Recorder
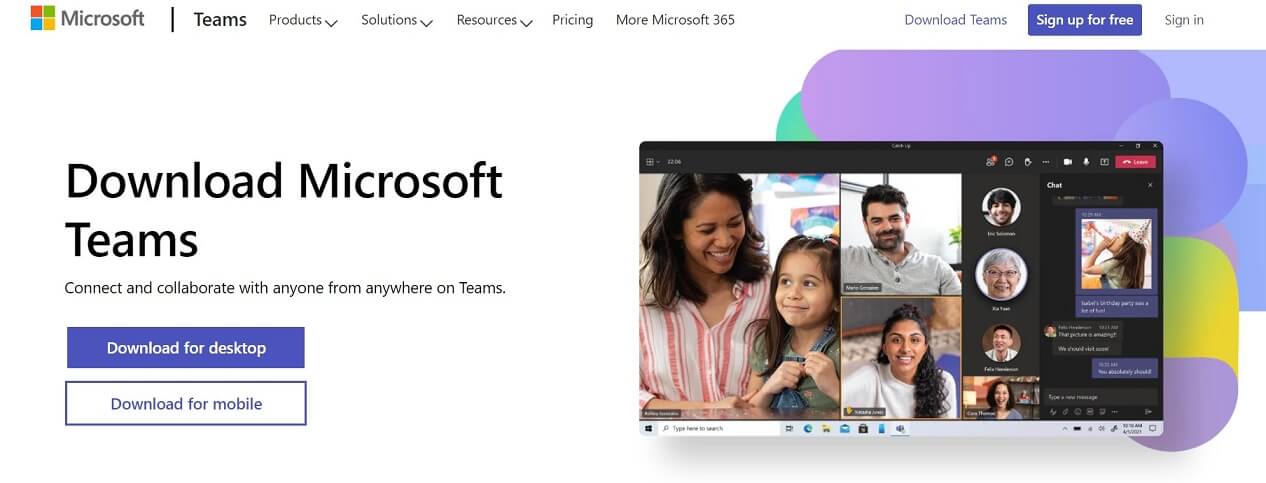
Microsoft Meeting Built-in Recorder
Once you navigate all the rules regarding who can record the meeting, the rest of the process is not very complicated. Since it’s possible to record from within the app and most settings are applied by default, there is no need to install any software or undergo any lengthy preparations. Just follow a succession of simple steps and Teams will do everything else automatically.
Here is how to start and stop a recording session in Microsoft Teams and capture everything that’s said and shared during a meeting:
Starting the Recording
Step 1. Open the Microsoft Teams app on your computer or phone and join the meeting in progress, or start a new one.
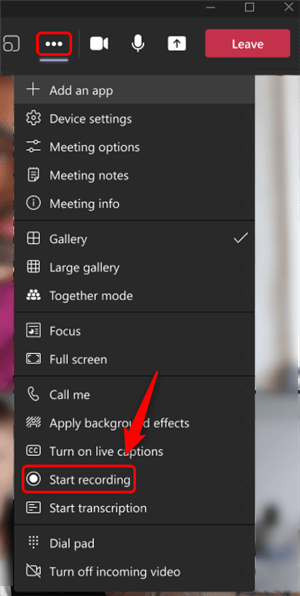
Step 2. Click on the three-dot icon at the top of the screen to access meeting controls for that meeting.

Click on the Three-dot icon
Step 3. Select More options from the menu, before clicking on the Start recording item.
Start the Recording
Step 4. From the same menu, you can also select Live transcriptions to be included, but only if that’s allowed by the admin.
Stopping the Recording
Step 1. Again, open the meeting controls by clicking on the three-dot icon in the Teams interface
Step 2. Choose More options, and then select Stop recording and/or Stop transcription, depending on what was being captured
Step 3. If there is a company policy regarding meeting recording, you must accept it before saving
Step 4. Wait for a short while for the recording to be processed and saved before it can be viewed
Finding the Finished Recording
All recordings are saved in the cloud, but the exact Teams recording location might differ for meetings of various types. If you are unsure where Teams save recordings, there is a very simple rule of thumb to follow. In case the recorded meeting was conducted within a channel, it will be saved on SharePoint. Otherwise, you should look for the recording on the OneDrive cloud service.
The file will remain in the same location for a fixed period defined by the admin, and in some cases may be kept permanently if the No Expiration option is active. Only members of the organization can access the recording by default, as guests and external participants require permission from the admin.
Record a Teams Meeting Using FocuSee
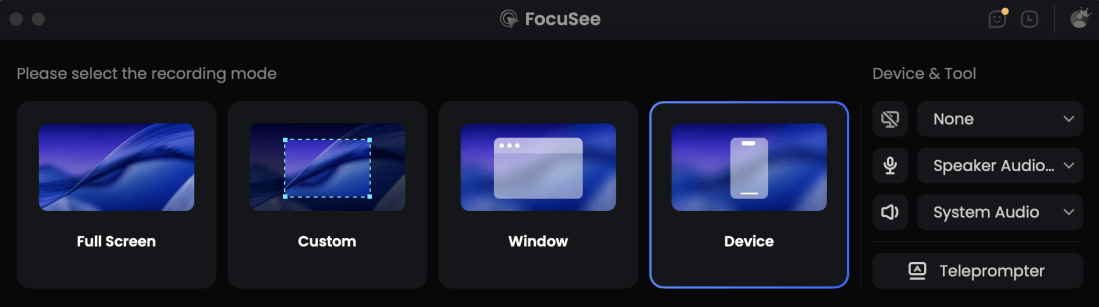
FocuSee is a professional screen recorder that allows you to easily record everything on your screen without needing additional editing. It provides 3 recording modes: record the full screen, custom the recording area, or record the window. You can freely choose the one you want to record. After recording, you can also edit your recording directly in FocuSee.
Key features of FocuSee include:
- Automated caption generation: Within minutes, FocuSee generates captions for your recordings, eliminating the need for manual transcription and saving you time while reducing errors.
- Zoom effect application: It automatically applies a zoom effect to the video, enabling the audience to better focus on the key content.
- Automatic cursor tracking: FocuSee seamlessly tracks cursor movement in real-time, capturing the mouse’s trajectory on the screen.
- Professional background elements: FocuSee allows you to add professional-level background elements to your video, such as blurred color gradients or simple graphics.
Step 1. Free download FocuSee and launch it on your computer and log in by entering your account and password.
Step 2. FocuSee offers three recording modes: full screen, custom recording area, or recording a specific window. Choose the mode that suits your needs.
Choose the Recording Model
Step 3. Once you’ve selected the recording mode, focus on your screen recordings while FocuSee handles the post-production automatically. You’ll have a visually appealing video ready as soon as you finish recording. You can also customize the background, adjust the cursor style, add captions, and more.
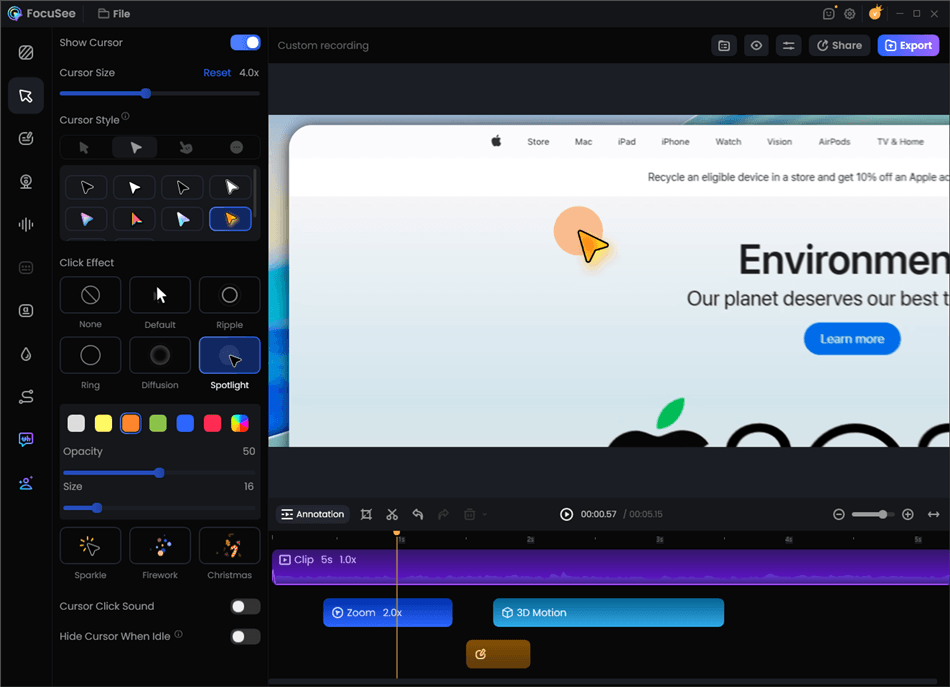
Record Screen with Cursor Following
Step 4. Finally, export your recordings as MP4 or GIF files, or easily share them using a link.
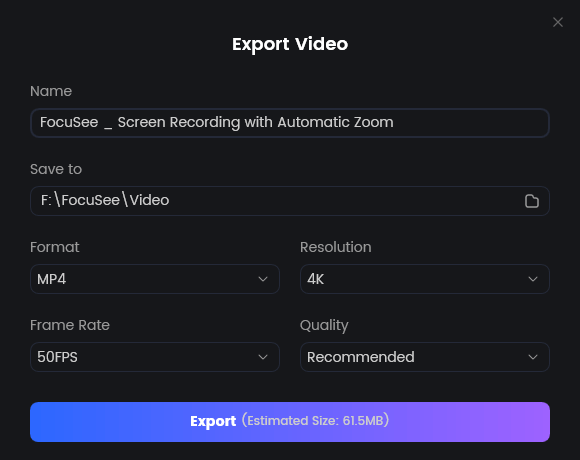
Export Your Video
The FocuSee method allows for discreet recording without notifying others in the meeting. Ensure you have the right to record and are compliant with any relevant policies or laws.
Record a Teams Meeting Using OBS Studio
OBS Studio is a powerful and free tool widely recognized for its ability to capture high-quality screen recordings. It’s not just for gamers—it’s also perfect for professionals looking to record online meetings with ease.
Step 1. Download and install OBS Studio on your PC.
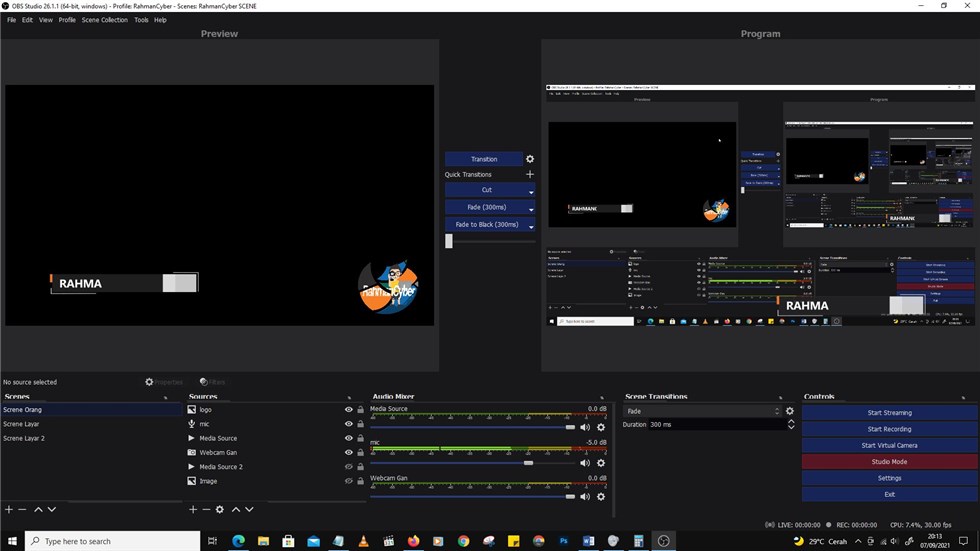
Open OBS Studio
Step 2. Open the app > Go to Settings and set your Video resolution and output format > Confirm with OK.
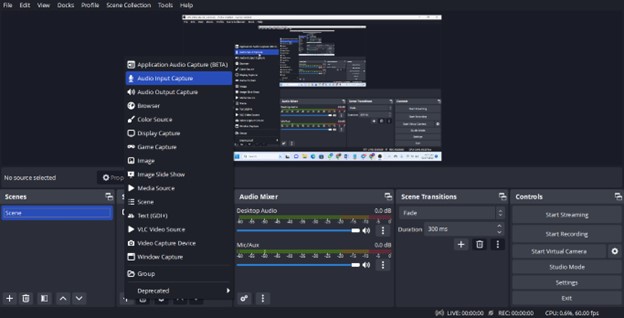
Setup OBS
Step 3. Click the + icon and choose Window Capture.
Step 4. Open Microsoft Teams in your browser without joining the meeting.
Step 5. In OBS, select the Teams window for a preview > Right-click the preview and select “Fit to Screen.”
Step 6. Hit the Start Recording button > Join the Teams meeting; recording will be in progress.
Step 7. Return to OBS and click Stop Recording to finish.
Record a Teams Meeting Using Xbox Game Bar
Step 1. During a Teams meeting, press Windows + G to open Xbox Game Bar.
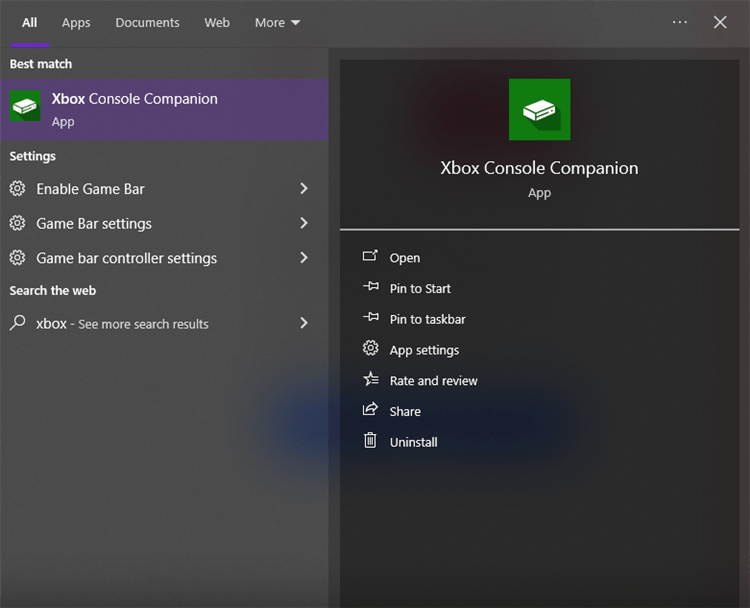
Open the Xbox Game Bar
Step 2. Click the Record icon to start capturing your screen.
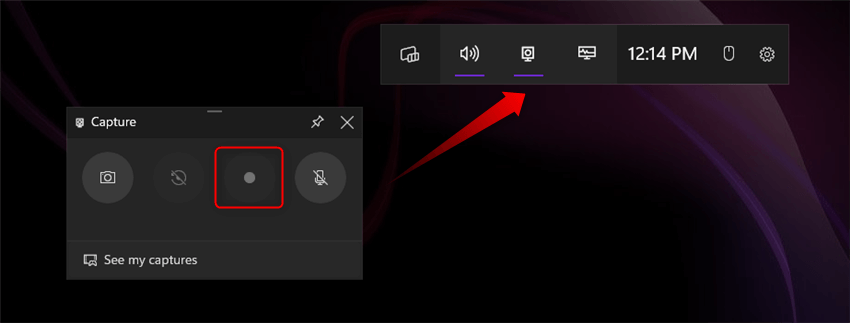
Start the Screen Recording
Step 4. Stop the recording using the Stop icon.
Step 5. Locate the file in File Explorer at C:\Users\YourUsername\Videos\Captures. Replace “YourUsername” with your actual username. And you can find your file by clicking the “See my captures” button.
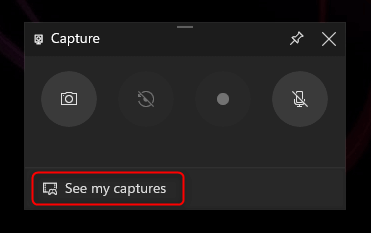
View Your Recorded Videos
How to Record Teams Meetings with Permission
Microsoft Teams provides a built-in recording feature for meetings, making it easy to capture the meeting with participants’ knowledge and consent. Before recording, let everyone know that the meeting will be recorded and make sure recording is permitted by your organization’s policies and applicable laws.
Step 1: Start or Join the Teams Meeting
Open Microsoft Teams and join the meeting as usual. Make sure you have permission to record the meeting. Depending on your organization and meeting settings, the recording option may only be available to certain participants.
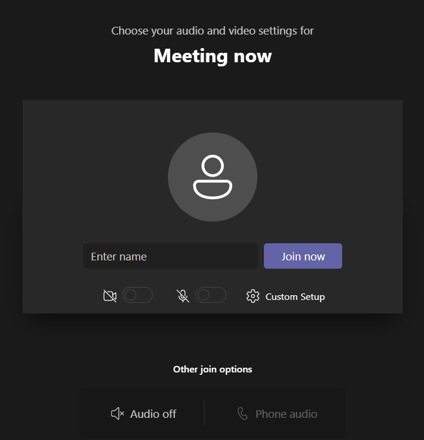
Join the Teams Meeting
Step 2: Notify Participants
Before starting the recording, inform all participants that the meeting will be recorded. Allow them to raise any concerns or opt out if appropriate.
Step 3: Start the Recording
In the Teams meeting, select More actions (…) > Record and transcribe > Start recording. Teams will notify participants that recording has started.
Start the Recording
Step 4: Stop and Access the Recording
When the meeting is finished, select More actions (…) > Record and transcribe > Stop recording. Teams will process the recording and make it available according to your organization’s meeting and storage settings.
Legal and Privacy Considerations
Recording a Teams meeting should be handled transparently and in accordance with applicable laws and organizational policies.
- Get Consent: Let participants know about the recording before it begins and obtain consent when required.
- Follow Company Policies: Check your organization’s rules for recording, storing, and sharing meeting content.
- Protect the Recording: Meeting recordings may contain confidential or personal information, so store and share them only with authorized people.
- Respect Privacy: Avoid recording meetings when participants reasonably expect the conversation to remain private unless you have appropriate authorization.
FAQs on Recording a Teams Meeting
Who can record a Microsoft Teams meeting?
Not every participant can start a Teams recording. Recording permissions depend on the meeting organizer, your Microsoft 365 account, and your organization’s Teams policies. If the recording option is unavailable, ask the organizer or your Teams administrator for access.
What does a Teams meeting recording include?
A Teams recording can capture the meeting’s audio, video, and screen-sharing content, depending on the meeting settings. Some content or participants may not appear in the recording based on Teams’ configuration and privacy settings.
Where is a Teams meeting recording saved?
The recording’s storage location depends on the type of meeting. Teams recordings are generally stored in Microsoft 365, such as OneDrive for meetings and SharePoint for channel meetings, rather than being saved directly to your computer.
Can I share a recorded Teams meeting with others?
Yes. A Teams meeting recording can be shared with people who have the appropriate access. Before sharing, check that the recording does not contain confidential or personal information and that you have permission to share it.
Final Words
Since the core functionality of Microsoft Teams is multimedia communication in real-time, it’s logical that the recording feature was given a lot of consideration. The limitations put in place serve to prevent any attempts at the abuse of this collaborative software and help companies keep their conversations private. Despite this, it’s still possible to get around some of those limitations by using a third-party screen recorder instead of the built-in function. This method allows meetings to be recorded without notifying other participants, but it’s ethically questionable and should be used only when it’s really necessary.