How to Record a Presentation: The Ultimate Step-by-Step Guide

Figuring out how to record a presentation can feel completely overwhelming. Take Emily, a college student facing a strict midnight deadline for an online class. She had never recorded a digital presentation before. Staring at a confusing screen, she panicked about how to capture her slides, record her clear voice, and somehow include a webcam video of her face at the same time without the technology crashing or requiring hours of complicated post-production edits.
If you share these frustrations—needing a simple, reliable process that functions smoothly for remote work or school assignments—you are in the exact right place. This guide delivers tested, step-by-step methods to capture clear narration, overlay your webcam appropriately, and export the final file without technical headaches.
We evaluated these presentation recording methods across 5 different laptop models (Windows and Mac) using both built-in webcams and affordable external USB microphones to ensure reliable results.
The Golden Rule: Design Your Slides with a Webcam “Safe Zone”
Before evaluating any software, we must address the physical logistics of recording slides and a webcam simultaneously. The most frequent error beginners make is designing a beautiful slide deck, hitting record, and later realizing the small video feed of their face completely covers critical bullet points on the screen.
To prevent this frustrating outcome, you must design your slides with a “Safe Zone” in mind.
Most recording tools, from PowerPoint to online meeting apps, place your webcam overlay in the bottom right corner of the final video by default. Therefore, treat the bottom right corner of every single slide as dead space. Do not place text, charts, or logos in this area. Leaving a designated blank square ensures your audience can see both you and your information clearly, preventing the need to re-record the entire presentation.
[Image: A visual diagram showing a PowerPoint slide with a red “Safe Zone” box drawn in the bottom right corner, demonstrating where the webcam overlay will go. Alt-text: A diagram illustrating how to design slides with a blank corner so a webcam overlay does not block text.]
Choosing Your Method: Built-in Tools vs. Dedicated Software
Before diving into the exact steps, you must decide on the best procedure for your specific needs, technical comfort level, and budget constraints.
You generally have three choices: using a “no-install” online meeting tool, relying on built-in software (like Microsoft PowerPoint), or downloading dedicated presentation recording software. To make an informed decision, compare the approaches:
| Built-in (PowerPoint) | No-Install (Zoom/Meet) | Dedicated Software (FocuSee) | |
| Cost | Free (if installed) | Free | Paid / Subscription |
| System Restrictions | Usually approved for school/work | Usually approved | Requires admin rights to install |
| Audio/Video Sync | Average | Highly dependent on internet | Excellent |
| Time Investment | High (manual editing) | Low (records live) | Low (edits automatically) |
| Best For | Zero-budget projects, strict corporate laptops | Fast recordings, familiarity | Professional sharing, automated editing |
Built-in software is highly accessible. However, the time cost is often higher, and correcting mistakes requires patience. Conversely, dedicated presentation recording tools automate the difficult segments, but they require a financial investment and the ability to download third-party software—a barrier for some corporate or student laptops.
Let us look closely at how to execute each method perfectly.
The “No-Install” Method: Recording via Zoom
For users who need an immediate solution and cannot download new programs, the absolute easiest method is using an online meeting platform you likely already use daily. Starting a private meeting in Zoom allows you to record your screen and webcam flawlessly.
Step-by-Step Workflow with Zoom:
Step 1. Prepare Your Deck: Open your completed presentation in full-screen mode.
Step 2. Start a Solo Meeting: Open the Zoom app and click New Meeting. You will be the only person in the room.
Step 3. Check Inputs: Ensure your microphone is unmuted and your webcam is turned on.
Step 4. Share Screen: Click the green Share Screen button. Select the specific window displaying your presentation. Ensure the “Share Sound” box is checked if your presentation includes videos.
Step 5. Record: Click the Record button on the Zoom toolbar (choose “Record to Computer” for faster access). Deliver your presentation. Your webcam video will automatically appear in a small box alongside your slides in the final file.
Step 6. End to Save: When finished, click Stop Recording, then End Meeting for All. Zoom will immediately process and save the MP4 file to your computer’s documents.
How to Record a PowerPoint Presentation Video (Built-in Alternative)
If you prefer to keep everything contained within your slide deck, Microsoft Office provides a capable alternative. This method is free for Office users, even though it requires more technical patience.
To record a presentation with audio directly inside PowerPoint, follow these specific steps:
Step 1. Open your completed slide deck in Microsoft PowerPoint.
Step 2. Navigate to the top menu ribbon and click on the Record tab. (Note: In older versions, look for the Slide Show tab, then select Record Slide Show).
Step 3. Choose whether to record from the current slide or the beginning.
Step 4. When the recording interface opens, verify that your microphone and camera icons at the bottom of the screen are toggled on.
Step 5. Click the red Record button to begin your voice narration.
Critical Callout: The PowerPoint Transition Trap
Speak clearly as you click through your slides, but never speak during the transition. PowerPoint does not record audio during the exact moment you transition from one slide to the next. Pause briefly, change the slide, take a breath, and then resume speaking to avoid cutting off your words.
Additionally, a real-world frustration many users experience is PowerPoint crashing halfway through a 30-minute recording session. To protect your hard work, save your document right before you hit record. Because PowerPoint records audio on a slide-by-slide basis, you can actually stop recording after every few slides, save the document, and pick up right where you left off.
[Image: A short visual guide demonstrating the specific action of locating and clicking the ‘Record’ tab inside Microsoft PowerPoint. Alt-text: A screenshot showing exactly how to record a PowerPoint presentation video using the built-in Microsoft Office tools.]
Using Dedicated Presentation Software
When Emily needed to record her presentation, she found that manual setups took hours she did not have. She eventually opted for FocuSee, an automated screen-recording software for Windows and macOS.
FocuSee captures your computer screen, camera, and microphone in one click. The software features Smart Focus and Auto-Zoom, automatically highlighting key slide actions so you do not have to manually edit the footage afterward.
Key Features of FocuSee
- One-Click Recording: Capture screen, webcam, and audio instantly
- Smart Focus & Auto-Zoom: Automatically highlight important actions and content
- Screen Annotation Tools: Add visual emphasis to explain steps clearly
- Cursor Highlighting: Make on-screen interactions easy to follow
- AI Subtitle Generation: Instantly create accurate captions
- AI Voice Enhancement: Reduce noise and improve voice clarity automatically
- Flexible Capture Control: Record screen, system audio, mic, and camera separately
- Local Export: No forced uploads; full control over your files
- Optimized Performance: Stable for long recordings on Mac and Windows
Step-by-Step Workflow with FocuSee:
Step 1. Set Up Your Capture: Open FocuSee and your slide deck. Select your external microphone and webcam in the settings menu.
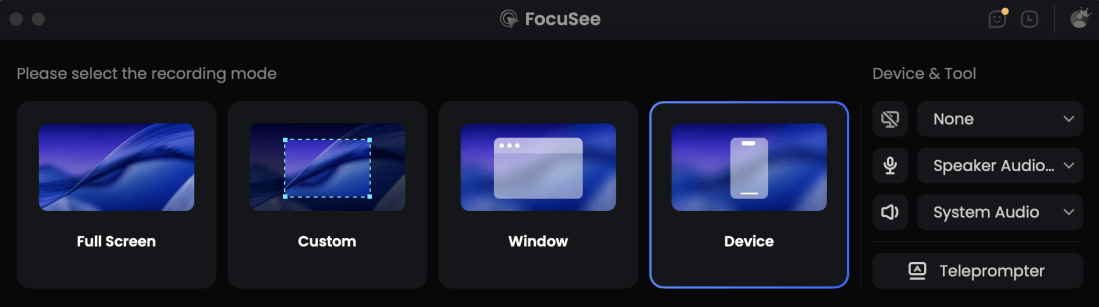
Choose the Recording Model
Step 2. Select the recording area.
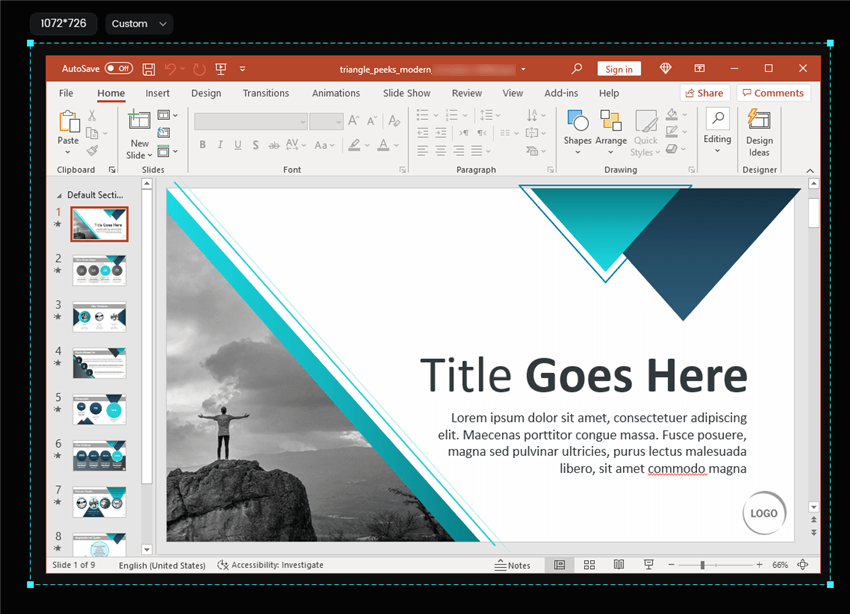
Frame an Area to Record
Step 3. Record Presentation: Click the red “Record” button. Deliver your presentation naturally.
Step 4. Automated Post-Production: Once you stop, FocuSee automatically applies zoom-ins on important text and generates subtitles.
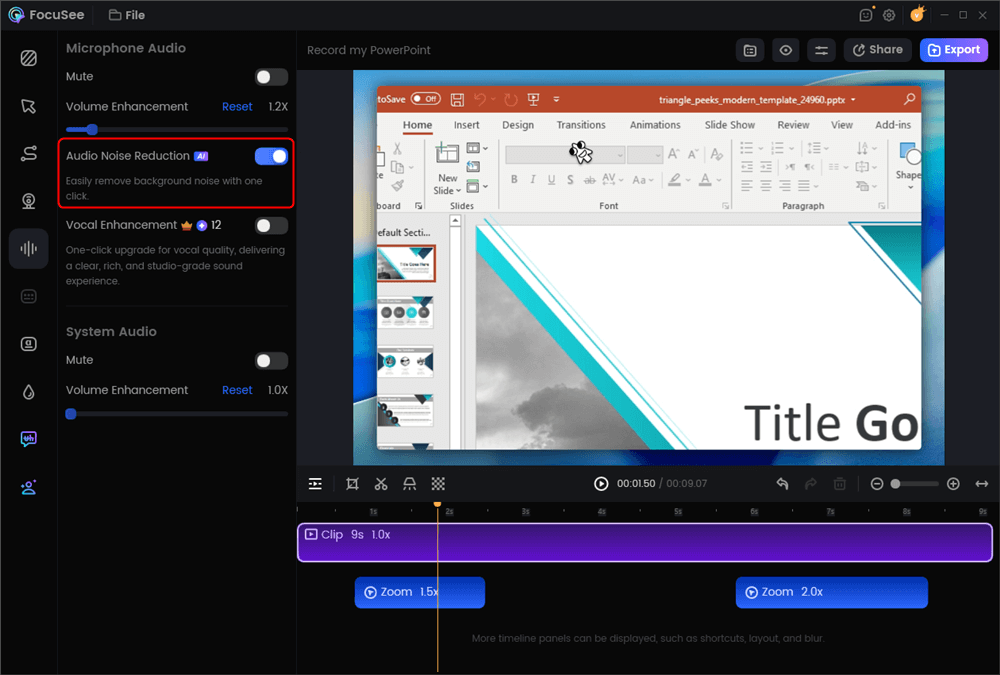
AI Audio Enhancement
Step 5. Export: Choose your format and save.
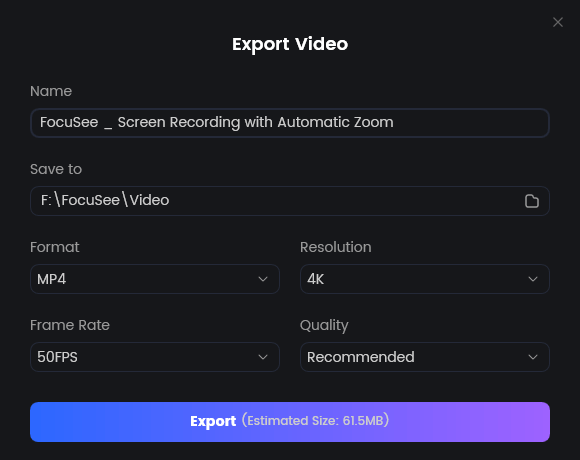
Export Your Video
Expert Advice: Fixing Audio Quality and Syncing Issues
In almost every scenario, poor audio—such as room echo, background noise, or a hollow sound—has a much greater negative impact on your audience than basic video resolution. Upgrading your camera software will not fix a distracting room echo.
Upgrading Your Audio Environment
Instead of buying an expensive camera, use a simple external USB microphone and control your physical recording environment. This single adjustment will dramatically improve the final result.
- Environment: Always record in a quiet, carpeted room to reduce sound bouncing. Keep windows closed to block traffic noise.
- Hardware Placement: Position your USB microphone just off-camera. Angle it slightly to the side so it is close to your mouth but does not block your computer screen or your view of your slide notes.
Preventing Audio Synchronization Disasters
A major frustration for beginners is finishing a 30-minute presentation only to realize the audio is completely out of sync with their lip movements. This issue usually relates to your computer’s processing limits being pushed too hard.
To guarantee a seamless recording, follow these two critical rules:
- Close Background Apps: Shut down resource-heavy programs, extra browser tabs, and cloud-syncing apps (like Google Drive or Dropbox desktop clients) before you start capturing your screen.
- Always Perform a 10-Second Test: Never commit to a full presentation without testing your setup. Record just 10 seconds of yourself speaking and clicking through two slides. Stop the recording, play it back, and verify that your audio perfectly matches your webcam video. If it looks correct, you are clear to record the full presentation.
[Image: An infographic comparing a poor audio setup versus an optimal setup with an external mic. Alt-text: A diagram illustrating the optimal room setup to record voice narration clearly and avoid audio synchronization issues.]
Exporting and Sharing Your Final Presentation
Once your recording is complete, the final step is formatting the file so others can actually view it.
You should always export your final presentation in a universal format like MP4. An MP4 file ensures maximum compatibility across learning management systems (LMS) like Canvas or Blackboard, Google Drive, YouTube, and standard media players. Exporting in niche formats often results in error messages when your professor or colleagues try to open the file.
If you are using built-in software like PowerPoint, navigate to the “File” menu, select “Export,” and choose “Create a Video.” Ensure the resolution is set to at least 1080p so your text remains readable. If you recorded via Zoom or FocuSee, the software will automatically generate a highly compatible MP4 file for you to upload directly to your desired platform.
Frequently Asked Questions (FAQs)
Can I record my presentation with a webcam and slides simultaneously?
Yes. Modern screen capture tools, online meeting apps like Zoom, and presentation software all allow you to create a webcam overlay. Remember to design a “Safe Zone” in the bottom right corner of your slides so your webcam video does not cover your text.
What is the easiest way to record a presentation without downloading software?
Starting a solo meeting in Zoom or Google Meet is the easiest method. You simply share your screen, turn on your camera, and click record. When you end the meeting, you receive a ready-to-share MP4 file.
Why is my presentation recording out of sync?
Audio synchronization issues usually happen when your computer’s processor is overloaded. Close all unnecessary browser tabs and background applications before recording. Always do a 10-second test recording first to verify everything is working smoothly.
How do I improve my presentation recording quality?
Focus on your audio first. Use an external USB microphone positioned slightly off-camera, record in a quiet room with soft furnishings to absorb echo, and ensure your face is well-lit by sitting facing a window or a desk lamp.
What format should I use to export my presentation video?
Always choose the MP4 format. It is the universal standard for video files and guarantees your professor, colleagues, or audience can view the presentation on any device.
Can I edit a recorded PowerPoint presentation?
PowerPoint offers limited editing capabilities. Its main advantage is that it records slide-by-slide. If you make a mistake on slide four, you can simply clear the recording for that specific slide and re-record it without having to restart the entire presentation.
Conclusion
Recording a presentation does not have to end in panic or frustration. If you previously worried about complicated editing, poorly synced audio, or your webcam blocking your slide text, you now have the exact strategies to succeed.
You can rely on a solo Zoom meeting for a fast, no-install solution, use PowerPoint’s built-in recorder for slide-by-slide control, or upgrade to dedicated software like FocuSee for automated editing. By designing your slides with a safe zone, performing a 10-second audio test, and controlling your recording environment, you can stop stressing over the technology and deliver a confident, professional video every single time.