Webinars can be arranged for various purposes, including online conferences with thousands of people, public debates, training courses, and remote workgroup meetings. Participants in a webinar can engage in real-time conversation, share their desktops, invite visitors, and launch polls. Since there can be some important discussion in the webinar, which you won’t always remember, it is essential to record the webinar so that it may be viewed later.
How to Record a Webinar
Although recording a webinar is no difficult task, some people are unaware of the built-in means you can use to record a webinar. And if you’re one of them, you’ve come to the right spot. In this article, you’ll discover How to Record a Webinar on your Windows and Mac using the built-in tools. Let’s get going!
Table of Contents: hide
Can You Record a Webinar You Are Watching?
1. How to Record a Webinar without Attending?
Can You Record a Webinar You Are Watching?
Yes, it is possible to record a webinar you are watching using the built-in tools available on your device. However, for recording a meeting in Zoom and other such apps, you must have permission to record or be the meeting organizer. It will also notify the attendees that you are recording the ongoing session. But if you don’t want anyone to know, you can use a screen recorder to record a webinar. Windows and Mac have their built-in screen recorder, i.e., Xbox Game bar and QuickTime Player. Moreover, you can also utilize third-party tools to record a webinar.
Further Reading: Invitation Video Maker >
How to Record a Webinar?
Looking for a way to record a webinar? This section has your answers! Recording a webinar is essential because it contains much useful information you will require in the future. You can learn to record a webinar down below:
1. How to Record a Webinar without Attending?
There can be times when you’re unable to attend a webinar, so you must be willing to record it. However, this is not possible using the built-in tools of Windows and Mac because both Xbox Game Bar and QuickTime Player cannot schedule a meeting, so you must download a third-party tool, such as Bandicam and Gemoo Recorder.
Method 1. FocuSee
FocuSee offers a unique solution for recording webinars without the need to attend them live. By using FocuSee, you can effortlessly record webinars and enjoy the flexibility of watching them later at your own pace. Whether you have a scheduling conflict or simply prefer to consume the content on your own time, FocuSee allows you to capture the valuable information shared during webinars without missing out.
Step 1. Free install FocuSee and open it on your computer. Choose a screen recording mode and get started.
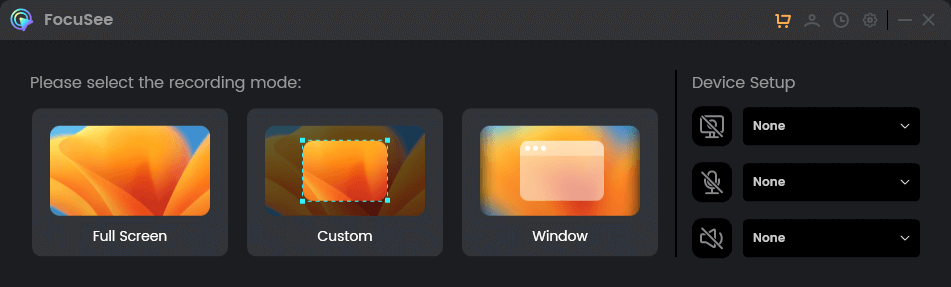
Choose a Recording Mode
Step 2. Frame an area to record and click the red Stop icon when finish recording.
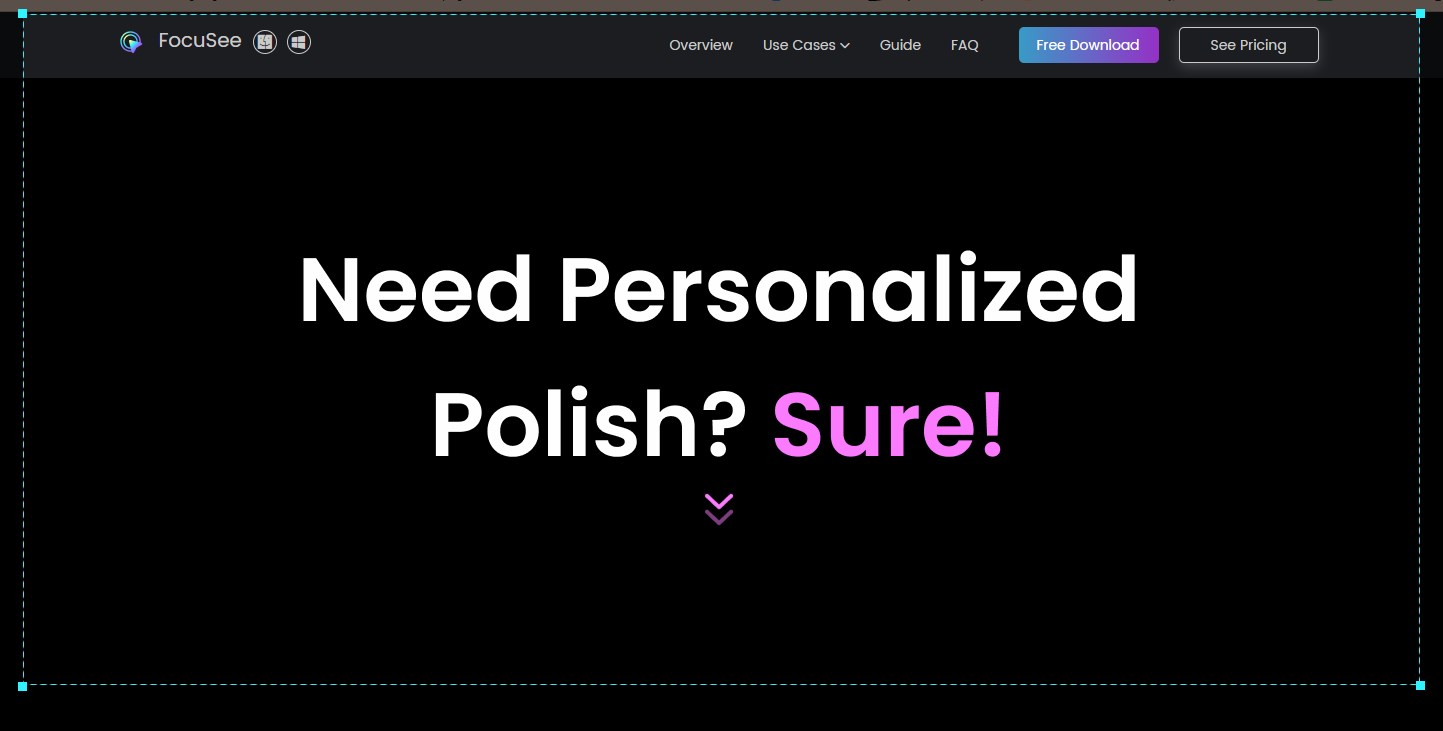
Frame an Area to Record
Step 3. Preview the recording and enhance the video if you need.
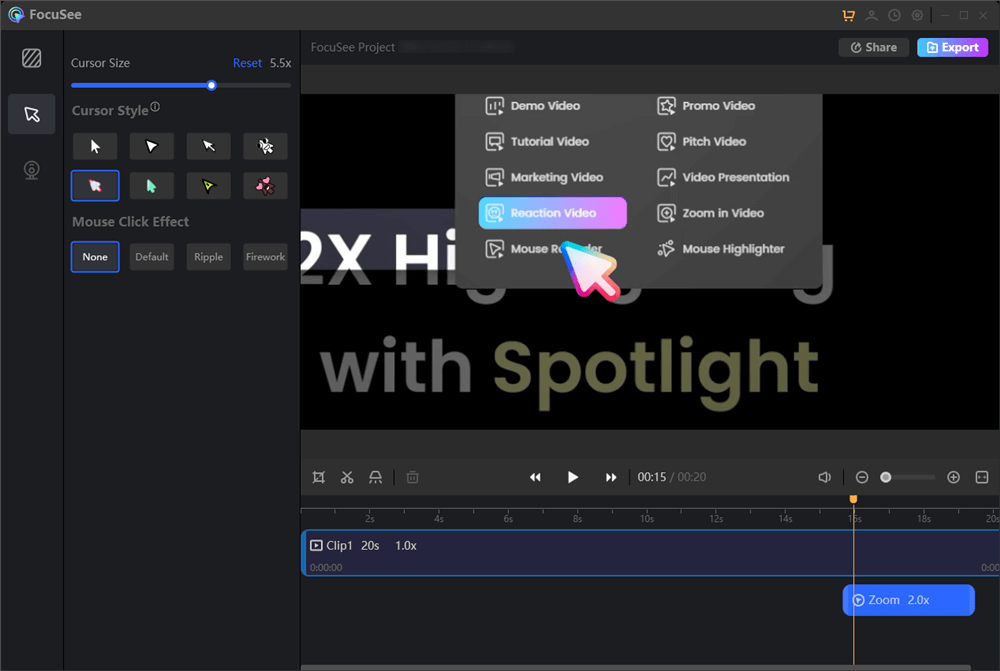
Edit Your Recording
Method 2. Gemoo Recorder
Next, we are pleased to present a comprehensive solution that allows users of both Windows and Mac to record screen on their computers. As one of the top screen recorders in 2024, Gemoo Recorder can capture and record your screen in high definition.
- Gemoo Recorder’s key features include the ability to record your computer screen or camera separately or simultaneously.
- Additionally, you can record computer screen audio while working on a meeting or conducting a presentation using both system and microphone soundtracks.
- Moreover, Gemoo Recorder allows you to add annotations and edit your recordings during the screen recording. You can draw lines, add text, stickers, or other annotations by using the annotation toolbar.
- Lastly, Gemoo Recorder supports users to record screens with no watermark and no time limit. With these features, you can now record your screen with ease and without any interruption.
Now, download Gemoo Recorder for free, explore its essential features, and follow the easy steps below to start screen recording your webinar.
Step 1. Free install Gemoo Recorder and launch the software on your computer > Choose the Screen Only mode and tap the Start Recording button to get it started.
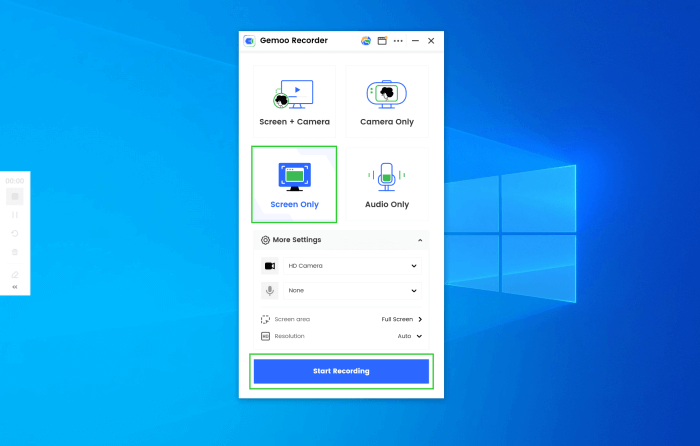
Launch Gemoo Recorder and Choose the Screen Only Mode
Step 2. After a three-second countdown finishs, screen recording will start. You can control the recording process via the lest side tools bar.
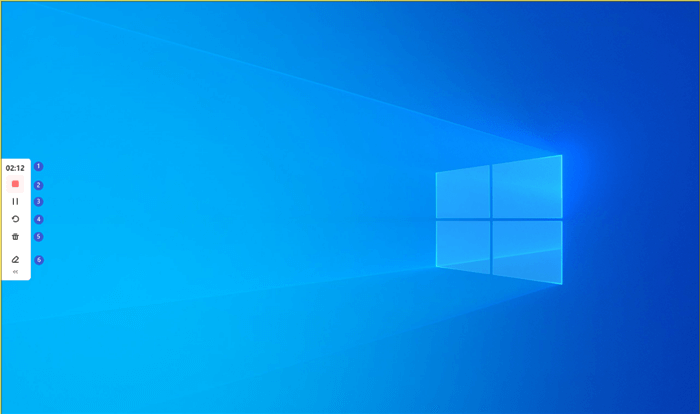
Start to Record the Screen
Step 3. Once the recording completes, you can hit the red ‘Stop’ button on the left menu or the ‘Finish Recording’ button to finish the process of screen recording.
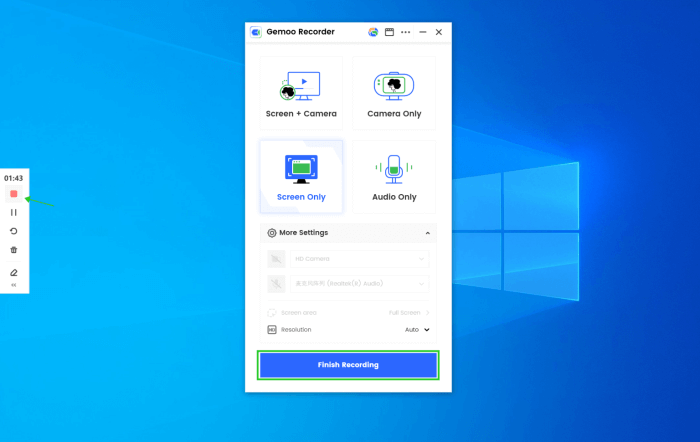
Finish Screen Recording
Method 3. Bandicam
Bandicam Screen Recorder is an application that allows you to record your computer’s display with simple clicks. Professionals may use it to record webinars, take screenshots, and make screencasts. Real-time sketching, camera overlays, audio/voice recording, mouse-click effects, and more are all a part of this solution.
To understand how to record a webinar, follow the steps below:
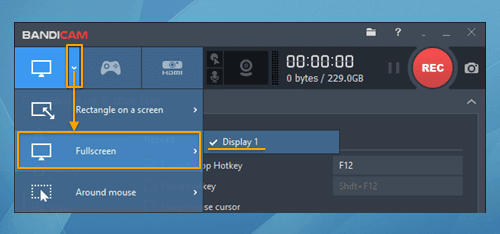
Screen Recording in Bandicam
Step 1: Download and install Bandicam Screen Recorder on your PC from the official site. After installing, launch this screen recorder.
Step 2: Now, click on Scheduled Recording, and then in the next window, click on the Add button.
Step 3: Now, enter the starting and ending time of the recording against the Start time and End time fields. After that, select what portion of the screen you wish to capture against the Recording Target field. Make other customization and click on OK to schedule the recording.
Note: Remember that you need to join the webinar to get it recorded without attending.
2. How to Record a Webinar as Attendee View?
Recording a webinar as an Attendee View allows you to save a digital copy of the live presentation for future reference or share it with others. Windows and Mac’s operating systems come with built-in tools, i.e., Xbox Game Bar and QuickTime Player, that allow you to record webinars as an attendee. These tools vary in functionality and ease of use, but they provide a straightforward way to record webinars and save them as video files. This can be especially useful for online learning, webinar presentations, and other virtual events.
For Windows
To record a webinar as an attendee view using the Xbox Game bar on Windows, follow these steps:
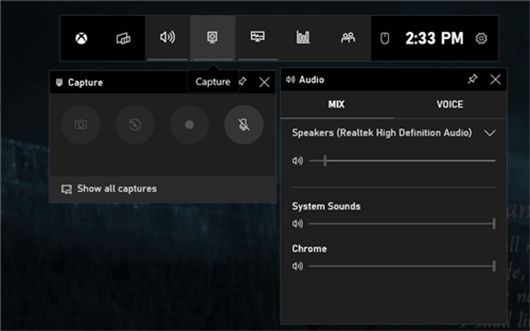
Record a Webinar as Attendee View on Windows
Step 1: Start or join the webinar you wish to record and press Windows + G keys to open the Xbox Game Bar.
Step 2: Now, click on Microphone to allow the external microphone if you wish.
Step 3: After that, click the Record button to start recording your webinar. Once done, press Windows + Alt + R keys to stop the recording.
For Mac
To understand how to record a webinar as Attendee on your Mac using the built-in QuickTime Player, follow the steps below:

Record a Webinar as Attendee View on Mac
Step 1: Open QuickTime Player on your Mac and click on File.
Step 2: Select New Screen Recording from the drop-down menu. In the Screen Recording prompt, click on the down arrow icon and click on Internal Microphone to open the microphone.
Step 3: After that, click the red Record button and select the area you wish to capture. If you wish to capture the whole screen, click anywhere on it. Once done, you can click the Stop button to stop.
Faqs About Recording a Webinar
In this part, we’ll collect several frequently-asked questions about recording a webinar.
1. How do I record a Zoom webinar without permission?
To record a Zoom webinar without permission, you can use your PC’s built-in screen recorder tools. If you’re a Windows user, use Xbox Game Bar by pressing Windows + G and then clicking on the Record button. For Mac, you can use QuickTime Player by clicking on File and then New Screen Recording. After that, click the Record button. This is how you can record the Zoom webinar on Windows and Mac without permission.
2. Do webinars automatically record?
It depends on the webinar platform and the settings selected by the host. Some webinar platforms, such as Zoom, can enable automatic recording, but this is typically up to the host to enable and control. Before attending a webinar, you can check with the host to see if they will be recording the session and if the recording will be available after the session.
3. Is It Possible to record a live webinar on my computer?
Yes, it is possible to record a live webinar on your computer. This can typically be done using screen recording software. Some popular options for screen recording software include Xbox Game Bar (Windows), Bandicam, and QuickTime Player (for Macs). To record a live webinar, start the screen recording software, navigate to the webinar, and then hit the record button on your screen recorder to capture the audio and video of the webinar.
Final Thought
Recording a webinar is a useful tool for businesses, educators, and speakers to reach a larger audience. Although most online meeting tools allow you to record the webinar, you need the host’s permission to do that. And if you don’t have permission, you can use the built-in tools, such as Xbox Game Bar on Windows and QuickTime Player on Mac to record a webinar. Moreover, we hope you know how to record a webinar as an attendee or without attending after reading this article. Also, if you have any further questions or tips, please share them in the comments section below, and don’t forget to share the article with your network!