How to Add Motion Blur to Videos in After Effects

Ever notice how objects in real life appear slightly blurred when they move quickly? That’s motion blur, a subtle but powerful visual cue that adds a sense of realism and fluidity to moving images. In video editing, motion blur can be the difference between footage that looks amateur and content that pops with professional polish.
Whether you’re dealing with fast-moving objects, slow-motion sequences, or even just want to smooth out shaky camera movements, adding motion blur in After Effects can significantly enhance the visual appeal of your videos. After Effects offers a range of tools to achieve this effect, from simple built-in effects to more advanced techniques.
Table of Contents: hide
Method 1: The Quick and Easy “Pixel Motion Blur” Effect
Method 2: Upgrade with “CC Force Motion Blur”
Method 3: Mastering Motion Blur with Frame Blending
Method 4: Install Third-Party Motion Blur Plugins in AE
Bonus Tip. Add Motion Blur in Screen Recording
Method 1: The Quick and Easy “Pixel Motion Blur” Effect
The “Pixel Motion Blur” effect is your go-to option for adding a basic level of motion blur quickly and easily. It analyzes the movement of pixels between frames and generates a blur based on that movement.
Here’s how to use it:
Add Pixel Motion Blur After Effects
Step 1: Import Your Footage
Import the video clip you want to edit into After Effects.
Step 2: Apply the Effect
Drag and drop the “Pixel Motion Blur” effect from the Effects & Presets panel onto your footage layer in the timeline.
Step 3: Adjust the Blur Amount
The “Pixel Motion Blur” effect has a single parameter: “Blur Length.” Increase this value to create a more pronounced blur. Begin with smaller increments and preview your changes to avoid excessive blurring.
Step 4: Preview and Fine-Tune
Preview your footage with the effect applied. You can further adjust the “Blur Length” value to achieve the desired level of motion blur.
Limitations: While incredibly simple, the “Pixel Motion Blur” effect can sometimes produce unwanted artifacts, especially with complex or fast-moving footage. It’s best suited for situations where you need a subtle blur and speed is a priority.
Method 2: Upgrade with “CC Force Motion Blur”
For enhanced control and refined results, “CC Force Motion Blur” is your secret weapon. This effect analyzes vector motion data instead of just pixel movement, resulting in smoother, more natural-looking motion blur, especially with complex scenes.
Here’s how to harness its power:
Step 1: Apply the Effect
Similar to Pixel Motion Blur, drag and drop the “CC Force Motion Blur” effect onto your footage layer.
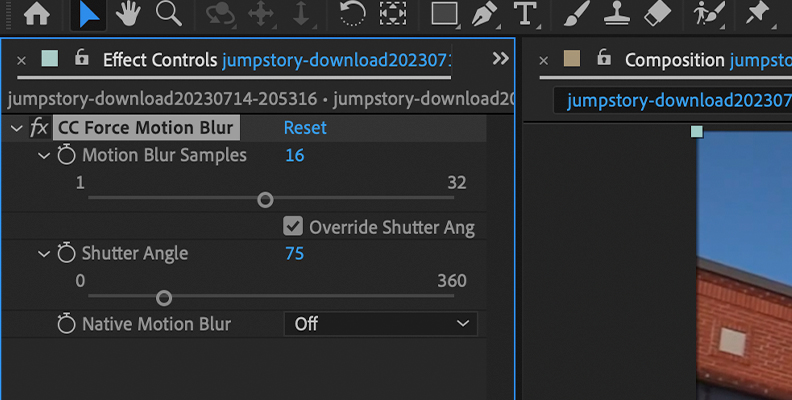
CC Force Motion Blur
Step 2: Adjust the Shutter Angle
The “Shutter Angle” parameter controls the amount of blur. A higher angle produces a more pronounced blur. Try different values to find what looks best for your footage.
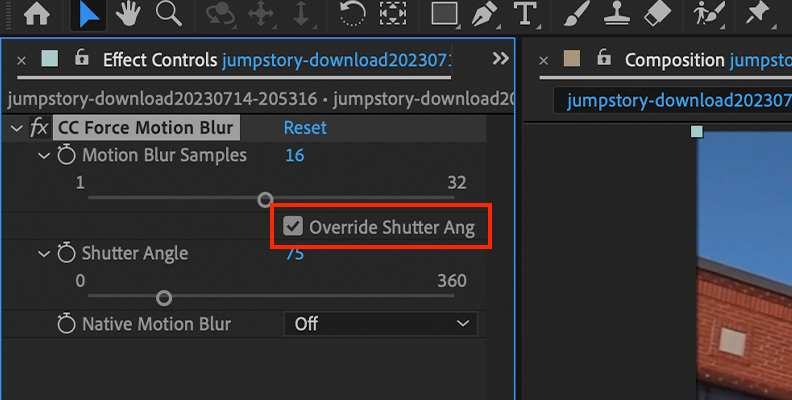
Adjust the Shutter Angle
Step 3: Fine-Tune with “Samples”
The “Samples” parameter determines the the blur quality. Higher samples result in a smoother blur, but can increase rendering time. Start with a lower value and increase it if needed.
Step 4: Preview and Adjust
Preview your footage and fine-tune the “Shutter Angle” and “Samples” settings to achieve the desired level of motion blur.
Advantages: “CC Force Motion Blur” produces higher-quality results than “Pixel Motion Blur,” with fewer artifacts and greater control over the blur characteristics.
Method 3: Applying Motion Blur with Timewarp in After Effects
One of the most powerful ways to add motion blur in After Effects is by using the Timewarp effect. This versatile effect allows you to remap time, creating slow-motion, fast-motion, and even freeze-frame effects. As a bonus, Timewarp includes built-in motion blur controls, giving you precise control over the intensity and quality of the blur. Here’s how to apply it:
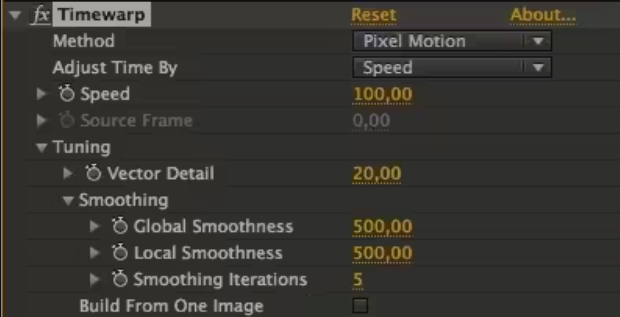
Applying Motion Blur with Timewarp
Step 1: Select your layer:
Choose the layer you want to add motion blur to.
Step 2: Apply Timewarp:
Go to “Effect” > “Time” > “Timewarp.”
Step 3: Adjust the “Speed” setting:
Set the speed to a value greater than 100% for slow motion (which will introduce motion blur), or less than 100% for fast motion.
Step 4: Enable Motion Blur:
Check the box for “Motion Blur.”
Step 5: Fine-tune the “Blur Amount” and “Samples” settings:
Adjust these to control the intensity and quality of the blur.
Method 4: Install Third-Party Motion Blur Plugins in AE
While After Effects has its own built-in motion blur options, sometimes you need more specialized tools or advanced effects. That’s where third-party plugins come in! These plugins, developed by talented programmers and visual effects artists, expand After Effects’ capabilities, offering a wider range of motion blur styles, customization options, and control.
Installing third-party motion blur plugins is usually a straightforward process. Most plugins come as installers or packages that you simply download and run. After installation, the new motion blur effects will be available within After Effects, ready to enhance your motion graphics and video projects.
Bonus Tip. Add Motion Blur in Screen Recording
ver noticed how fast-moving objects in videos can sometimes look jerky or strobed, especially at lower frame rates? This visual artifact can be distracting and even strain your eyes.
Motion blur is a powerful effect that simulates the natural blurring we see in real life when objects move quickly. It smooths out those jarring transitions, making the motion appear more natural and cinematic.
Want to easily add motion blur to your screen recordings? FocuSee is here to help!
Here’s how to create a screen recording with motion blur using FocuSee:
Step 1: Download and install FocuSee for free from the official website.
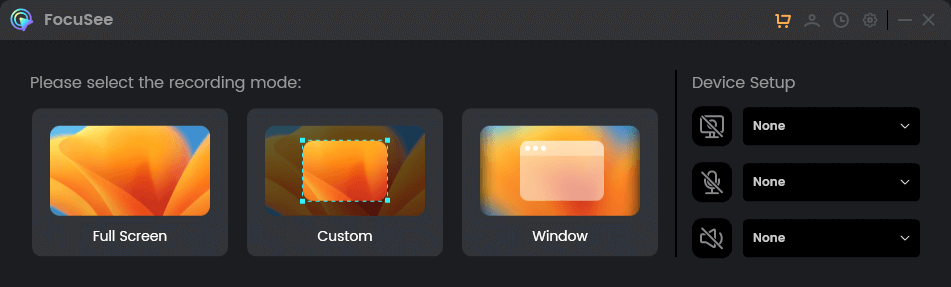
Choose a Recording Mode
Step 2: Launch the software and choose your desired recording mode (full screen, window, or region), and Hit the “REC” button to start capturing.
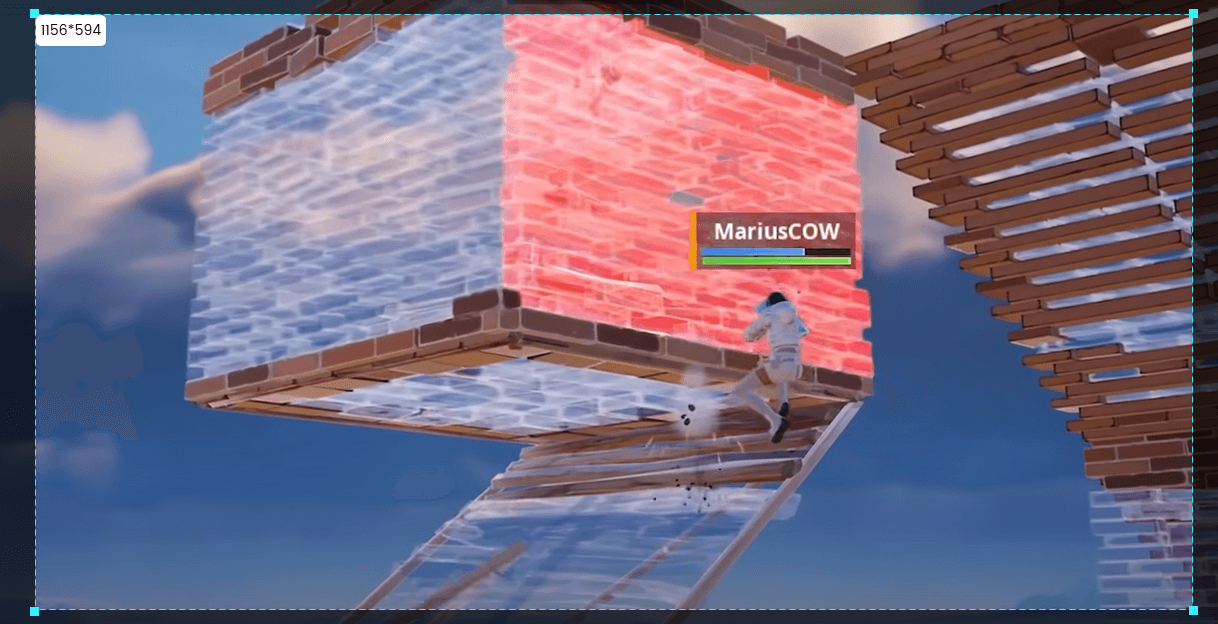
Frame the Area to Record
Step 3: After recording, your video opens in FocuSee’s editor, where you can easily adjust the motion blur intensity for perfect smoothness.
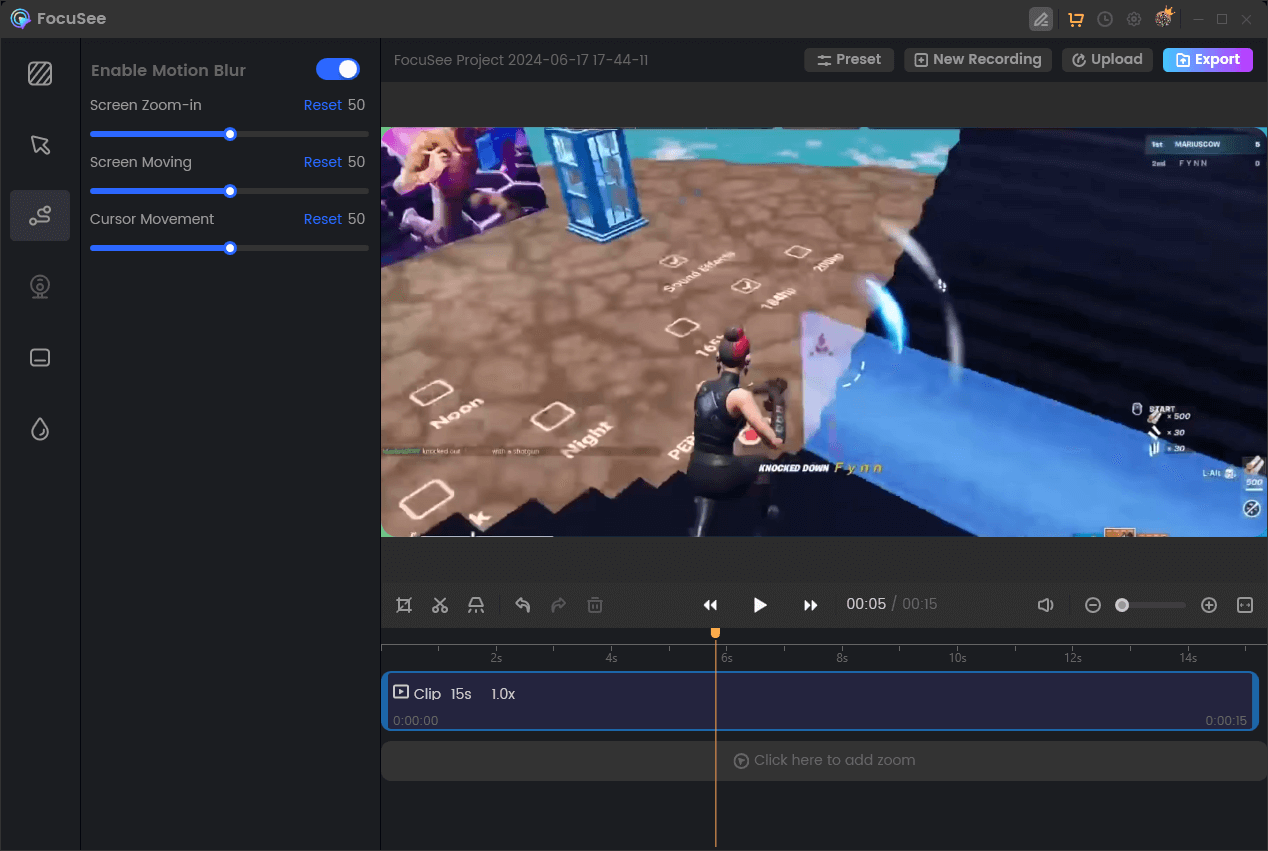
Edit Motion Blur in Recording
Tips for Achieving Stunning Motion Blur Results
- Don’t Overdo It: A little motion blur goes a long way. Overuse of blur can make your footage look unnatural and blurry. Start with subtle adjustments and gradually increase the intensity.
- Match the Shutter Angle to Your Content: The “Shutter Angle” parameter in CC Force Motion Blur simulates the shutter speed of a real camera. Use a shutter angle of around 180 degrees for a more cinematic look. A higher angle (360 degrees or more) might be more suitable for fast-paced action.
- Use Motion Paths for Greater Control: Instead of relying solely on keyframes, consider using motion paths to create smoother, more organic movements, resulting in more natural-looking motion blur.
- Preview Your Footage in Real Time: Always preview your footage in real-time to accurately assess the motion blur impact. This helps you avoid unpleasant surprises during final rendering.
Frequently Asked Questions
Q1: Which motion blur effect in After Effects is best?
There’s no single “best” effect, as each caters to different needs:
Pixel Motion Blur: Simplest, analyzes pixel movement. Good for quick, subtle blurs.
CC Force Motion Blur: More advanced, uses vector motion data. Smoother results, greater control, but can be more resource-intensive.
Frame Blending: Most control, manually creates in-between frames. Highly realistic but time-consuming.
The best choice depends on your footage, desired effect, and computer’s processing power.
Q2: Are there any resources for learning more advanced motion blur techniques in After Effects?
Absolutely! Many online tutorials and courses delve deeper into motion blur:
Video Copilot: Known for in-depth After Effects tutorials, including motion graphics and visual effects.
Skillshare & Udemy: Offer various After Effects courses, some specifically focused on motion design and visual effects.
YouTube Channels: Many creators specialize in After Effects tutorials, often covering advanced motion blur techniques.
Q3: Can I apply motion blur to only a specific part of my video?
Yes! You can use masks or tracking to isolate the object or area where you want to apply motion blur:
Create a mask around the object or track its movement.
Pre-compose the layer with the mask or tracking data.
Apply the motion blur effect to the pre-composed layer.
Conclusion
Adding motion blur in After Effects is a game-changer for creating professional-looking videos. Whether you choose the simplicity of Pixel Motion Blur, the control of CC Force Motion Blur, the precision of frame blending, or the targeted approach of masking and tracking, mastering this technique will significantly enhance your work’s visual appeal and realism. So, experiment with these methods to find what works best for your projects, and watch your videos come to life with stunning motion blur.